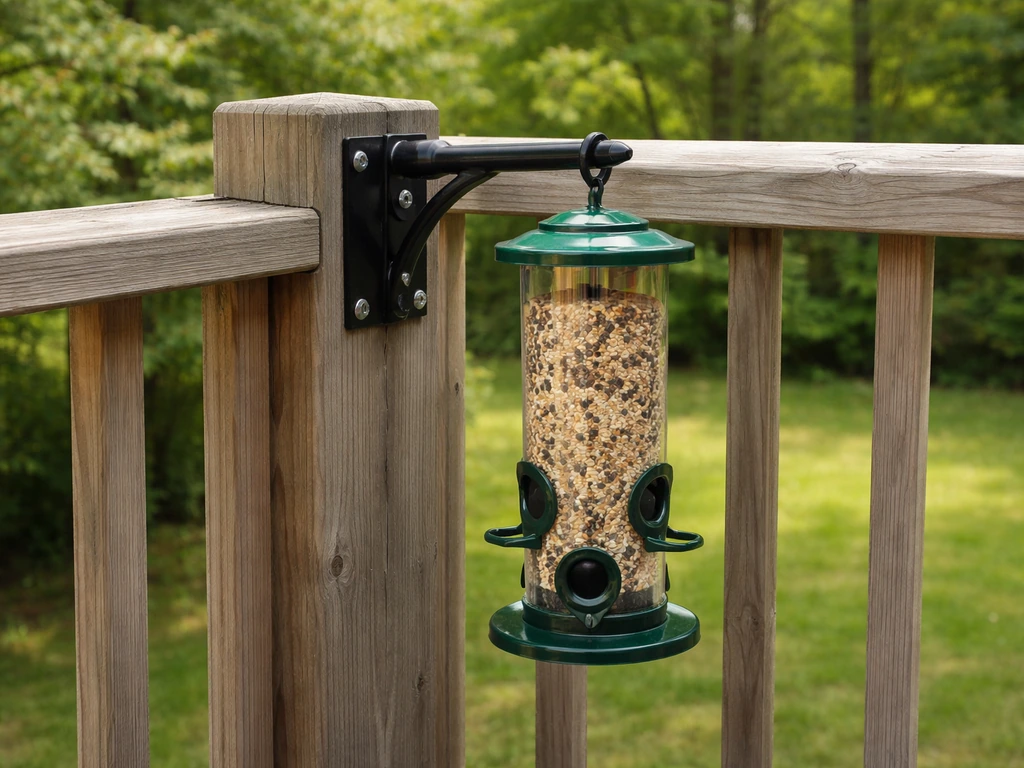
The easiest and most secure way to attach a bird feeder to a deck railing is with a dedicated railing clamp mount or a hook-style bracket that grips the top rail. These hold firmly without drilling, work on wood and most metal railings, and can support feeders up to 10 or 15 pounds with no wobble. If you want something even more stable for a heavier feeder, a through-bolt bracket screwed into the railing post is the most solid option you can do in about 20 minutes.
How to Attach a Bird Feeder to Deck Railing

Marcus Brennan
3 May 2026
Choose the right railing-mounting method
Before you buy a single piece of hardware, figure out what your railing is actually made of and how it's built. That determines everything. A wood railing with 4x4 posts gives you a lot of options, including screws and bolts. A composite or vinyl railing is hollow inside, which means you need to spread the load carefully or avoid drilling altogether. A metal railing, like wrought iron or aluminum tubing, is best served by clamp-style mounts that wrap around the rail without piercing it.
The second thing to figure out is what style of feeder you're hanging. A pendulum-style hanging feeder (the kind you thread a wire or chain through) needs an arm or hook that extends out past the railing far enough that the feeder clears the balusters and can swing freely. If you specifically want to hang a bird feeder from the soffit, plan on using a properly rated ceiling bracket or hanging kit and check clearance before you drill hang a bird feeder from soffit. A tray feeder or a platform with legs needs a flat bracket or a mount with a horizontal arm. A tube or silo feeder can go either way depending on how you hang it.
| Mounting Method | Best Railing Type | Tools Needed | Max Feeder Weight | Drilling Required |
|---|---|---|---|---|
| Railing clamp with arm | Wood, composite, metal tube | Screwdriver or wrench | 10–15 lbs | No |
| Screw-in hook or eye bolt | Wood post or 2x top rail | Drill, bit, wrench | 5–8 lbs | Yes |
| Through-bolt bracket | Wood post | Drill, bolts, nuts | 20+ lbs | Yes |
| Over-rail hook (J-hook) | Any flat-top rail | None | 3–5 lbs | No |
| Shepherd's hook with deck stake clamp | Wood decking nearby | Screwdriver | 8–12 lbs | Sometimes |
For most people hanging a single tube or seed feeder, a clamp-style railing mount is the sweet spot: no holes in your railing, adjustable positioning, and easy to move seasonally. If you're going heavier (think a large platform feeder full of sunflower seeds plus squirrel traffic), go with a through-bolt bracket into a solid wood post. It's more work once, but you'll never have to retighten it every week.
Tools and materials for attaching to deck railing
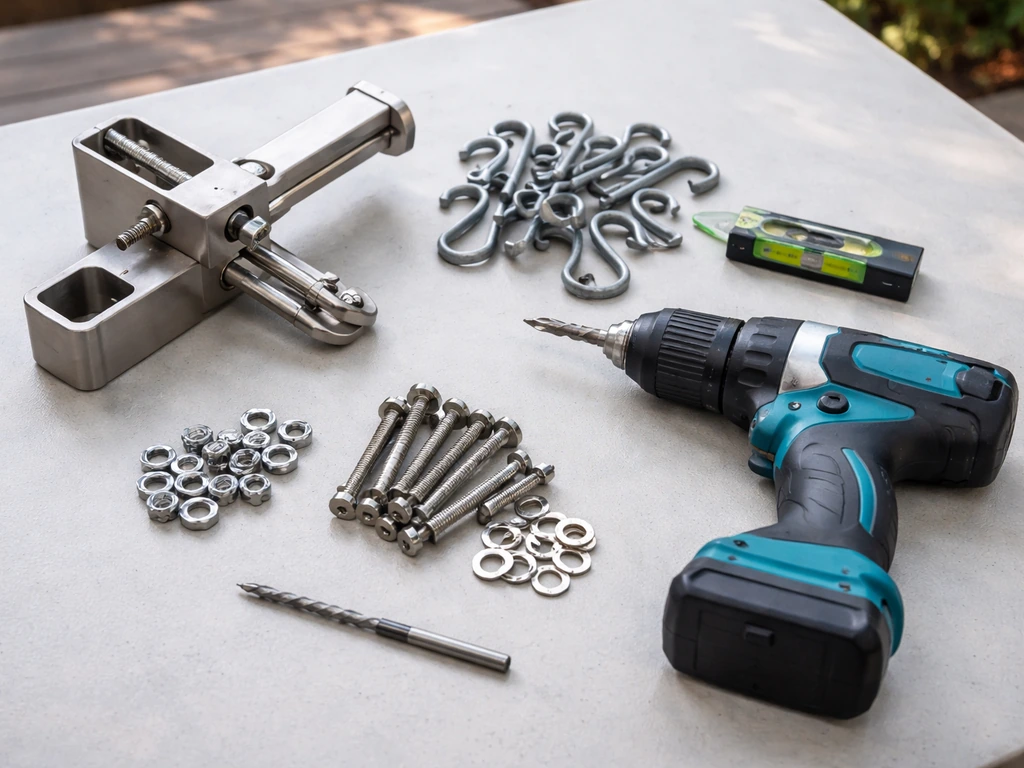
You probably already have most of what you need. Here's a realistic list covering the main mounting approaches:
- Railing clamp feeder mount or bracket (sold at garden centers and online for $12 to $30 depending on arm length)
- J-hook or S-hook in galvanized steel or stainless (avoid bare steel, it rusts fast outdoors)
- Drill with a 3/8-inch bit for pilot holes if drilling into wood
- Exterior-grade screws or carriage bolts with washers and locking nuts (for through-bolt installs)
- Adjustable wrench and screwdriver
- Level (a small torpedo level works great for checking bracket alignment)
- Tape measure
- Loctite or thread-locking compound for any bolt connection that will vibrate or take wind load
If you're working with a metal or composite railing and want to avoid drilling, pick up a railing clamp with a built-in arm at any hardware store. Brands like Perky-Pet and Droll Yankees make models specifically for this. For wood railings, a simple L-bracket with a hook threaded through it does the job for under $10 in parts. You can also repurpose a shepherd's hook by clamping or screwing its base to the deck boards just inside the railing, which keeps the feeder nicely over the rail.
Step-by-step mounting for hooks, brackets, and clamps
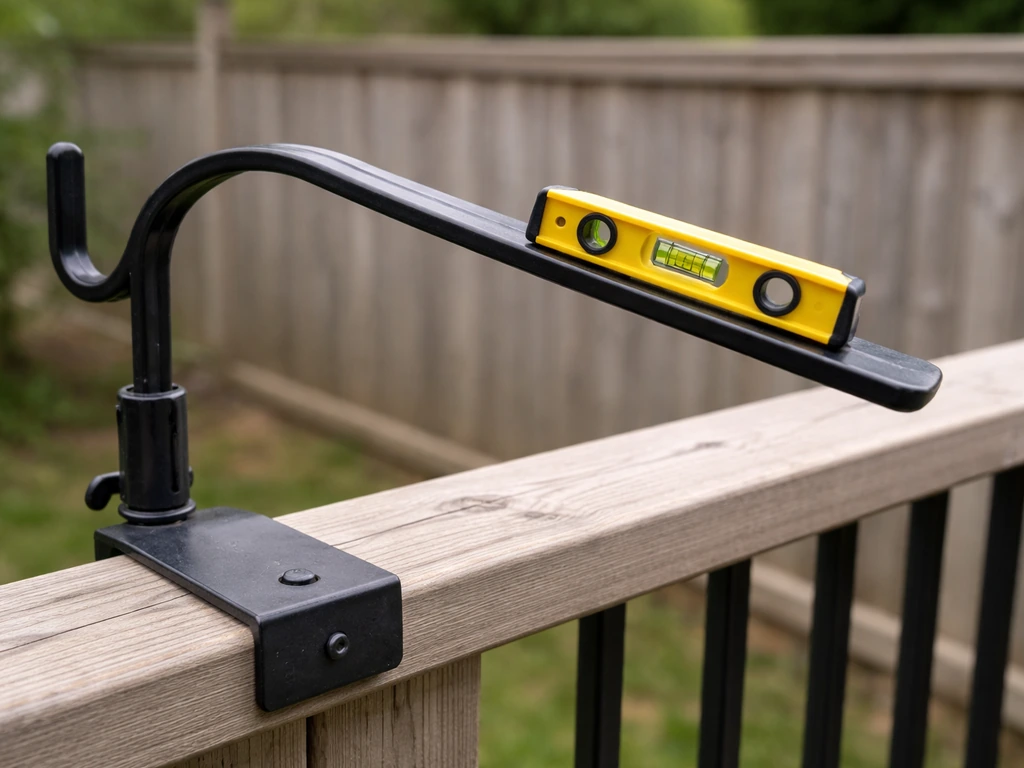
Using a railing clamp mount (no drilling)
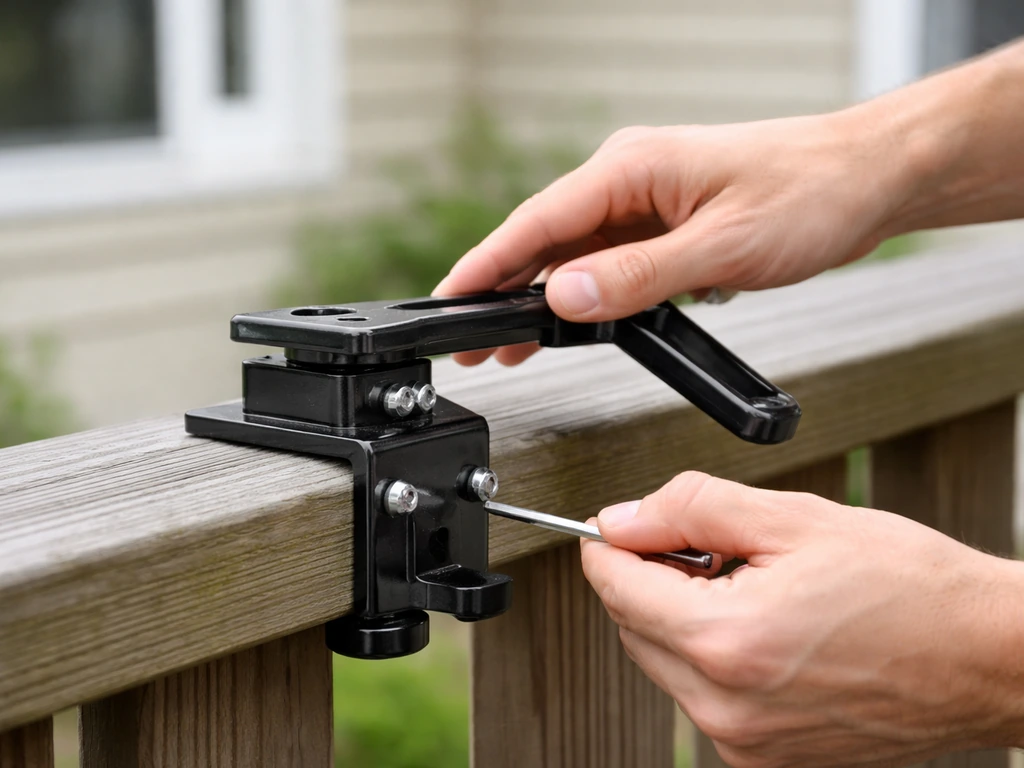
- Pick the spot on your railing where you want the feeder. Make sure there's at least 12 inches of clearance between the feeder and the nearest baluster or wall so birds can approach from multiple angles.
- Open the clamp on your bracket mount and slide it over the top rail. Most clamps have a flat plate that sits on top of the rail and a lower jaw that grips the underside.
- Hand-tighten the clamp bolts first, then check that the arm is pointing the direction you want before fully tightening with a wrench.
- Snug both bolts firmly but don't overtorque on composite or vinyl rails, which can crack. Finger-tight plus a quarter-turn is usually enough.
- Hang your feeder from the hook at the end of the arm. Give it a firm tug and a light shake to confirm nothing moves before loading it with seed.
Using a screw-in hook (wood railing only)
- Choose a solid section of the top rail or a post, not a hollow section or a thin baluster.
- Drill a pilot hole slightly smaller than the hook's threads to avoid splitting the wood. For a 3/8-inch hook, a 1/4-inch bit works well.
- Thread the eye hook or screw hook by hand as far as it goes, then use a screwdriver or rod through the eye to get the last few turns. It should feel tight and resist turning when you pull down on it.
- If you're hanging anything over 5 pounds, add a lock washer or apply a dab of exterior-grade thread compound on the threads before screwing in. This keeps vibration from loosening the hook over time.
- Hang your feeder and check the hook angle. It should point straight up or slightly inward, not at an angle that lets the feeder slide off.
Using a through-bolt bracket (wood post, most secure)
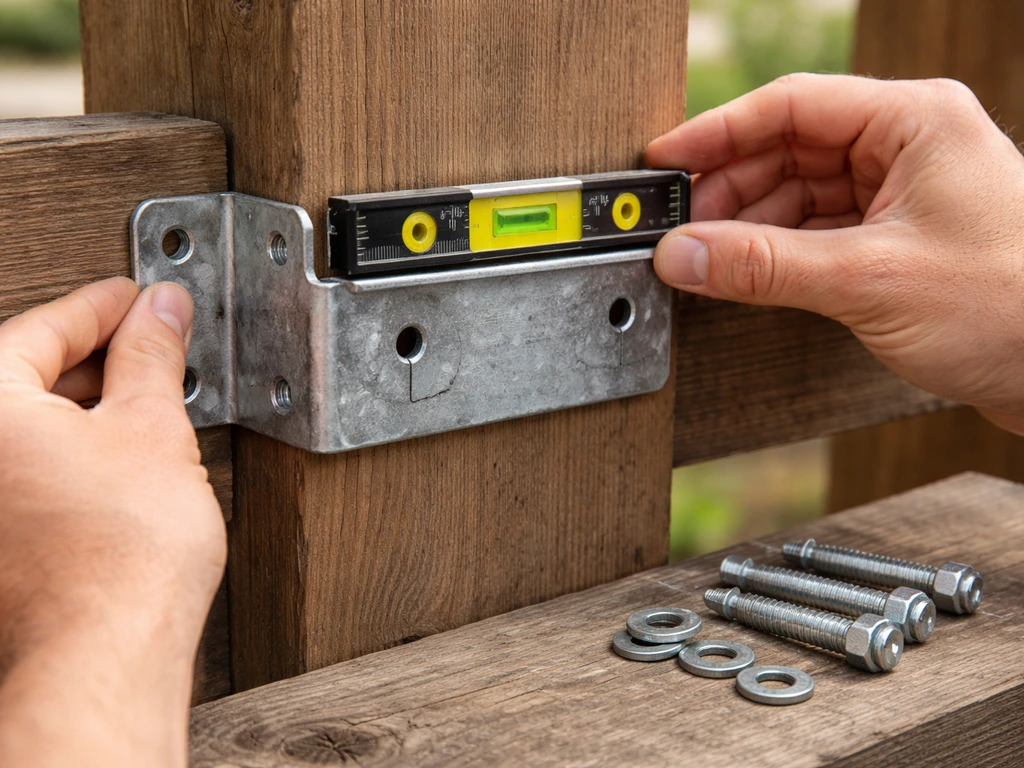
- Mark your bracket position on the post. Hold it up, use a level to make sure the arm is horizontal, and mark the bolt holes with a pencil.
- Drill completely through the post at each mark.
- Insert carriage bolts from the front (bracket side), push them through, and add a washer and locking nut on the back side.
- Tighten the nuts with a wrench until the bracket is snug against the post with no play. Do not overtighten to the point of crushing the wood fibers.
- Apply a small bead of exterior caulk around each bolt hole on both sides to keep water from wicking into the wood and causing rot over time.
Placement and height tips to attract birds (and reduce pests)
Where you put the feeder along your railing matters almost as much as how you attach it. If you’re wondering where to hang it for the best results, aim for a clear flight path and enough open space around the feeder bird feeder where to hang it. Birds want a clear flight path in and out, and they're more comfortable when they can see their surroundings while feeding. Avoid tucking the feeder into a corner where they can't approach from multiple directions. Aim for a spot with at least 2 to 3 feet of open space on at least two sides.
Window safety is a real concern here. Feeders placed between 3 and 30 feet from a window put birds in a dangerous zone where they've built enough speed to seriously injure themselves in a collision. The Audubon Society recommends either placing feeders within 3 feet of the nearest window (close enough that birds can't accelerate) or more than 30 feet away. A deck railing feeder that's right outside the sliding door is actually safer than one mounted 15 feet back from the house on a pole, because birds feeding at close range just flutter rather than flying at speed. To hang a bird feeder from eaves, use an exterior-rated bracket and secure it into the structural framing so it can handle the feeder’s full weight deck railing feeder.
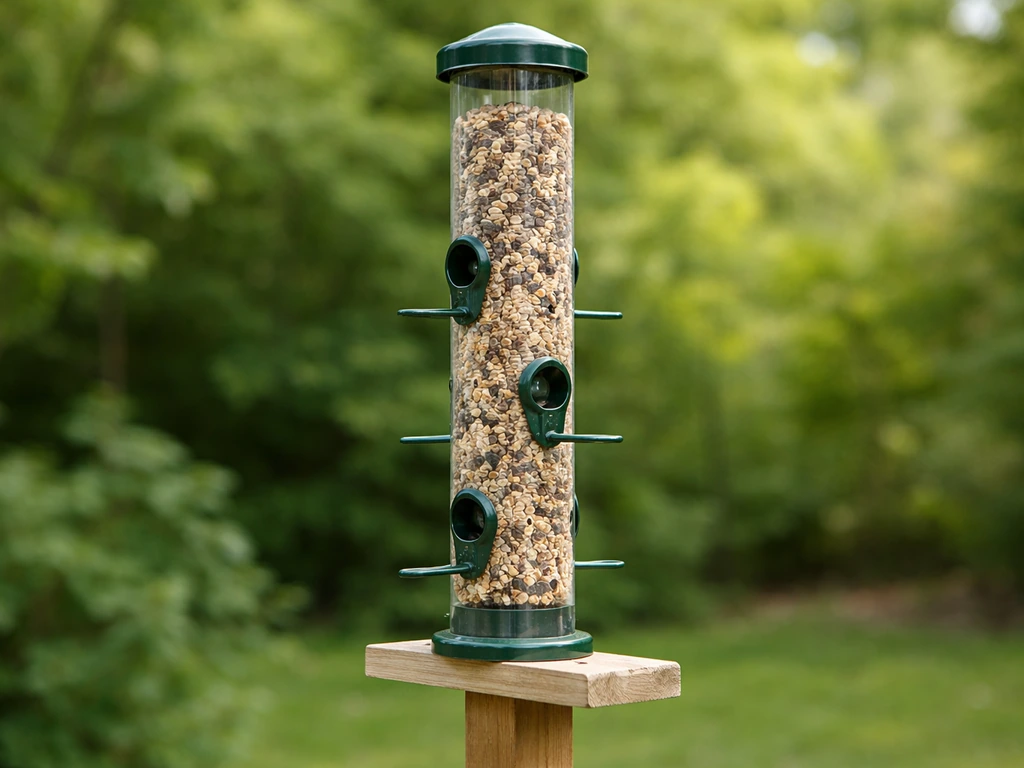
For height, most railing feeders end up somewhere between 3 and 6 feet off the ground, which works fine for the majority of backyard species including chickadees, finches, sparrows, and nuthatches. Ground-feeding birds like juncos will pick up dropped seed below, so that natural spillage actually works in your favor. Keep the feeder low enough that you can refill it comfortably without a stool.
To reduce squirrel and raccoon access, extend the feeder arm as far out from the railing as possible, ideally 12 to 18 inches. Perky-Pet’s blank" rel="noopener noreferrer">Transparent Squirrel Baffle instructions include guidance on how far to position the baffle relative to the feeder arm to help reduce squirrel access. Squirrels can jump from above or below, and they'll use the railing itself as a highway to reach the feeder if it's close enough to grab. A baffle on the arm between the railing and the feeder adds another layer of deterrence, and it's worth it if you've already dealt with squirrels emptying your feeder overnight.
Safety, stability, and weight considerations
The main stability risk with railing mounts isn't the hardware failing under normal bird traffic. It's wind. A tube feeder full of nyjer seed swinging in a 20 mph gust creates surprising leverage on a small clamp. Always check that your mount is rated for at least twice the weight of your feeder fully loaded. Perky-Pet specifies an blank" rel="noopener noreferrer">11 lb weight limit for its “More Birds 18 Inch Clamp-On Deck Hook | 38015”. A 2-pound feeder holding 3 pounds of seed is 5 pounds of live weight, and with wind swing, it can exert much more force on the attachment point.
- Use locking hardware (nylon-insert lock nuts or locking washers) on any bolted connection exposed to the elements.
- Check all mounting connections at the start of each season, not just once when you install them.
- Composite and vinyl railings are strong but can become brittle in cold temperatures. Avoid overtightening clamps in winter.
- A heavier feeder (platform, suet cage plus tray combo) needs a bracket mounted to a post, not just the top rail, which has much less structural strength.
- Keep the arm length proportional to the feeder weight. A very long arm (over 18 inches) amplifies sway and torque on the mount considerably.
If you're renting or have a landlord-managed space, clamp-style mounts are your best friend since they leave zero marks and come off in minutes. The same goes for balcony setups where drilling into the railing isn't allowed. A strong suction-cup hook on a nearby glass surface can supplement a railing hook for lighter feeders, though it's not rated for much weight.
Troubleshooting common hanging issues and maintenance
The feeder won't sit level
This usually means the arm or bracket isn't perfectly horizontal. Loosen the clamp, use a torpedo level on the arm itself, adjust the angle, and retighten. If your railing top has a slight slope for drainage, you may need to shim one side of the clamp plate with a thin rubber washer to compensate.
The feeder swings too much
Excessive sway scares birds away and can cause the feeder to bump the railing repeatedly, which loosens the mount over time. Try shortening the hanging chain or wire to reduce the pendulum effect. Switching from a hanging feeder to a bracket-mounted tray or a feeder with a built-in post that sits on the arm eliminates swing almost entirely. You can also add a thin rubber bungee or a short length of rigid wire at the bottom of the feeder to anchor it loosely to the railing or post during high wind periods.
The mount keeps loosening over time
Vibration from wind and bird activity works clamp bolts loose faster than you'd expect. Apply a small amount of thread-locking compound (blue Loctite, not red, so you can still remove it) to bolt threads before final tightening. Check and retighten once a month during the active feeding season. If a screw-in hook keeps backing out of a wood rail, the hole has likely widened. Remove the hook, pack the hole with a toothpick and wood glue, let it dry fully, and re-thread the hook.
Pests are taking over
Squirrels using your railing as a launch pad are the most common complaint. Start by moving the feeder to the end of a longer arm so it hangs further from the railing edge. Add a cylindrical or dome baffle on the arm between the post and the feeder. If raccoons are the problem, bring the feeder inside at night and put it back out in the morning. Raccoons are almost entirely nocturnal in their feeder raids, so this alone solves the problem without any hardware changes.
Cleaning and maintenance schedule
Railing-mounted feeders collect moisture faster than pole-hung ones because they're closer to the deck surface where humidity and splashing rain concentrate. Audubon recommends cleaning seed and suet feeders every other week as a starting point, and more often in hot or rainy weather when mold develops quickly. Empty the feeder completely, scrub it with a 9:1 water-to-bleach solution, rinse well, and let it dry fully before refilling. While it's off the mount, use that opportunity to wipe down the bracket, check all hardware for rust or play, and tighten anything that's shifted. This two-week rhythm catches problems before they become serious and keeps birds coming back reliably.
FAQ
Can I attach a bird feeder to a deck railing if the top rail is sloped or uneven?
Yes, but the mount needs a level contact surface to prevent gradual loosening. Loosen the clamp, place a torpedo level on the arm where it meets the feeder mount, then retighten. If the rail has drainage slope, use a thin rubber washer or small shims under one clamp side so the mount sits evenly, not rocking.
What should I do if my railing is hollow composite or vinyl and I cannot drill?
Stick to clamp-style mounts that wrap the top rail and avoid piercing the material. If you need extra stability for a heavier feeder, choose a bracket that spreads the load across more rail area rather than a single-point screw or hanger. When in doubt, prefer lighter feeder types and confirm the clamp’s weight rating before loading with full seed.
How far from the railing edge should the feeder hang to reduce squirrels getting to it?
Aim to extend the arm as far out as you can, typically 12 to 18 inches, so squirrels have less grip on the railing itself. If you still get raids, add a cylindrical or dome baffle on the arm between the rail and the feeder, since it blocks the approach path more reliably than repositioning alone.
Will wind really loosen clamp mounts, and how can I prevent it?
Yes, wind can create enough swinging leverage to work bolts loose even if the feeder is within the mount’s normal rating. Check for movement after gusty days, and during the feeding season retighten at least monthly. For added insurance, use a small amount of blue thread-locker on bolt threads so they stay snug but remain removable.
How do I stop a pendulum-style hanging feeder from swaying too much?
Reduce the swing by shortening the hanging wire or chain so the feeder can only move a small arc. If you want near-zero motion, switch to a bracket-mounted tray or a tube feeder with an arm that supports the feeder more directly, which eliminates most pendulum effect.
What’s the best way to verify the mount can handle my feeder when fully loaded?
Use the feeder’s full-load weight, not just the empty feeder. A practical method is to weigh or estimate the live weight (feeder plus seed) and then choose hardware rated for at least twice that amount, since wind swing can multiply forces at the attachment point.
Can I mount a feeder on a deck railing if I’m in a rental and drilling isn’t allowed?
Clamp-style railing mounts are usually the safest choice for landlord or rental setups because they leave minimal to no marks and install without drilling. If you also have a balcony where drilling is restricted, prioritize mounts designed for those rails, and only consider alternatives like suction hooks for very light feeders.
How do I choose the correct height for railing-mounted feeders?
A common sweet spot is 3 to 6 feet off the ground, since many small songbirds feed comfortably at that range. Place lower if you want easier refilling and expect ground birds like juncos to take advantage of spilled seed, but keep it high enough that it stays safe from frequent deck traffic or pets.
Are window collisions a concern with deck railing feeders, and how can I manage placement?
Yes. The risk zone is generally between 3 and 30 feet from a window. To reduce collisions, place the feeder within 3 feet of the window so birds cannot build speed, or more than 30 feet away. A practical advantage of a railing feeder mounted very close to the house is that birds often flutter rather than fly at speed.
How often should I clean the feeder and the bracket when using a deck railing mount?
Clean on a frequent schedule because railing setups are closer to splash and humidity. As a baseline, clean seed and suet feeders about every other week, and more often in hot or rainy weather. When the feeder is off the mount, wipe the bracket, inspect for rust or play, and tighten anything that shifted.
What if my screw-in hook keeps backing out of a wood rail?
That usually means the wood hole has loosened or widened. Remove the hook, pack the hole with toothpicks and wood glue, let it cure fully, then re-thread the hook. After reinstalling, avoid over-tightening immediately, since wood can compress further after a load is applied.
Next Articles
How to Make a Tube Bird Feeder Step by Step
Step-by-step how to make a tube bird feeder with materials, safe mounting, maintenance, and fixes for leaks and clogs.
How to Put Bird Seed in a Bird Feeder Step by Step
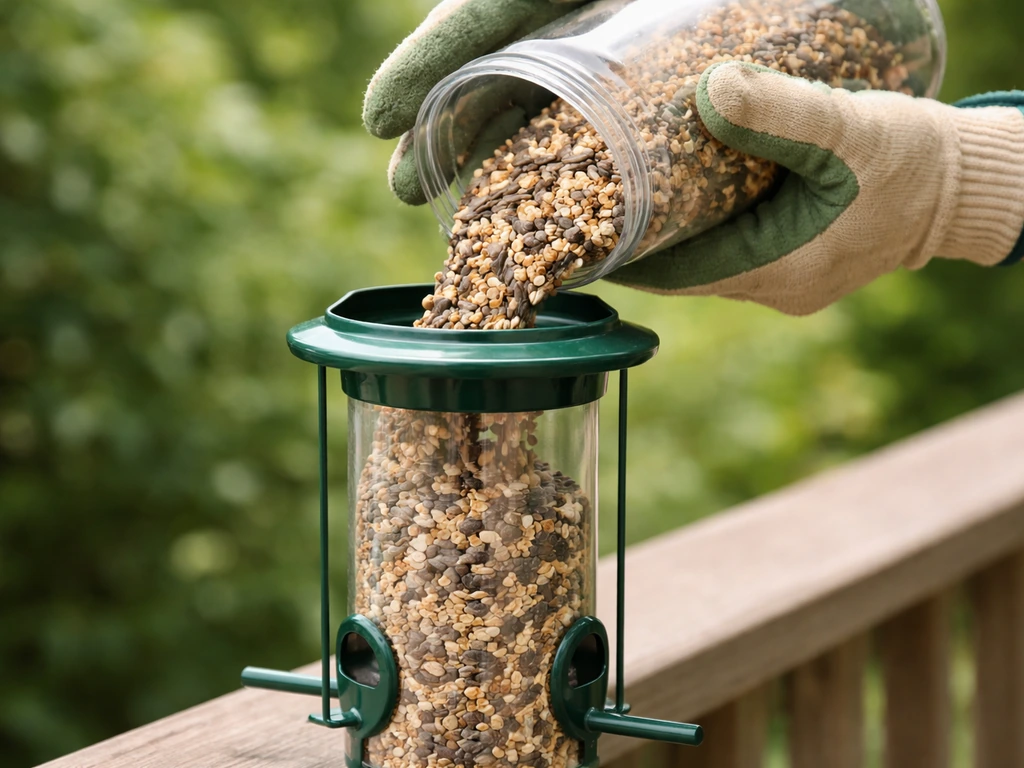
Step-by-step guide to add bird seed to hopper, tube, platform, and suet feeders, avoiding spills and jams.
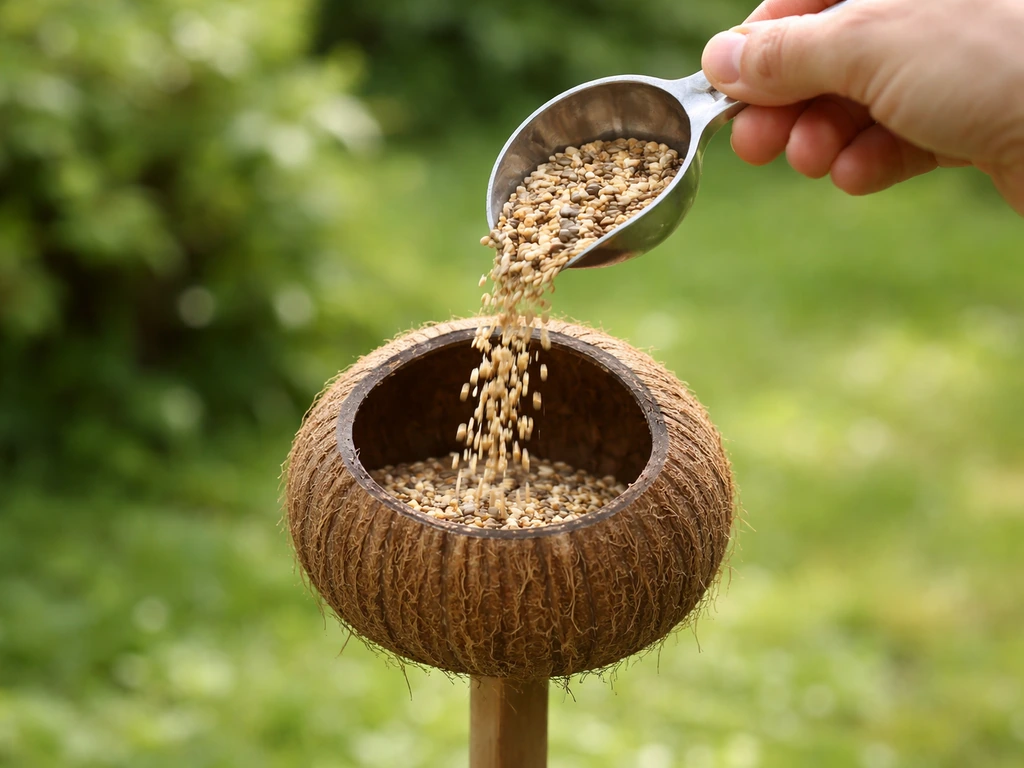
How to Refill a Coconut Bird Feeder Fast and Clean
Learn how to refill a coconut bird feeder fast, clean, and mess-free, with feeding, cleaning, and pest-proof tips.