Yes, you can absolutely make a solid, functional bird feeder out of a milk jug, milk bottle, or milk carton today, using things you probably already have at home. The whole project takes about 20 to 30 minutes, costs next to nothing, and produces a feeder that songbirds will actually use. The trick is knowing which cuts to make, how to add drainage so seeds don't rot, and how to hang the thing so it doesn't spin, tip, or fall apart after one rainstorm. This guide walks you through both the plastic milk jug version and the carton version, step by step, so you can pick whichever container you have on hand.
How to Make a Bird Feeder Out of a Milk Jug

Marcus Brennan
21 Apr 2026

Plastic jug or milk carton? Pick the right container first
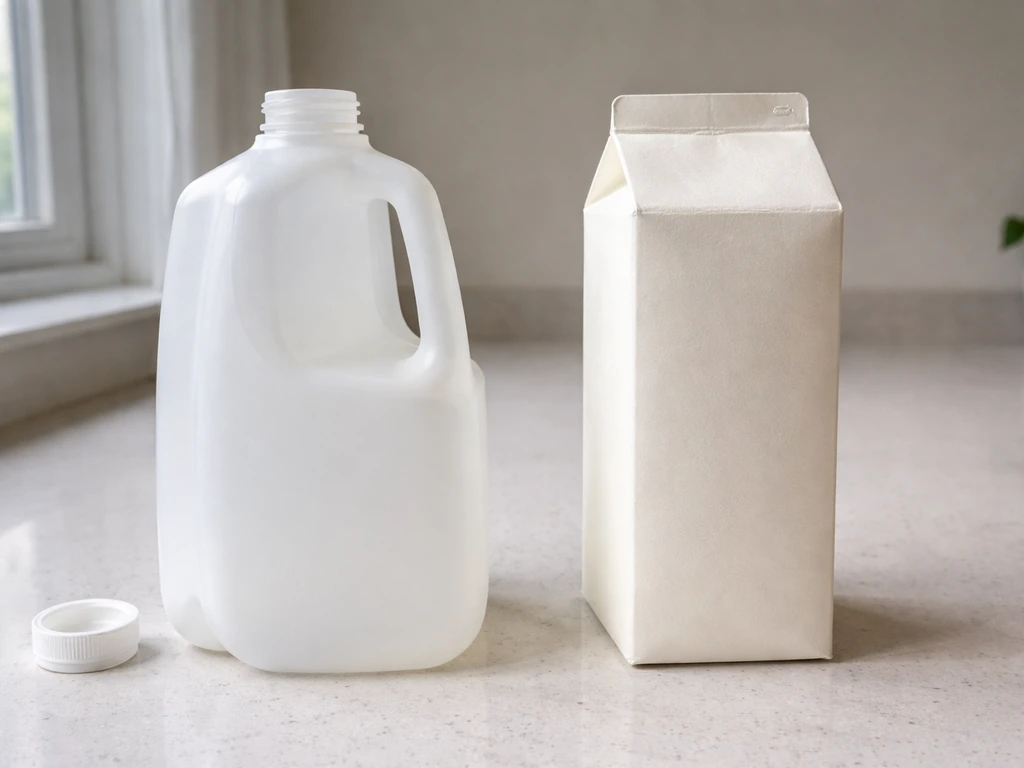
Before you grab scissors, it helps to know what you're working with, because the two container types behave differently when you start cutting them up.
| Feature | Plastic Milk Jug / Bottle | Wax-Coated Milk Carton |
|---|---|---|
| Material | HDPE plastic (opaque white) | Paperboard with wax or poly coating |
| Durability outdoors | Excellent, handles rain well | Decent short-term, softens with prolonged soaking |
| Cutting ease | Needs sharp scissors or a craft knife | Cuts easily with regular scissors |
| Decorating | Paint doesn't stick well without sanding | Waterproof glue and paint adhere nicely |
| Drainage | Drill or punch holes in the bottom | Punch or skewer holes in the bottom |
| Lifespan outside | Several months to a full season | A few weeks to a couple of months |
| Best for | Long-term use, all weather | Quick craft, kids' projects, shorter seasons |
The plastic milk jug wins on durability hands down. A gallon or half-gallon jug holds a good amount of seed, resists warping, and survives rain and sun better than a carton. Milk cartons are a great option if you're doing this as a kids' activity or want a quick feeder that you're fine replacing every month or so. Both work, both attract birds, so just go with what you have.
What you'll need (materials, tools, and safety prep)
Gather everything before you start cutting. Nothing slows a simple project down like hunting for tape mid-build.
- A clean, dry gallon or half-gallon plastic milk jug, OR a clean, dry milk carton (quart or half-gallon)
- Sharp scissors or a craft knife (a craft knife gives cleaner cuts on plastic)
- A nail, hole punch, or skewer for small holes
- A wooden dowel, pencil, or straight twig about 6 to 8 inches long (for the perch)
- Twine, zip ties, or thin wire for hanging
- A permanent marker for marking cut lines
- Scotch tape (optional but useful for sizing drainage holes)
- Dish soap, water, and a scrub brush for cleaning the container
Safety first: if you're using a craft knife, cut on a stable surface and always cut away from your hand. The cut edges on plastic jugs get sharp. After cutting, run your finger lightly along the edge and use scissors to snip off any jagged points, or cover them with a strip of tape. If kids are helping, let them handle the marker, the twig insertion, and the filling, while an adult does the cutting.
Wash the container thoroughly before doing anything else. Rinse out any milk residue, scrub with dish soap, and let it dry completely. Leftover milk residue will sour and attract the wrong kind of wildlife fast.
Building the plastic milk jug feeder: step by step
This is the version I'd recommend for most backyard setups. It's sturdy, holds plenty of seed, and lasts a whole season with minimal fuss.
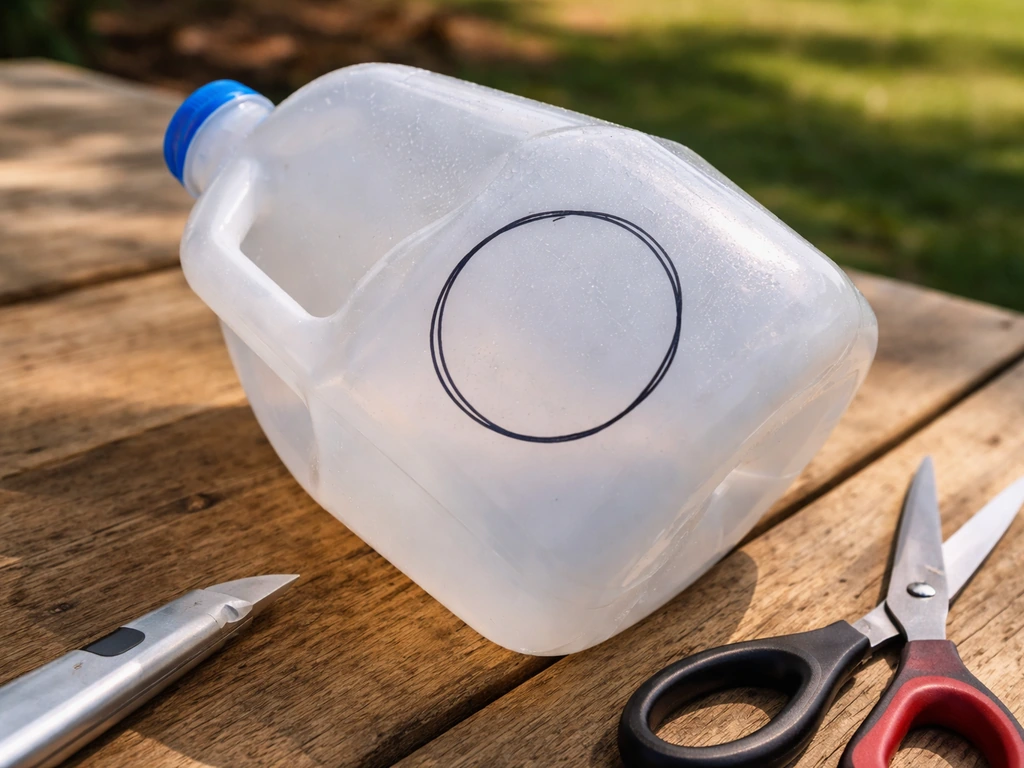
- Mark your entrance hole. On one side of the jug, draw a circle about 2.5 inches wide, positioned a few inches up from the bottom of the jug. This height keeps seed from spilling out immediately and gives birds room to dig in. You can cut two or three openings on different sides of the jug if you want to attract more birds at once.
- Cut the opening. Use a craft knife or the tip of your scissors to pierce the center of your marked circle first, then cut outward to the line. Take your time on this cut. A rough, jagged opening will have sharp edges that can hurt birds. Smooth the edges after cutting.
- Mark and punch the perch hole. Just below each entrance opening, use a nail or hole punch to make a small hole sized to fit your dowel or twig snugly. This hole should sit about half an inch to an inch below the bottom edge of the entrance opening.
- Insert the perch. Push your dowel or twig through the perch hole so it sticks out a few inches on both sides of the jug. If you have openings on opposite sides, you can run one long dowel all the way through, which also adds structural stability to the jug.
- Add drainage holes. Flip the jug upside down and punch two or three small holes through the bottom using a nail or skewer. These holes let rainwater drain out instead of pooling and rotting your seed. Keep the holes small. If they feel too big, cover with a small piece of scotch tape and re-punch a smaller hole through the tape to reduce seed loss.
- Create the hanging point. The jug's existing handle is your best friend here. Thread twine or wire through the handle and tie it off securely. If your jug doesn't have a handle, punch two holes near the top of the jug on opposite sides, thread twine through, and knot it firmly inside before pulling tight.
- Fill the feeder with seed (about one to two inches deep in the bottom of the jug) and hang it up.
Building the milk carton feeder: step by step
The milk carton version is a bit quicker to cut because the material is softer. It's a great project for kids and still functions well as a feeder, just plan to replace it more often than a plastic jug.
- Wash and dry the carton completely. This is non-negotiable. Milk cartons trap residue in the folds at the top, so rinse thoroughly and let it air dry for a few hours.
- Mark the entrance opening. On one flat side of the carton, draw a large rectangular or rounded opening. Leave at least an inch of carton below the opening to act as a seed tray. The opening can be generous since you're not trying to exclude large birds, you're just giving them access to the seed inside.
- Cut the opening with scissors. Because the carton material is softer, regular scissors work fine here. Cut cleanly along your lines. Smooth any rough edges by folding them slightly inward.
- Add the perch. About half an inch below the bottom edge of your opening, punch a small hole through the side of the carton using a skewer or nail. Do the same on the opposite side directly across from the first hole. Push a 6 to 7 inch stick or dowel through both holes so it extends a couple of inches on each side. This gives birds a landing spot.
- Punch drainage holes in the bottom. Use a skewer or nail to make two or three small holes in the carton's bottom panel so water drains out.
- Create the hanging point. At the very top peak of the carton, push a skewer or nail through to make a small hole, thread your twine through it, and tie a large knot inside the carton so the string can't pull through. Alternatively, poke two holes near the top on opposite sides and thread twine through both for a more balanced hang.
- Optional: decorate the outside with waterproof glue and colored paper or paint designed for outdoor use before you fill and hang it. Avoid decorating the inside.
- Add seed and hang.
Perches, drainage, and making your feeder actually sturdy
These three things are where DIY feeders most often fail, so it's worth spending an extra five minutes getting them right.
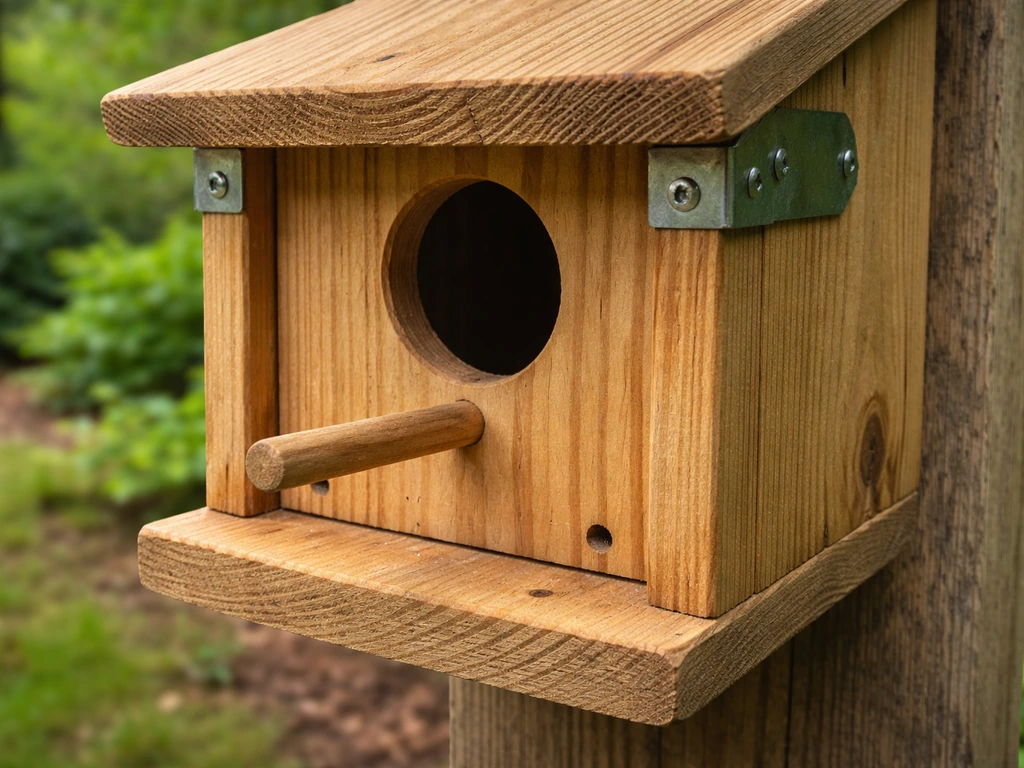
Perches
A twig or wooden dowel works better than a pencil for perches because birds grip natural wood more easily and it won't get slippery when wet. Make sure the perch extends at least 2 inches out from the feeder on each side so a bird can comfortably land before moving to the opening. If the perch wobbles, dab a small amount of waterproof glue around the hole where it enters the jug or carton wall.
Drainage
Two or three small holes in the bottom are enough. The mistake most people make is either skipping drainage entirely (the feeder turns into a puddle after rain and the seed molds within days) or making the holes so big that seed falls straight through. Keep each drainage hole smaller than a sunflower seed in diameter. If you're using a carton and worried about the bottom getting soggy, add an extra layer of packing tape on the outside of the bottom panel before punching your drainage holes through it. This reinforces the base.
Sturdiness and attachment
The single biggest cause of a fallen feeder is a single string hung from one point that lets the whole thing spin and eventually unwind. Use at least two anchor points whenever possible. For a milk jug, the handle plus a second line through holes near the top gives you a triangle of support that keeps the jug stable and level. For a carton, run twine through two holes at the top rather than one. Twist the wire or tie off the string with a double knot and tug hard to test it before you fill the feeder with seed.
Where to hang it and how to set it up
Location matters more than most people expect. Get this right and you'll see birds within a day or two. Get it wrong and the feeder sits ignored or becomes a squirrel buffet.
Window collisions are a real hazard. The rule that actually works: hang your feeder either within 3 feet of a window or more than 30 feet away from one. Anything in between puts birds at risk because they build up enough speed to hurt themselves if they misread the glass. Three feet or closer means a bird that does hit the window doesn't have enough room to accelerate to a dangerous speed.
For squirrel deterrence, think in terms of distance and height. Squirrels can jump roughly 3.5 feet straight up, so if you're hanging from a pole, a baffle positioned about 4 feet off the ground helps keep them off. 5 feet straight up, so if you're hanging from a pole, a baffle positioned about 4 feet off the ground helps keep them off how to make teacup bird feeder on a pole. Keep the feeder at least 5 feet away from any structure, fence, or branch they can use as a launching pad. Duncraft's popular 5-7-9 rule summarizes it well: position the feeder 5 feet off the ground, 7 feet from any horizontal jump surface, and 9 feet from any overhead launch point. A milk jug feeder isn't going to have a built-in baffle, but smart placement alone cuts squirrel access significantly.
Choose a spot that has some nearby cover, like a shrub or tree within 10 feet, so birds have somewhere to retreat if a predator shows up. But don't hang the feeder directly on a branch where cats or squirrels can reach it easily. An open hook screwed into the soffit of a roof overhang, or a shepherd's hook pole in the yard, both work well for milk jug or carton feeders.
What to fill it with, how to keep it clean, and dealing with pests
Seed choices
Black oil sunflower seed is the most universally attractive option for a general backyard feeder. It draws chickadees, nuthatches, finches, sparrows, and more. If you want to target smaller songbirds specifically, use nyjer (thistle) seed, though the openings in a standard milk jug cut are usually too large for nyjer without seed waste. A mixed seed blend with millet, sunflower, and safflower is a good middle ground. Avoid mixes heavy in milo or oats, most songbirds ignore them and they just go stale.
Refilling and maintenance schedule
Check the feeder every two to three days during active feeding season. Refill before it empties completely, because birds that find an empty feeder may not return. Every two weeks, dump any remaining seed, shake out debris, and wipe down the inside. Once a month, do a proper clean: wash with dish soap and water, scrub any stuck-on material, and disinfect with a solution of one part bleach to nine parts water. Let the feeder soak for at least 10 minutes when disinfecting with a diluted bleach solution disinfect with a solution of one part bleach to nine parts water. Let everything soak for a few minutes, then rinse thoroughly and dry completely before refilling. That bleach ratio is the most effective at eliminating salmonella and other pathogens that can build up in feeders.
Troubleshooting common problems
- Seed getting wet and clumping: your drainage holes may be blocked or too small. Clear them with a toothpick after each rain. Adding a small roof over the feeder (a piece of plastic cut from another jug and zip-tied over the top) helps a lot.
- Feeder spinning constantly in wind: add a second hanging line tied lower on the jug or carton to stabilize it, or use a shepherd's hook with a twist that locks the feeder in place.
- Squirrels raiding the feeder: recheck your placement distances. If that's already correct, try adding a squirrel baffle on the pole below the feeder. Safflower seed is also less popular with squirrels than sunflower.
- No birds showing up after a week: move the feeder closer to cover, make sure the opening is clearly visible from above (not hidden under dense foliage), and check that the seed is fresh and dry.
- Milk carton feeder going soft or leaking: this is normal after a few weeks of rain. Replace it. This is why it's worth keeping a few clean cartons on hand if you like the carton-style build.
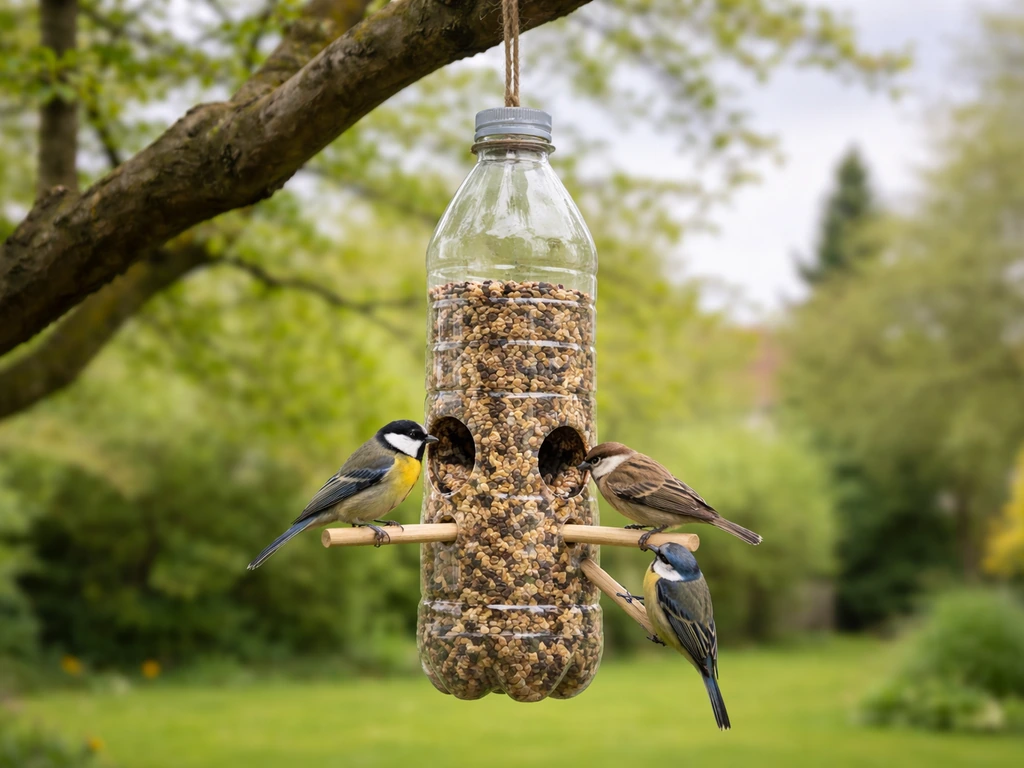
If you enjoy this kind of upcycled feeder project, a plastic bottle feeder works on the exact same principles and is worth trying with a 2-liter or large water bottle. Teacup feeders and wine bottle feeders use entirely different construction approaches but share the same placement and maintenance logic once they're up. The milk jug version is genuinely one of the easiest entry points to backyard bird feeding, and once you see your first chickadee hanging off that little twig perch, you'll probably end up making a second one. If you want a quick follow-up idea, you can also use the teacup approach to make teacup bird feeder style options that are fun to customize.
FAQ
What size milk jug should I use for a bird feeder, and does it change the cut plan?
Use either a half-gallon or gallon jug for best results. A half-gallon feeds fewer birds and refills more often, but it's lighter and easier to hang securely. A gallon jug holds more seed, so you can space your refills farther apart, and it tends to stay level better when you use two anchor points.
Can I make this feeder work for suet, nuts, or peanut hearts instead of seed?
Yes, but not with the same opening sizes. Seed-specific cuts are usually too large for small bits, and nuts or suet can block the perch area. If you want suet, consider making a “platform” style feeder by using the jug as a cover and placing suet in a separate tray inside, then keep drainage and cleaning extra thorough to prevent grease buildup.
How can I stop rainwater from pooling inside the milk jug feeder, especially in wind?
Beyond bottom drainage holes, angle the feeder slightly so water runs toward the holes rather than pooling near the perch openings. After drilling holes, gently shake the empty jug to confirm water flows out, and avoid making the side opening too low, since splashes can wet seed even when drainage exists.
My drainage holes are letting seeds fall out too quickly. What should I adjust?
Reduce hole diameter so each hole is smaller than a sunflower seed, and keep the bottom holes only in the lowest section. Also avoid making the side opening directly under the holes. If seeds still escape, add a small piece of mesh or perforated liner cut to fit inside the bottom, leaving drainage pathways uncovered.
What if I only have cardboard milk cartons or very thin juice cartons, will they last?
Thin cartons work, but treat them as short-term feeders. Reinforce the bottom with an exterior tape layer before punching drainage holes, and place the feeder in a sheltered spot where rain is less likely to directly hit the opening. Expect replacement on a monthly cycle during wet seasons.
Is it safe to use glue or hot glue near the birds’ perch area?
Use waterproof glue only where it reinforces a structural hole, not where birds will peck or cling and pull. Keep adhesive blobs inside the jug walls, then let everything fully cure before adding seed. If glue smells strong even after drying, wait longer or wipe the area with a damp cloth and dry again.
How do I prevent sharp plastic edges after cutting?
After the cut, trim jagged points with scissors, then check by lightly running your fingertip along every edge (wearing a glove is fine). Cover rough edges with a narrow strip of tape if you cannot remove all sharp points. Avoid leaving any flap that can tear off and injure a bird.
What should I use to hang it so it doesn’t twist or spin?
Use at least two anchor points, and avoid a single long straight string from one top spot. For extra stability, tie off with a double knot and then tug hard to confirm it does not slip. If your line stretches, pre-test after wetting the line briefly, because stretching can loosen knots.
Where exactly should I put it if I have only one window nearby, and can I use a feeder baffle?
If the window is within the risky mid-range, move the feeder either closer than about 3 feet or farther than about 30 feet. A baffle helps more for squirrels than window safety, so focus placement first for window collisions, then add a squirrel baffle if squirrels are the main problem.
Will birds eat from the feeder if I see squirrels first?
They might, but squirrels will often win early if seed is left out too long or placement makes access easy. Start with a smaller fill so the feeder empties faster, check daily at first, and place it where there is nearby cover for birds but no obvious launch point for squirrels.
How often should I clean a feeder made from a milk jug, and what’s the bleach step for?
Do quick checks every 2 to 3 days during heavy feeding, and do a full clean about once a month. During the monthly clean, use a bleach-to-water solution of 1:9, soak briefly, then rinse thoroughly and dry completely before refilling to reduce pathogen buildup that can spread in dirty feeders.
Can I keep the feeder out year-round, including during cold months?
You can, but switch behavior based on conditions. In winter, keep seed dry and clean more often if snowmelt or condensation gets inside. In extreme weather, inspect the hanger knots and holes for loosening, because repeated freeze-thaw can make plastic more brittle.
What’s the easiest seed choice if I’m trying to attract the maximum number of species?
Black oil sunflower seed is usually the safest bet for general backyard feeding. If you notice heavy wastage from your specific cut design, use a seed with slightly larger pieces for more efficient perching, or adjust drainage hole size so seeds stay put long enough for birds to feed.
Next Article
How to Make a Bird Feeder Out of a Plastic Bottle
Step-by-step plastic bottle bird feeder plans, from materials to cutting, perches, hanging, cleaning, and fixes.