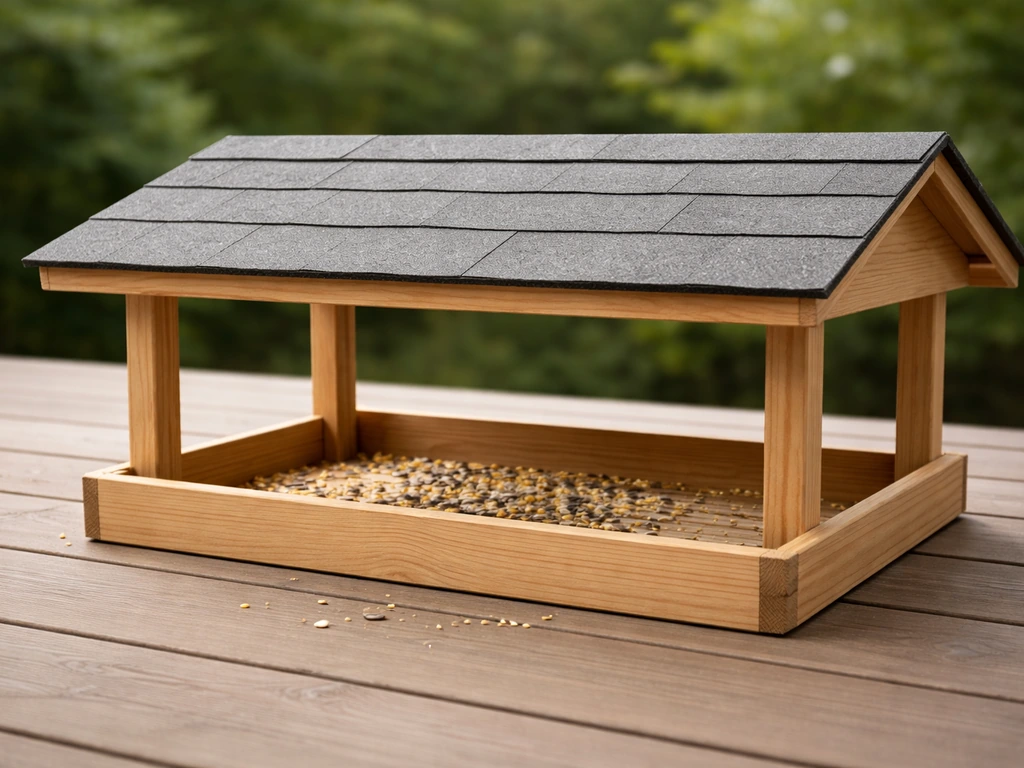
You can build a covered platform bird feeder in an afternoon using cedar or pine boards, a piece of metal window screen, and a few basic tools. If you want a spinning version, you can adapt this same covered platform build by adding a rotating mechanism that keeps the seed protected while it turns covered platform feeder. The roof keeps seed dry, reduces mold, and gives birds a sheltered spot to feed even in light rain. The key dimensions to work with: a platform around 12 inches by 16 inches, a roof that overhangs each side by at least 3 to 4 inches, and a cover height of 8 to 10 inches above the platform so larger birds like jays and doves can actually get under it.
How to Make a Bird Feeder Cover: Step by Step Guide

Marcus Brennan
14 May 2026
Why bother adding a cover at all
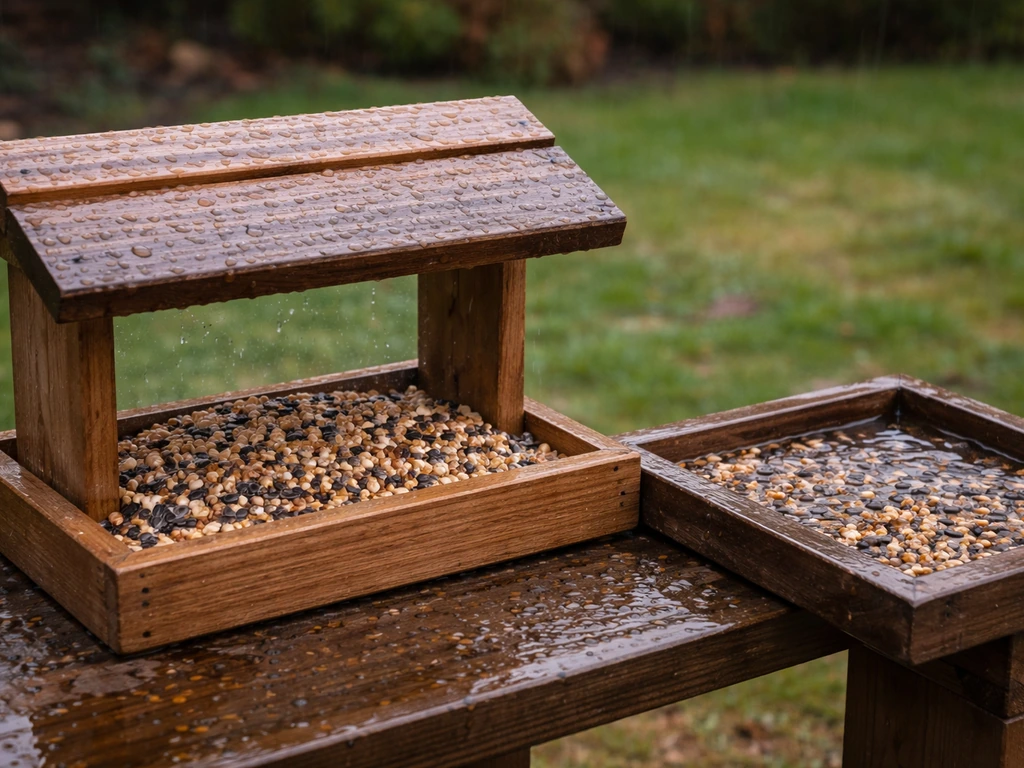
If you've ever walked out to your feeder after a rainstorm and found a soggy lump of millet and sunflower hulls sitting in standing water, you already know the problem. Wet seed molds fast, especially in warm weather, and moldy seed can make birds sick. K-State Extension flags this directly: covered feeders help keep seed dry, but warm wet conditions still create mold risk if you're not cleaning regularly. A roof doesn't make your feeder maintenance-free, but it dramatically slows down how fast seed deteriorates between fill-ups.
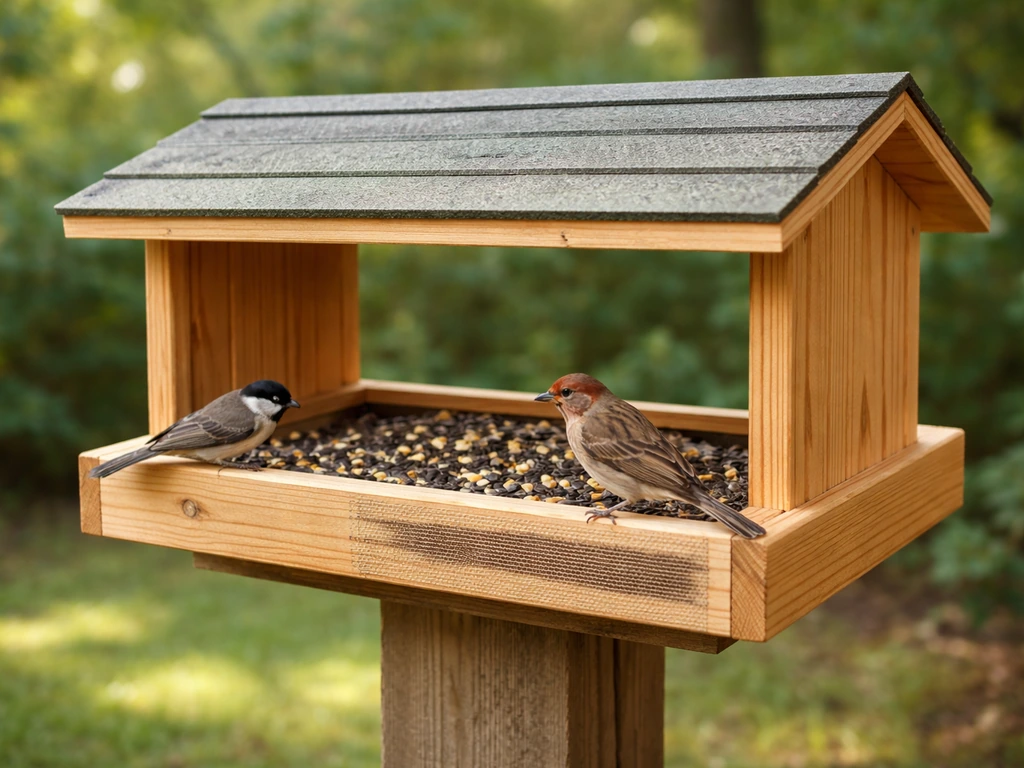
Beyond seed quality, a cover makes your feeder more attractive to birds that prefer sheltered feeding spots. Cardinals, juncos, and sparrows all tend to linger longer at a covered platform than at an open tray baking in the sun or getting rained on. The roof also reduces direct sun exposure on the seed, which matters in summer. Think of it as giving your backyard birds a little diner with a roof rather than a picnic table in the open.
Materials and tools you'll need
This build uses cedar, which naturally resists rot and doesn't need staining. You can substitute pine if that's what you have on hand, but seal it with an exterior wood sealant before use. Here's a complete cut list and materials list for a covered platform feeder with a simple gable or shed-style roof.
Lumber and materials
- One 1x6 cedar board, 6 feet long (yields the platform base and side rails)
- One 1x8 cedar board, 4 feet long (yields the two roof panels)
- Four corner posts cut from 1x2 cedar or hardwood dowel, each 10 inches tall
- Metal window screen, cut to roughly 10 inches by 14 inches (for the drainage sub-base inside the platform frame)
- Exterior wood glue
- 1.25-inch exterior screws (about 20)
- Small finish nails or staples for attaching the screen
- Exterior wood sealant or linseed oil (if using pine)
- Optional: a piano hinge or two small hinges if you want a hinged roof for easy cleaning
Tools
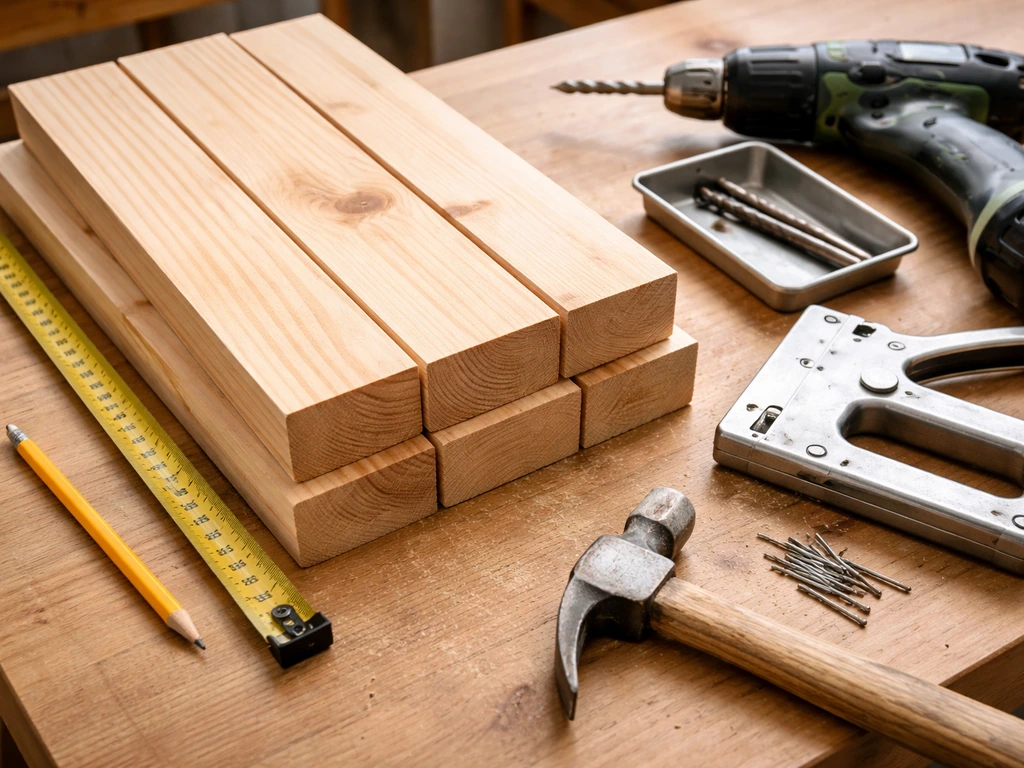
- Circular saw or handsaw
- Drill with Phillips bit and a 3/8-inch drill bit for drainage holes
- Staple gun or small hammer and tacks
- Tape measure and pencil
- Sandpaper (80 and 120 grit)
- Clamps (helpful but not essential)
Designing the platform and cover before you cut
Before you make a single cut, spend five minutes sketching the feeder so you know how all the pieces interact. The platform is essentially a shallow open tray: a flat base (or screen sub-base) surrounded by a low rail on all four sides to keep seed from rolling off. The roof sits above it on four corner posts, high enough for birds to land and move around underneath without feeling cramped.
Platform size
A 12-inch by 16-inch platform is a good all-around size. It's large enough to hold a useful amount of seed and accommodate multiple birds at once, but small enough to build from a single 6-foot 1x6 board. If you want to attract larger species like mourning doves, go up to 14 by 18 inches.
Roof overhang and height
The roof needs to extend at least 3 to 4 inches beyond each edge of the platform on all sides. That overhang is what actually keeps driving rain off the seed. A roof that only covers the platform edge-to-edge provides very little protection in anything but a straight-down drizzle. With a 12x16 platform and 3-inch overhangs all around, your roof panels need to be at least 18 inches wide and 22 inches long. The cover height, meaning the clearance from platform surface to the underside of the roof, should be at least 8 inches. Ten inches gives you comfortable access for larger birds and makes refilling easier.
Roof pitch
A simple shed roof (one slope only) is the easiest to build and sheds water effectively. A gable roof looks nicer but requires a ridge board and angled cuts. For a first build, go shed style: one roof panel tilted at roughly 20 to 30 degrees, higher at the back and lower at the front. That slight slope moves water off the roof and away from the seed tray below.
Step-by-step build instructions
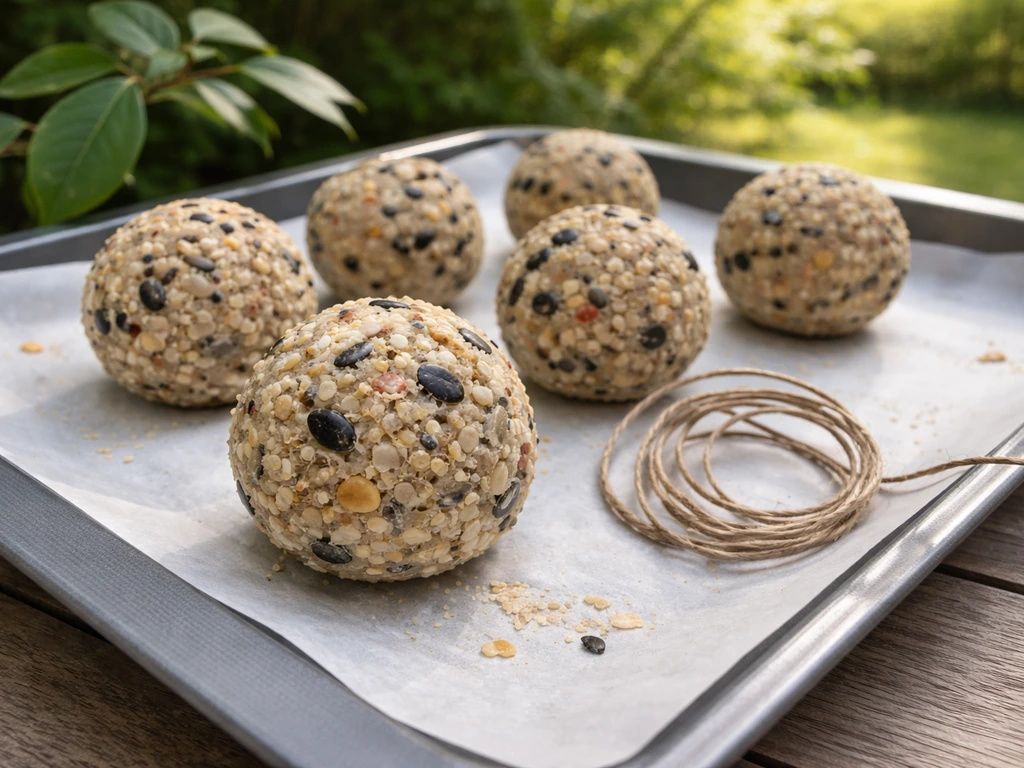
Set aside about two to three hours for the full build, including drying time for glue. If you want a quick DIY upgrade, you can also learn how to make a bird feeder ball using similar seed-and-hardware principles. If you're using a hinge for the roof, add another 20 minutes.
- Cut the platform frame pieces. From your 1x6 cedar board, cut two side rails at 16 inches and two end rails at 10.5 inches (this accounts for the 0.75-inch thickness of the side pieces on each end, giving you a finished inner platform of 12 by 16 inches). Sand all edges lightly.
- Assemble the platform frame. Arrange the four rails into a rectangle with the side rails on the outside of the end rails. Apply exterior wood glue to each joint, then drive two 1.25-inch screws through the side rail into each end rail. Let the glue set for at least 20 minutes.
- Attach the screen sub-base. Cut your metal window screen to 12 by 16 inches. Lay it flat against the bottom of the assembled frame and staple it in place along all four sides, spacing staples about every 2 inches. This screen is your drainage layer: seed sits on it and any moisture drains straight through rather than pooling.
- Drill additional drainage holes (optional but recommended). If you prefer a solid wood base instead of or in addition to screen, cut a thin plywood or cedar floor piece and drill 3/8-inch holes every 2 to 3 inches across the surface. Combine this with the screen layer for the most effective drainage.
- Cut and attach the corner posts. Cut four posts from 1x2 cedar stock, each exactly 10 inches tall. Glue and screw one post to each inner corner of the platform frame, making sure they're flush with the top edge of the frame. These posts carry the roof.
- Cut the roof panels. For a shed-style roof, cut one panel from your 1x8 board at 22 inches long and 8 inches wide. This single panel runs the full length of the feeder with overhang. For a gable roof, cut two panels at 22 inches long by 6 inches wide and cut a ridge board at 22 inches from a 1x2 piece.
- Attach the roof. For the shed-style roof: screw the panel to the top of the two front posts at a slight angle (shim the back posts up about 1.5 inches with a scrap piece to create the slope, or cut the back posts 1.5 inches longer than the front posts). Drive two screws through the panel into each post. For a hinged roof: attach a piano hinge along one long edge of the roof panel and screw the other leaf of the hinge to the top of the back two posts so the roof can lift open.
- Sand and seal. Give all surfaces a final sand with 120-grit paper. Apply two coats of exterior wood sealant, letting each coat dry fully. If using cedar, a coat of linseed oil is sufficient and food-safe.
Drainage, weatherproofing, and keeping seed fresh
The screen sub-base is your first line of defense against waterlogged seed. But it only works if seed can actually fall or drain through, which means you should keep seed layers thin, around half an inch or so, rather than piling it up. Thick piles of seed trap moisture even with screen underneath.
The roof overhang does most of the weatherproofing work, but the angle of your roof matters too. Make sure your feeder hangs or sits level from side to side but slightly pitched front-to-back so water runs off the roof edge and away from the platform, not back toward the seed tray. A small drip edge, even just a strip of aluminum flashing tacked along the low edge of the roof, will stop water from wicking back under the roof panel.
Even with perfect drainage, wet weather accelerates mold. All About Birds and Project FeederWatch both recommend cleaning seed feeders about every two weeks as a baseline, and more frequently during wet weather or heavy use. For the cleaning solution, use either the Minnesota DNR's recommended mix of 2 ounces of bleach per gallon of water or the Audubon-cited National Wildlife Health Center ratio of 1 part bleach to 9 parts water. Scrub all surfaces, rinse thoroughly, and let the feeder air dry completely before refilling. Wet wood plus fresh seed is a fast recipe for mold.
One other weatherproofing tip: if your roof panel is solid wood, consider adding a thin strip of 1x2 along each underside edge of the roof panel. These act as mini gutters or drip stops and keep water from running down the posts and into the corners of the platform during heavy rain.
How to hang or mount your covered feeder
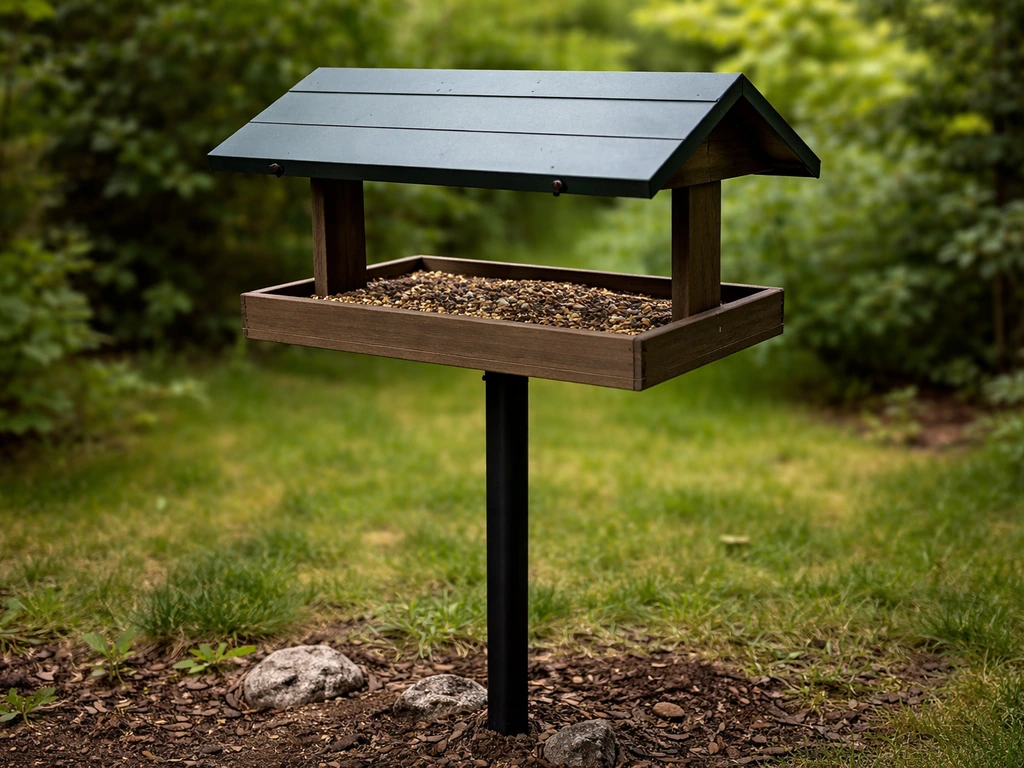
A covered platform feeder can be pole-mounted, hung from a branch or shepherd's hook, or placed directly on a deck railing. Each mounting method has trade-offs worth knowing before you commit.
| Mounting method | Best for | Main advantage | Main drawback |
|---|---|---|---|
| Pole mount with baffle | Open yard, pest-prone areas | Best squirrel protection when baffled | Requires a dedicated pole |
| Hanging from branch/hook | Trees, covered porches | Easy to install and relocate | Squirrels can access from above |
| Deck railing mount | Decks and balconies | Convenient for refilling and cleaning | Low clearance, more predator risk |
| Ground platform (legs added) | Low-clearance birds like doves | Attracts ground-feeding species | Higher rodent and cat risk |
For most backyard setups, a pole mount is the most versatile and pest-resistant option. The USFWS recommends adding a wrap-around baffle to the pole below the feeder as one of the most effective ways to stop squirrels from climbing up. Perkypet’s listing describes the Squirrel-X wrap-around baffle as a barrier designed to stop pole-climbing squirrels from accessing the feeder. Position the feeder at least 5 feet off the ground and 10 feet from any fence, branch, or structure a squirrel could jump from.
For window placement, All About Birds notes that feeders placed closer than 3 feet to a window are actually safer than those placed 10 to 30 feet away, because birds that do flush and hit the glass do so at a lower speed. Either very close (under 3 feet) or very far (over 30 feet) are the safer zones. Avoid the middle distance if you can.
Choose a spot with morning sun and afternoon shade if possible. Some protection from prevailing winds helps too. The covered roof already handles light rain, but a naturally sheltered spot reduces the workload on the feeder and keeps seed fresher longer.
Maintenance, mess, mold, and pests
Routine cleaning
Every two weeks is the baseline. In summer or after prolonged wet weather, clean weekly. The process is straightforward: dump out all remaining seed, scrub the platform and roof with your bleach solution using a stiff brush, rinse well, and let the feeder dry fully in the sun before refilling. Leaving a damp feeder out and immediately filling it defeats the purpose entirely.
Dealing with moldy or wet seed
If you open the feeder and the seed smells musty, feels clumped, or looks discolored, toss all of it. Don't try to pick out the bad bits. The BirdNET fact sheet from the Ornithological Council is direct about this: if seed gets wet, empty the feeder and clean it before putting in fresh seed. Moldy seed makes birds sick, and the covered design exists to prevent exactly this, so don't undermine it by letting spoiled seed sit.
Managing mess below the feeder
Covered feeders still generate mess below: husks, dropped seed, and bird droppings accumulate on the ground. Project FeederWatch specifically recommends raking and clearing waste beneath feeders regularly, not just because it looks bad but because ground accumulation attracts rodents. A layer of wood chips or pea gravel under your feeder makes raking easier and keeps the area tidier.
Squirrels and other pests
The roof on your covered feeder is not a squirrel deterrent on its own. Squirrels can and will sit on top of it and reach down into the platform. A pole-mounted baffle is the most reliable fix. K-State Extension also flags that feeders concentrate wildlife activity and can attract predators like raccoons, so be aware of that if you're mounting close to the ground or near cat territory.
When the roof causes problems
If birds seem reluctant to use the feeder, the cover height is usually the culprit. Eight inches is the minimum; try 10 or even 12 inches if you're targeting larger birds or notice them hovering outside without landing. Also check that your roof overhang isn't so deep that it blocks sight lines from inside the feeder, which makes some birds nervous about approaching. A slight trim to the overhang (down to 3 inches on the sides birds approach from most) can help.
If water is somehow still pooling on the platform despite the screen base, check that the screen hasn't clogged with seed debris. Rinse it with a hose during each cleaning and replace it once a year if it starts to sag or clog. Replacing screen costs almost nothing and makes a real difference.
Expanding the design later
Once you've built and hung this basic covered platform feeder, you'll start noticing what works and what you'd change. The platform size, roof pitch, and cover height are all easy to modify on a second build. If you want to experiment with different roof shapes, a dome-style cover is another popular option that sheds water in all directions and looks great. If you prefer the look and weather coverage of a dome, follow the steps in our guide on how to make a bird feeder dome dome-style cover. Specialty designs like spinning feeders and ring-style feeders serve different feeding purposes, but for all-weather seed protection with minimal fuss, the covered platform is hard to beat as a starting point.
FAQ
Can I make a covered bird feeder cover without woodworking tools (no saw or drill)?
Yes. Use pre-cut boards or repurpose a small outdoor dog-licking station style shelter frame, then attach a lightweight roof panel (thin cedar scrap or weatherproof plastic) with exterior-rated screws or strong outdoor brackets. Keep the same functional targets from the build, roof overhang of about 3 to 4 inches on all sides, and clearance of 8 to 10 inches so birds can comfortably enter.
What should I use as a roof if I do not have cedar or pine boards?
Choose a material that stays rigid and water-shedding after sun exposure, plywood with an exterior sealant is one option, but metal or composite panels often last longer. Whichever you use, keep the underside sealed or protected from constant moisture, and still pitch the roof front-to-back so water runs away from the tray.
How do I prevent seed from clogging the screen base?
Limit seed depth to around half an inch so water can pass through rather than being trapped in a dense layer. During each cleaning, rinse the screen thoroughly to flush out husk and debris, and replace it if it starts to sag or doesn’t drain quickly.
Should I line the platform with plastic or a tarp under the seed?
Avoid impermeable liners, like plastic sheeting or tarps, because they stop drainage and make pooling more likely. Instead, rely on the screen sub-base and keep a thin seed layer. If you must add a liner for cleaning convenience, use a permeable mesh that still drains freely.
How much overhang is enough if I live in an area with strong sideways rain?
Match the standard 3 to 4 inch overhang on every side, but consider increasing it slightly on the windward side. Also keep the roof slightly pitched and add a drip edge (aluminum flashing strip) along the low edge, so water doesn’t wick back under the roof panel.
What cover height should I choose to reduce hovering or missed landings?
8 inches is the minimum, if birds hover outside without entering, move toward 10 to 12 inches clearance. Taller clearance also helps larger birds reach the seed without crowding the roof underside, but make sure the roof stays low enough to maintain strong weather coverage.
Can I use the same design for seed types like peanuts or suet?
Not perfectly. The screen-based tray is best for small to medium loose seed. For suet or peanut feeders, use a holder style that prevents large chunks from falling through, otherwise you can create a wet mess below and reduce drainage inside the tray.
How do I know if my feeder is mounted at the right angle?
The platform should be level side-to-side, and slightly pitched front-to-back so water drains away from the seed surface. A practical test is to sprinkle water with a hose after mounting, observe whether it runs off the low edge of the roof toward the outside, and confirm it does not run back toward the tray.
Do I need to seal a cedar feeder even if it resists rot naturally?
Often you can skip staining, but if the wood will stay wet frequently (heavy rain area or frequent puddling risk), sealing the wood surfaces improves lifespan. For pine substitutions, sealing is recommended, and for both woods, let the feeder fully dry before refilling so you do not trap moisture inside.
What cleaning mistake causes mold even with a roof?
Refilling before the feeder is completely dry is the biggest one. Dump and scrub, rinse thoroughly, then air dry fully. If you have persistent dampness, increase cleaning frequency during wet stretches, and check that the roof overhang and roof pitch are directing water away from the tray.
How often should I clean if it rains most days?
Use the two-week baseline only for dry periods. In consistently wet weather or heavy visitation, switch to weekly cleaning, and do a quick midweek check if you notice clumping seed or musty odor. Emptying and cleaning immediately is safer than trying to spot-treat a partially spoiled batch.
Will a covered feeder attract squirrels less, or more, than an open tray?
A covered roof can actually make it easier for squirrels to sit and reach down, so squirrel control is still needed. If you pole-mount, add a wrap-around baffle below the feeder and position the feeder at least 5 feet off the ground, away from jump-off structures.
Next Article
How to Make a Bird Feeder Ball Step by Step
Step-by-step guide to make fat ball bird feeder balls with safe ingredients, molding, hanging, maintenance, and pest-pro