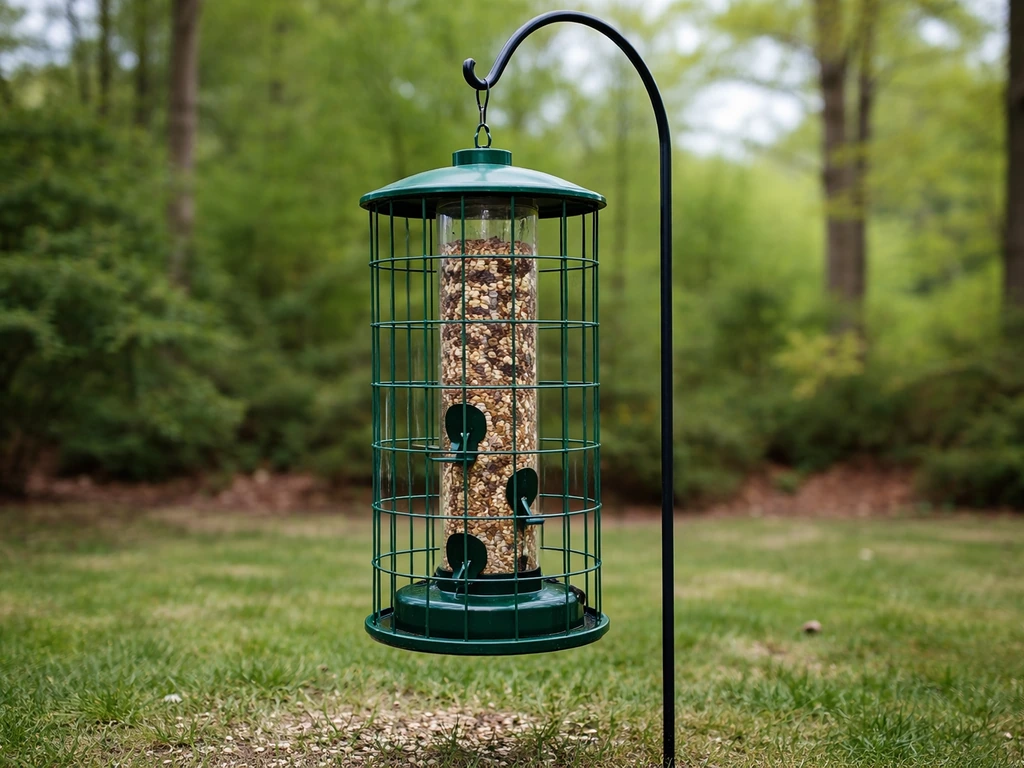
Assembling a Roamwild PestOff bird feeder takes about five minutes and requires zero tools. If you're wondering how to start a bird feeder from scratch, begin with assembly first so you can then fill and hang it correctly. The whole system is designed to click together by hand: you seat the lower assembly onto the seed tube, align the metal collar over the plastic retaining flange until the pips click into place, and you're done. The trickiest part is getting the lower collar seated correctly, and once you know the click you're listening for, you won't second-guess it again.
How to Assemble Roamwild Bird Feeder Plus Setup Tips

Marcus Brennan
12 May 2026
Before you start: parts list and tools
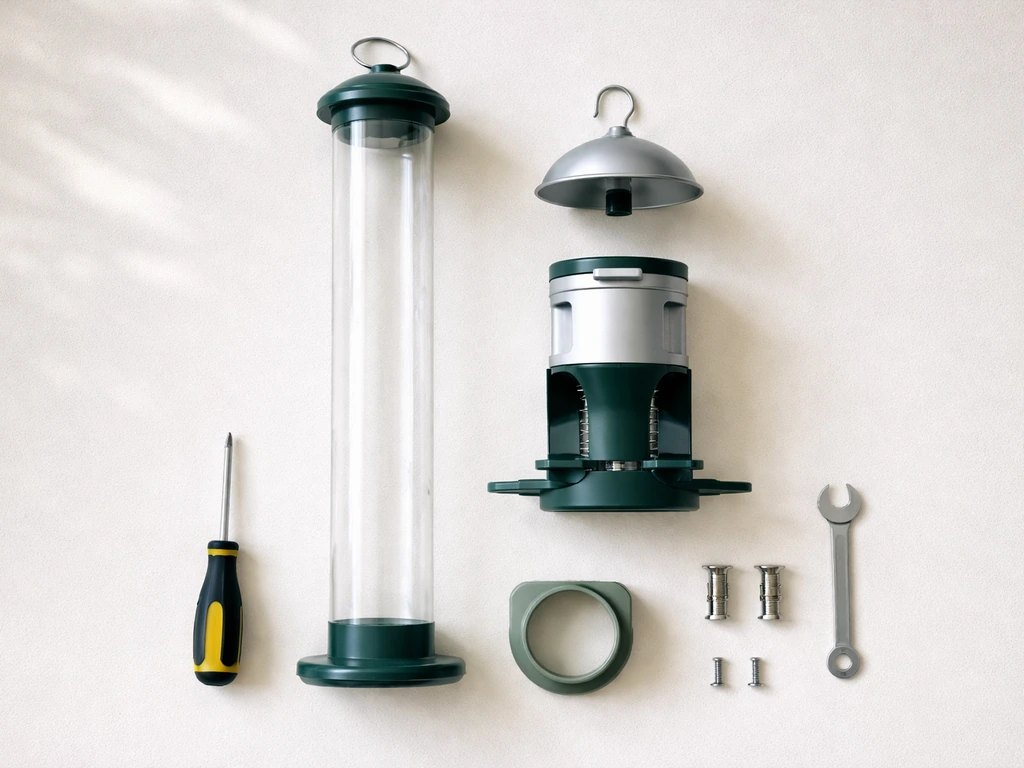
Lay everything out on a flat surface before you touch anything. Roamwild ships the PestOff 2.0 with everything you need inside the box, and there are no loose screws or small fiddly parts to lose. Here's what should be in the box:
- Seed tube (the main clear or coloured cylinder that holds the seed)
- Lower assembly (base/perch unit with the spring-loaded port mechanism)
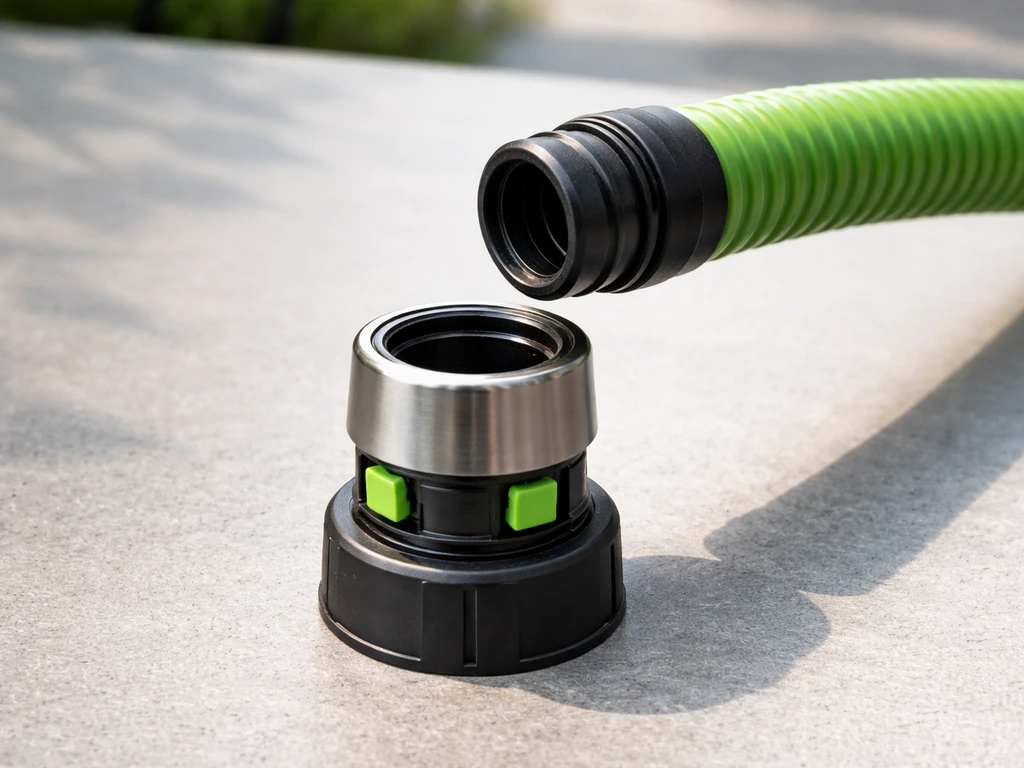
- Metal lower collar (slides up and down to lock or release the tube)
- Hanging wire or hook (for suspending the feeder)
- Rain guards integrated into the port design (not separate parts)
- Any model-specific inserts: Mixed Seed/Sunflower Hearts version has wider ports; Peanut/Pellet version has mesh or smaller ports
Tools required: none. Roamwild explicitly designed the PestOff line for tool-free assembly and cleaning. You don't need a screwdriver, pliers, or any hardware. If your box included a small instruction sheet, keep it handy for the first assembly. If not, Roamwild's FAQ page links to video walkthroughs for the 2. Roamwild's help content also includes video walkthroughs, with separate videos for the Mixed Seed/Sunflower Hearts versus the Peanut/Pellet versions. 0 specifically, with separate videos depending on which version (Mixed Seed/Sunflower Hearts vs. Peanut/Pellet) you bought. It's worth a 60-second watch before your first attempt.
Step-by-step assembly: Roamwild bird feeder
This walkthrough covers the Roamwild PestOff Bird Feeder 2.0, which is by far the most commonly searched model. The steps apply to both the Mixed Seed/Sunflower Hearts and Peanut/Pellet variants, though the port inserts look slightly different between the two.
- Identify your two main pieces: the seed tube and the lower assembly. The lower assembly is the heavier, more complex unit that contains the spring-loaded ports and the perch ring.
- Hold the seed tube vertically with the open end facing down. You'll be attaching the lower assembly to this end.
- Look at the bottom rim of the tube. You'll see two small green release lugs (tabs) sitting on the outside of the tube. These are what lock into the lower assembly.
- Position the lower assembly directly below the tube. Align the tube's open end over the central post of the lower assembly.
- Push the tube down firmly into the lower assembly until you feel and hear it seat. The green lugs should engage with the internal channel inside the lower assembly.
- Now slide the metal lower collar upward over the joint. You're looking for small pips (raised bumps) around the edge of the collar. As you slide the collar up, press each pip so it clicks over the plastic retaining flange on the tube. Work your way around the collar until every pip has clicked into place. This click is the confirmation that the assembly is locked.
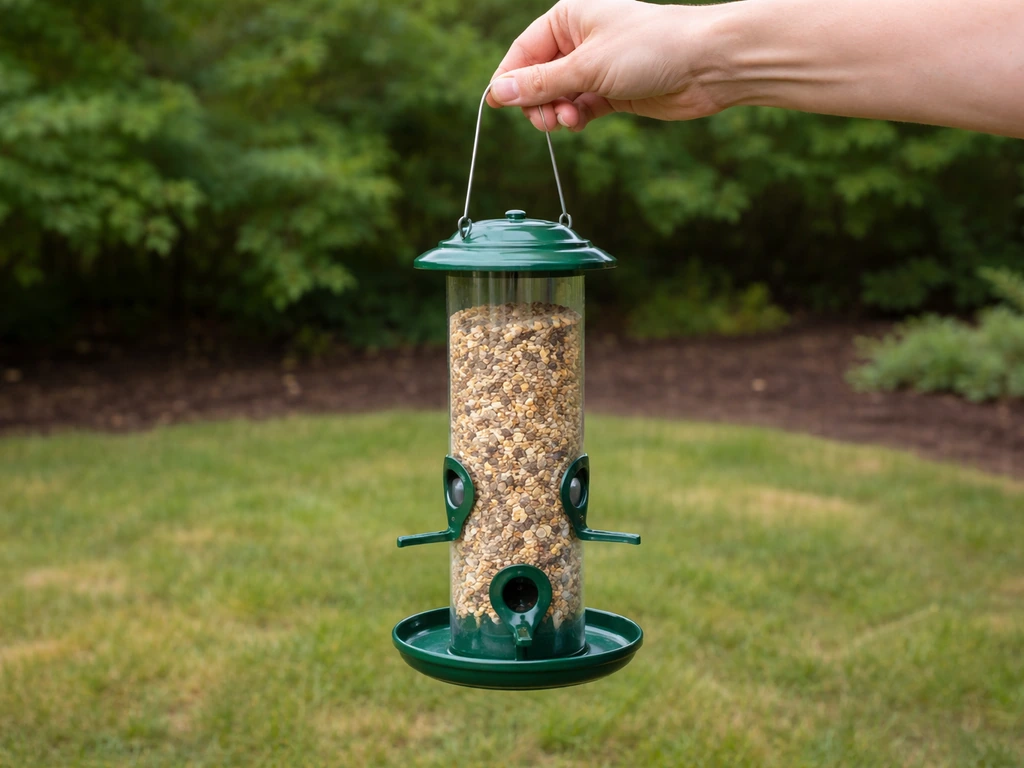
- Attach the hanging wire or hook to the top of the tube. Most Roamwild models have a fixed hook point at the cap — just thread the wire through and secure it.
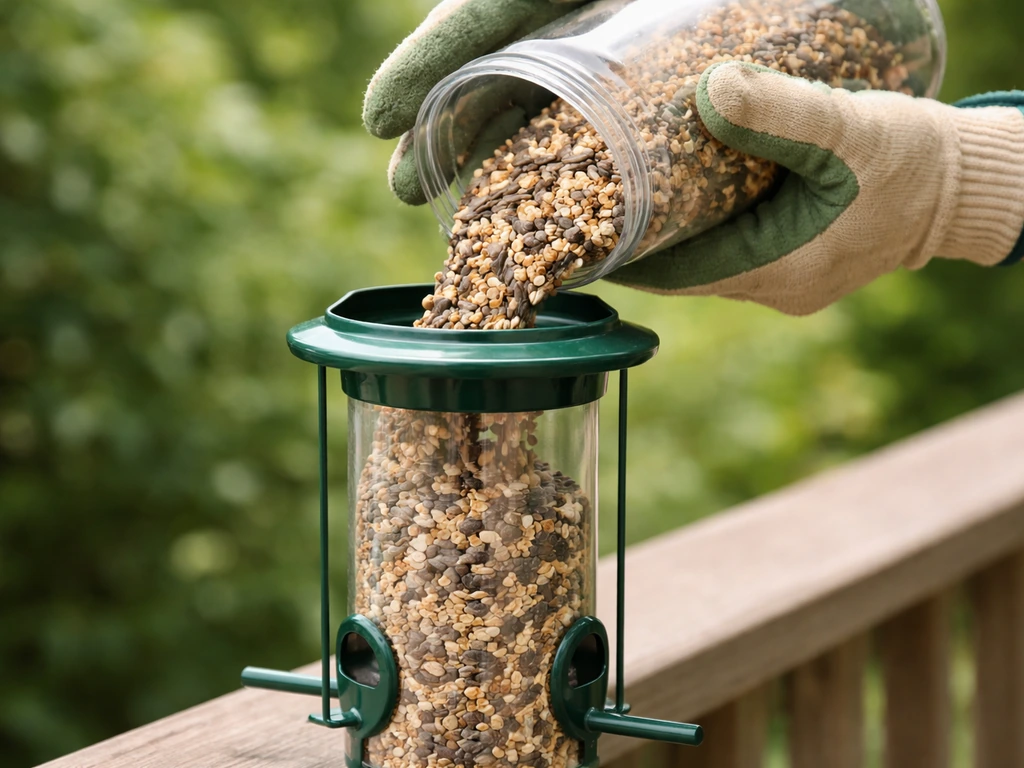
- Fill the tube with seed through the top before hanging. Don't overfill: leave about an inch at the top so the cap seats properly.
- Replace the top cap firmly. It should press down and lock without any gap around the rim. A gap here means seed will get wet and the cap isn't seated.
That's genuinely all there is to it. The whole process should take three to five minutes the first time, and under two minutes once you've done it once. The spring-loaded port mechanism is internal and pre-set from the factory, so you don't need to adjust anything there.
Assembly walkthrough for other models (Squirrel Buster, Gardman, Smart)
If you landed here searching for how to assemble a different brand, here's a quick rundown of the assembly logic for each. They all follow similar principles but have their own quirks.
Squirrel Buster Mini
The Squirrel Buster Mini is also tool-free, but the assembly order matters more than it does on the Roamwild. Get the order wrong and you'll find yourself pulling it apart and starting over. The correct sequence from the user guide is:
- Replace the metal mesh shroud over the seed tube first.
- Insert the hooked end of the hanger into the top of the feeder.
- Slide the 'Negative Grip' tube over the hanger hook. This tube is what physically closes the feeding ports when a heavy animal (like a squirrel) grabs on.
- Hang the feeder. The weight-sensitive mechanism only works correctly once it's hanging freely, so don't test the port closure while the feeder is sitting on a table.
The Squirrel Buster Plus works on the same principle but also features a Seed Tube Ventilation System, which means there are vents near the top cap designed to let warm air and humidity escape. Don't seal these vents or cover them when reassembling after cleaning. If you notice the seed clumping at the top, check that those vents are clear.
Gardman squirrel-proof feeder
Gardman feeders vary a bit by model, but the squirrel-proof range generally involves a wire cage assembly around a central tube. Assembly is straightforward: the cage clips or hooks around the feeder body, and the hanging point is usually a fixed loop at the top. The more important thing with Gardman is the siting requirements, which are strict and specified in the manual. More on that in the hanging section below.
Smart bird feeders
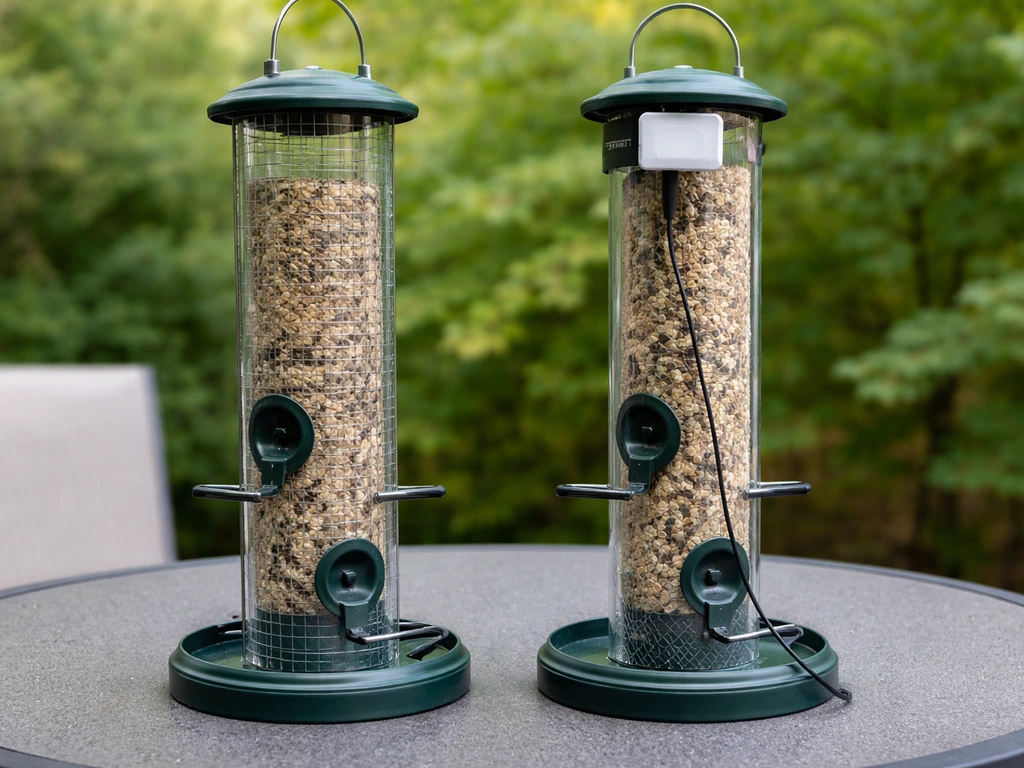
The 'Smart' bird feeder category covers several brands, including camera-enabled feeders like the Birdfy. These tend to have more components than a standard tube feeder because they include electronic housings, solar panels, or camera mounts. If you have one of these, follow the manufacturer's printed quick-start guide closely, as the assembly sequence differs significantly from a passive feeder. The key watch-out is making sure the camera or sensor housing is fully seated before filling, since a loose housing can let water into the electronics. If your specific model doesn't have printed instructions in the box, search the brand name plus 'assembly guide' or 'setup video' to find the official walkthrough.
Common mistakes and troubleshooting
Here are the problems I see most often, and how to sort them quickly.
The lower collar won't stay locked
This almost always means the pips haven't all clicked over the retaining flange. Take the collar back off, re-seat the tube into the lower assembly, and this time work around the collar methodically, pressing each pip individually. Don't just push the collar up in one motion and assume it's locked. Each pip needs to clear the flange. If one pip is riding just below the flange, the whole collar will feel loose and can slide back down.
The tube won't release during disassembly
To release the tube for cleaning or reassembly, you need to slide the metal collar upward first to expose the green release lugs, then press both lugs simultaneously and lift the tube straight up. If you try to pull the tube without pressing both lugs at the same time, it won't budge and you might think something is broken. It's not. Press both green tabs at once, then lift.
Seed is leaking from the ports
A small amount of seed settling at the ports during filling is normal. Ongoing leaking usually means one of two things: the lower assembly isn't fully seated (go back and re-click the pips), or the wrong seed type is being used for the port size. The Peanut/Pellet version has smaller mesh ports designed for whole peanuts or pellets, not fine mixed seed, which will pour straight through. Make sure you're using the seed type the feeder was designed for.
Ports aren't closing when you apply weight
On the Roamwild PestOff, the spring-loaded ports close automatically when triggered by weight. If they're not closing, first make sure the feeder is hanging freely and not resting against a surface. A feeder pressed against a wall or post can't respond properly to weight changes. On the Squirrel Buster, if the Negative Grip tube isn't sliding freely over the hanger hook, the weight mechanism can jam. The Squirrel Buster Mini user guide notes that the Negative Grip tube needs to slide freely over the hanger hook for the mechanism to work correctly Negative Grip tube isn't sliding freely over the hanger hook. Check that it moves smoothly before hanging.
Extra parts left over after assembly
If you have pieces left over, stop and check the instruction sheet or video again. On most tube feeders, a leftover part usually means the lower assembly isn't fully engaged with the tube. A loose washer or rubber ring is more concerning and typically belongs on the cap or around the base to create a seed seal. Don't skip it.
Finishing checks before you fill and hang
Before you add any seed, run through these quick checks. They take 30 seconds and will save you cleaning up a pile of spilled seed or chasing a broken feeder across the garden.
- Stability: hold the feeder by the hanging wire and give it a gentle shake. Nothing should rattle loose or feel unsteady. The lower assembly should feel solid, not wobbly at the joint.
- Leak check: hold the assembled feeder upside down briefly over a table. If the bottom cap (now on top) pops open or you can see daylight around the collar joint, it's not seated correctly.
- Port movement: push gently on each port cover to make sure the spring returns it to the closed position. On the Roamwild, the ports should spring back immediately. Sticky or slow-moving ports can indicate a manufacturing issue or debris in the mechanism from the factory.
- Cap seal: press down on the top cap firmly and make sure it's flush with the tube. A raised cap edge is a leak and a squirrel handhold.
- Hanging hardware: check that the wire or hook is properly secured and rated for the feeder's full weight. A 4 lb seed capacity feeder plus the feeder body can be heavier than expected when full.
How to hang and place your feeder after assembly
Where you hang the feeder matters almost as much as whether it's assembled correctly. If you want to prevent squirrels and other pests from getting to the seed, learn how to install bear proof bird feeders with the right hardware and placement. If you are starting from scratch, this guide on how to buy a bird feeder will help you choose the right type for your yard and birds.
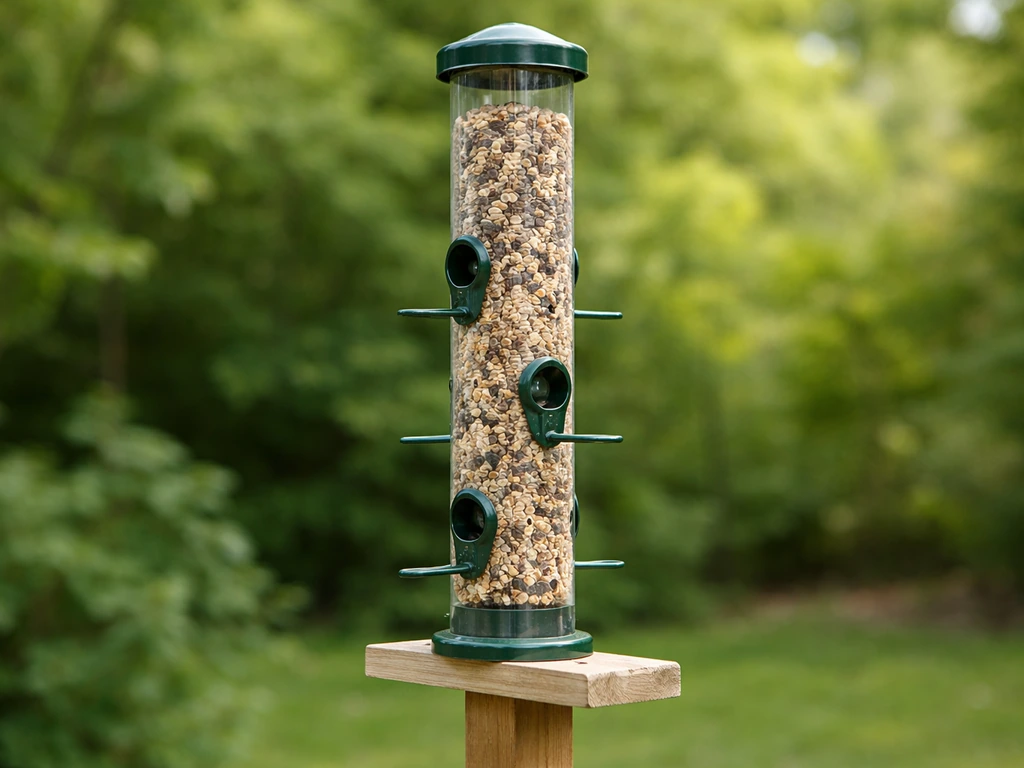
For the Roamwild PestOff specifically, Roamwild recommends hanging the feeder at least 18 inches (45 cm) away from any vertical surface. That means keeping it away from fence posts, walls, tree trunks, and anything else a squirrel can use as a launch pad. If it's hanging right next to a fence, the squirrel-proofing mechanism becomes irrelevant because they'll just lean over and grab it.
For Gardman feeders, the siting rules are even more specific. The manual specifies a minimum hanging height of at least 1.35 m (about 4.5 ft) above the ground, with at least 1.5 m (about 5 ft) of clear space in every direction with no branches, fences, or buildings within that radius. The feeder should only be approachable by squirrels from directly above. If your garden doesn't have an obvious hanging point that meets those specs, the Gardman manual suggests slinging a horizontal wire between two anchor points and suspending the feeder at least one foot below that wire.
For any tube feeder, a free-hanging position away from solid surfaces also helps the weight-sensitive mechanisms work correctly, reduces seed spoilage from wall splash-back during rain, and makes the feeder more visible to birds approaching from multiple directions.
Basic pest-proofing and maintenance after setup
Once the feeder is up and full, there are a few things worth doing right away to make sure it stays working as designed.
Squirrel access
If squirrels are still getting to the feeder after you've followed the distance guidelines (18 inches from any vertical surface for Roamwild), the next step is to photograph exactly how they're accessing it and send the picture to Roamwild's support team. They'll give you specific advice for your setup. This is worth doing rather than guessing, because the fix depends entirely on the access route the squirrel is using.
Cleaning routine
For the Roamwild, Roamwild recommends a specific cleaning process: slide the metal collar up to expose the green tube release tabs, press both tabs and lift the tube away, then remove the lower assembly from the tube. Soak the lower assembly in hot water for 10 minutes, then scrub gently and rinse. The tube itself can be rinsed under a tap or soaked separately. Reassemble once everything is fully dry to prevent mould. The whole thing snaps back together the same way you first assembled it.
Keeping seed dry
The Roamwild PestOff has integrated rain guards on the ports, which keep water from entering during wet weather. But the top cap is your main defense against moisture. Check it regularly after storms to make sure it hasn't been knocked loose. Wet seed clumps, blocks ports, and goes mouldy quickly. If you notice seed isn't flowing to the ports freely, take the feeder down and check whether the seed inside has compacted or clumped from moisture. A 10-minute soak and clean will sort it.
Once your feeder is assembled, hung, and running cleanly, the ongoing work is minimal. Refill as needed, clean every couple of weeks during peak use, and do a quick stability check every time you refill. If you ever need to take the feeder apart for storage or a deep clean, the disassembly process is just the assembly steps in reverse.
FAQ
What should I do if the Roamwild feeder clicks together but still feels wobbly when empty?
Re-check that the lower assembly is fully seated on the seed tube, then run your collar around the pips again (one pip at a time) until you confirm the flange is fully covered. A wobble with no seed often means one pip is not fully over the retaining flange, which can worsen once the feeder is weighted.
Can I assemble the Roamwild PestOff first, then fill later, or do I need to fill right away?
You can assemble first and fill later, just avoid leaving the ports uncovered in a damp spot. If the ports get wet, seeds can swell or form early clumps that make the spring-loaded ports stick more easily when you test it.
How do I confirm I have the correct port and seed type for my Roamwild version (Mixed Seed/Sunflower vs Peanut/Pellet)?
Look for the port size and insert shape that matches the kit you ordered. If you’re seeing seeds pouring straight through or no matter how you adjust assembly, the flow seems “too fast,” you may have the finer-seed mismatch, which usually points to the Peanut/Pellet mesh ports being used with mixed seed.
What’s the safest way to test that the spring-loaded ports are working correctly before birds arrive?
Hang the feeder fully free (not pressed to a wall or fence), then gently apply weight to the feeder. If the ports do not respond, stop testing and inspect whether the feeder is touching a surface or whether the tube is seated correctly, because “almost seated” can prevent full triggering.
When assembling, how can I tell whether any pips are stuck or misaligned before everything is locked in?
During collar placement, pause if the collar won’t glide smoothly. If a pip sits just below the retaining flange, the collar may feel loose even after you think it’s locked, so remove the collar and reseat the tube before pressing pips individually.
Is it normal to see small seed gaps around the ports after filling, or does that mean I assembled something wrong?
A small amount of settling at the ports can be normal, especially right after filling. Ongoing leaking (seed steadily dribbling) usually indicates the lower assembly is not fully seated or you have a seed-to-port mismatch, so verify both before making extra disassembly attempts.
What if my Roamwild kit has extra parts, and I’m not sure where they belong?
Do not guess. Cross-check the instruction sheet or the specific walkthrough for your exact version, because “extra” pieces commonly come from skipped seals around the cap or base. If it’s a ring or washer-type piece, it generally should create a seed seal, not remain loose inside the feeder body.
How do I remove the tube for cleaning without risking damage to the release mechanism?
Slide the metal collar up to expose the green release lugs, press both green tabs at the same time, then lift the tube straight up. If you press only one side or pull sideways, the tube can jam and you may think the mechanism is broken when it’s simply not released.
After cleaning and reassembly, how can I prevent mould-related issues?
Reassemble only when the lower assembly and tube are fully dry, then store the feeder dry until you hang it. Even a small amount of residual moisture in the tube and port area can contribute to quick clumping and mould during heavy use.
What should I do if rain seems to make the ports sluggish even though the rain guards are in place?
After a storm, inspect whether the top cap has shifted, then check for compacted seed that can block the ports. If flow looks restricted, take it down and do the hot-water soak and gentle scrub routine, because wet seed clumps are one of the fastest causes of port sticking.
Next Articles
How to Make a Tube Bird Feeder Step by Step
Step-by-step how to make a tube bird feeder with materials, safe mounting, maintenance, and fixes for leaks and clogs.
How to Put Bird Seed in a Bird Feeder Step by Step
Step-by-step guide to add bird seed to hopper, tube, platform, and suet feeders, avoiding spills and jams.
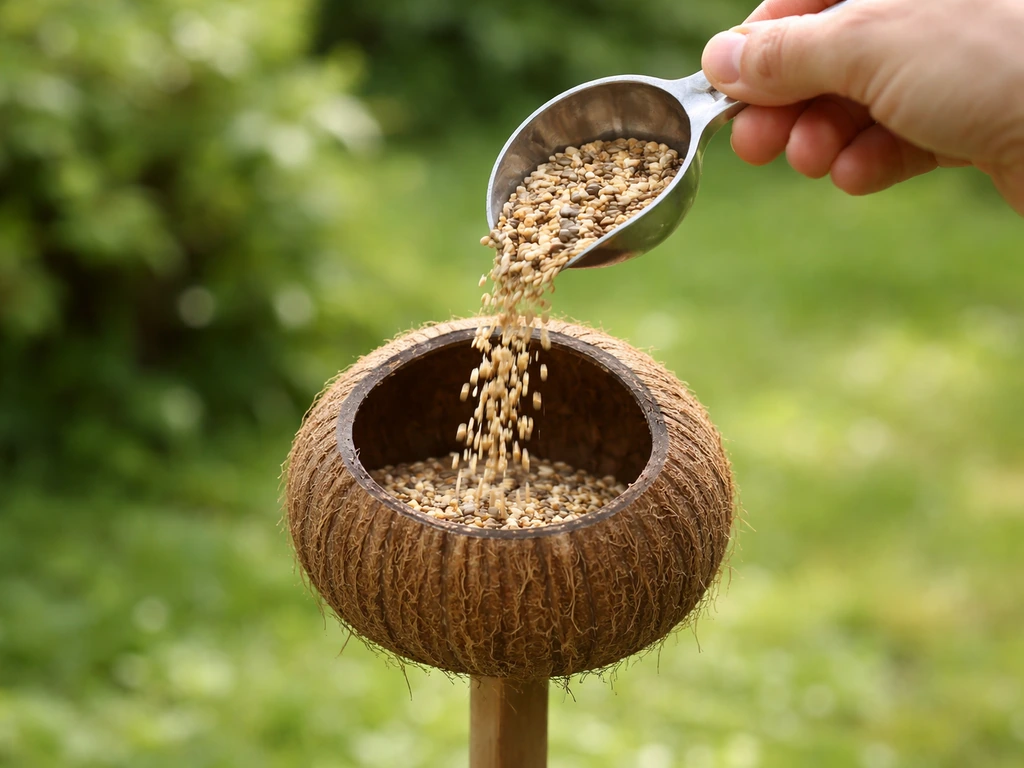
How to Refill a Coconut Bird Feeder Fast and Clean
Learn how to refill a coconut bird feeder fast, clean, and mess-free, with feeding, cleaning, and pest-proof tips.