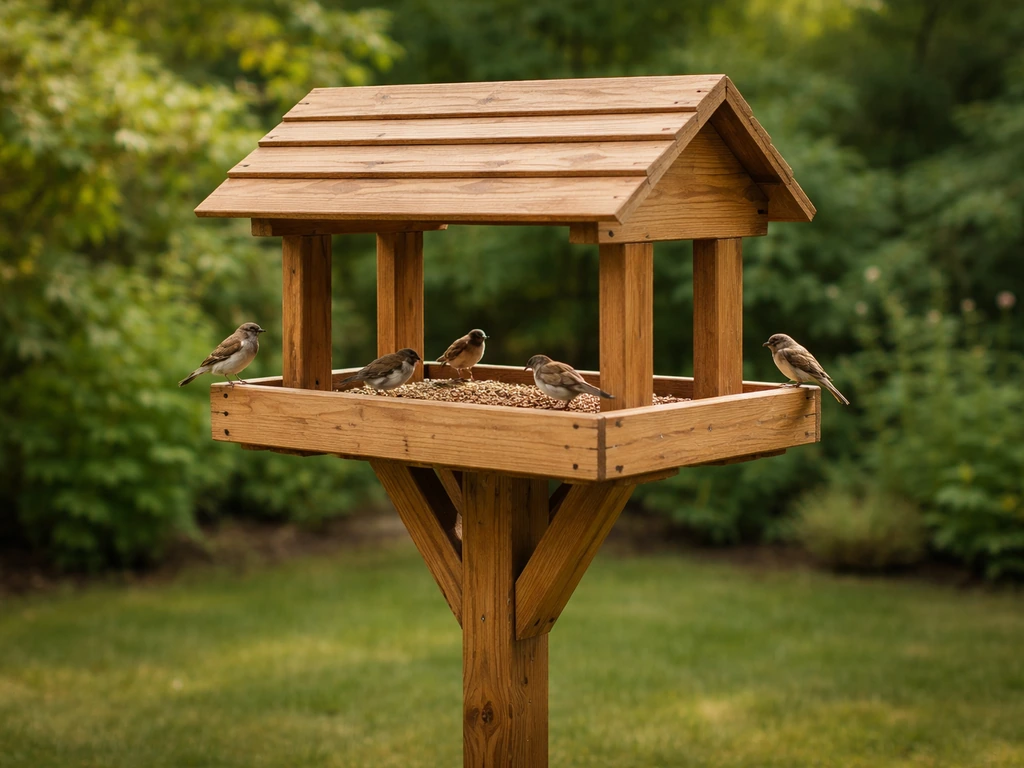
You can build a solid, eye-catching wooden bird feeder stand in an afternoon using a 4x4 post, some basic lumber, and a handful of screws. Whether you want a simple pole-style stand that holds a hanging feeder or a flat feeding table where birds can perch and peck, wood is the best material for the job: it's easy to cut, holds up outdoors when treated right, and looks far better than metal conduit or a plastic spike stuck in the lawn.
How to Make a Wooden Bird Feeder Stand Stand Out

Marcus Brennan
26 Apr 2026
Stand, table, or both? Figuring out what you actually want to build
Before you cut a single piece of wood, it helps to be clear on what 'making a bird feeder stand out of wood' actually means for your yard. There are two main builds here, and they serve different purposes.
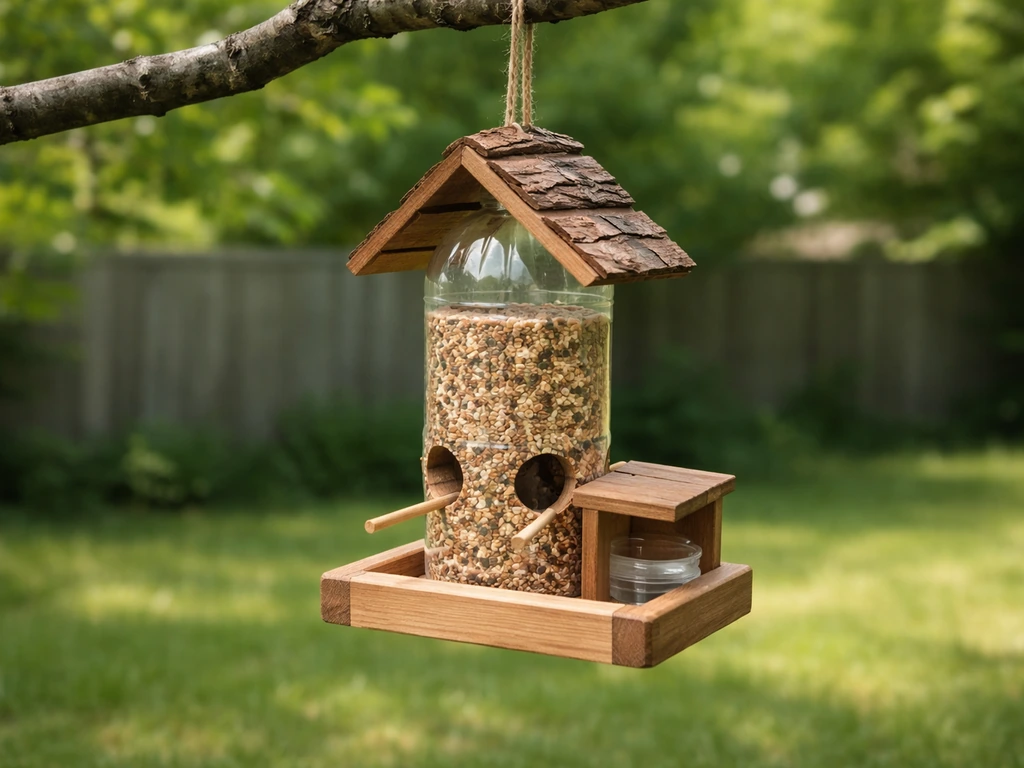
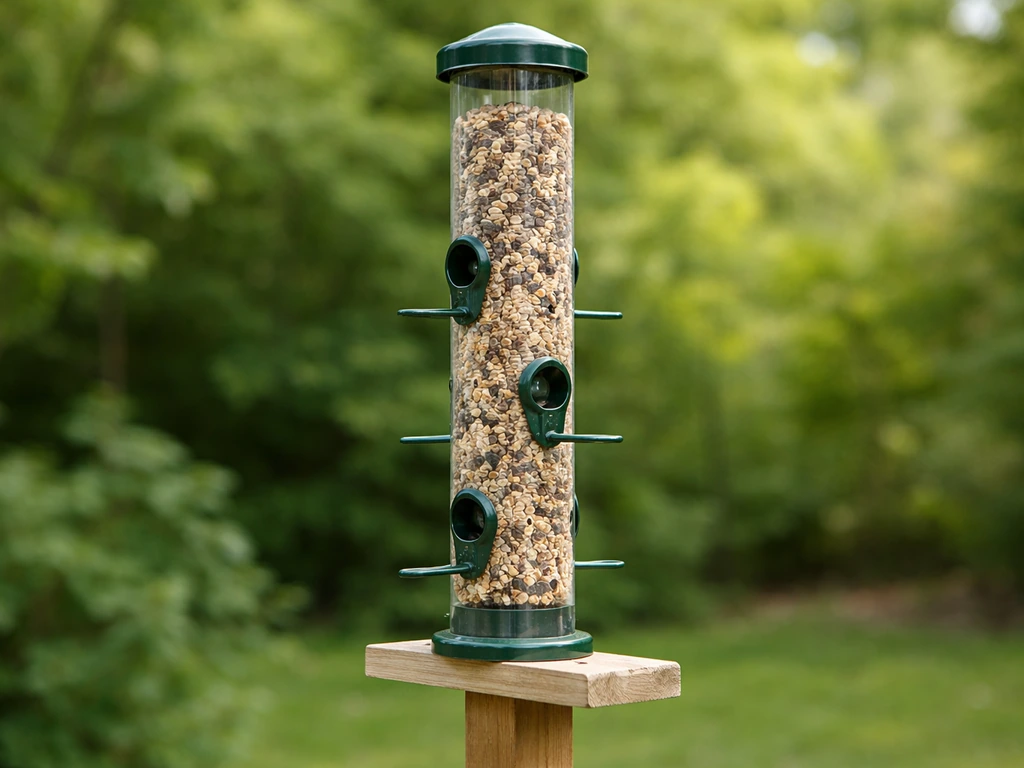
A free-standing feeder stand is basically a wooden post on a base (or driven into the ground) with a bracket or hook at the top. You hang an existing feeder from it, the same way you'd hang one from a tree branch. It's the right choice if you already have feeders you like, or if you want to position feeding at a specific height above squirrel-jumping range.
A bird feeding table (sometimes called a feeder table or platform feeder) is a flat tray or tabletop mounted on a post or legs. If you're also trying to use waste material, look for safe, untreated scrap wood and repurpose it into the stand or feeder tray how to make bird feeder with waste material.
If you want a budget-friendly project, you can also learn how to make a bird feeder out of pallets and fit it into the same stand or tray plan repurpose it into the stand or feeder tray. If you want a twig-style look, you can use small branches and twigs as the visual texture while keeping the tray safe for birds repurpose it into the stand or feeder tray.
You can also learn how to make bird feeders out of toilet paper rolls using simple supplies and safe, bird-friendly ingredients use waste material. If you prefer paper craft, you can also use this approach to learn how to make bird feeder with paper for a simpler, lightweight build. Seed, suet, or fruit sits directly on the surface.
Ground-feeding species like doves, sparrows, and juncos especially love these, and the open design means you can see birds clearly from inside your house. Many people build both: a post stand holding a hanging tube feeder up high, with a low feeding table nearby for ground-preferring birds. If you want the exact process, see our guide on how to make a bird feeder post step by step.
The phrase 'stand out' in the title is also worth addressing directly. It can mean two things: a structure that's visually distinctive in your yard, and a stand that holds feeders up off the ground in a stable, functional way. This guide covers both. You'll end up with something that actually looks intentional and handmade in the best sense, not just a grey stick poking out of your lawn.
What wood, tools, and hardware you'll actually need
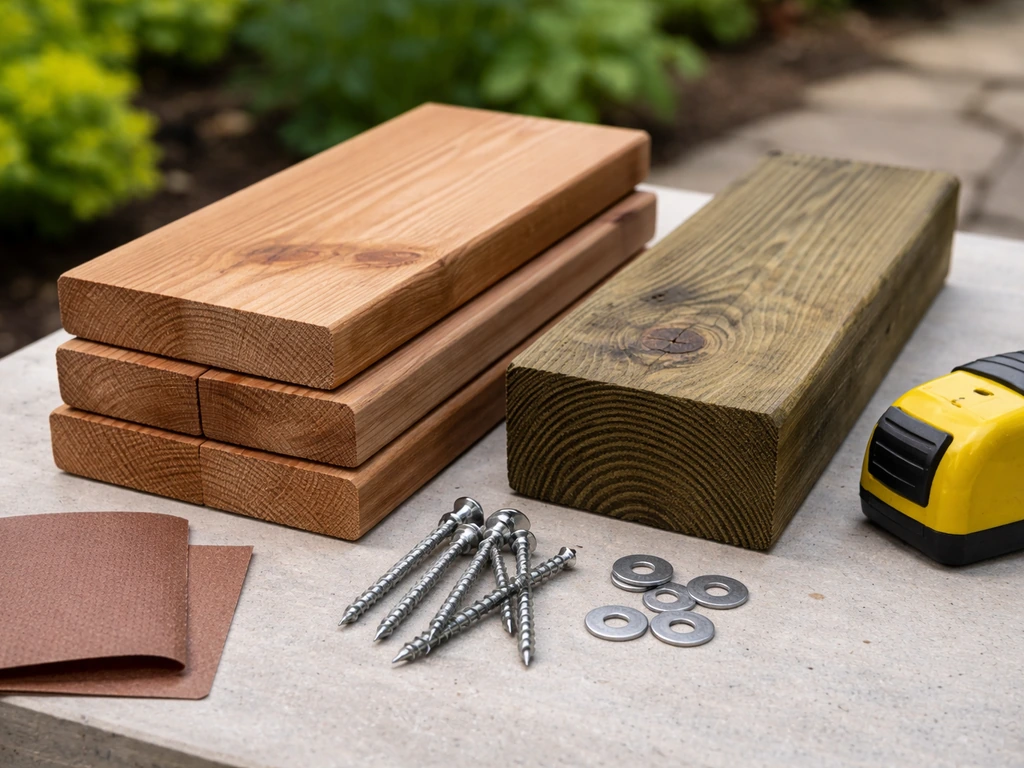
The best wood for outdoor bird feeder stands
Not all lumber handles outdoor exposure equally. Here's what I recommend based on what actually lasts:
- Cedar: The top pick for outdoor bird projects. Naturally rot-resistant, lightweight, and it smells great. Western red cedar is widely available at lumber yards and home improvement stores. It costs a bit more than pine but lasts years longer without treatment.
- Pressure-treated pine (labeled ACQ or CA-B): Inexpensive, very strong, and rot-resistant because of chemical treatment. Good for the post that goes into the ground, but avoid using it for any surface birds will peck directly. Use it for structural pieces only.
- Redwood: Similar to cedar in natural rot resistance. Harder to find in some regions but excellent if you can get it.
- Untreated pine or SPF (spruce-pine-fir): Cheap and easy to work with, but it will rot outdoors within a couple of seasons unless you seal it very well. Fine for indoor or temporary builds, not ideal for a permanent stand.
- Salvaged or pallet wood: Totally usable if it's not pressure-treated with older chemicals (avoid anything stamped 'CCA'). Pallet wood can look fantastic with a wire brush and a coat of outdoor stain, and it's free. If you want to explore pallet-specific builds, that's a whole separate project worth tackling.
Tools you'll need
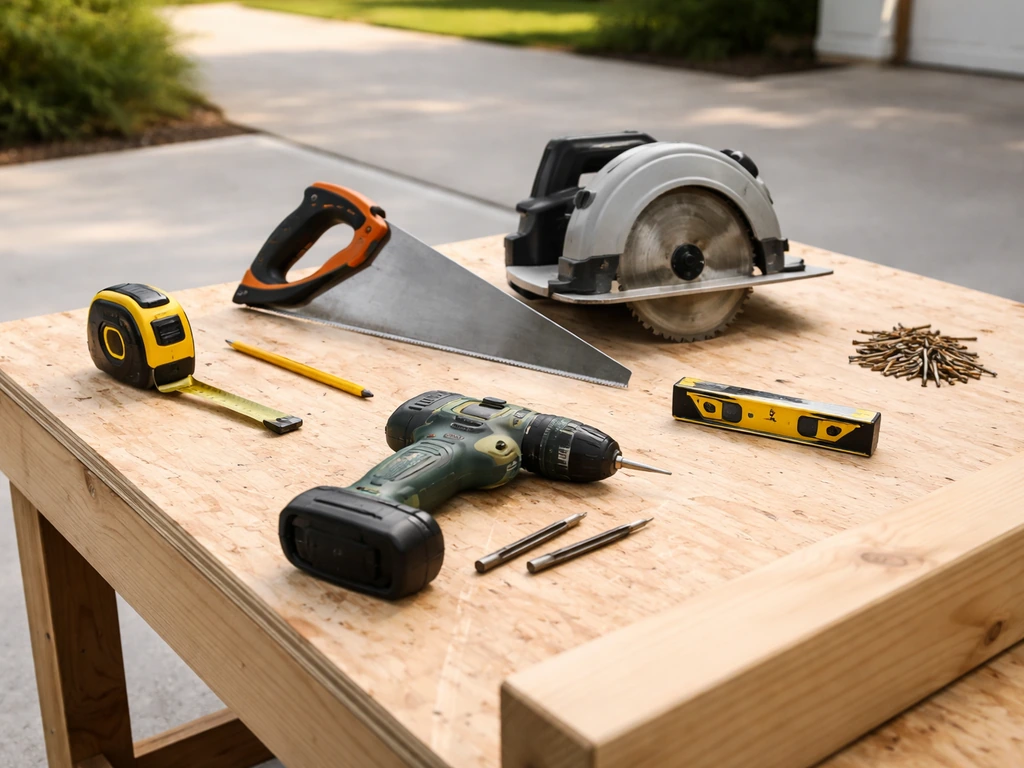
- Tape measure and pencil
- Circular saw or hand saw (a miter saw makes cleaner cuts but isn't required)
- Drill and drill bits
- Screwdriver or impact driver
- Level (a small torpedo level is fine)
- Sandpaper (80-grit and 120-grit)
- Clamps (at least two, helpful when assembling alone)
- Safety glasses and gloves
Hardware and fasteners
- Exterior-grade screws (2.5 inch and 3 inch deck screws) — don't use drywall screws outdoors, they rust fast
- Galvanized or stainless steel carriage bolts (for the bracket or cross-arm connection)
- A shepherd's hook bracket or a simple screw-in eye hook if you're hanging feeders
- Post spike or concrete mix if you're driving the post into the ground
- Waterproof wood glue (optional but adds strength at joints)
How to build a free-standing wooden bird feeder stand (step by step)
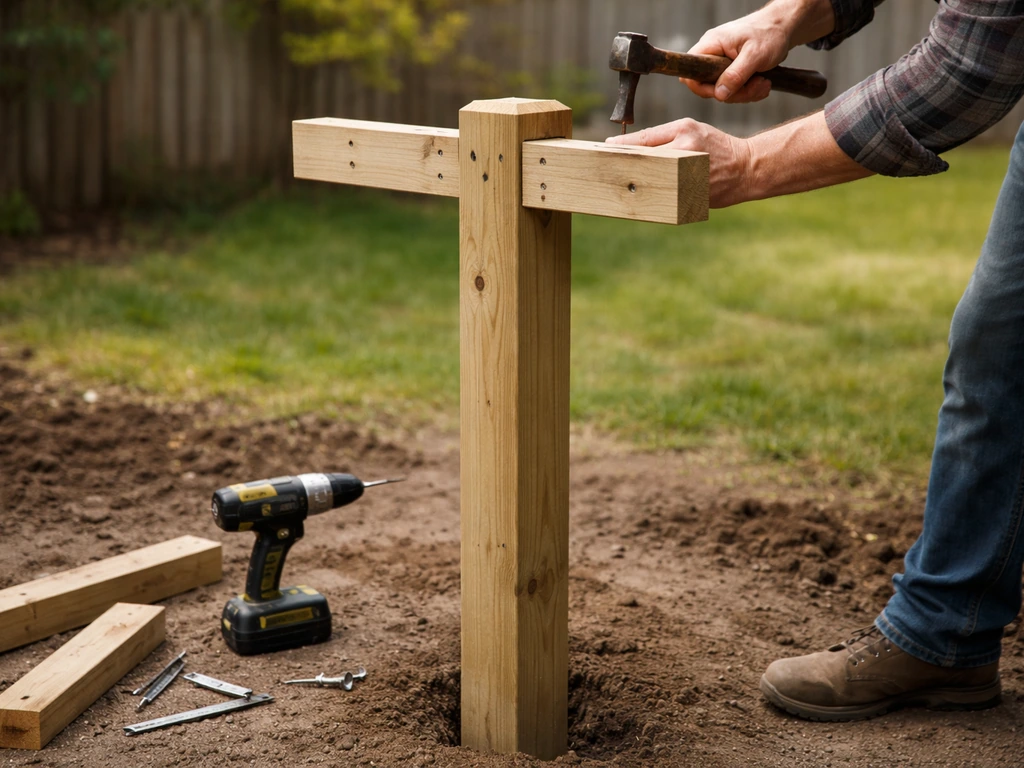
This is the pole-style stand. If you want something more natural than a wooden stand, you can also look at how to make a bird feeder with twigs as a related DIY option. It holds a hanging feeder at height and takes about 2 to 3 hours to build, including drying time if you glue any joints. Here's what you'll need for materials:
- One 4x4 cedar or pressure-treated post, 8 feet long (gives you a finished height of about 5 to 6 feet above ground)
- Two pieces of 2x4 lumber, each about 24 inches long (for the base feet or a cross-base)
- One piece of 2x4 or 1x4, about 18 inches long (for the cross-arm at the top, if you want to hang two feeders)
- Exterior screws (2.5 inch and 3 inch)
- Two carriage bolts with nuts and washers, 3/8 inch diameter by 3.5 inches long
- Screw-in eye hooks or a shepherd's hook bracket
- One metal post spike (optional, for driving into soft ground)
- Cut your post to length. If you're using a post spike to anchor it, cut the post to 7 feet so it sits about 5.5 to 6 feet above ground after the spike is driven in. If you're using a cross-base instead of driving it into the ground, cut the post to 6 feet.
- Build the base (if not using a post spike). Cut two 2x4 pieces to 24 inches each. Lay them flat in an X or T shape on the ground. Drill pilot holes and attach the post centered over the cross point using 3-inch screws, at least three per joint. This base needs to be solid. If you're placing it on a deck or patio, this design works well. If it'll sit on soil, a post spike driven 18 inches into the ground is far more stable.
- Add the cross-arm at the top (optional but recommended). Take your 18-inch 2x4 or 1x4 and center it across the top of the post. Drill two 3/8-inch holes through both pieces and bolt them together with carriage bolts, one near each end of the cross-arm. Tighten with a wrench. This gives you two hanging points instead of one.
- Install the eye hooks. Screw a galvanized eye hook into the bottom face of each end of the cross-arm (or into the top of the post if you skipped the cross-arm). Pre-drill a small pilot hole first so the wood doesn't split. These are your hanging points for feeders.
- Sand all exposed edges. Run 80-grit sandpaper over any rough cuts, then follow with 120-grit. This prevents the wood from catching moisture at the grain and also just makes the whole thing look more finished.
- Prime and paint or stain before assembly if possible, or apply a coat of outdoor sealer after assembly (see the weatherproofing section below).
- Set the stand in position. If using a post spike, drive the spike into the ground with a mallet, check that it's plumb with a level, then slide the post in and tighten the bolt on the spike collar. If using a cross-base, place it on a flat surface and add a heavy brick or paver on each foot to keep it from tipping in wind.
- Hang your feeders and you're done.
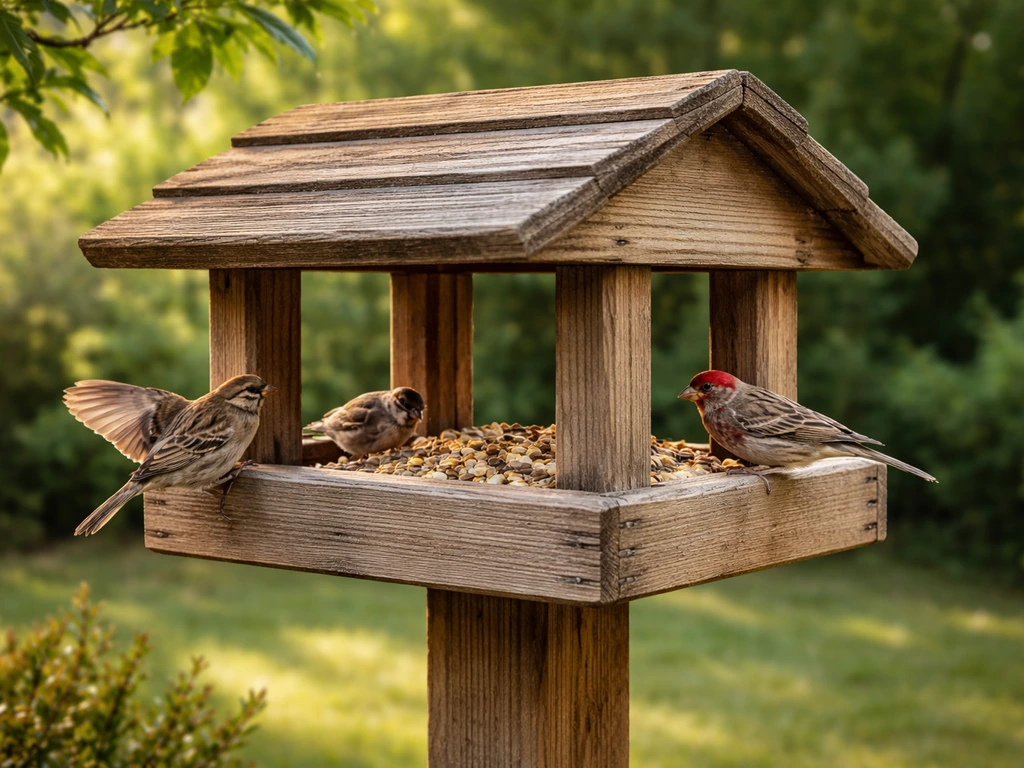
How to build a bird feeding table (step by step)
A feeding table is a flat tray on a post or legs. It's one of the simplest and most rewarding builds for attracting a wide variety of birds. If you want a quick, kid-friendly project instead, learn how to make bird feeder with paper and hang it for short-term feeding. Budget about 3 to 4 hours for this one. Here are the materials:
- One 4x4 post, 5 to 6 feet long (for a single post-mounted table)
- One piece of 3/4-inch exterior plywood or cedar boards glued edge-to-edge, cut to 14x14 inches or up to 18x24 inches for a larger tray
- Four pieces of 1x2 lumber, each about 12 to 22 inches long (for the tray rim, to keep seed from blowing off)
- 2x4 scraps for a mounting bracket between post and tray
- Exterior screws and waterproof wood glue
- Drill bit slightly smaller than 1/4 inch for drainage holes
- Cut the tray platform. A 14x14-inch square is plenty for most backyards, but if you want to attract larger birds like jays or mourning doves, go up to 18x24 inches. If you're using cedar boards instead of plywood, glue and clamp two or three boards edge-to-edge and let them dry before cutting to final size.
- Drill drainage holes in the tray. Use a 1/4-inch bit to drill 6 to 10 holes evenly spaced across the tray floor. This is not optional: standing water in a feeder causes seed to rot and mold fast, which can harm birds.
- Attach the rim. Cut four pieces of 1x2 to form a low border around the tray edge, about 1 inch tall. This keeps seed from blowing off in wind. Glue and screw them to the tray edges with 1.5-inch screws. Don't make the rim taller than 1.5 inches or water will pool instead of draining out the holes.
- Build the mounting bracket. Cut two pieces of 2x4 about 6 inches long. Attach them to the underside of the tray in a V or L shape, leaving a gap that the post top will slot into. Alternatively, cut a notch in the bottom of the tray to receive the post top snugly. Either way, use carriage bolts to lock the tray to the post securely.
- Mount the tray to the post. If you're setting the post in the ground, attach the tray before setting it (it's easier). Check that the tray is level using your torpedo level, then tighten all bolts. If you're using a post spike, set the spike first, insert the post, then attach the tray.
- Set the post in the ground or into a spike. For a feeding table, I prefer a concrete-set post over a spike: dig a hole about 18 inches deep and 6 inches wide, pour in a bag of fast-set concrete, position the post plumb, brace it with scrap wood, and let it cure for 24 hours. This keeps the table rock solid even when a squirrel lands hard on it.
- Sand and finish before or after assembly (same approach as the stand, detailed below).
- Fill the tray with seed and step back.
Placement: where to put your stand for the most bird activity (and fewest problems)
Where you position your stand matters as much as how you build it. The two biggest issues are window strikes and predator access, and the research on window placement is worth knowing.
Audubon's recommendation on window distance is specific: place feeders either within 3 feet of a window or more than 30 feet away.
The logic is straightforward. Birds hit windows when they have enough speed to do real damage. Within 3 feet, they can't build up that speed before impact, so a collision is a harmless bump rather than a fatal strike. At 30-plus feet, birds have enough visual field to recognize the house as an obstacle and fly around it.
The middle zone, roughly 4 to 29 feet from windows, is where most window strikes happen. [All About Birds suggests 10 feet as a reasonable compromise if you can't do either extreme, and notes that experimenting with exact positioning is worthwhile. ](https://www. allaboutbirds.
org/news/where-to-put-your-bird-feeder/)
Beyond window safety, pick a spot that has nearby shrub or tree cover within about 10 feet. Birds feel safer feeding when they can see a quick escape route. But don't put the stand right against dense brush, or cats will use it as an ambush point. About 10 feet of open ground between the stand and thick cover is a good balance.
For squirrel management, position matters too. Squirrels can jump horizontally about 8 to 10 feet and vertically about 4 feet. Keep the stand at least 10 feet from any fence, tree trunk, or structure they can launch from, and aim for a feeder height of 5 feet or more off the ground.
Getting your stand stable before you're done
A wobbly stand will stress the wood joints over time and spook birds. If your cross-base design rocks on uneven ground, add adjustable feet (small furniture levelers work fine) or pack dirt firmly under the low corner. For in-ground posts, the concrete method I described above is the most reliable. If you used a post spike and it feels loose after a few months, you can pull it out, widen the hole slightly, add a bag of gravel for drainage, and re-drive the spike.
Weatherproofing, finishing, and keeping it looking good for years
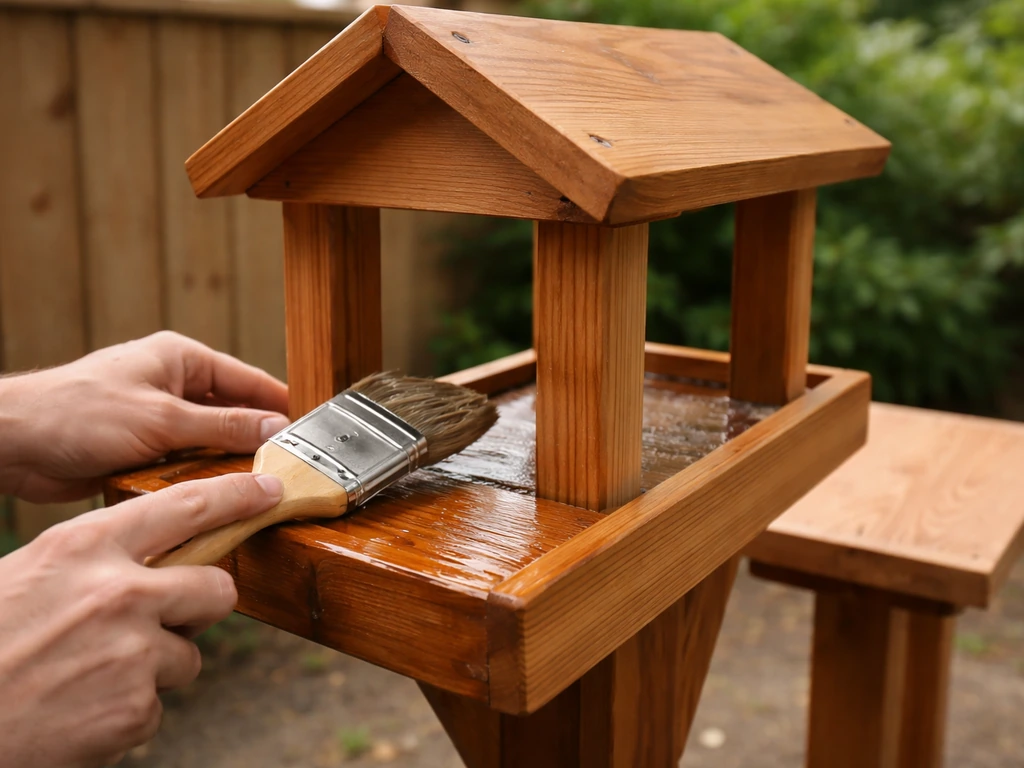
Raw wood outdoors will grey and crack within one or two seasons if you don't protect it. Here's what actually works:
| Finish type | Best for | Longevity outdoors | Bird-safe when dry? |
|---|---|---|---|
| Exterior deck stain (semi-transparent) | Cedar, pine | 3 to 5 years before recoating | Yes |
| Linseed oil (boiled) | All wood types | 1 to 2 years, needs more frequent reapplication | Yes when fully cured (48 hrs) |
| Outdoor wood sealant (clear) | Any wood, preserves natural look | 2 to 3 years | Yes |
| Exterior latex paint | Any wood, most color options | 4 to 6 years | Yes when dry |
| Teak oil | Cedar, hardwoods | 1 to 2 years | Yes when dry |
My personal go-to is a semi-transparent cedar-toned exterior deck stain on cedar wood. It deepens the natural color, soaks into the grain rather than sitting on top (so it won't peel like paint), and lasts several years before needing a light recoat. Apply it before assembly when possible so you can hit all the surfaces easily. Let it dry for at least 24 hours before setting the feeder up.
Avoid using creosote, varnish, or any solvent-based finish on surfaces birds will contact directly. Stick to water-based exterior products for the tray surface and any area where birds perch.
Ongoing maintenance (it doesn't take much)
- Check all screws and bolts once a season. Outdoor temperature swings cause wood to expand and contract, which can loosen fasteners over time. A quick tighten every spring takes five minutes.
- Sand and reapply finish every 2 to 3 years, or sooner if the wood starts looking grey and dry.
- Clean the feeding tray every week or two during active feeding seasons. Old wet seed and droppings harbor bacteria. A stiff brush and a rinse with diluted white vinegar works well and is safe for birds.
- Check the post base each spring for soft spots in the wood that indicate rot starting. If you catch it early, a coat of wood hardener can extend the post's life considerably.
- If you set the post in concrete and the post itself starts to rot at the soil line, you can cut it off above ground level and attach a new post section with a metal post repair spike rather than digging out the concrete.
Optional upgrades that make your stand genuinely stand out
Once you have the basic structure built, there are several upgrades worth adding if you want better aesthetics, more functionality, or stronger pest resistance. None of these are required, but they make a real difference.
Visual upgrades
- Routed edges: If you have a router or know someone who does, running a simple roundover or cove bit along the tray edges and post corners gives a much more finished look with almost no extra effort.
- Carved or branded post: A simple woodburning tool lets you add a design, your house number, or even a bird silhouette to the post. Takes about 20 minutes and looks completely custom.
- Mixed-material accent: Wrap 6 to 8 inches of the post just below the feeder in copper pipe or copper flashing. It looks great against cedar and has the bonus of being slippery for squirrels.
- Twig or branch cross-arm: Instead of a milled 2x4 for the cross-arm, use a straight, thick branch (1.5 to 2 inches in diameter) from a fallen tree. Peel the bark, let it dry, and bolt it to the post. This is the most natural-looking option and pairs well with twig-style feeder builds.
Pest-resistance upgrades
- Squirrel baffle: A cone-shaped or cylinder metal baffle mounted on the post about 4 feet off the ground stops squirrels from climbing. You can buy these or cut one from a piece of aluminum flashing formed into a cone and slid over the post.
- Copper mesh tray liner: Line the bottom of your feeding table with copper mesh hardware cloth before adding seed. It allows drainage, discourages seed from matting and rotting, and is easy to pull out and rinse.
- Wrap the post with metal: Attach a section of smooth metal stovepipe or PVC pipe around the lower 3 feet of the post. Squirrels and raccoons can't grip it. This is the most effective deterrent short of a full baffle.
- Weight-sensitive perch ring: For hanging feeders on your stand, choose feeders with weight-sensitive ports that close under a squirrel's weight. The stand itself doesn't need modification for this, but pairing a good stand with a squirrel-proof feeder means you've solved the problem at both levels.
Structural upgrades for a longer-lasting build
- Diagonal bracing: Add a short 2x4 brace at a 45-degree angle between the post and the base cross-members. This dramatically increases lateral rigidity and keeps the stand from rocking in strong wind.
- Epoxy wood filler at joints: Before screwing joints together, work a bit of two-part exterior epoxy wood filler into the joint. It bonds wood fibers together and seals out moisture at the same time.
- Post cap: Fit a metal or wooden cap on top of the post where it meets the cross-arm or tray. This prevents end-grain moisture absorption, which is the fastest way a post rots. Even a piece of flashing cut and folded over the top works well.
- Stainless steel hardware throughout: It costs about 15 to 20 percent more than galvanized, but stainless screws and bolts will still look clean and hold tight after 10 years outdoors without the white rust staining that galvanized fasteners can develop.
If you want to go further with the feeder itself, a wooden free-standing stand pairs naturally with a wooden feeder box mounted directly on the post top, which is a project closely related to building a bird feeder from wood. And if you want multiple feeding stations in your yard, a dedicated post design is worth exploring separately from the stand described here. Starting with one good stand, finishing it well, and watching which birds show up will tell you a lot about where to go next.
FAQ
What wood sealing details matter most if I want the stand to last longer than a couple seasons?
Use only lumber grades rated for outdoor use, then seal any end grain and all cut edges before assembly. End grain soaks water fast and will split sooner than the face boards. For best results, apply your water-based exterior finish on every surface that could get wet, and leave the underside of the base open enough to dry after rain (avoid fully encapsulating the post bottom).
Can I use pressure-treated lumber or unknown scrap wood for a stand that birds will touch?
Never let birds contact treated lumber residues. If your scraps are pressure-treated, stick to boards that are fully cured and dry, and do not use treated wood on the part of the feeder where birds land or peck. If you are unsure, use untreated hardwood or exterior-safe scrap for any contact surfaces, and reserve treated lumber only for non-contact structural parts below the feeding plane.
How should I design for rain and drainage so seed and droppings do not build up on the wooden parts?
Yes, but do it with a clear plan: for ground-feeding tables, keep the tray floor slightly sloped (even a small tilt) so spilled seed and droppings do not pool. For tube or hanging feeders, confirm the hanging height keeps the feeder outlet away from the wood base, so you do not have a tight area where rain can drip back onto perches. If you add a roof or baffle, keep drainage holes on the underside so water exits instead of soaking the posts.
What connection mistakes make a wooden feeder stand rock or loosen over time?
Use a stable attachment method for the feeder to prevent lateral wobble. For hanging feeders, choose hardware rated for outdoor load (heavy-duty hooks, eye bolts, or brackets) and through-bolt where possible, not just screws into end grain. For platform tables, pre-drill all pilot holes and consider adding corner blocks or cleats under the tray to reduce racking when birds hop on and off.
My stand looks faded or rough quickly, how do I troubleshoot the finish and repair it?
If you are seeing a lot of fraying, splitting, or peeling in the first year, you likely sealed too late (after the wood was already weathered) or used a film finish in the wrong place. Film finishes can crack when wood expands and contract. Recoat only with the same product family when possible, and sand lightly to dull glossy spots before reapplying so adhesion improves.
What is the most effective way to reduce squirrels from using the wooden post as a ladder?
Even if the stand is sturdy, squirrels and larger birds often exploit height and reach. The practical fixes are (1) raise the feeder, (2) extend a baffle so squirrels cannot climb the post, and (3) keep launch points away, like fences, tree trunks, and nearby deck rails. A simple add-on is a smooth metal or plastic squirrel guard band installed on the post at a position where it blocks climbing.
If I build both a hanging feeder stand and a ground-feeding table, how should I place them to reduce mess and conflict?
When you place multiple feeding zones, keep ground feeding and hanging feeding separated vertically and horizontally so birds do not crowd the same surface. If you use both, position the platform table far enough that droppings do not blow onto the hanging feeder. Aim for different heights and give at least a few feet of spacing between structures when yard space allows.
How do I choose a location that is safe for birds but also convenient for regular cleaning and refilling?
Plan for safe access to fill and clean. Leave enough clearance around the tray or feeder so you can remove seed, scrape surfaces, and rinse without dragging tools into the perching area. Also avoid placing the stand where hoses or sprinklers will repeatedly soak the same wood contact points, since constant wetting shortens finish life.
Next Articles
How to Make a Bird Feeder With Waste Material
Step-by-step DIY guide to build seed and bird water feeders from recycled waste, with safe assembly, hanging and mainten
How to Build a Bird Feeder Out of Wood Step by Step
Step-by-step guide to build a wood bird feeder with measurements, weatherproofing, mounting tips, and maintenance.
How to Make a Tube Bird Feeder Step by Step
Step-by-step how to make a tube bird feeder with materials, safe mounting, maintenance, and fixes for leaks and clogs.