You can build a solid, functional wooden bird feeder in an afternoon with basic tools and a few dollars' worth of lumber. To get started with the full build, use this guide to make a bird feeder post with safe materials and a weatherproof design. To get even more specific, follow these step-by-step tips to make a bird feeder with twigs. The core build is simple: a platform or house-style feeder made from untreated wood, glued and screwed together, with drainage holes drilled in the base and a weatherproof finish applied before birds arrive. Here is everything you need to go from raw board to a feeder that will last several seasons.
How to Build a Bird Feeder Out of Wood Step by Step

Marcus Brennan
19 Apr 2026
Choosing wood and tools for a simple backyard project
The single most important rule when choosing wood for a bird feeder: do not use pressure-treated lumber. Treated wood off-gasses chemicals that are harmful to birds, especially in a food-contact environment that gets wet repeatedly. The same goes for manufactured wood products that contain high levels of formaldehyde-based adhesives, like some grades of plywood.
The best options are naturally rot-resistant species. [Cedar is the classic choice because it handles moisture well and lasts outdoors for years without needing heavy finishing. ](https://www. fpl.
fs. usda. gov/documnts/finlines/finishlinemknaebe2013_008. pdf) Redwood performs similarly.
If you want the cheapest option, plain pine works fine as long as you weatherproof it properly (more on that below). A 1x6 or 1x8 cedar or pine board from any hardware store is all you need for most simple feeders.
If you want a lighter, craft-style option, you can also learn how to make a bird feeder with paper for a quick project A 1x6 or 1x8 cedar or pine board from any hardware store is all you need for most simple feeders. . Budget around $10 to $20 for enough lumber to build one or two feeders.
One thing worth double-checking: some cedar products sold commercially are marketed as 'treated' or 'conditioned' and may have surface coatings applied. Always verify that cedar you buy is bare, untreated wood. Do not assume the label 'cedar' automatically means bird-safe.
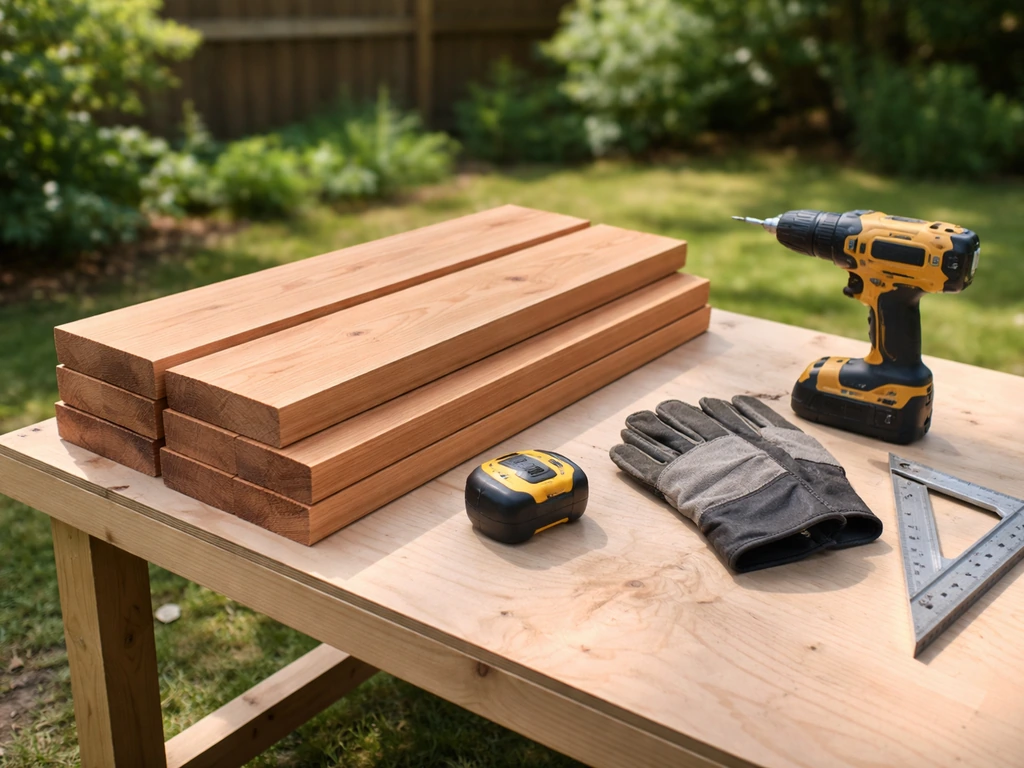
For tools, you do not need much. A handsaw or circular saw handles all the cuts. A drill with a 1/4-inch bit (for drainage holes) and a 2-inch bit (for perch holes on a house feeder) covers the drilling. Wood glue, 1-1/4-inch exterior screws, sandpaper (120-grit), and a measuring tape round out the kit. If you have clamps, use them during glue-up. If not, screws alone work.
Design options for wooden bird feeders
Three designs cover most beginner needs, and each attracts slightly different birds. Understanding the differences helps you choose before you cut a single board.
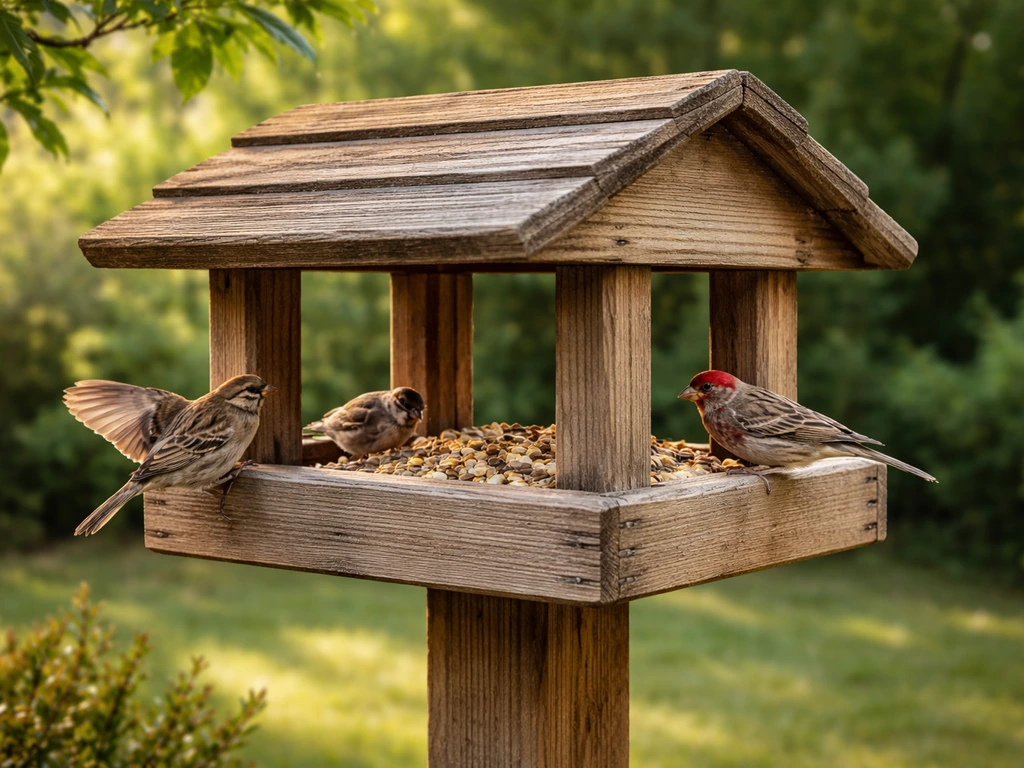
Platform (tray) feeder

A platform feeder is the simplest build: a flat tray with low side rails and drainage holes in the bottom. It attracts a wide range of birds including cardinals, jays, and mourning doves because it offers open, easy access. The tradeoff is that seed sits exposed to rain and bird droppings, so it needs more frequent cleaning. A standard platform size is roughly 24 by 24 inches, though a smaller 12 by 16-inch version works great for most yards and uses less lumber.
House (hopper) feeder
A house-style or hopper feeder has walls and a roof, which means seed stays drier and lasts longer between refills. Birds feed from a gap at the base of the walls where seed flows out onto a small ledge. This style is more work to build but holds more seed and looks attractive. It is a good second project once you have done a platform feeder.
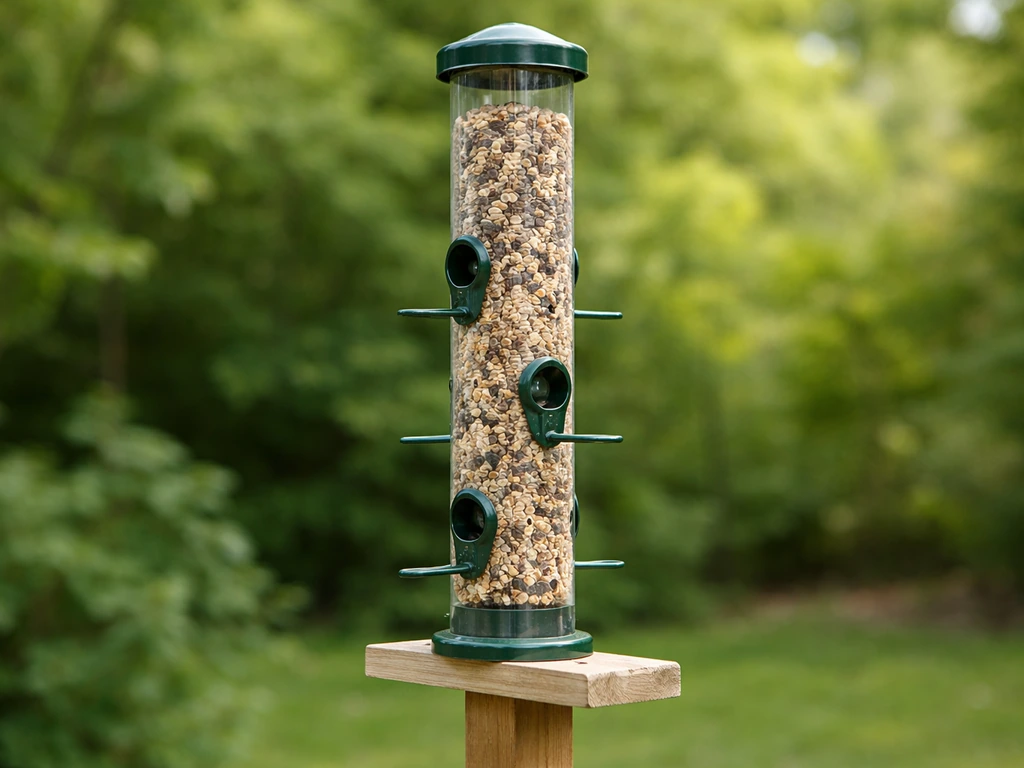
Simple tube or enclosed feeder
A box-style enclosed feeder with a small opening functions like a tube feeder: seed is contained, less exposed to weather, and easier to fully disinfect because the interior surfaces are accessible when you remove the roof. Research actually shows that enclosed tube-type feeders are safer from a disease standpoint than open platform feeders because they are easier to clean thoroughly. If you want the most hygienic option, lean toward an enclosed design.
| Style | Build Difficulty | Seed Exposure | Birds Attracted | Cleaning Ease |
|---|---|---|---|---|
| Platform/Tray | Easy | High (open) | Wide variety, ground-feeding species | Moderate (open but exposed) |
| House/Hopper | Intermediate | Low (protected) | Chickadees, nuthatches, finches, cardinals | Moderate (enclosed sides) |
| Enclosed Box/Tube | Easy-Intermediate | Low (enclosed) | Smaller songbirds, finches | Easiest (fully accessible interior) |
For a first build, go with the platform feeder. It is the fastest to make, the most forgiving of imperfect cuts, and it will attract birds almost immediately.
Step-by-step build instructions
These instructions cover two builds: a quick platform feeder and a basic house feeder. Start with the platform if this is your first woodworking project.
Build 1: Simple platform feeder (beginner, about 1 hour)
Cut list from a single 1x6 or 1x8 cedar or pine board:
- Base: 1 piece at 12 x 16 inches
- Side rails: 2 pieces at 1 x 1.5 x 16 inches (long sides)
- End rails: 2 pieces at 1 x 1.5 x 12 inches (short sides)
- Optional roof or cover: 1 piece at 14 x 18 inches (only if you want partial rain cover)
- Cut the base board to 12 x 16 inches and sand all edges smooth with 120-grit sandpaper.
- Drill eight drainage holes in the base using a 12 mm (about 1/2-inch) drill bit, spaced evenly across the surface. Water needs to drain freely so seed does not sit in puddles.
- Cut the four rail pieces. These are the short perimeter walls that keep seed from falling off the tray. Each rail should be about 1 to 1.5 inches tall.
- Apply wood glue to the bottom edge of each rail and position them along the perimeter of the base, leaving the corners slightly open or cutting a small notch at each corner for additional drainage.
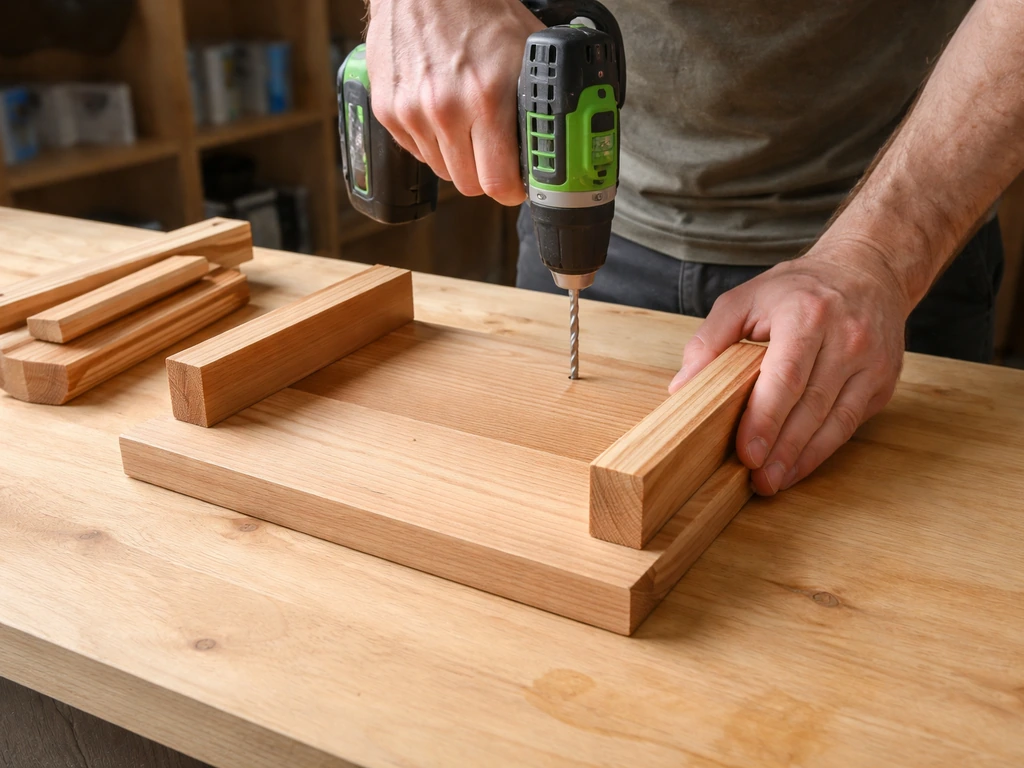
- Drive 1-1/4-inch exterior screws through the base into each rail (two screws per rail side) to reinforce the glue joints.
- If you want a hanging feeder, drill two holes at opposite corners of the base, thread wire or rope through, and knot securely underneath. Use at least 18-gauge galvanized wire for durability.
- If you are mounting to a post, attach a 3-inch deck screw through the base center into the post, or use a 3/8-inch carriage bolt for a more secure connection.
- Let glue cure for at least 2 hours before applying any finish.
Build 2: Basic house (hopper) feeder (intermediate, about 2 to 3 hours)
Cut list from a 1x6 board (8 feet long) plus a small piece of 1/4-inch plywood for the roof panels:
- Floor: 1 piece at 6 x 12 inches
- Front and back walls: 2 pieces at 6 x 10 inches, with a peaked top cut at roughly 30 degrees
- Side walls: 2 pieces at 5.5 x 8 inches
- Roof panels: 2 pieces at 5 x 9 inches (plywood or thin cedar)
- Feed ledge (perch shelf): 2 pieces at 1.5 x 12 inches, attached to front and back just above the floor
- Cut all pieces to size and sand all faces and edges.
- Drill four 1/2-inch drainage holes in the floor piece, evenly spaced.
- Glue and screw the front and back walls to the floor, keeping everything square. Check with a square before the glue sets.
- Attach the side walls between the front and back walls. Pre-drill to avoid splitting the wood.
- Leave a 1/2-inch to 3/4-inch gap between the bottom of the side walls and the floor on both sides. This gap is where seed flows out onto the feed ledge.
- Attach the feed ledge pieces flush with the front and back walls, resting just below that seed gap.
- Attach the two roof panels along the peak using a continuous hinge or small brass hinges so the roof can open for cleaning and refilling. This is one of the most useful features to add.
- Drill a 3/8-inch hole through the peak of the roof to thread hanging wire through, or attach a screw eye rated for outdoor use.
- Sand any rough spots, especially inside surfaces where birds will contact the wood.
Finishing, weatherproofing, and safe coatings for birds
This is where people make the most mistakes. A lot of standard wood finishes, paints, and stains off-gas VOCs (volatile organic compounds) that are harmful in a food-contact environment, especially when the feeder heats up in summer sun. The goal is to protect the wood from moisture while keeping the surface safe for birds.
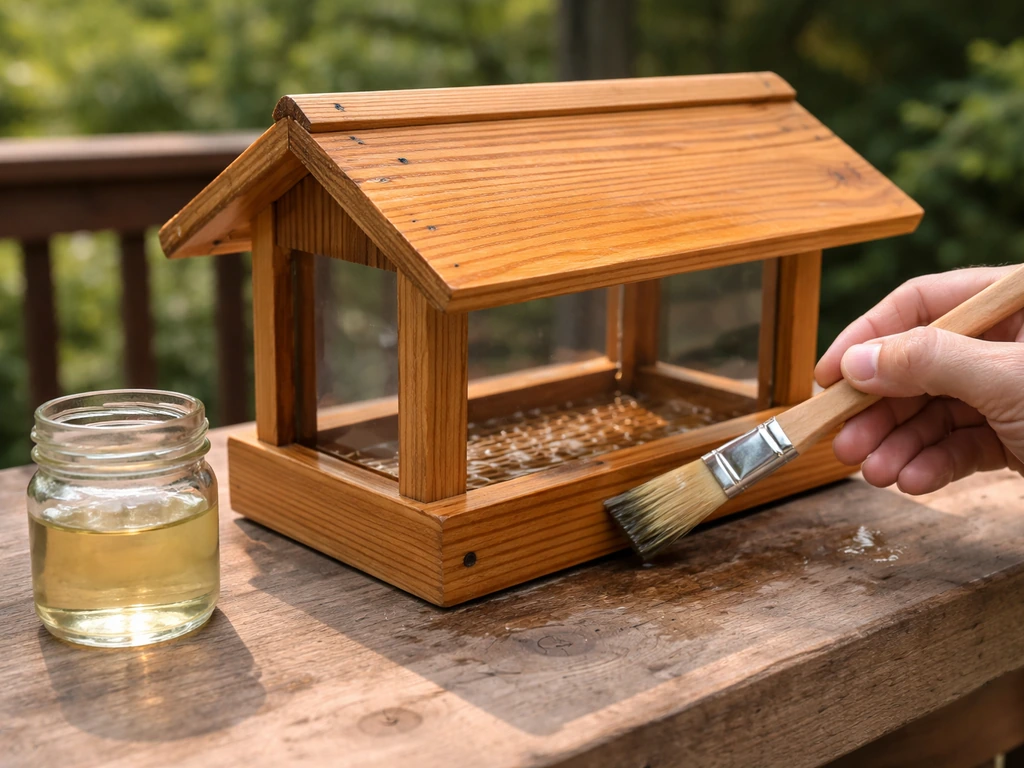
The safest options are food-safe or low-VOC natural oil finishes. Pure tung oil and raw linseed oil are both good choices. They penetrate the wood, provide real moisture resistance, and once fully cured, are considered food-safe. The catch is cure time: tung oil takes 7 to 10 days for a partial cure and 15 to 30 days for a full cure. Raw linseed oil has a drying window of roughly 12 to 18 hours per coat, but needs multiple coats and time before the feeder should be put into service. Some modern unpigmented finishes labeled as food-safe are also appropriate if you let them cure properly (typically 5 to 7 days at minimum before use).
Exterior paint can be used on the outside surfaces only, specifically on the roof and outer walls, never on interior surfaces or any surface that contacts seed. If you use paint, choose a low-VOC latex exterior paint and let it cure for at least a week before putting the feeder out. Avoid glossy finishes on roof peaks or areas where birds land, as they can be slippery.
For cedar and redwood, you can honestly skip finish altogether. These woods are blank" rel="noopener noreferrer">naturally rot-resistant and will weather to a gray patina over time. That is perfectly fine and fully bird-safe. Unfinished cedar feeders often outlast painted pine ones because water beads off naturally and there is no finish layer to crack and peel.
Apply two coats of your chosen finish to all exterior surfaces, letting each coat dry fully before applying the next. Leave interior seed surfaces and the tray floor unfinished or use only a pure tung oil coat. Do not put the feeder outdoors with seed until the finish has cured to the minimum safe window for whatever product you used.
How to hang or mount your wooden feeder safely
Placement matters more than most people realize, and getting it right from the start saves a lot of frustration with squirrels, window collisions, and birds that never show up.
Height and distance from structures
Hang or mount your feeder so that the bottom of the feeder is at least 5 to 6 feet off the ground. Squirrels can jump roughly 3.5 feet straight up from a standing position, so anything lower is an easy target. If you are using a pole mount, add a squirrel baffle positioned 4 to 5 feet above the ground on the pole, below the feeder. This baffle is the single most effective squirrel deterrent.
Just as important as height is horizontal distance. Place the feeder at least 8 to 10 feet away from any tree, fence, roof edge, or surface a squirrel could use as a launch point. Squirrels are good jumpers and will simply bypass the height barrier if they can leap sideways from a nearby branch.
Hanging vs. pole mounting
Hanging feeders on a wire from a tree branch or dedicated hook works well for lightweight platform feeders. Use galvanized steel wire (at least 18-gauge) and tie it securely. A shepherd's hook stake is a simple, affordable pole option that you can move around your yard until you find the best spot. For heavier house feeders, a dedicated 4x4 post set in concrete is the most stable solution, and it also makes adding a baffle easy.
Window collision safety
Place feeders either within 3 feet of a window (so birds cannot build up enough speed to cause injury if they fly toward the glass) or more than 30 feet away. The danger zone is the 3- to 30-foot range, where birds can accelerate before hitting glass. If your only good placement option is in that range, apply window collision tape or decals to the nearest window.
Cleaning, maintenance, and troubleshooting common problems
A wooden feeder that is not cleaned regularly becomes a disease vector, full stop. Wet seed molds quickly, droppings accumulate, and bacteria spread between birds that share a feeding surface. The good news is that cleaning is straightforward once you have a routine.
Regular cleaning schedule
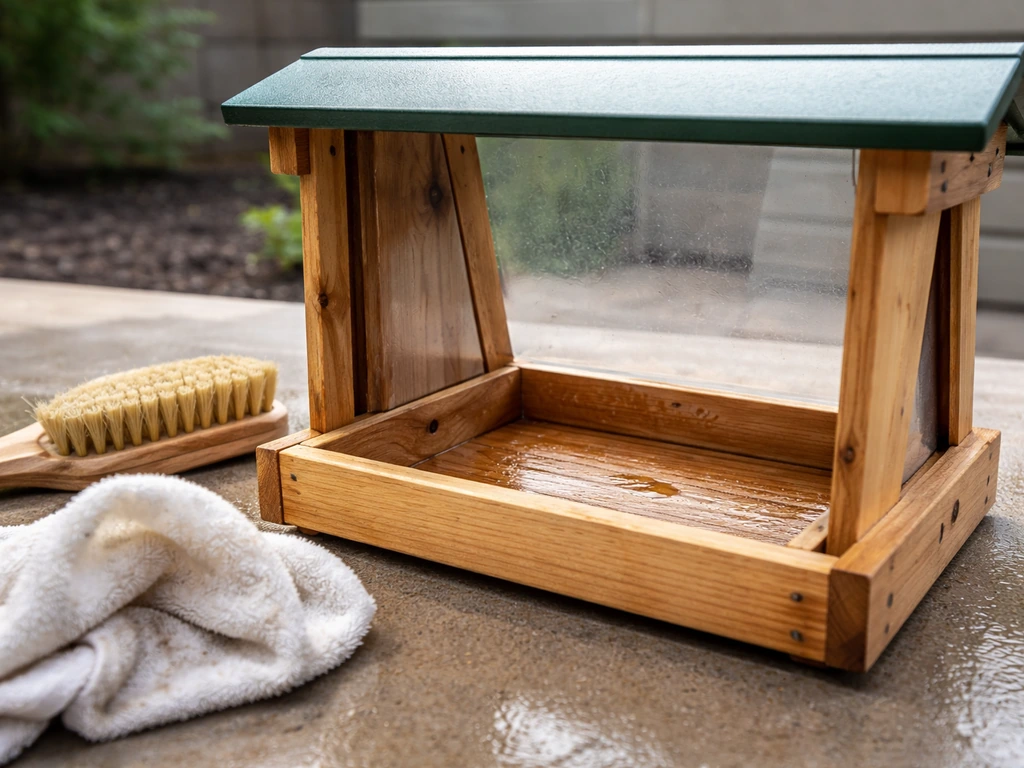
Clean seed feeders at least once a week, ideally more often during wet weather when seed clumps and molds fast. Remove all old seed first. Scrub the feeder with hot water and a bottle brush or stiff-bristle brush to remove debris and droppings from all surfaces, including corners and drainage holes.
For disinfecting, soak all feeder parts in a solution of 1 part bleach to 9 parts water for 10 minutes. That ratio (roughly 10% bleach solution) is the standard recommended by multiple wildlife organizations. Rinse thoroughly with clean water and let the feeder air dry completely before refilling with seed. Do not rush the drying step: damp feeders just breed the same problems again.
Troubleshooting common problems
- Seed clumping or molding: Check drainage holes first. If they are clogged, clear them with a skewer or small drill bit. Switch to a seed mix without millet if you are in a wet climate, as millet absorbs moisture quickly.
- Wood cracking or splitting: This usually means the finish has worn off. Re-sand the affected area and apply another coat of tung oil or linseed oil. Cracks also appear when screws were driven without pre-drilling; fill small cracks with exterior wood filler.
- Birds not visiting: Give it a week. New feeders need time. Make sure the feeder is visible from a perch, not buried in dense cover. Scatter a small amount of seed on the ground near the feeder to draw birds in initially.
- Feeder swings too much in wind: Add a small weight to the bottom of hanging feeders, or switch to a pole mount. Excessive swinging wastes seed and deters shy species.
- Roof leaking onto seed: Check the roof pitch and make sure the peak joint is sealed. A bead of exterior silicone caulk along the peak ridge keeps water out without affecting the wood's natural movement.
Seasonal maintenance
At the end of each season (or at least once a year), do a full inspection. Look for soft spots in the wood that indicate rot, check all screws for rust and replace any that are corroding, and reapply a coat of natural oil finish to exterior surfaces. A well-maintained wooden feeder can last 5 to 10 years before it needs replacing.
Bird-specific and pest-proof considerations for wooden feeders
Not all birds use feeders the same way, and matching your design to the birds you want to attract makes a real difference. Platform feeders are best for larger birds like cardinals, jays, and mourning doves that prefer open feeding surfaces. Smaller songbirds like chickadees, titmice, and finches prefer enclosed feeders with smaller openings where they feel less exposed. If you want to attract a specific species, think about perch placement and opening size before you finalize your design.
Drainage and ventilation are non-negotiable in wooden feeder design regardless of bird species. For any enclosed or box-style design, include at least four drainage holes of 3/8 to 1/2 inch diameter in the base. For house feeders that are deeper, add ventilation holes near the top of the side walls (two per side, about 5/8 inch diameter) to prevent heat and moisture buildup. These are the same principles used in nest box design, and they apply here because the same conditions that trap moisture in a nest box will ruin seed and rot wood in a feeder.
For squirrel-proofing, the combination of height (5 to 6 feet minimum), distance from launch points (8 to 10 feet), and a physical baffle on the pole is your best system. No single measure works on its own. Squirrels are persistent and will eventually find a way around any single barrier, but the combination of all three makes most feeders genuinely inaccessible. Avoid adding large perches or wide ledges to house feeders: these give squirrels a grip to hang and chew at the wood.
Raccoons and larger animals are mostly a nighttime problem. If you are losing seed overnight, bring the feeder in after dark or add a weight-sensitive perch that collapses under anything heavier than a songbird. These mechanisms can be built into a wooden feeder using a spring-loaded dowel perch, though it is a more advanced modification.
One last thing worth knowing: if you see sick or dead birds near your feeder, take the feeder down immediately and do a full bleach disinfection before putting it back out. Disease outbreaks can move through a backyard bird population quickly when feeders concentrate birds in one spot. This is one area where a well-maintained enclosed feeder has a real advantage over an open platform, simply because it is easier to disinfect completely.
If you enjoy this kind of project and want to keep building, there are natural extensions from here: you could build a matching wooden feeder stand to go with your feeder, or experiment with reclaimed wood like pallet boards for the structure. If you are working with pallet boards, keep them fully weatherproofed and use only bare, untreated wood so your feeder stays safe for birds.
Once you have the basic design and safe wood and finishes, you can adapt it to make a bird feeder with waste material like scrap boards or pallet wood make bird feeder with waste material. Once you have the basic design and safe wood and finishes, you can adapt it to make a bird feeder with waste material like scrap boards or pallet wood. Each variation teaches you something new and costs almost nothing to try. If you want a budget, no-wood option, you can also learn how to make bird feeders out of toilet paper rolls using simple household materials.
You can also learn how to make bird feeder with paper using simple, household materials instead of wood.
FAQ
Can I use scrap wood or pallet boards for a bird feeder out of wood?
Yes, but only if the wood is bare, untreated, and fully checked for markings, stains, or coatings. Avoid pallet boards with unknown treatments (often stamped or painted) and sand off any surface residues before finishing. Also keep the feeder interior seed-contact surfaces as clean and food-safe as possible, since glue and old finishes can off-gas when warmed by sun.
What is the safest way to attach parts without getting finish or glue inside the seed area?
Dry-fit first, then glue and screw with the feeder positioned so excess glue squeeze-out stays on the outside surfaces. If you have to route glue near the interior, wipe it immediately and let it cure fully before sealing, then inspect for any sticky residue. For seed-contact surfaces, prefer tung oil or leaving them unfinished rather than painted or heavily sealed layers.
How do I handle drainage holes to avoid clogging?
Drill drainage holes and keep them clear during every cleaning. If you notice seed or hulls blocking the holes, increase cleaning frequency after wet weather and lightly scrub around the holes with a brush. For platform designs, consider adding a slight pitch to the tray so water and debris drain consistently rather than pooling.
Is it okay if my feeder looks weathered or cracked after some time?
Minor graying and checking is normal, especially with cedar or redwood. Replace the feeder when you see soft spots, crumbling around screw holes, or widening cracks that allow water to soak into untreated areas. If only the finish is failing on painted pine, you can recoat outside surfaces after fully drying and cleaning, but do not refinish seed-contact areas with regular paint.
How long should I wait before adding seed after the final coat?
Wait at least the minimum cure window for your specific product, and longer is better if weather is cool or humid. If you can smell the finish strongly or it feels tacky, it is not ready. For oil finishes, expect days not hours, and only fill once the feeder is fully odor-free and dry to the touch inside and out.
What should I feed in a wooden platform feeder versus a house-style feeder?
Platform feeders tolerate mixed seed well because birds have open access, but wet seed clumps and increases mold risk. House-style and enclosed designs work better for drier, smaller feed types because the roof and walls reduce direct rain exposure. Regardless of type, use seed that suits your local birds and remove spoiled or damp seed quickly.
How can I reduce seed waste and mess below the feeder?
Place the feeder where you can easily clean the ground and avoid putting it directly over hard-to-reach areas. Use a tray-like platform design with drainage holes, and sweep up hulls and fallen seed during weekly cleaning. In wet climates, tighten your cleaning schedule so fewer pellets fall in a moldy state.
Why do birds ignore my feeder even though it is built correctly?
Common causes include incorrect placement (too close to a busy squirrel launch point, or in a dangerous 3 to 30 foot window for glass collisions), lack of shelter nearby, or using seed that does not match local species. Also consider topping off seed only lightly at first and maintaining a consistent routine, since birds often investigate after repeated visits rather than immediately.
Can I use a perch on the platform feeder, or will it increase squirrel problems?
A perch can help some birds, but it may also create a grip point for squirrels. If you add a perch, keep it narrow, avoid large landing ledges, and rely on the pole baffle plus correct height and distance as your main squirrel protection. For a first build, the simpler platform without added perches is often easier to keep both functional and squirrel-resistant.
What should I do if I see sick or dead birds near the feeder?
Take the feeder down immediately, discard any old seed, and disinfect all removable parts before replacing it. After cleaning, let it dry completely, then restart with fresh seed. If you repeatedly see disease symptoms, switch to a design that is easier to fully disinfect and increase cleaning frequency until things stabilize.
How do I winterize a wooden bird feeder to make it last longer?
In freezing climates, ensure drainage holes are not blocked so water does not trap and expand in wood. Clean thoroughly before cold weather, let it dry fully, and consider moving the feeder to a sheltered spot if storms or heavy snow constantly soak it. Inspect screws and recheck for early rot in the base after the first thaw.