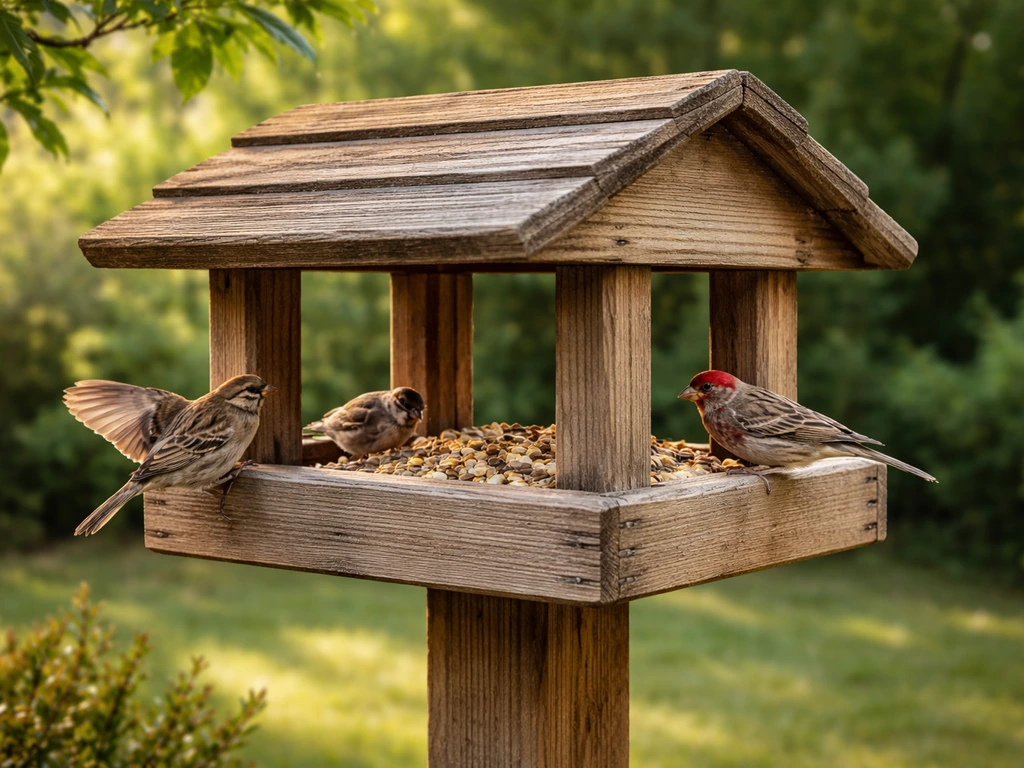
You can build a fully functional bird feeder from materials you were about to throw away, and it will work just as well as anything from a store. Plastic bottles, milk jugs, yogurt containers, tin cans, old teapots, wooden pallets, even worn-out boots, all of these have been turned into reliable feeders that birds visit every day. The key is knowing which materials are safe, how to prep them properly, and how to put them together so they last through rain, wind, and the occasional squirrel assault. This guide walks you through several proven builds, a DIY water feeder, and everything you need to hang, maintain, and troubleshoot them.
How to Make a Bird Feeder With Waste Material

Marcus Brennan
22 Apr 2026
Choosing safe waste materials (and what to avoid)
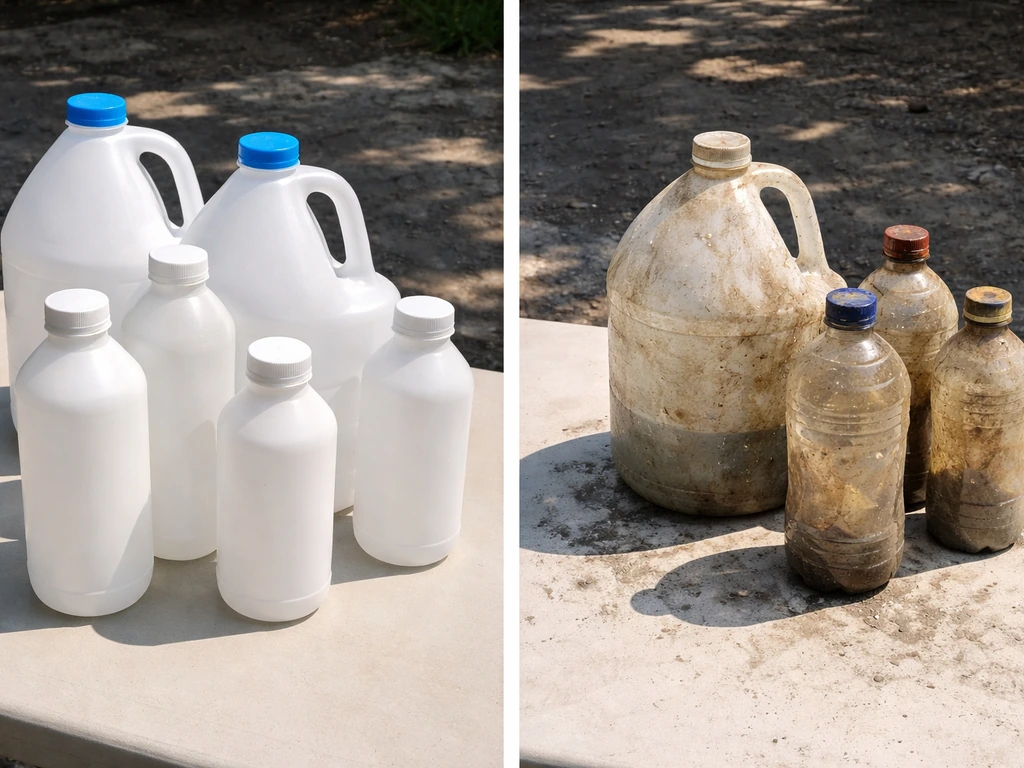
Not every piece of recycling is a good candidate. The goal is a feeder that won't leach chemicals into seed or water, won't trap moisture against the birds' feet, and won't fall apart after one rainstorm. Before you grab something from the recycling bin, run it through this quick mental checklist.
Safe materials that work well include: clean plastic bottles and jugs (HDPE plastics marked #2 or PET marked #1 are both fine), tin cans with no sharp interior edges, glass jars and bottles, ceramic mugs or bowls, untreated or naturally-weathered wood, and cardboard or paper tubes coated with seed-and-peanut-butter (for short-term feeders only, these are not weatherproof). If you want to try a paper-based option, use a cardboard or paper tube feeder coated for seed and keep it out of heavy rain so it lasts how to make bird feeder with paper. Wooden pallets and scrap lumber are excellent for more structured builds.
Materials to avoid: anything that previously held motor oil, pesticides, cleaning chemicals, or paint, residues cling to plastic and porous materials even after washing. Avoid PVC or vinyl containers if you can, since prolonged sun exposure causes them to off-gas. Skip galvanized metal for water feeders specifically, as zinc can be toxic to birds at high concentrations. Foam or styrofoam breaks into small pieces birds can ingest. And never use containers with sharp interior edges; if you cut metal, file or sand the edges smooth before assembly.
- Clean plastic bottles and jugs (#1 PET or #2 HDPE): safe and widely available
- Tin cans (soup, coffee, tomato): great structure, just file any sharp cut edges
- Glass jars and bottles: durable, easy to clean, excellent for water stations
- Ceramic mugs, plates, or bowls: ideal for open platform feeders or water dishes
- Untreated scrap wood or pallet boards: best for long-lasting frame or platform builds
- Cardboard tubes (toilet paper, paper towel): fine for short-term peanut-butter feeders, not weatherproof
- Avoid: containers that held chemicals, PVC in direct sun, galvanized metal for water, styrofoam, unfinished sharp metal edges
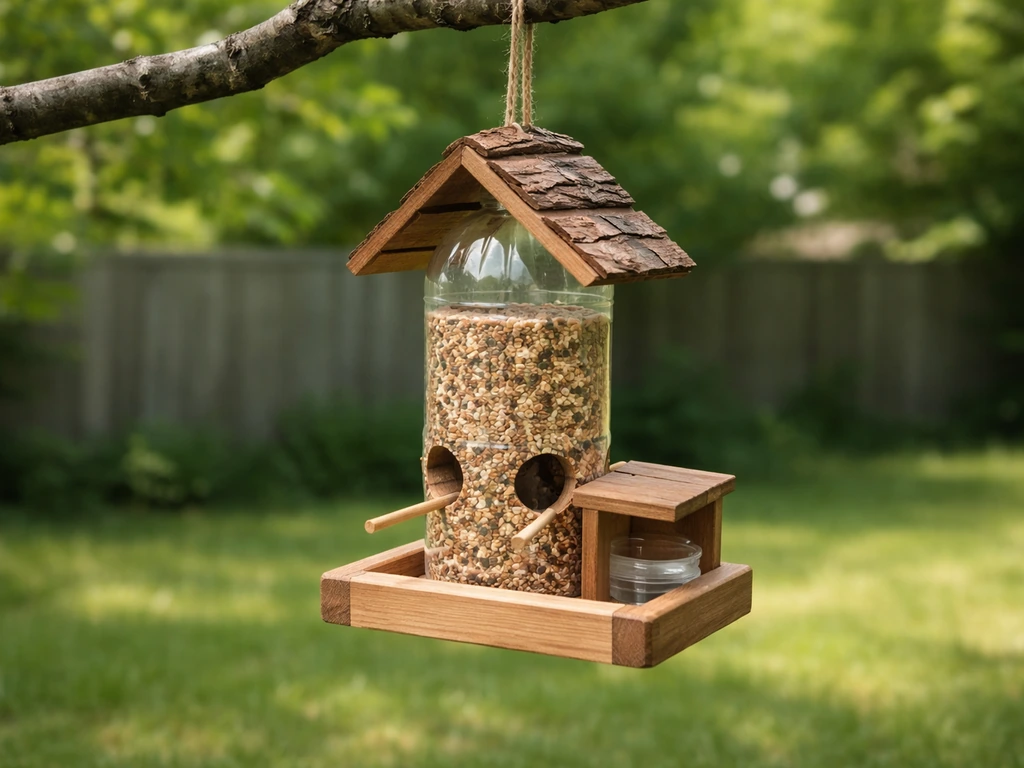
Project 1: Plastic bottle or milk jug seed feeder
This is the most popular recycled feeder build, and for good reason, a 2-liter soda bottle or a plastic milk jug costs you nothing, takes about 20 minutes, and holds enough seed to last several days. Here's how to build one that actually works, including the drainage detail most tutorials skip.
What you need
- 1 clean 2-liter plastic bottle or 1-gallon milk jug
- 2 wooden dowels, chopsticks, or straight sticks (about 20–25 cm long each)
- Craft knife or sharp scissors
- Thin rope, jute twine, or wire for hanging
- Permanent marker
- Sandpaper or a file (for smoothing cut edges)
- Sunflower seeds or mixed birdseed
Step-by-step build
- Wash the bottle thoroughly with hot, soapy water and rinse completely. Let it dry.
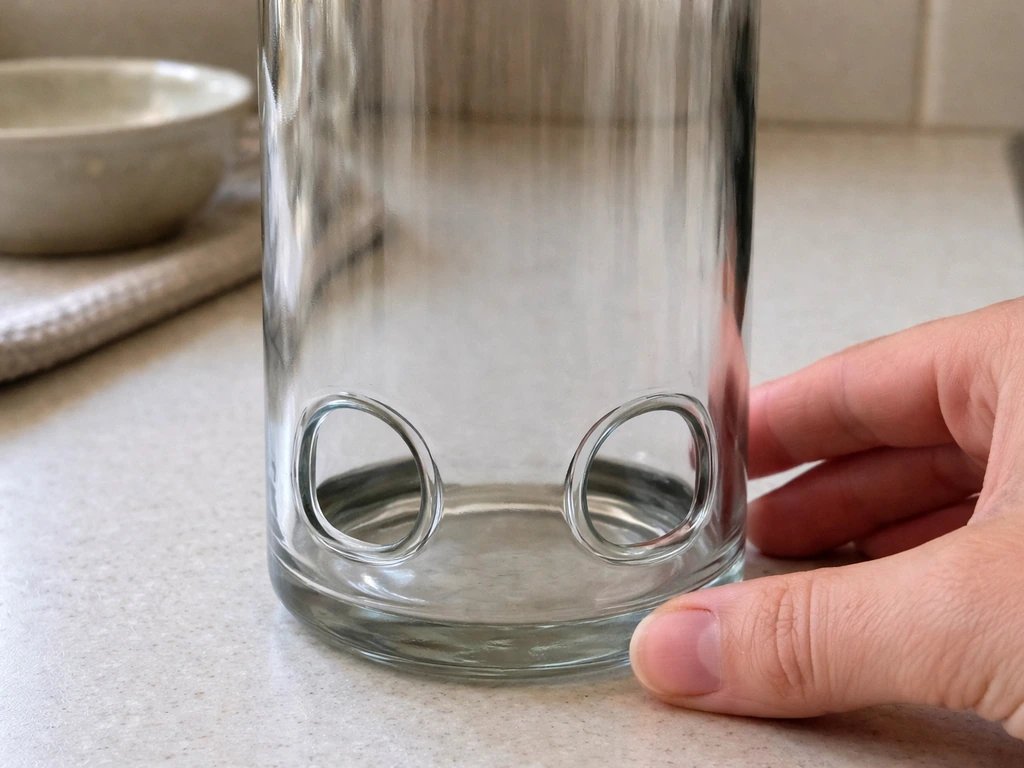
- Mark two small circles on opposite sides of the bottle, about 5 cm up from the base. These will be your seed ports — make them roughly 2.5 cm in diameter, just large enough for seed to spill out slowly.
- About 3–4 cm below each seed port, use the tip of your knife or a skewer to poke a hole just wide enough for your dowel or stick. Push the dowel all the way through both holes so it extends about 5–7 cm on each side as a perch.
- Cut a second pair of seed ports 90 degrees around from the first pair, and install a second dowel/perch the same way. Now you have four feeding spots and two perches crossing inside the bottle.
- Poke 4–6 small drainage holes (about 3–4 mm) in the very bottom of the bottle. This step is critical: without drainage, trapped water rots seed rapidly.
- At the neck of the bottle, thread your twine or wire securely and tie a strong hanging loop. For a milk jug, the handle is already there — just thread rope through it.
- Fill the bottle with seed through the open top (2-liter bottle) or through a large cut in the back of the jug. Replace the cap or tape the cut flap securely.
- Hang it at least 1.5 meters off the ground in a sheltered but visible spot.
A tip from trial and error: the seed ports don't need to be huge. If you cut them too wide, seed pours out and you're refilling every day while feeding squirrels a free buffet. Start small, you can always enlarge the ports later if seed flow is too restricted.
Project 2: Other recycled container feeder builds
The bottle feeder is the go-to, but it's far from the only option. If you want to attract ground-feeding birds, offer more variety, or just use what you actually have on hand, these alternative builds all work well in a real backyard.
Tin can feeder
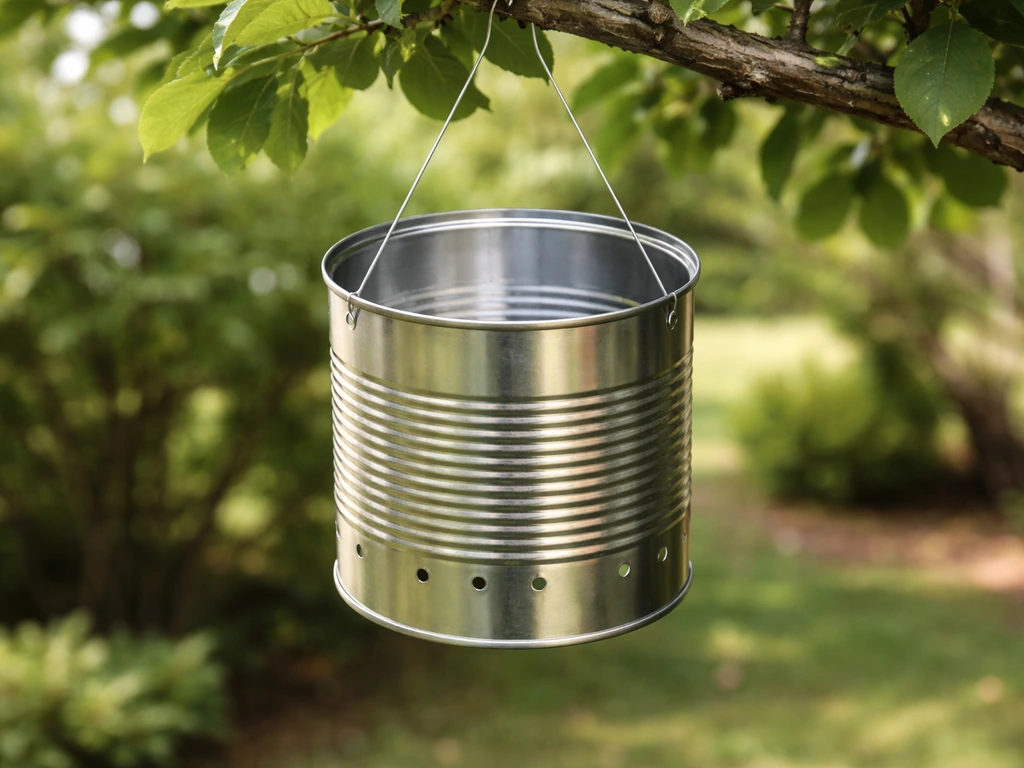
A large tin can (a 28-oz tomato or coffee can works perfectly) makes a solid hanging feeder. Open the can from the top, wash it well, then use a nail and hammer to punch several small drainage holes in the bottom. File or sand the top rim smooth so birds don't catch their feet. Cut a 5 cm wide feeding notch on one side near the base. Thread wire through two holes punched near the open top to form a hanging loop. Fill with seed and hang. The metal holds up well in wet weather, and you can spray-paint the outside with non-toxic outdoor paint to slow rust.
Yogurt or takeout container platform feeder
A shallow plastic container (a wide yogurt tub, a takeout tray, or even a plastic plate) can be turned into an open platform feeder in minutes. Punch four small drainage holes in the base. Drill or punch four holes near the rim at equal intervals, thread rope or twine through each, and tie all four cords together above the container to form a hanging cradle. These open feeders attract a wider range of birds including robins and sparrows that don't use tube feeders well. The trade-off is that seed gets wet faster, so you need to refresh it more often after rain.
Cardboard tube (toilet paper roll) peanut-butter feeder
This is the simplest possible build, no cutting tools required. Roll the outside of a toilet paper or paper towel tube in peanut butter, then roll it in birdseed until fully coated. Thread a piece of string or twine through the center of the tube and knot it at one end. Hang it from a branch. Birds love it, and it costs essentially nothing. The honest downside: it lasts one or two days at most before it gets soggy or gets emptied. Think of it as a quick-start feeder while you build something more permanent. Toilet paper roll feeders are also a great project to do with kids.
Pinecone or twig feeder
Large pinecones coated in peanut butter and rolled in seed are nearly identical in function to the cardboard tube version, but they're more weather-resistant and look great hanging in a tree. Tie twine around the top scales and hang directly from a branch. If you enjoy slightly more involved builds, arrangements of natural sticks or twigs can form both the hanging structure and the perch. If you also want a twig-and-stick approach for a complete build, follow our guide on how to make a bird feeder with twigs. Twig-based feeders are a natural companion to the tube-and-bottle approach and add a low-footprint, fully natural option to your backyard setup.
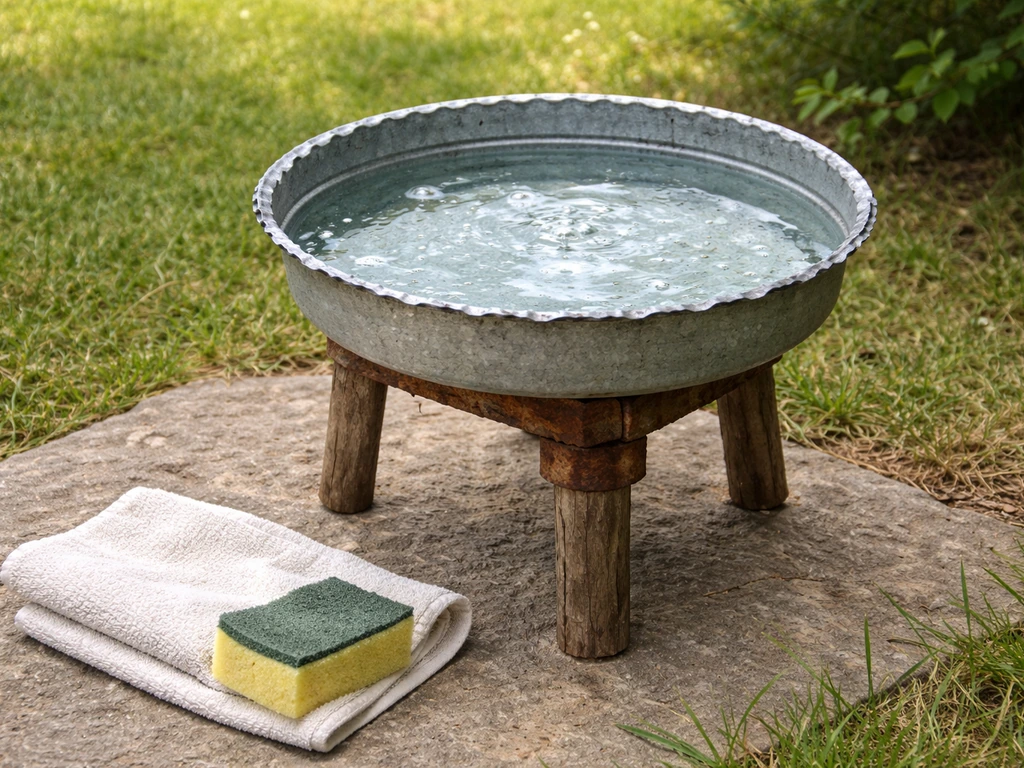
Project 3: DIY bird water feeder from waste material
A clean, fresh water source is honestly more valuable to backyard birds in summer than a seed feeder. Birds need water for drinking and bathing, and a DIY water station made from recycled materials is one of the most impactful things you can put in your garden. The key challenges are preventing stagnation, ensuring drainage when you're cleaning, and stopping algae and bacteria from building up. The U.S. Fish & Wildlife Service also advises against adding salt to birdbaths, since it is not recommended for wildlife safety.
What you need
- A shallow, wide container: a ceramic plate, terracotta saucer, shallow plastic tray, glass casserole dish, or an old bowl (2–5 cm depth is ideal)
- A base or stand to hold it: a stack of bricks, an upturned pot, a piece of scrap wood, or a repurposed pipe section
- Clean pebbles or flat stones (optional, for perching and depth variation)
- Twine or wire if you want to suspend it rather than set it on a stand
Assembly and placement
- Choose your container: shallow and wide wins every time. Birds won't use a deep bucket but they'll love a shallow terracotta saucer. Aim for no deeper than 5 cm, ideally 2–3 cm in the center.
- Place a few clean pebbles or flat stones in the bottom. These give small birds and insects a safe footing at varying depths, and they also slow algae growth slightly by reducing the amount of bare surface area.
- Set the container on a stable, flat surface at least 60–90 cm off the ground (keeps cats and ground predators at a safe distance) or hang it the same way as the platform feeder above using a cradle of twine.
- Fill with fresh, clean water to just below the rim of the pebbles. Change the water every 1–2 days in warm weather to prevent mosquito larvae.
- Place the water station at least 1–2 meters away from your seed feeders. Seed hulls and droppings falling into the water station will contaminate it quickly if they're too close.
Cleaning the water station
This part matters more than most people realize. According to wildlife guidance from Iowa DNR, bird baths and water stations should be cleaned at least once per week, more often in hot weather. Empty the container completely, scrub it with hot, soapy water and a stiff brush to remove biofilm and algae, then disinfect with a 1-part bleach to 9-parts water solution (a 10% bleach solution). Let it soak for 10–15 minutes. Then rinse thoroughly with clean water for at least 10 seconds, you want no bleach residue left before you refill. Allow it to air-dry if time permits, then refill with fresh water. The whole process takes about five minutes once it's part of your routine.
Assembly best practices: holes, perches, sealing, and weatherproofing
A few universal principles apply to almost every recycled feeder build, and getting these right makes the difference between a feeder that lasts a season and one that's falling apart in three weeks.
Drainage holes are non-negotiable. Every feeder, bottle, can, container, or tray, needs drainage holes at the lowest point. Even with a roof or cap, condensation and rain find their way in. Without drainage, seed clumps, molds, and can actually become dangerous for birds. Use a drill, nail, or sharp awl to punch 4–6 holes of about 3–4 mm in the base of every feeder you build.
Perch size matters. For small backyard birds like finches, sparrows, and chickadees, a 6–8 mm dowel or a sturdy stick is perfect. Anything thicker and smaller birds struggle to grip. Position perches 2–3 cm below the seed port so birds can comfortably reach in while standing. For open platform feeders you don't need perches, the flat surface is the perch.
Sealing seed access points: if you're building a bottle feeder, the seed should flow out slowly through small ports, not pour freely. If you notice seed spilling and collecting on the ground (which invites rodents), reduce the port size with a piece of tape and re-cut smaller. For cans and jars with lids, a hot glue gun can seal the connection between lid and body to reduce moisture ingress without permanently sealing it shut.
Weatherproofing without chemicals: the safest approach for plastic feeders is to keep them in partial shade so UV doesn't degrade the plastic. For wooden components (perches, any frame pieces), a coat of linseed oil or beeswax is a natural, non-toxic way to add weather resistance. Avoid varnishes, lacquers, and paints on any interior surfaces or surfaces birds touch directly.
Hanging, placement, and attracting the right birds
Where you hang your feeder matters almost as much as what's in it. Birds need to feel safe enough to land and eat, which means good sightlines (so they can spot predators) but also nearby cover to retreat to. A spot 2–3 meters from a shrub or tree works well: close enough that birds can dart to cover, far enough that cats can't use the shrub as a launching pad.
Height: for most hanging feeders, 1.5–2 meters off the ground keeps them accessible for refilling and reasonably squirrel-resistant. If squirrels are a serious problem, going higher alone won't solve it, a baffle (even a recycled plastic bowl threaded onto the hanging wire above the feeder) is much more effective than height alone.
Window strikes are a real risk if you hang feeders too close to glass. Either hang within 90 cm of a window (so birds don't build up enough speed to be injured) or at least 3 meters away from any window. The 1–3 meter zone is the danger zone for window collisions.
Seed choice attracts specific birds. Sunflower seeds (black oil type especially) attract the widest variety of backyard birds. Nyjer (thistle) seed is popular with finches. Mixed seed draws sparrows and juncos. Peanut butter and suet attract woodpeckers and nuthatches. If you're building multiple feeders (and now that you have the skills, why not), placing them at slightly different heights and stocking them with different seeds will bring in noticeably more species.
| Seed/Food Type | Birds Attracted | Best Feeder Style |
|---|---|---|
| Black oil sunflower seeds | Chickadees, cardinals, finches, sparrows | Bottle/tube or platform |
| Nyjer/thistle seed | Goldfinches, house finches, siskins | Bottle/tube with small ports |
| Mixed seed | Sparrows, juncos, doves | Open platform or tray |
| Peanut butter (unsalted) | Woodpeckers, nuthatches, titmice | Tube coated / suet cage / tin can |
| Suet (fat scraps) | Woodpeckers, starlings, jays | Wire-mesh cage or tin can with mesh insert |
Maintenance, cleaning, and dealing with pests and mess
The number one reason homemade feeders fail (and birds stop visiting) is neglect after the build. A feeder that's fun to make but never cleaned becomes a disease vector. Salmonella and avian conjunctivitis spread easily at communal feeding stations, and the birds can't tell if the food is safe. Regular cleaning is genuinely important, not just good housekeeping.
Cleaning routine for seed feeders
Iowa DNR recommends a full disinfection clean roughly once a month for seed feeders, and more often during periods of heavy use or wet weather. Empty the feeder completely first, then tap out any clumped or moldy seed. Scrub the interior with hot, soapy water and a brush, this physical scrubbing step is what removes biofilm and stuck debris. Then soak or wipe down with a 10% bleach solution (1 part bleach to 9 parts water) and let it sit for 10–15 minutes. Rinse thoroughly with clean water and let the feeder dry completely before refilling. Never put fresh seed on top of damp old seed.
Squirrels and other pests
Squirrels are persistent and clever, and if your feeder is made of plastic, they will chew through it. The most effective low-cost deterrent is a physical baffle on the hanging wire, a recycled plastic bottle or bowl with a hole punched in the center, threaded above the feeder, creates an inverted dome that squirrels can't get past. Smearing the wire with petroleum jelly also works, though you need to reapply it after rain. Placing feeders more than 3 meters from any tree branch, fence, or ledge they can launch from reduces but doesn't eliminate squirrel access.
Mess control
Seed hulls and droppings under a feeder attract rats and mice, which in turn can scare off the birds you're trying to attract. A few practical fixes: use a tray or old plate hung below the feeder to catch falling hulls, switch partially to hulled sunflower seed (more expensive but nearly no mess), and rake up under the feeder weekly. If you're getting a lot of seed on the ground, check your port sizes, they're probably too large.
What to do if birds stop visiting
If your feeder suddenly goes quiet, run through this quick list before assuming something is wrong with the build. Check if the seed is damp or moldy (the most common reason). Check if a neighborhood cat has been sitting nearby. Consider whether migration season has shifted the local bird population. And check whether a neighbor started a feeder nearby, birds spread out to use multiple sources. Most of the time, a thorough clean, a fresh seed refill, and a few patient days is all it takes to bring them back.
Your next steps: a quick-start checklist
If you want to go from reading this to having a working feeder in your yard today, here's the order that makes most sense. Start with the simplest build you have materials for right now, get it hung, and then build up from there. Start with the simplest build you have materials for, and then follow the steps in how to make a bird feeder post to get a sturdy, easy-to-hang setup. Most experienced backyard birders end up with three or four feeders offering different food types at different heights, and a water station year-round.
- Collect your materials: grab a clean plastic bottle, milk jug, or tin can from the recycling bin. File or sand any sharp edges on metal.
- Build your first feeder using the bottle or tin can instructions above. Punch drainage holes before anything else.
- Hang it at 1.5–2 meters height, 2–3 meters from a tree or shrub, and away from windows.
- Add a recycled-material water station (a shallow terracotta saucer on a stack of bricks works perfectly) at least 1–2 meters from the seed feeder.
- Fill the seed feeder with black oil sunflower seeds as your starting food — it attracts the most species.
- Set a weekly reminder to change the water and check seed freshness. Schedule a full bleach-solution clean once a month.
- Once you're comfortable with one feeder, add a second build using a different container type or food (peanut butter tube, open platform tray) to attract more species.
- If squirrels become a problem, add a baffle above the feeder before trying anything else — it's the most reliable fix.
If you want to take the builds further, wooden pallets and scrap lumber open up platform feeders and more durable structures that last for years rather than seasons. For a standout look, you can follow dedicated plans on how to make a bird feeder stand out of wood. The core principles stay the same: safe materials, drainage, clean surfaces, and a good spot in the yard. Everything else is just details you'll figure out as you go.
FAQ
What’s the safest way to clean recycled containers before making a bird feeder?
Wash thoroughly with hot, soapy water, then inspect for lingering odors, discoloration, or residue. If the container ever held chemicals you are unsure about, don’t use it, porous plastics and some paper coatings can trap residues even after washing.
Can I use a recycled container that was previously used for food only (like pasta sauce or pickle jars)?
Yes, if it held food and was cleaned completely. Still look for cracks, peeling labels that may flake into the seed, and sharp edges from lids or metal bands, then add drainage holes at the lowest point.
How do I handle mold or algae that keeps coming back on my feeder?
Reduce moisture retention by making sure drainage holes are real and not blocked. After heavy rain, empty and scrub, then fully dry before refilling. In humid weather, use smaller seed quantities so seed does not sit damp for long periods.
How often should I refill seed in a feeder that’s partially sheltered but still gets rain?
Check after each wet day for clumping. As a rule, refill only when seed is fully dry, and remove moldy seed promptly. If seeds are sticking, your drainage or port sizing is likely letting too much moisture in.
Is it okay to paint or seal the outside of a homemade feeder?
Painting is fine on exterior surfaces, but avoid coatings anywhere birds touch, especially on interior walls, perches, and seed access points. For plastic, partial shade helps prevent UV damage, and for wood, use a natural weatherproofing like linseed oil or beeswax.
What perch size should I use if I’m not sure what birds visit my yard?
Aim for a 6 to 8 mm dowel or a similar sturdy stick. That thickness is usually comfortable for small songbirds. If you include larger platforms without appropriate grip, birds may avoid the feeder even if seed is available.
My bottle feeder spills seed onto the ground, how can I fix it?
Reduce the feed-port opening size, this prevents seed from pouring and avoids a constant mess that attracts rodents. Add small port adjustments gradually, rechecking after a day because some seeds bridge and then suddenly release.
Can I use cardboard or paper tube feeders if my area gets frequent rain?
They work best as short-term feeders and should be kept under cover or out of heavy rain. Once the coating is compromised or the tube softens, replace it, paper-based options are not meant to last through repeated soaking.
Do I need to disinfect seed feeders more than once per month?
Yes during wet weather or heavy use. If you see damp seed, visible mold, or lots of bird traffic, increase cleaning frequency and never top off with fresh seed over old damp seed.
How can I stop squirrels without making the feeder unsafe to birds?
Use an inverted dome or physical baffle on the hanging wire. Keep it positioned so birds can still access the seed ports normally, and avoid smearing substances that could transfer onto perches or seed. Also consider a baffle in addition to placement, height alone is rarely enough.
Is there a safe height and distance from windows for homemade feeders?
Place feeders either close enough that birds don’t build speed (within about 90 cm of a window), or far enough away to reduce collision risk (at least 3 m). Many people hang in the middle distance by accident, that 1 to 3 m range is the collision-prone zone.
What should I do if birds stop visiting after I install the feeder?
First, confirm seed is dry and not moldy, then check for a new predator risk like cats nearby. After you clean and refill, give it several days, birds may take time to re-discover the source. If needed, adjust seed type or placement closer to cover.
How do I reduce rodents if hulls keep piling up under the feeder?
Use a catch tray or old plate to collect fallen hulls, rake weekly, and consider switching partially to hulled sunflower seed to cut mess. If the seed ports are too large and generating excess spillage, reduce port size to address the root cause.
Can I make a water feeder from waste material, or is it too risky?
You can, but focus on drainage and cleaning. Use a container that can be fully emptied and scrubbed, then disinfect weekly in hot weather. Avoid materials that can trap water against birds’ feet, and ensure the station does not become a stagnant algae surface.
What’s a good starter plan if I only want one feeder right away?
Choose the simplest build you have materials for, hang it in a safe spot near cover, and start with sunflower seed for broad attraction. Once that’s stable, add one more feeder type later (different seed and slightly different height) to increase species without overwhelming the birds.
Next Article
How to Build a Bird Feeder Out of Wood Step by Step
Step-by-step guide to build a wood bird feeder with measurements, weatherproofing, mounting tips, and maintenance.