You can make a gourd bird feeder in an afternoon using a dried hard-shell gourd, a drill, a hole saw bit, and some twine or wire. The basic process is: pick the right gourd, cure it if it isn't already dry, drill an entry hole sized to your target birds, clean out the interior, add drainage and ventilation holes, attach a perch and hanger, seal the outside, and hang it at least 5 feet off the ground away from squirrel launch points. That's really it. If you prefer a quicker option, you can also learn how to make a bird feeder from a 2L bottle and set it up the same way for safe, reliable feeding. The details below will help you get each step right so the feeder lasts more than one season and actually attracts birds.
How to Make a Bird Feeder Out of a Gourd: Step by Step

Marcus Brennan
13 May 2026
Choosing the right gourd for a feeder
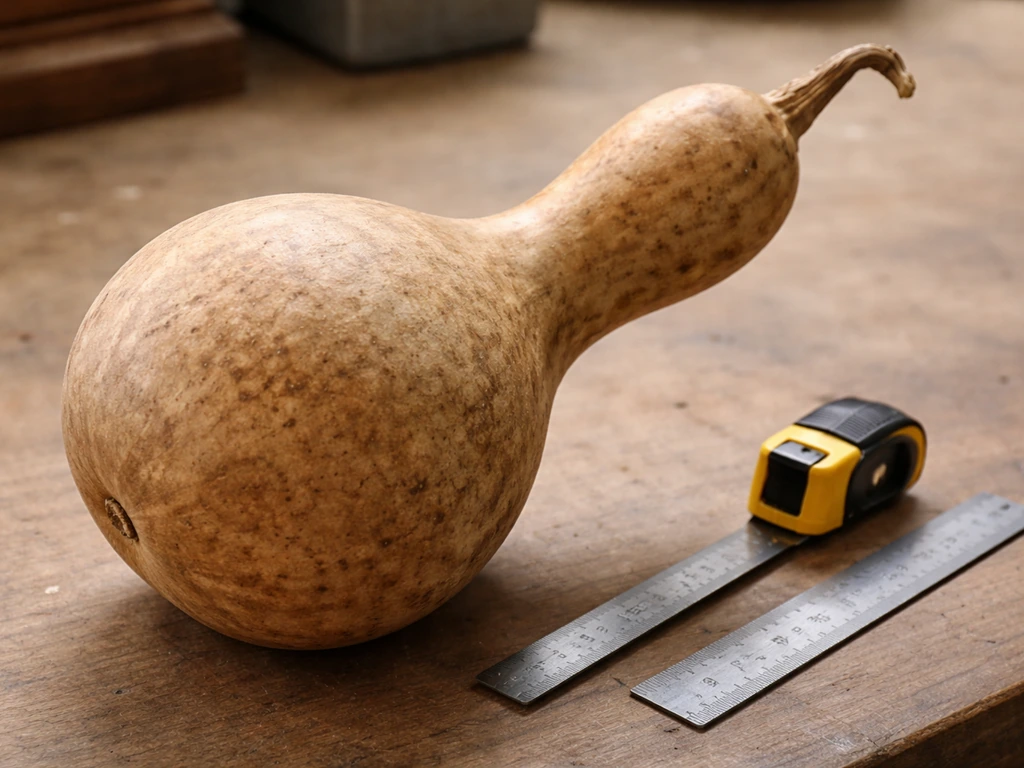
Not every gourd works here. You want a hard-shell Lagenaria siceraria, commonly called a birdhouse gourd, bottle gourd, or martin gourd. These have thick, woody shells once dried and hold up outdoors far better than the thin-skinned ornamental types (Cucurbita pepo) you see in fall harvest displays. Those decorative ones will rot within weeks outside, so skip them entirely.
For size, think about which birds you actually want to attract. A 4-inch-wide gourd works for nuthatches. A 5-inch-wide gourd is a good fit for wrens and chickadees. If you want to go bigger and attract multiple species or offer more seed volume, a round gourd in the 6- to 8-inch range gives you more interior space. The classic long-necked bottle gourd is also popular because the neck gives you a natural hanging point and the round base holds seed well.
You can grow your own or buy pre-dried gourds from craft stores, gourd societies, or farmers markets. If you're buying, squeeze the gourd firmly. It should feel completely solid and rock-hard, not spongy anywhere. Give it a shake. If you hear seeds rattling around inside, that's actually a good sign that it's fully cured and dry all the way through. That rattle method is a reliable cue that the gourd is ready to work with.
Drying your own gourd first (if you grew it)
If you harvested your own gourd, you can't skip curing. A fresh gourd is mostly water and will crack or mold if you try to drill and hang it immediately. After harvest, wipe the outside with a cloth dampened in household disinfectant, then spread the gourds out in a single layer in a warm, dry, well-ventilated spot like a garage shelf or covered porch. Expect the drying process to take several weeks to a few months depending on the size. Flip them every few days so they dry evenly. Don't worry if mold patches appear on the outside during curing. That's normal and doesn't mean the gourd is ruined. You'll clean all of that off later.
Materials and tools you'll need
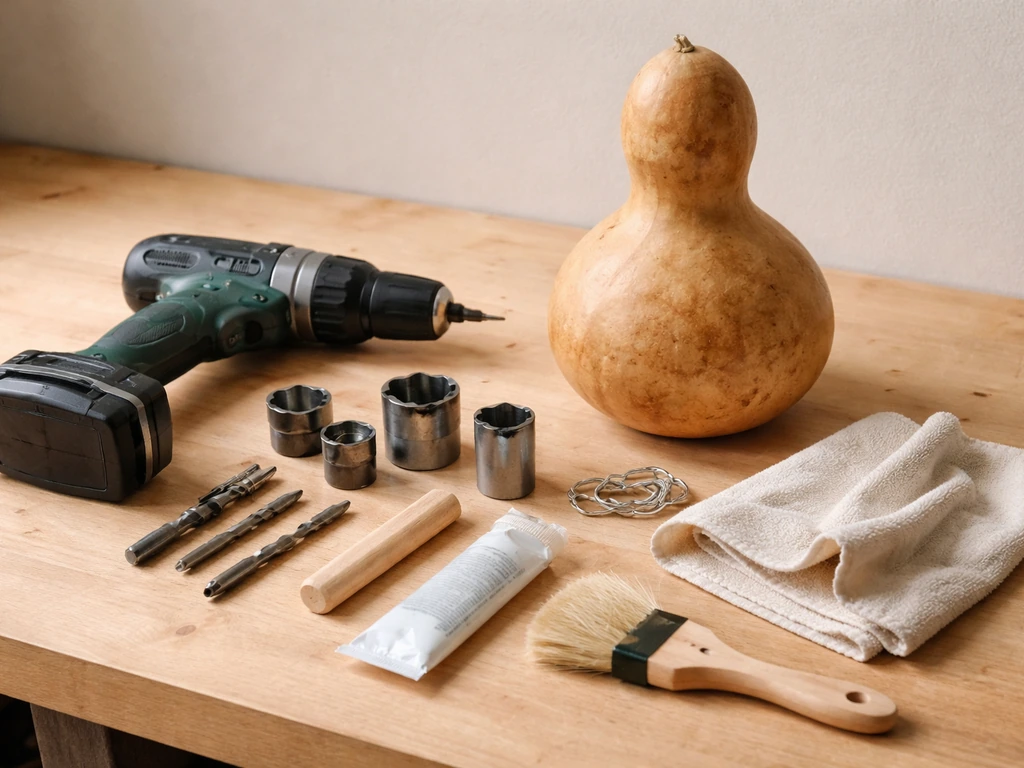
The good news is this project doesn't require much. Here's what to pull together before you start:
- One (or more) fully dried hard-shell gourd, birdhouse or bottle variety
- Drill with a variable-speed setting
- Hole saw bit in the appropriate size for your target bird (see hole size guide below)
- 1/4-inch drill bit for ventilation, drainage, and hanger holes
- Sandpaper (medium and fine grit)
- Stiff scrub brush or copper scrubbing pad
- Dilute bleach solution (2 ounces bleach per 1 gallon of water) for cleaning
- Exterior-grade wood sealer, linseed oil, or spray polyurethane
- Wooden dowel (3/8-inch diameter, about 4 inches long) for a perch
- Heavy-gauge wire, metal chain, or braided jute twine for hanging
- S-hook or screw eye hook
- Bird seed appropriate to your target species
Optional but useful: a spoon or small scoop for removing interior debris, a wire brush for stubborn mold patches, and a squirrel baffle (more on that in the pest-proofing section). If you're making multiple feeders at once, batch the drilling and sealing steps together to save time.
Step-by-step: make a gourd bird feeder
Step 1: Clean the exterior
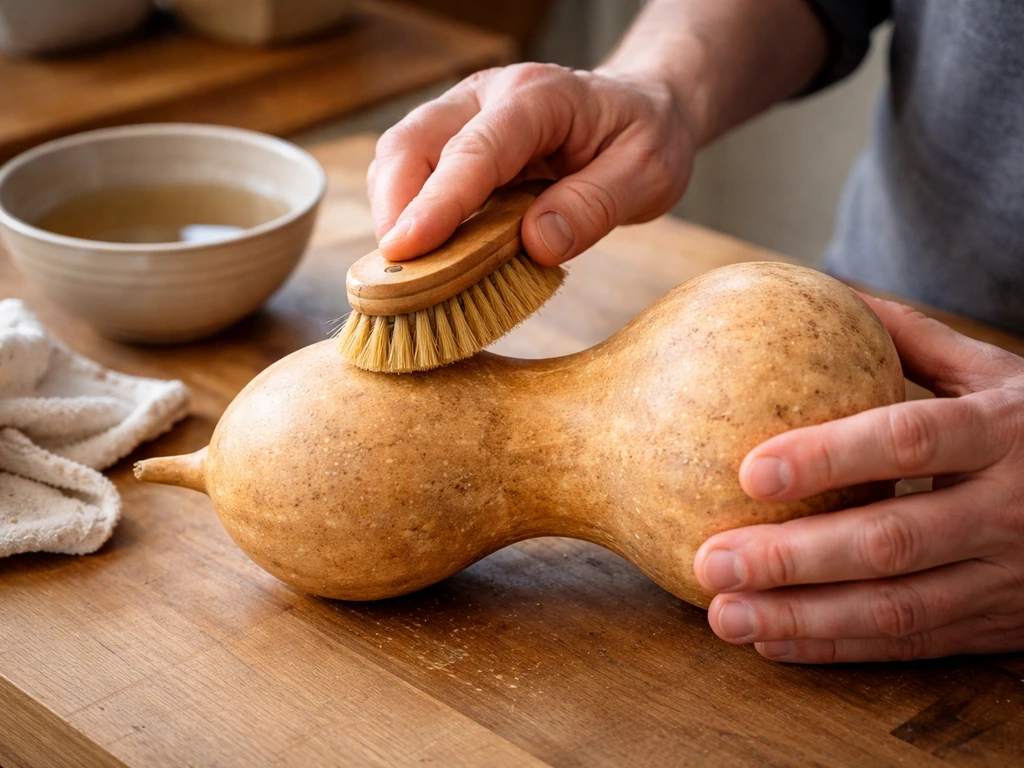
Before you drill anything, scrub the outside of the dried gourd with a stiff brush and warm water to remove any dried mold, dirt, or loose skin. If there's heavy mold, wet a cloth with a dilute bleach solution (2 oz bleach to 1 gallon of water) and scrub the affected areas, then rinse and let the gourd dry fully before proceeding. Don't toss a gourd just because it looks rough on the outside. The shell underneath is usually fine.
Step 2: Mark and drill the entry hole
Position your entry hole on the widest, roundest part of the gourd, roughly 7 inches up from the base. Use a hole saw bit attached to your drill and go slowly with steady pressure. Let the bit do the work. The gourd shell can crack if you force it, especially near the top where the shell may be slightly thinner. Use the hole size that matches your target bird: The Ohio Gourd Society’s hole-size table lists entry-hole sizes such as House Wren at 1 inch, Chickadee at 1 1/8 inches, and White-breasted Nuthatch at 1 1/4 inches (with matching gourd sizes) Use the hole size that matches your target bird.
| Bird Species | Entry Hole Diameter | Gourd Width (approx.) |
|---|---|---|
| House Wren | 1 inch | 4–5 inches |
| Black-capped Chickadee | 1 1/8 inches | 5 inches |
| White-breasted Nuthatch | 1 1/4–1 3/8 inches | 4–5 inches |
| Mixed/General Use (open feeder style) | 2–3 inches | 6–8 inches |
For a more open tray-style feeder rather than a birdhouse-style feeder, you can cut a larger oval or half-moon opening on one side instead of a round hole. This lets you fill the interior with seed directly. Just keep the opening toward the top third of the gourd so seed doesn't spill out immediately.
Step 3: Drill drainage, ventilation, and hanger holes
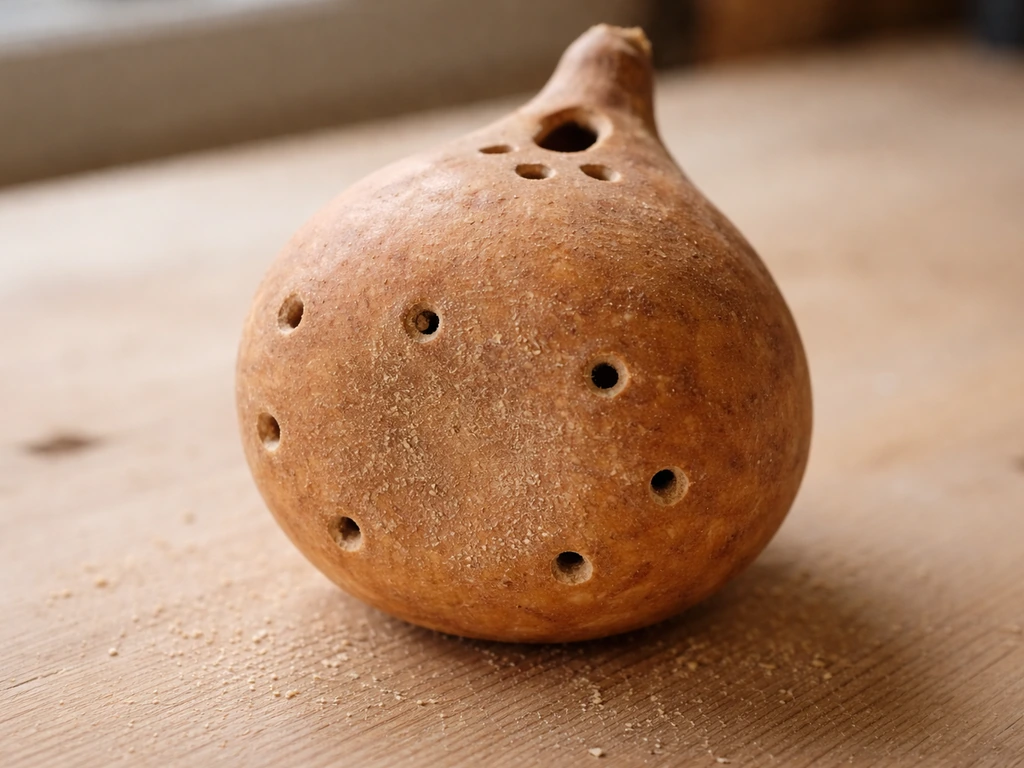
Switch to your 1/4-inch bit and drill at least four small holes in the bottom of the gourd for drainage. This is critical. Without drainage, any moisture that gets inside will sit and rot the seed fast. Then drill two or three small holes near the top of the gourd (above the entry hole) for ventilation. Finally, drill two holes through the neck of the gourd or through the top, opposite each other, for running your hanger wire or twine through.
Step 4: Clean out the interior
Reach inside through the entry hole and scoop or shake out all the dried seeds and any loose fibrous material. A long-handled spoon works well here. Then take your dilute bleach solution on a cloth or small brush and wipe the interior walls. Let it air out completely, at least 24 hours, before adding any seed. You don't want chemical residue in there.
Step 5: Add a perch
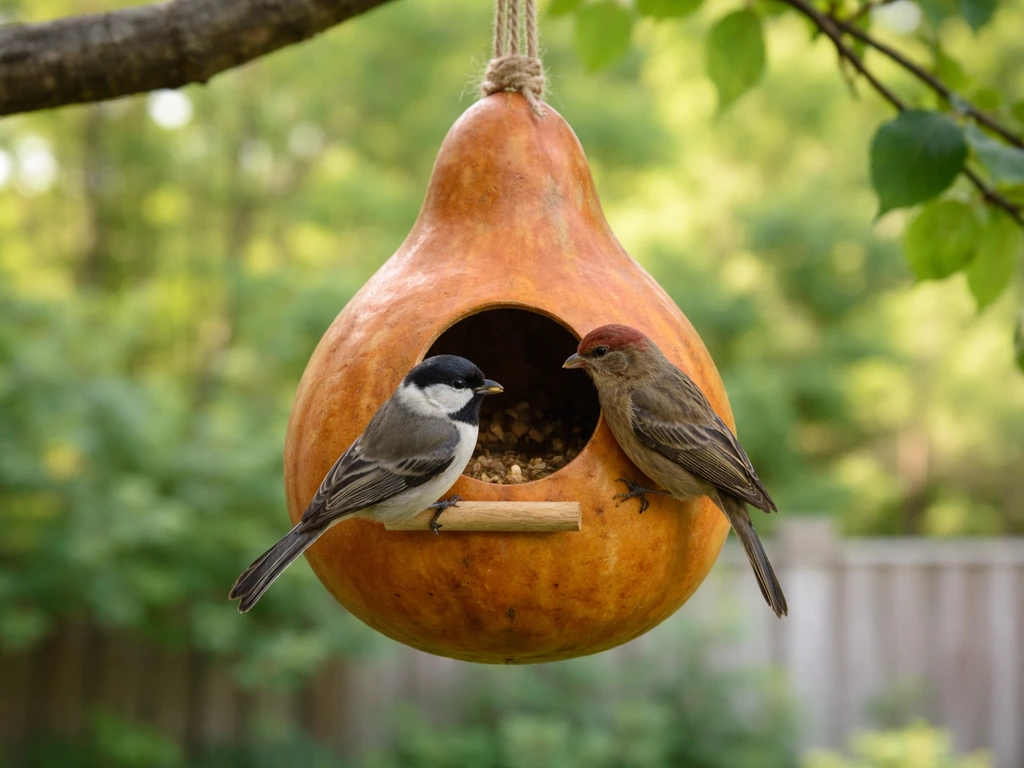
Drill a 3/8-inch hole just below the entry hole, about 1 to 2 inches down. Push a wooden dowel through until it extends roughly 2 inches on each side. A dab of exterior wood glue on each side will hold it in place once it dries. This gives birds a landing spot before entering, which most species appreciate.
Step 6: Thread the hanger
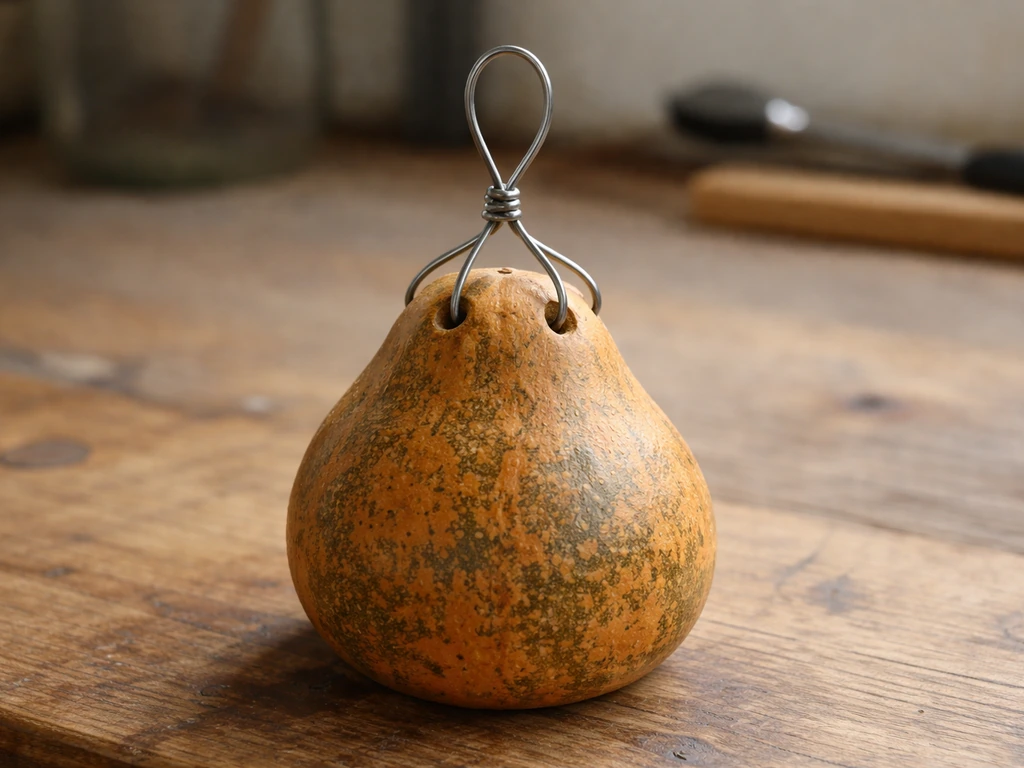
Run heavy-gauge wire or metal chain through the hanger holes you drilled at the top of the gourd. Twist or connect the ends above the gourd to form a hanging loop. Metal chain or galvanized wire holds up much better than twine in wet weather, and it also makes squirrel-proofing easier later. If you used the gourd's neck as your hanger point, wrap several loops of wire around it and twist tight.
Hanging, placement, and setup tips
Where you hang the feeder matters as much as how you build it. Hang it at least 5 feet off the ground. Birds feel exposed and vulnerable at ground level, and low feeders are also an easy target for cats. For most backyard species, hanging between 5 and 8 feet high hits the sweet spot.
Position the feeder somewhere you can actually see it from a window but not so close to dense shrubs or tree branches that predators can hide right next to it. About 10 feet from the nearest large branch or fence is a reasonable buffer. Too close to cover and cats and squirrels use that cover to stalk birds at the feeder.
Face the entry hole away from prevailing winds if you can. The American Gourd Society also recommends protecting the opening from rain and wind by using roof overlap over the hole and adding ventilation holes if needed Face the entry hole away from prevailing winds. This keeps rain from blowing directly inside and reduces how quickly seed gets wet and moldy. If your gourd has a natural curve, use it to your advantage and position the opening toward a sheltered side.
If you're hanging from a tree branch, use an S-hook to connect your hanger wire to the branch. For a shepherd's hook or metal pole, you can hang the gourd directly or use a short chain extender. Either setup works well, and a pole gives you the added option of attaching a squirrel baffle below the feeder.
Sealing, finishing, feeding choices, and maintenance
Sealing and finishing the gourd
Sealing the exterior is what separates a feeder that lasts one season from one that goes three or four years. Once the gourd is fully clean and dry, apply two coats of exterior-grade polyurethane, linseed oil, or an outdoor wood sealer to the outside. Let each coat dry fully. Don't seal the interior or the drainage holes. The inside stays bare so you can clean it easily. Reapply exterior sealer every spring before the rainy season.
What seed to use
For a general backyard mix attracting chickadees, nuthatches, finches, and sparrows, black-oil sunflower seed is your best starting point. It's high in fat, easy for small birds to crack, and widely available. Safflower seed is also a solid choice and has the bonus of being less appealing to squirrels. Avoid cheap filler mixes with lots of milo or red millet. Most backyard birds toss that aside anyway, and it just piles up wet on the ground underneath.
Keeping the feeder clean
Plan to clean the feeder every two weeks during warm, wet weather and monthly during dry or cold conditions. Dump out any old or wet seed, scrub the interior and exterior with a brush, then rinse with your dilute bleach solution (no more than 1 part bleach to 9 parts water, or 2 ounces per gallon). Rinse well with clean water and let the feeder air dry completely before refilling. Moldy or spoiled seed is genuinely harmful to birds, so don't just top off a feeder that already has wet seed at the bottom.
Troubleshooting and pest-proofing
Cracking gourd
If your gourd develops a crack after hanging, it usually means it wasn't fully dried before you worked with it, or the sealing was uneven. Small surface cracks can be filled with exterior wood filler or even a dab of waterproof caulk and then resealed. A crack that goes all the way through the shell is harder to fix but not always fatal. Wrap it tightly with a few loops of wire and reseal the area heavily. If the gourd is splitting apart at the base, it's had a good run. Start a new one.
Mold and wet seed
Mold inside the feeder almost always means one of two things: the drainage holes are blocked, or seed is being left too long between cleanings. Check the bottom holes with a straightened wire or thin skewer to make sure they're clear. If wet weather is persistent, consider putting less seed in at a time so it gets eaten before it can sit and mold. Switching to a seed variety with lower moisture-absorption like whole peanuts or shelled sunflower chips also helps.
Squirrels and other critters
Squirrels are the most common problem with any feeder, and a lightweight gourd hanging from a thin wire is not exactly a challenge for them. The most reliable fix is a squirrel baffle. For a hanging feeder, a dome-shaped baffle positioned directly above the feeder on the same chain or wire blocks squirrels from climbing down to it. For a pole-mounted setup, a cylindrical pole baffle below the feeder stops them from climbing up. Either way, keep the feeder at least 10 feet away from any branch, fence, or rooftop edge. Squirrels can jump surprisingly far horizontally.
Raccoons are a nighttime problem in many areas. Bringing the feeder inside after dark is the simplest solution if raccoons are persistent. If that's not practical, a large dome baffle over the feeder and a smooth metal pole mount with a wrap-around baffle will deter most of them.
Birds aren't coming
Give a new feeder at least two weeks before worrying. If you are wondering how to make an oriole bird feeder, you will want to tailor the opening size and the food and placement to attract orioles specifically. Birds take time to discover a new food source, especially if there are no other feeders nearby. If the feeder has been up a month with no activity, check that the entry hole size is appropriate for local species, make sure the feeder is visible and not hidden deep in dense brush, and confirm there's fresh seed inside. Sometimes something as simple as moving the feeder 15 feet to a slightly more open spot makes the difference.
Gourd feeders are one of the most satisfying builds in this category because the material itself is so well-suited to the purpose. If you enjoy this project, the same basic skills transfer well to other natural or repurposed feeder builds, whether you're working with orange halves, tin cans, mason jars, or even wine corks. If you want a fun seasonal alternative using a softer carving material, see how to make a pumpkin bird feeder for the comparable steps and setup tips. If you want a different route, you can also make a bird feeder from a coke bottle using simple cutting and drainage steps how to make a bird feeder from a coke bottle. You can also adapt the same drill-and-clean approach to make bird feeders out of mason jars. You can also make a bird feeder out of an orange using the same idea of creating an opening, adding drainage, and keeping it secure orange halves. You can use these same basics to build a bird feeder out of wine corks too wine corks bird feeder. You can also make a bird feeder from a tin can by cleaning the can thoroughly, punching drainage holes, adding a perch, and sealing any sharp edges so birds stay safe tin cans. The gourd version just happens to be particularly durable and, once sealed and hung properly, can genuinely last for years with minimal fuss.
FAQ
How long does a gourd bird feeder usually last, and what most often makes it fail early?
With a fully cured gourd and a well-applied exterior sealant, many people get multiple seasons. Early failure usually comes from one of two issues, drilling or hanging before the gourd is completely dry, or skipping regular cleanings so seed moisture and grime build up. Check that drainage holes stay open before you refill, and refresh the exterior sealer each spring.
Is it safe to use bleach on the inside if I plan to seal or stain later?
Bleach is fine for interior disinfection, but it must be fully rinsed and air dried before adding seed. Do not seal the interior, because you want to be able to clean it and because sealants can lock in residual chemicals. If you still smell bleach after 24 hours, wipe again with clean water and let it dry longer.
Can I leave the seed inside between cleanings to reduce work?
You should not. Topping off is a common mistake, wet or moldy seed can contaminate the dry seed above it. Instead, empty the feeder during each scheduled cleaning, scrub out any damp buildup, rinse, and let it dry completely before refilling.
What should I do if my gourd starts leaking seed or the opening is too big?
If seed spills immediately, the entry or side opening is likely too low or too wide for the gourd’s interior angle. In that case, either adjust placement (keep the opening toward the top third and on a sheltered side) or rebuild with a smaller round opening sized to your target birds. Temporary fixes like stuffing paper inside are not reliable, moisture will trap and mold the material.
How do I know which hole size to drill for local birds if I am unsure of species?
When in doubt, choose a smaller entry hole and observe what visits. Most bird activity is driven by both hole size and seed choice, so if you see mainly larger birds taking over, the hole may be too big. If no birds show up after two weeks, the hole may be too small or the feeder placement may be too hidden or exposed.
What is the best way to prevent mold without overhauling the feeder?
Keep seed drier and the interior able to breathe. Make sure the bottom drainage holes are clear, reduce how much seed you add during rainy stretches, and consider switching to seed types that absorb less moisture, like shelled sunflower chips or whole peanuts. Also keep the entry hole oriented so rain does not blow directly inside.
Should I seal the inside or coat the interior with food-safe products?
No, keep the interior bare as designed. Coating the inside makes it harder to clean thoroughly and can trap moisture, which increases mold risk. Focus sealing on the exterior only, and leave drainage and ventilation holes unsealed.
Can I paint the gourd instead of using polyurethane or outdoor sealer?
Paint can work for exterior protection, but it must be an exterior-rated product and fully cured before hanging. Polyurethane and outdoor wood sealers are commonly used because they form a durable barrier and are easier to maintain seasonally. If you paint, ensure the entry area, ventilation, and drainage holes are not sealed shut.
What if the gourd cracks after drilling but before I hang it?
Stop and patch before proceeding. Small surface cracks can be filled with exterior wood filler or waterproof caulk, then fully resealed. If a crack runs through a structural area like near the hanger or base, wrapping with wire and resealing may help temporarily, but it is often safer to start with a new gourd.
How can I reduce squirrel access beyond simply hanging it high?
Height helps, but it is not enough if squirrels can jump or climb nearby. Use a baffle designed for hanging or pole setups, and keep the feeder farther from jumping-off points like branches, fences, and roof edges. A practical rule is to position it well away from any cover the squirrels can use to launch.
Do I need a perch, and what if my chosen birds do not use it?
A perch is usually beneficial because it gives birds a stable landing spot before entering. If birds are not using it, the perch hole placement or size might not match typical landing behavior. Adjust by ensuring the perch sits just below the entry hole area and stays dry, and confirm the entry opening is not angled in a way that discourages approach.
How long should I wait before expecting birds to show up?
Give a new feeder about two weeks. Birds take time to discover a new food source, especially if there are no other feeders nearby. If activity is still zero after that window, re-check the entry size for local species, confirm fresh seed is dry and visible, and consider moving the feeder to a slightly more open spot.
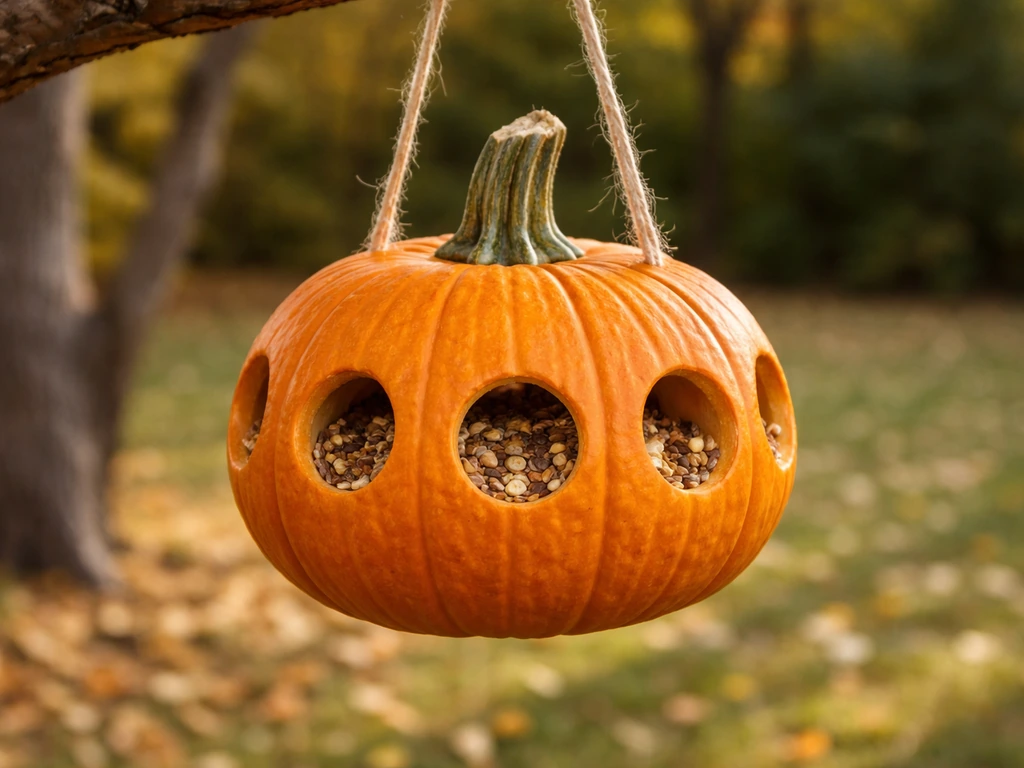
Next Article
How to Make a Pumpkin Bird Feeder: Step by Step Guide
Build a pumpkin bird feeder step by step: pick, prep, carve/drill, add seed or suet, hang secure, and prevent rot