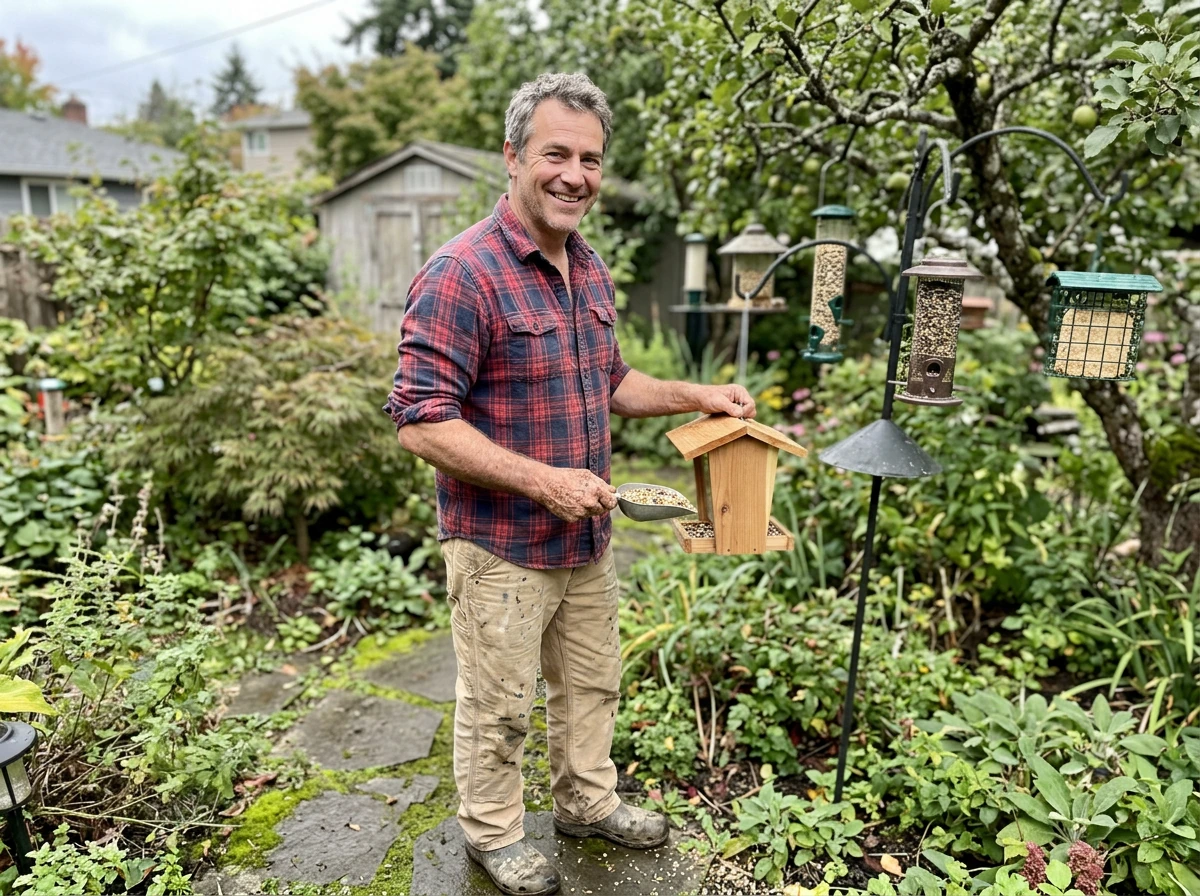
A do it yourself bird feeder kit is one of the fastest ways to get a real, working feeder in your backyard without starting from scratch on materials or design. Most wood kits give you pre-cut cedar or pine pieces, hardware, and basic instructions, so you spend your time assembling and finishing rather than measuring and cutting. That said, not all kits are created equal, and the choices you make after the kit is done, where you hang it, what you fill it with, and how you clean it, matter just as much as the build itself. This guide walks you through the whole process so you're not just building a feeder, you're setting up something birds will actually use.
Do It Yourself Bird Feeder Kits: Build a Wood Feeder Today
Marcus Brennan
23 Mar 2026
Choosing the Right DIY Wood Bird Feeder Kit
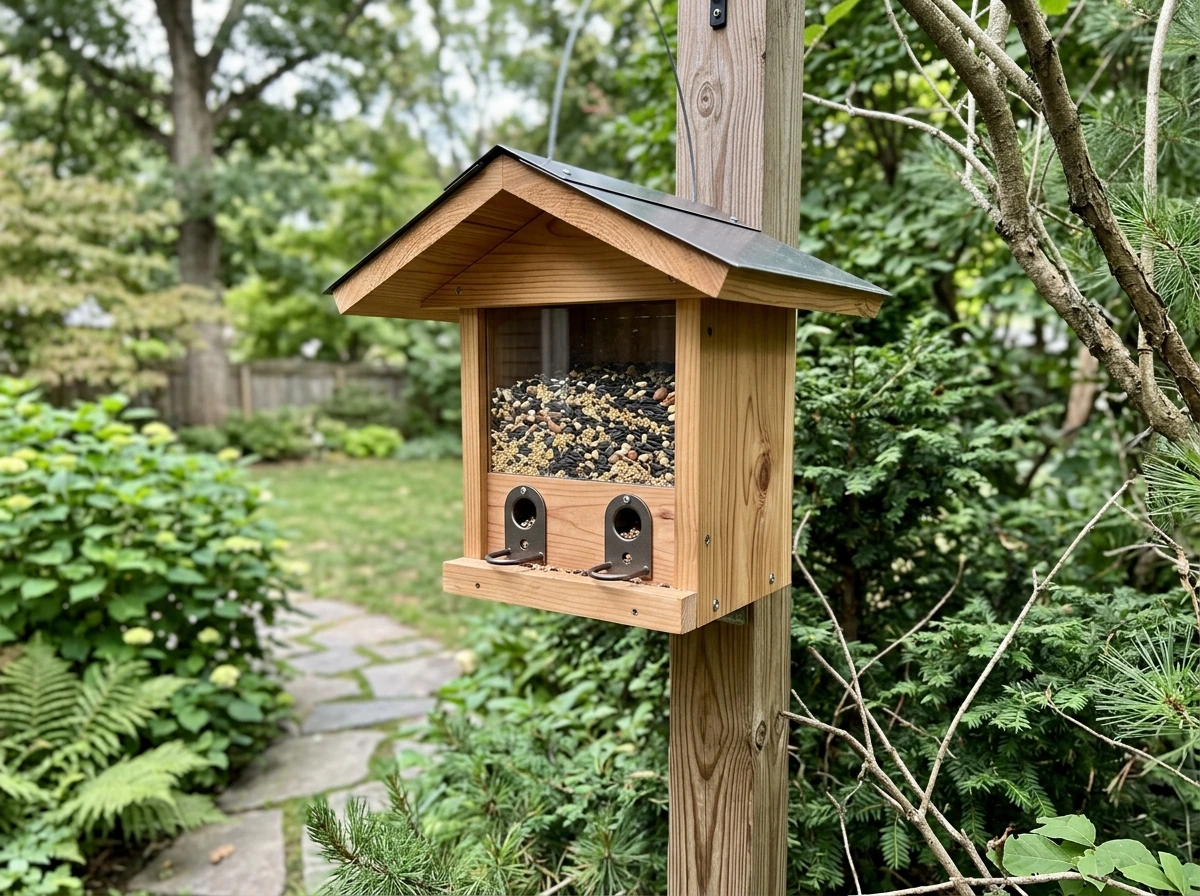
The first decision is feeder style, and it should be driven by which birds you want to attract. Hopper and tube-style kits work well for songbirds that prefer feeding at height, like chickadees, finches, titmice, and nuthatches. Platform or tray-style kits suit ground-feeding birds like sparrows, towhees, and doves, and you can follow the same overall build steps when learning how to make heart shaped bird feeders. Suet cage kits are the go-to for woodpeckers, nuthatches, and chickadees that cling while feeding. If you want a little of everything, a hopper kit with a suet cage attachment covers the most ground.
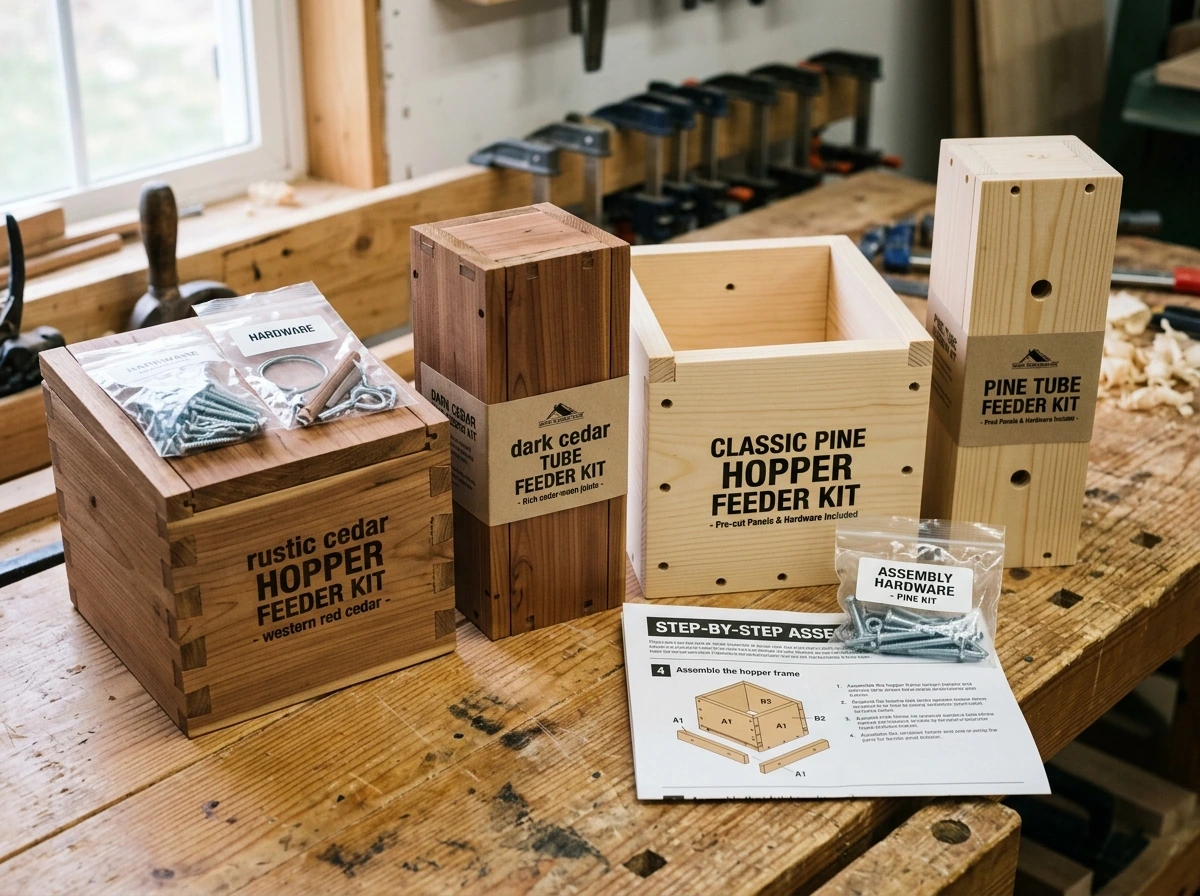
When comparing kits, look at three things: wood species, joinery quality, and included hardware. Cedar and redwood naturally resist rot and insects, which matters a lot for a feeder that will sit outside in rain. Pine is cheaper and easy to work with, but it needs a solid weatherproof finish or it will warp and crack within a season. Joinery quality means checking whether the pieces interlock or just butt together, and whether the kit includes screws or just nails (screws hold better over time). Hardware matters because a flimsy hook or thin wire will let the feeder twist, wobble, or fall.
Skill level is worth being honest about. A basic platform or hopper kit with pre-drilled holes and labeled pieces can be assembled in about 30 to 45 minutes with just a screwdriver. More complex kits with rooflines, perch rails, and drainage channels take closer to 90 minutes and benefit from a clamp or two while the glue sets. If this is your first build, go simpler. You can always upgrade later, and plenty of companion builds (like a DIY bird feeder pole for hanging or a more decorative design) can come after you have the basics down.
| Kit Type | Best For | Skill Level | Typical Wood | Assembly Time |
|---|---|---|---|---|
| Hopper | Chickadees, finches, jays, titmice | Beginner to intermediate | Cedar or pine | 45–90 min |
| Platform/tray | Sparrows, doves, ground feeders | Beginner | Cedar or pine | 20–40 min |
| Suet cage frame | Woodpeckers, nuthatches, chickadees | Beginner | Cedar | 20–30 min |
| Tube feeder frame | Finches, small songbirds | Intermediate | Cedar or hardwood | 45–60 min |
| Combination hopper + suet | Mixed species | Intermediate | Cedar | 60–90 min |
Tools and Materials Checklist (and Safety Quick Tips)
Most wood bird feeder kits supply the pre-cut wood pieces, screws or nails, and a basic instruction sheet. What they usually do not include is everything you need to finish, seal, and hang the feeder properly. Before you start, gather the following.
What you'll need
- Phillips-head screwdriver or a power drill with a Phillips bit
- Wood glue (exterior-rated, like Titebond III)
- Clamps (even two spring clamps help while glue sets)
- Sandpaper: 220-grit for prep sanding before finishing
- Exterior water-based polyurethane or exterior wood topcoat (for pine kits especially)
- A small foam brush or disposable brush for applying finish
- Hanging hardware: a sturdy screw hook, braided wire or chain, and an S-hook
- A tape measure and pencil for marking any custom adjustments
- Optional: a hand saw if any pieces need minor trimming
Safety quick tips
Sanding wood generates fine dust that irritates eyes, skin, and nasal passages. OSHA flags wood dust as a real exposure concern, so put on safety glasses before sanding or drilling, and work in a ventilated space or outdoors. A simple dust mask is worth wearing if you are doing extended sanding indoors. Eye protection is especially important when drilling, since small chips can fly back. These are not dramatic precautions, just sensible ones for a quick project.
Step-by-Step Assembly and Finishing (Weatherproofing Included)
Before you touch any pieces, lay everything out and match them against the kit's parts list. Missing a piece now is much less frustrating than discovering it mid-build. Check that all pre-drilled holes line up correctly by doing a dry-fit (assembling without glue or screws) before committing.
- Prep sand all wood surfaces with 220-grit sandpaper. Even pre-cut kit pieces have rough edges or mill marks that will catch water if left unsealed. Sand in the direction of the grain, wipe off dust with a dry cloth, and let the wood sit for a few minutes before moving on.
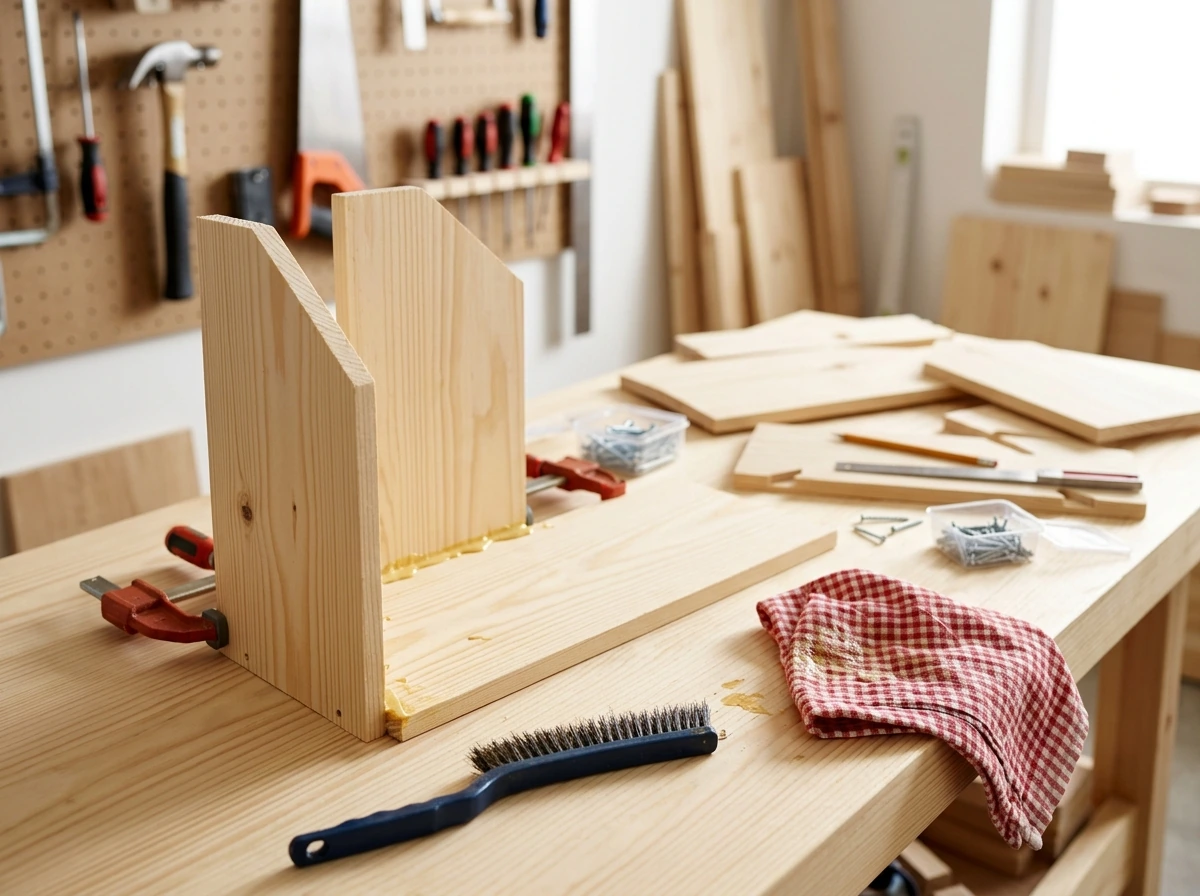
- Dry-fit the entire feeder. Slot or align every piece without glue to confirm fit. This is also the time to identify any pieces that need a light pass with sandpaper to seat flush.
- Apply wood glue to joints, then press pieces together. For hopper or platform kits, start with the floor and side walls. Hold or clamp each joint for at least 5 minutes, or follow the kit's instruction time if listed.
- Drive screws or nails as directed. Screw into pre-drilled holes rather than free-handing new ones to avoid splitting the wood. If the kit only includes nails, consider substituting 1.5-inch exterior screws for a more durable hold.
- Attach the roof last (on hopper styles). Many kits hinge the roof for easy refilling. Make sure the hinge hardware seats flush so the roof sits level and sheds water properly.
- Let the assembled feeder dry fully, ideally overnight, before applying any finish.
- Apply exterior finish. For pine kits, this step is non-negotiable. Sand lightly with 220- to 320-grit between coats. A product like ZAR Exterior Water-Based Polyurethane touches dry in about 30 minutes and can be recoated in 2 to 3 hours. Apply 2 to 3 coats total, as recommended by most exterior topcoat manufacturers, letting each coat fully cure before adding the next.
- Let the final coat cure for at least 24 hours before hanging or filling with seed. Rushing this step leads to sticky surfaces that trap debris and degrade faster.
A note on color and stain: if you want to stain the wood before sealing, use an exterior-rated stain, sand lightly with 220-grit after the stain dries, then apply your topcoat layers over it. Avoid painting the interior seed trough or any surface birds will contact directly. The exterior faces and the roof are where finish matters most for weatherproofing.
Hanging and Mounting: Location Is Everything
Where you put the feeder has more impact on bird activity than almost any other choice. There are a few rules worth following that make a real difference.
Height and proximity to cover
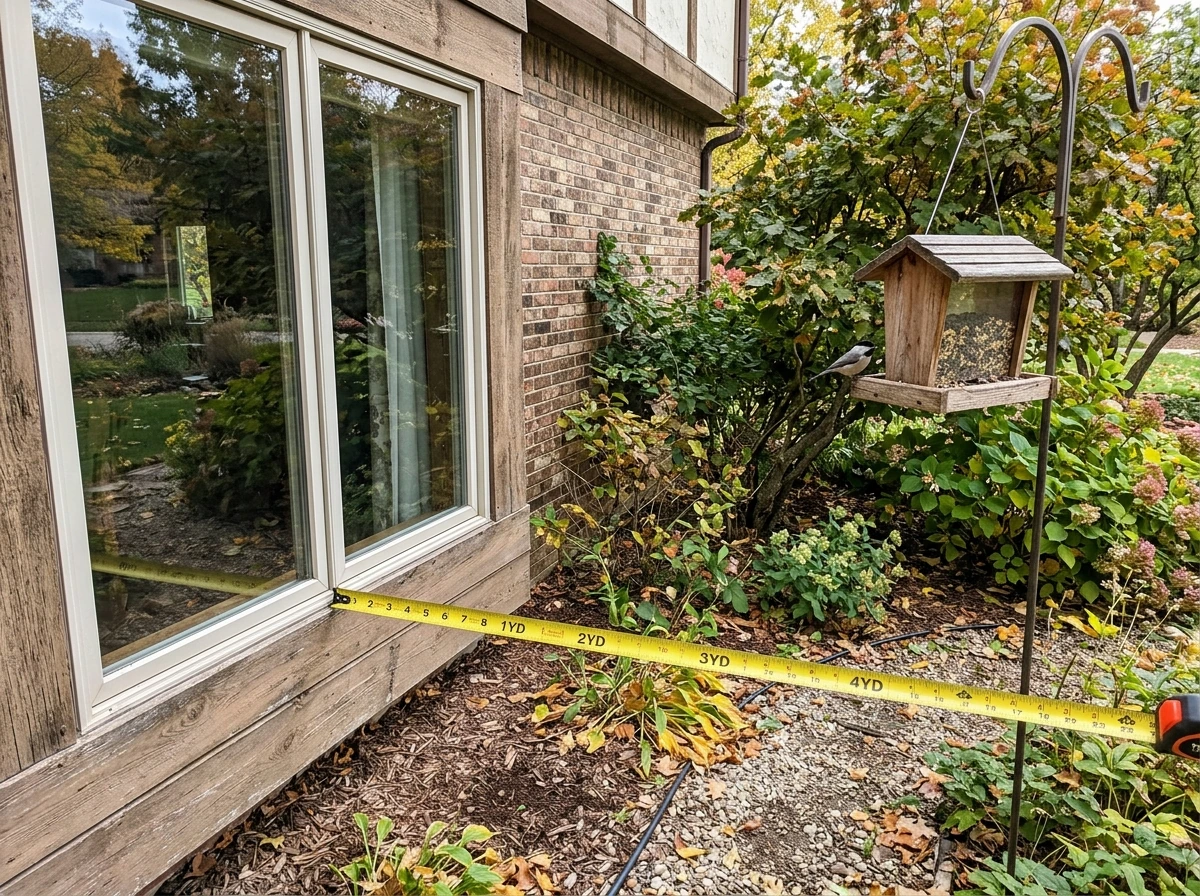
Aim for a hanging height of roughly 5 to 6 feet above the ground. This puts the feeder at a comfortable refilling height for you and keeps it visible to birds while making it harder for cats to ambush visiting birds from below. Birds also feel more comfortable feeding when there is nearby cover, like a shrub or tree, within about 10 feet. That cover gives them a place to retreat if they sense a predator, but close enough that they can spot and reach the feeder easily.
The window-strike rule
Window strikes are one of the most common and preventable causes of bird injury in backyard setups. The safe zones are: within 3 feet of a window (so birds cannot build enough speed to injure themselves if they do fly toward the glass) or more than 10 feet away (far enough that birds have time to redirect). The danger zone is the 3-to-10-foot range. If you are hanging the feeder from a bracket mounted near a window, get it within that 3-foot threshold.
Hanging methods
- Shepherd's hook pole: The most flexible option. You can move it and add baffles easily. Use a pole with a wide, stable base or anchor it with a ground stake.
- Tree branch: Works well if the branch is sturdy and at least 5 feet up. Use braided wire or a chain rather than rope, which rots faster.
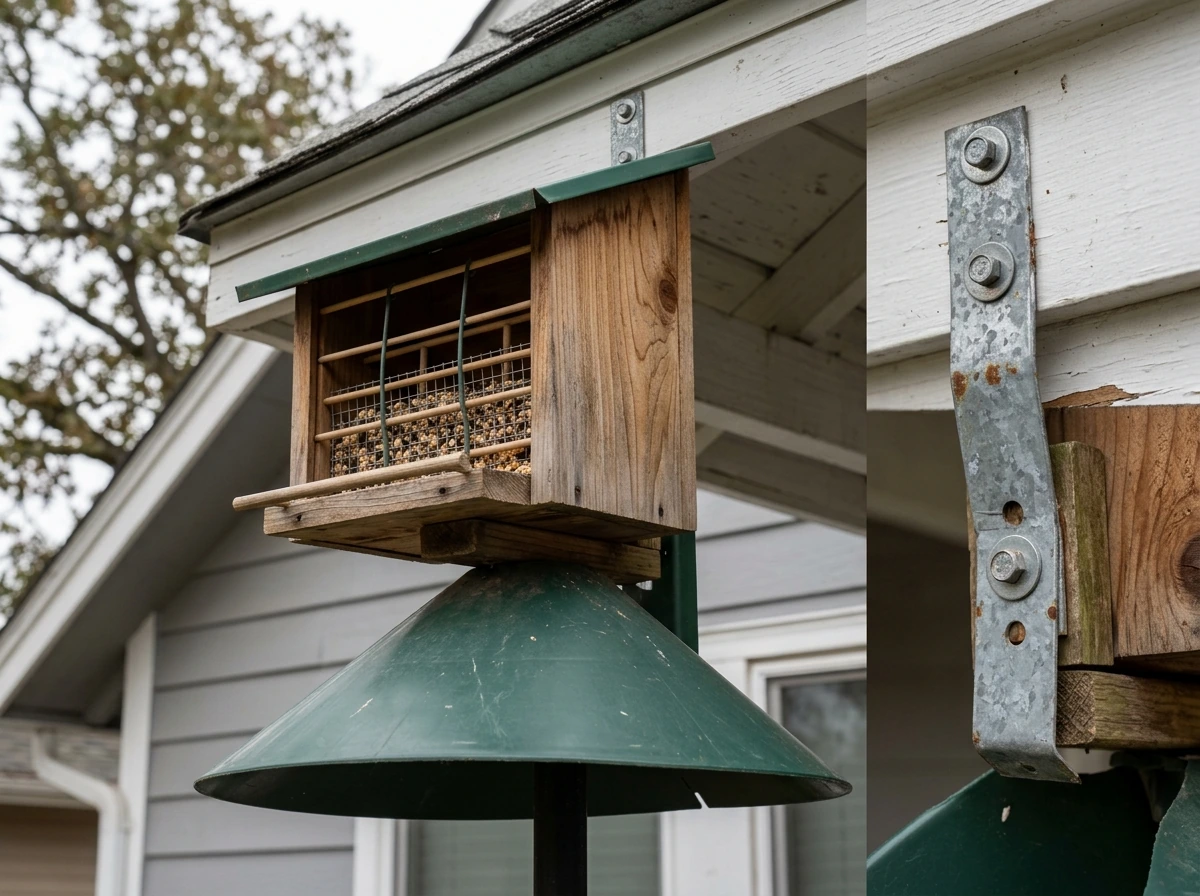
- Deck railing bracket: Convenient for apartments or small yards. Look for a bracket rated to hold at least 10 pounds when the feeder is full of wet seed.
- Mounted post: The most permanent setup. Cedar or pressure-treated 4x4 posts work well. This pairs naturally with a DIY bird feeder pole build if you want to go that route.
Avoid hanging a feeder directly over a patio, walkway, or seating area. Seed hulls, droppings, and spilled seed accumulate below the feeder, and it is easier to manage that mess in a mulched garden bed or grass area than on a hardscape surface.
Selecting Seed and Attracting the Right Birds
Seed choice is where a lot of first-time feeder builders overthink things. Start simple: black oil sunflower seed is the single best all-around choice. Audubon and Mass Audubon both point to black oil sunflower as the seed that appeals to the greatest number of backyard birds, including chickadees, titmice, nuthatches, finches, and jays. The thin shell makes it easy for smaller birds to crack, which is why it outperforms the thicker-shelled striped sunflower variety for broad appeal.
If you want to target specific species or just draw more variety, here is a quick breakdown of what works.
| Seed/Food | Best For | Feeder Type |
|---|---|---|
| Black oil sunflower | Chickadees, titmice, nuthatches, finches, jays | Hopper, platform, tube |
| Sunflower chips (shelled) | Same as above, plus reduces shell mess | Hopper, platform, tube |
| Safflower | Cardinals, chickadees (squirrels dislike it) | Hopper, platform |
| Shelled peanuts | Jays, woodpeckers, nuthatches | Platform, hopper, mesh feeder |
| Suet cakes | Woodpeckers, nuthatches, chickadees, creepers | Suet cage |
| Nyjer (thistle) | Goldfinches, siskins, redpolls | Tube or sock feeder |
| Mixed blends (sunflower + safflower + peanuts) | Broad mixed species | Hopper, platform |
One practical note: avoid cheap mixed seed bags that are heavy on milo, millet, and filler grains. Many birds toss these out of the feeder looking for the sunflower seeds, which creates a mess and wastes money. A simple black oil sunflower-only fill is cleaner and more effective than most multi-ingredient budget blends.
Maintenance, Cleaning, and Seasonal Care
A bird feeder that is not cleaned regularly becomes a disease vector. Moldy seed and bacteria-laden droppings are genuinely dangerous to birds, and a dirty feeder will drive birds away faster than a squirrel will. The good news is that cleaning a wood feeder is straightforward if you do it on a regular schedule.
Cleaning routine
Clean your feeder roughly once a month under normal conditions. During wet weather, or if you notice seed clumping, sick birds nearby, or an unusual drop in visitors, clean it immediately. The most widely recommended disinfecting method is a bleach solution. A 1:32 ratio (1 part bleach to 32 parts water) is recommended by Madrone Audubon: soak the feeder for 10 minutes, scrub with a stiff brush, rinse thoroughly with clean water, and let it dry completely before refilling. Iowa DNR and Clemson Extension also endorse a 10% bleach solution (1 part bleach to 9 parts water) as effective for disinfection including salmonella control. Either concentration works. The critical step that people skip is the drying: wet seed molds within a day or two, so do not refill until the feeder is fully air-dried.
Seasonal considerations
- Spring and summer: Seed ferments faster in heat and humidity. Check the seed trough every few days and replace any clumped or discolored seed. Fill in smaller quantities so you are not leaving seed out for more than a week.
- Fall: Great time to add suet feeders as migrating birds pass through and resident species ramp up feeding before winter.
- Winter: Seed can freeze and clump in cold, wet weather. Use a covered hopper design (which your kit likely already is) and tap the feeder gently to loosen frozen seed. Suet is especially valuable in winter when insects are scarce.
- Late winter to early spring: Clean the feeder thoroughly before peak spring migration. This is also when you should touch up any worn weatherproofing on pine feeders, sanding lightly and reapplying a coat of exterior finish.
Troubleshooting and Pest-Proofing for DIY Feeders
Even a well-built feeder runs into problems. Here is what commonly goes wrong and how to fix it.
Feeder wobbles or swings too much
This usually means the hanging point is not stable enough or the feeder is too light relative to wind exposure. Fix it by switching from a single hook to a two-point chain system that distributes the weight, or add a few small rocks or marbles to the seed trough as ballast until it fills up. If the feeder is hanging from a shepherd's hook that flexes, anchor the pole base with a ground stake and guy wire.
Roof leaks or seed gets wet
If water is getting into the seed trough, check the roof overhang first. A good hopper roof should extend at least an inch beyond the walls on all sides. If the kit's roof is flush or nearly flush, add a strip of exterior-grade trim along the front and side edges to extend the overhang. Also confirm the seed trough has drainage holes: most kits include small holes in the floor of the trough, but if yours does not, drill two or three 1/4-inch holes in the lowest point of the trough floor.
No birds showing up
Give it time first. Birds can take anywhere from a few days to a few weeks to discover a new feeder, especially if there is no established feeding activity in your yard. The most common reasons for slow uptake are: feeder is too exposed (move it closer to a shrub or tree for perching cover), wrong seed for local species (switch to black oil sunflower if you haven't already), or the finish smell is still strong (let a freshly finished feeder air out for 48 to 72 hours before filling).
Squirrel-proofing your DIY feeder
Squirrels are the most common and most persistent pest problem for backyard feeders. The two-part solution that actually works is placement plus a baffle. For placement, position the feeder at least 8 feet horizontally from any surface a squirrel can launch from (fence, tree trunk, deck railing, or roof overhang). Then mount a baffle on the pole below the feeder, positioned between 4 and 4.5 feet from the ground. This height prevents squirrels from getting a running start or reaching over the baffle from below. A torpedo-style or dome baffle attached above a hanging feeder also works well when you cannot control horizontal clearance.
Raccoons and larger pests
Raccoons typically hit feeders at night. The simplest fix is to bring the feeder inside after dark during active raccoon periods in spring and summer. If that is not practical, a heavy-duty pole baffle (metal, not plastic) rated for larger animals is the next best option. Raccoons are strong enough to displace or crush lightweight baffles designed only for squirrels.
Ants and insects
Ants follow scent trails to the feeder, especially in summer. An ant moat (a small water-filled cup that mounts between the hanging hook and the feeder) is the most effective and least toxic solution. Fill it with plain water and refill every few days. Keep the feeder itself free of syrup or fruit residue that draws ants in the first place.
Seed spillage and shell mess
Seed hulls accumulating below the feeder is normal, but excessive spillage usually means the feed ports or perch design are too loose, letting birds fling seed while feeding. If your kit has adjustable port sizes, reduce the opening. Switching to shelled sunflower chips also eliminates the hull mess entirely and reduces waste significantly, since birds cannot sort through and toss out whole seeds.
Building a feeder from a kit is genuinely one of the more rewarding quick projects you can do in an afternoon, and the payoff, watching birds come back day after day, makes the maintenance worthwhile. If you want to go beyond the kit and build fully from scratch, a do it yourself bird feeder is a natural next step once you have the assembly process under your belt. But for getting birds feeding quickly and reliably, a solid wood kit, finished properly and hung in the right spot, is hard to beat. Once your kit is dialed in, you can take the next step with a do it yourself bird feeder for more customization.
FAQ
Can I use a do it yourself bird feeder kit outdoors without staining or sealing the wood right away?
It is risky because pine can warp quickly and cedar finishes can weather unevenly. If you are not sealing immediately, store the assembled feeder under cover, then apply an exterior-rated topcoat as soon as possible, with full drying time before refilling to avoid damp, mold-prone seed exposure.
What should I do if my do it yourself bird feeder kit wobbles even after tightening all screws?
Check the hanger and the attachment points first. A loose hook or uneven chain can twist the feeder even when the wood joints are tight. Use a two-point chain, confirm both points are level, and replace any thin wire with hardware-store rated chain or stainless components.
Is it safe to put peanuts, suet crumbles, or fruit in a wood do it yourself bird feeder kit designed for seeds?
Only if the kit type supports it. Seed-only hoppers and platforms often lack drainage and can trap moisture from fruit or soft spreads, which increases spoilage and mold. If you want suet or fruit, use the kit style (suet cage or properly designed tray) and keep surfaces dry.
How do I prevent birds from getting stuck in the finish or on sticky spots?
Avoid over-applying topcoat on interior seed-contact areas. Let each coat cure fully (not just dry to the touch), and do a quick wipe test on contact surfaces with a gloved hand, if it feels tacky wait longer. Also remove excess drips before they cure.
Do I need to use a specific oil or product on a do it yourself bird feeder kit to weatherproof it?
Exterior stains and exterior topcoats are usually the simplest path because they are formulated for outdoor UV and moisture. Avoid interior varnishes or generic wood oils that do not create a stable exterior barrier, since they can become sticky or break down into uneven patches.
Why are squirrels getting to my do it yourself bird feeder even though I followed the distance rule?
They may be launching from a hidden access point like low tree branches, stacked items, or nearby fences. Re-check the 8-foot horizontal clearance in every direction and consider a dome or torpedo baffle designed for hanging feeders, because it blocks vertical access better than a simple flat board.
What is the best way to handle cleaning if I cannot remove the feeder easily?
Use a stiff brush to scrub out hulls and residue, then disinfect with a controlled soak or targeted application if your bracket does not allow full removal. The key detail is still complete drying before refilling, so set up a tarp below, rinse thoroughly, and allow full air dry before adding seed.
How can I tell whether the feeder is too wet, before birds stop visiting?
Look for clumped seed, darker wood staining around the trough, or seed dampness after rain, plus a sour smell. These signs mean water is getting into the seed area or the drainage is inadequate. Increase the roof overhang, ensure drainage holes are clear, and switch to a seed fill that does not hold moisture as easily.
What if birds are not feeding quickly, even after I moved the feeder near cover and used black oil sunflower?
Try a placement adjustment and a patience window. If there are multiple feeders in the yard, reduce competition by offering only one at a time. Also ensure the fresh finish has fully aired out 48 to 72 hours and place the feeder where birds have a clear approach path, not blocked by thick open gaps.
Can I line the wood trough or add a removable tray to make a do it yourself bird feeder kit easier to clean?
Yes, but use food-safe materials that do not trap water. A removable tray can help with mess control, but it must not interfere with drainage holes or create standing moisture. If you add a liner, make sure it is simple to remove and dry completely.
How do I adjust feed port openings on a kit without causing birds to waste seed?
Start with the smallest opening that still allows easy feeding for your target species. If you see heavy hull scatter or empty ports, reduce the opening or switch to a fill that birds crack quickly, like black oil sunflower, since smaller birds benefit and there is less sorting waste.