You can make a cookie-cutter bird feeder in about 30 minutes using birdseed, unflavored gelatin, a cookie cutter, parchment paper, and a piece of twine. Press the seed mixture firmly into the cutter on a parchment-lined tray, poke a hanging hole before it fully sets, let it firm up in the refrigerator, and hang it outside at least 5 feet off the ground. That's the core of it. The details below will help you get a feeder that actually holds together, attracts birds quickly, and doesn't collapse on the first warm afternoon.
How to Make Cookie Cutter Bird Feeders Today

Marcus Brennan
23 May 2026
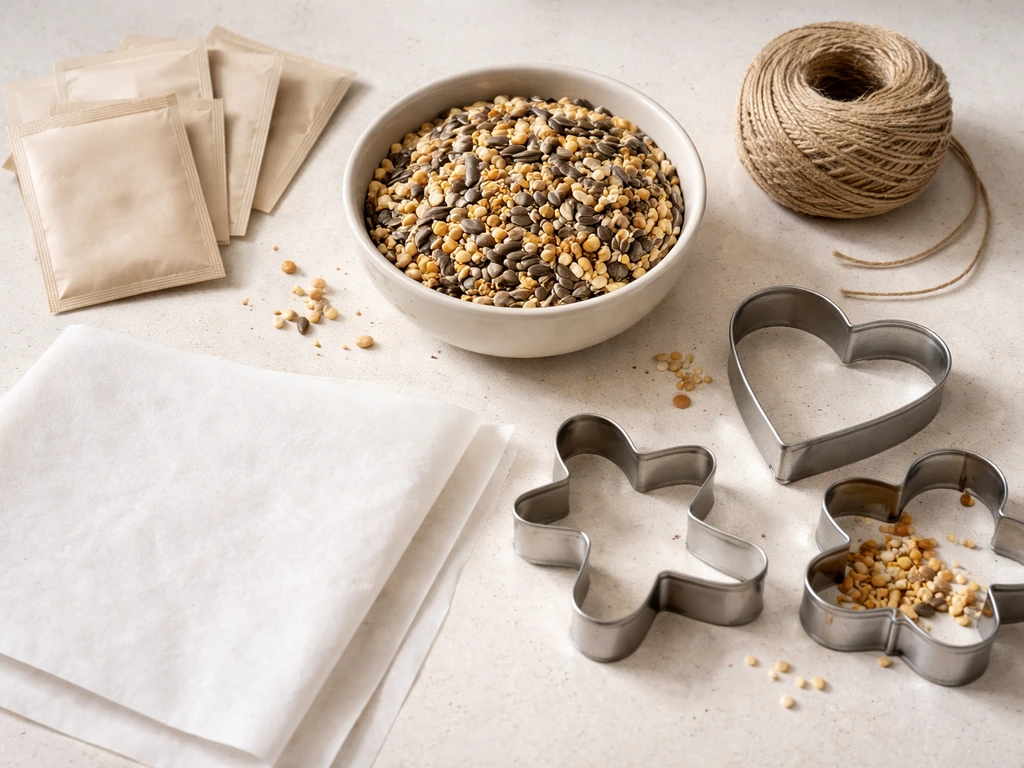
What you need: materials and bird-safe ingredients
The binding agent is the most important decision you'll make. blank" rel="noopener noreferrer">Unflavored gelatin (plain Knox packets work perfectly) is the go-to binder for cold-weather feeders. It's cheap, bird-safe, and easy to work with. The catch is that gelatin softens above roughly 50°F, so if you're making these in late spring or summer, swap gelatin for agar-agar, which holds up in warmer temperatures without going limp. Peanut butter is a popular DIY binder, but it can spoil quickly and some birds struggle with the thick texture, so gelatin or agar is a more reliable choice for a hanging ornament-style feeder.
For the seed mix, use whatever appeals to the birds in your yard. A blend of black oil sunflower seeds, millet, and safflower covers most backyard species. Avoid anything salted, flavored, or artificially colored. If you want to attract specific birds, you can lean heavier on nyjer (thistle) for finches or safflower for cardinals. Keep dried fruit (unsweetened) out of gelatin-based ornaments because the moisture can prevent the gelatin from setting properly.
- Unflavored gelatin (2 packets per batch) or agar-agar for warm weather
- 1/3 cup water per batch for dissolving the gelatin
- 2 to 3 cups mixed birdseed (black oil sunflower, millet, safflower, or nyjer)
- Cookie cutters: metal preferred, at least 3 to 4 inches across and 1 inch deep
- Parchment paper and a rimmed baking sheet or flat tray
- A wooden skewer or chopstick for poking the hanging hole
- Natural twine, jute string, or thin wire for hanging (avoid dyed cord)
- Non-stick cooking spray (optional, makes releasing the ornament easier)
Edible vs. non-edible feeders, and choosing the right cookie cutters
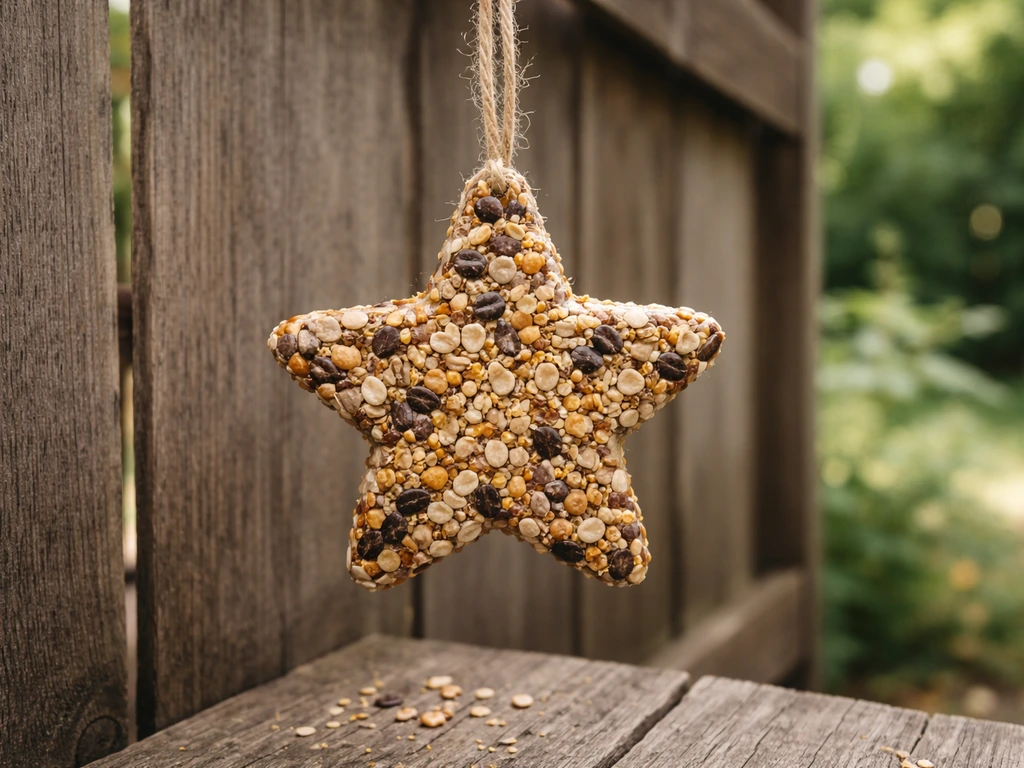
Cookie-cutter bird feeders generally fall into two camps: edible seed ornaments (the birds eat the whole thing) and non-edible decorative molds (the cutter is just used to shape a refillable tray or platform). For most backyard projects, the edible seed ornament is the better choice. It's self-contained, hangs easily, requires no hardware, and birds love pecking at it directly. The non-edible style requires a waterproof tray and a way to secure loose seed, which adds complexity without much benefit for a beginner build.
For cookie cutter selection, metal cutters outperform plastic ones. They hold their shape better when you press seed mix in firmly, and they release the finished ornament cleanly. Simple, bold shapes work best: stars, circles, hearts, and basic animal silhouettes. Avoid intricate cutters with thin points or narrow channels since the seed mixture won't pack well into those areas and the thin sections break off when you try to unmold. The cutter should be at least 1 inch deep. Shallow cutters produce thin ornaments that crack under their own weight when hanging.
| Feature | Edible Seed Ornament | Non-Edible Mold Feeder |
|---|---|---|
| Binder needed | Yes (gelatin or agar) | No |
| Weather durability | Moderate (gelatin melts in heat) | High (plastic or wood tray) |
| Refillable | No (single use) | Yes |
| Setup time | 30 min + 1–2 hrs setting | Varies by build |
| Best for | Seasonal gifts, kids' projects, cold months | Year-round use |
| Mess level | Low | Moderate (loose seed) |
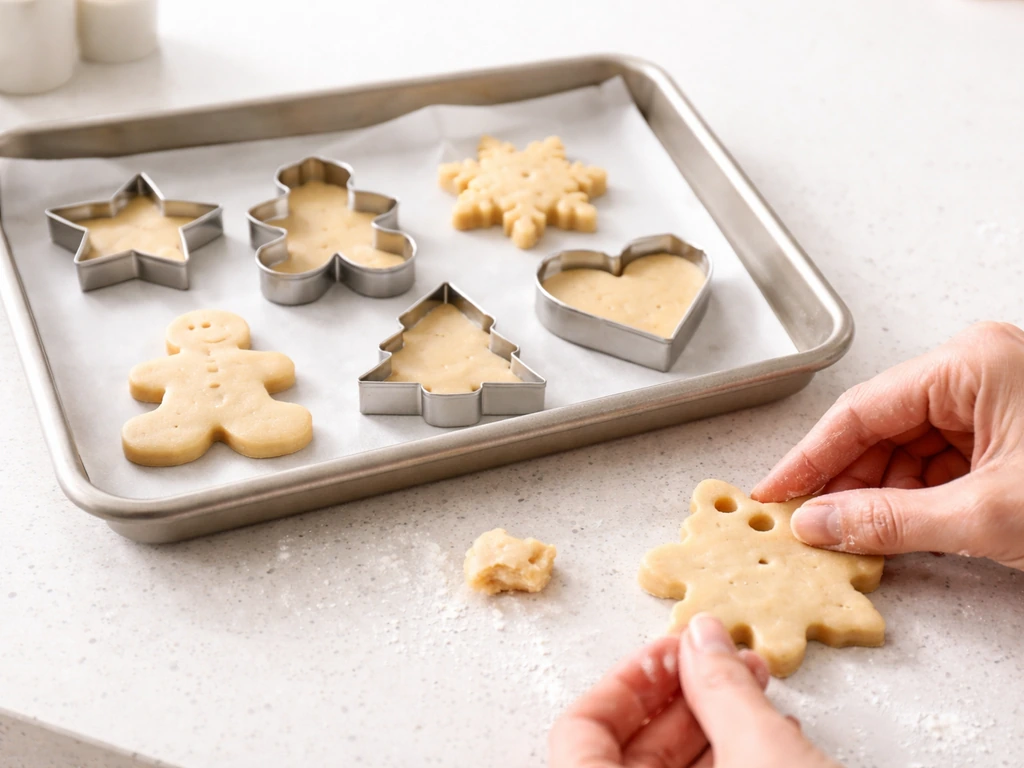
Step-by-step: mold, fill, shape, and add hanging holes
This is the process I've landed on after several batches. It takes about 30 minutes of active time, plus 1 to 2 hours of setting time in the refrigerator. Read through the whole thing before you start because the timing in a couple of steps matters more than you'd expect.
- Line a flat baking sheet or tray with parchment paper. Lightly spray your cookie cutters with non-stick cooking spray on the inside walls, then set them on the parchment with a little space between each one.
- Dissolve 2 packets of unflavored gelatin in 1/3 cup of cold water in a small bowl. Let it sit for 2 minutes to bloom, then stir in 2 tablespoons of hot (not boiling) water until fully dissolved. Stir well so there are no clumps.
- Pour the dissolved gelatin over your birdseed in a large bowl and mix thoroughly. Every seed should be coated. The mixture will look slightly wet and sticky but should still be crumbly, not soupy. If it's too wet, add more seed.
- Place the bowl in the refrigerator for about 10 minutes. This step is critical: you want the gelatin to start firming up slightly so it doesn't seep under the cutters when you fill them. Don't skip this, but don't leave it longer than 10 to 12 minutes or it will set too much and become crumbly when you pack it.
- Spoon the mixture into each cookie cutter and press it down firmly. Really pack it in. Use your thumb, a spoon, or the flat bottom of a glass to compress the mixture tightly. Loose packing is the number-one reason ornaments fall apart. The finished ornament should be at least 1 inch thick.
- Before the mixture sets completely (within about 15 minutes of filling), poke a hole near the top of each ornament using a wooden skewer or chopstick. Position the hole at least 1/2 inch from the edge of the cutter. Holes too close to the edge will crack or tear when the ornament bears its own weight while hanging.
- Place the filled tray in the refrigerator and let everything firm up for 1 to 2 hours. For suet-based versions, freeze for 2 to 3 hours until completely solid.
- Once firm, gently press each ornament out of its cutter from the bottom. If it sticks, run a thin butter knife along the inside wall of the cutter. Thread twine or jute string through the hole and tie a secure loop. The ornament is ready to hang.
How to hang and place your feeders so birds actually use them
Placement matters as much as the build itself. Hang your cookie-cutter feeders at least 5 feet off the ground. Lower than that and ground predators like cats can reach them, and squirrels have an easier time jumping up to them. A dedicated feeder pole with a hook at the top is ideal, but a sturdy branch works too as long as the ornament has room to swing freely without hitting anything.
Keep the feeders away from windows unless you're specifically setting up a window feeder. If you do hang near a window, position the feeder either directly against the glass (within 3 feet) or more than 10 feet away. The dangerous zone is 3 to 10 feet from glass: birds pick up speed flying away from the feeder and hit the window before they can course-correct. Adding window decals helps, but distance is the easiest fix.
Choose a spot with some nearby cover, like a shrub or small tree, within 10 to 15 feet. Birds like to scout before they land, and a completely exposed feeder in the middle of an open yard will get ignored longer than one near natural perching spots. That said, don't hang feeders directly in dense brush where cats can hide and ambush birds on the ground below.
Troubleshooting: crumbling, melting, and poor binding
Most failures come down to one of three problems: the ornament is crumbly, it softens and sags in the sun, or it falls apart at the hole. All of these are fixable once you know the cause.
Crumbly ornaments
If your ornament crumbles when you unmold it or breaks apart easily, the gelatin either set too long before you filled the cutters or wasn't fully dissolved to begin with. Gelatin starts firming up fast once it cools. If you let the seed-gelatin mixture sit in the fridge longer than 12 minutes before packing the cutters, it turns grainy and won't bond well. The fix is to work faster: mix, chill briefly (10 minutes max), then pack immediately. Also check that you're pressing the seed mix in firmly. Lightly packed ornaments always crumble.
Melting or softening in warm weather

Gelatin is great in winter but starts breaking down once temperatures climb above 50°F, especially in direct sun. If you're making these in spring or summer, switch to agar-agar as your binder. It behaves similarly to gelatin in the recipe but holds its structure at higher temperatures. Another option: use a suet-based mix (rendered beef fat mixed with seed) and freeze the ornaments solid for 2 to 3 hours. Suet feeders work well in fall and winter but turn rancid in summer heat, so they're not a year-round solution either.
Breaking at the hanging hole
This almost always means the hole was punched too close to the edge. The rule is simple: keep the hole at least 1/2 inch from the nearest edge. If your cutter is small, go with a thicker twine loop and a slightly larger hole so the string distributes the weight without cutting into the seed mixture. Also make sure the ornament is fully set before you hang it. A partially set ornament will tear under its own weight.
Maintenance, cleaning, and when to refill
Because these ornaments are consumed rather than refilled, maintenance is pretty simple: replace them before they go moldy or fall apart. In cold, dry weather a gelatin-based ornament can last 1 to 2 weeks outside. In humid or rainy conditions, plan to replace them after 3 to 5 days. Check the ornament every couple of days. If it looks soft, discolored, or has visible mold, take it down immediately. Moldy seed can make birds sick, so don't wait until it falls apart on its own.
If you're using a non-edible cookie-cutter tray feeder instead, clean it every 1 to 2 weeks. Scrub with a 1-part white vinegar to 9-parts water solution, rinse thoroughly, and let it dry completely before refilling. Wet seed ferments fast and can harbor mold and bacteria. Don't let wet seed sit in the tray for more than a day or two. If rain is a regular issue in your area, look for a spot with overhead cover or add a simple baffle above the feeder to deflect rain.
Keeping squirrels, ants, and other pests away
Squirrels are the main problem with hanging feeders. They'll eat through a gelatin seed ornament in minutes if they can reach it. The most reliable deterrent is distance: hang the feeder far enough from any branch, fence, railing, or roof edge that a squirrel can't leap to it directly. Squirrels can jump roughly 4 to 5 feet horizontally and 8 to 10 feet from an elevated launch point. If you're using a pole, add a dome-shaped squirrel baffle below the feeder. The baffle works best when it's wide enough and positioned so the feeder hangs beyond the squirrel's reach from the pole itself.
Ants are a bigger issue with feeders that contain sweet binders like corn syrup. Sticking to gelatin or agar as your binder reduces ant attraction significantly. If ants are persistent, hang the feeder from a thin wire and apply a ring of petroleum jelly or a commercial ant guard around the wire above the feeder. Ants can't cross it. Avoid spraying any insecticide near or on the feeder since birds will peck directly at the seed.
Raccoons, chipmunks, and other climbers respond to the same approach as squirrels: height and baffles. A feeder hanging freely from a thin wire at least 5 feet off the ground, well away from any climbable surface, is genuinely hard for most animals to reach. If you're still getting raids, the issue is usually a nearby launch point you haven't noticed, like a low-hanging branch or a fence post within jumping distance.
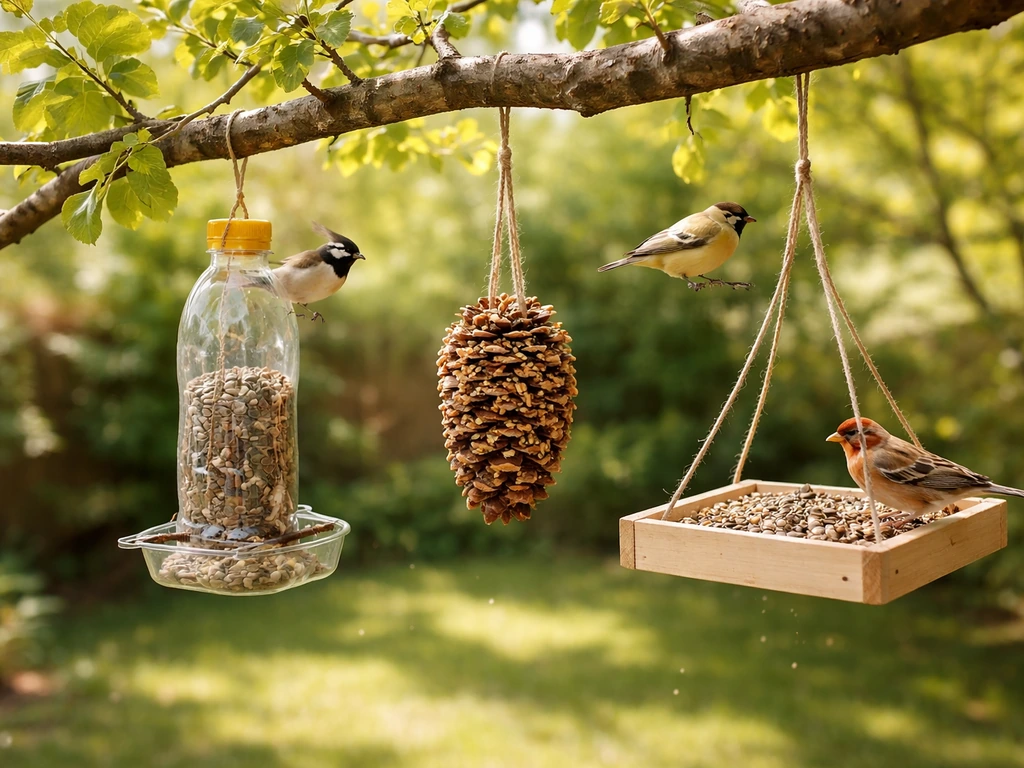
These cookie-cutter feeders are a great entry point into DIY bird feeding, and they pair well with other simple builds like pinecone feeders and bottle feeders if you want to expand your setup. If you're wondering why make a bird feeder in the first place, these quick, no-hardware ornaments are an easy way to bring more wildlife to your yard. If you want a kid-friendly project, these bird feeders preschoolers can make are perfect for easy measuring, safe mixing, and decorating together. If you want to create and learn bird feeder skills, this is a fun project to start with before you move on to other designs entry point into DIY bird feeding. Once you've made a couple of batches and dialed in your gelatin ratio and packing technique, the whole process takes under 30 minutes and the birds will find them within a day or two. Start with one or two feeders, hang them in a sheltered spot with nearby perching cover, and adjust from there based on what you see.
FAQ
Can I add sugar, honey, or flavored ingredients to the seed mix?
No. Skip sugar, honey, or other sweeteners, and avoid anything salted or flavored. Sweet ingredients can increase ant activity and can also leave sticky residue on the ornament that attracts insects more than birds.
What happens if my gelatin mixture is too hot or not fully cooled when I press it into the mold?
It can, but it raises the risk of crumbly feeders. If you use warm gelatin or agar, pour and mix only until it is fully dissolved, then let it cool just enough to thicken before pressing into the cutter. If it is still too hot, you get softer structure and faster sagging later.
Can I make these ahead of time and store them (fridge or freezer) before hanging?
Yes, but only if you swap your binder to match the storage temperature. Store unfinished ornaments in the fridge until set, then hang them right away. If you freeze, allow them to fully thaw in the refrigerator before hanging to prevent condensation that can soften the surface and encourage mold.
How long can I wait after chilling the gelatin mixture before filling the cookie cutters?
For gelatin, you generally want to keep working within about 10 to 12 minutes of chilling the mixture, then pack immediately. Past that window it tends to turn grainy and won’t bind well, which leads to crumbling when unmolding.
What twine size should I use, and how do I prevent the feeder from tearing at the hanging hole?
Use normal string or twine, and size it so the loop sits inside the seed mass without cutting into the ornament. If your ornament keeps tearing at the hole, make the hole slightly larger and place the string loop closer to the center rather than near the very edge.
Will birds drop a lot of seed onto the ground, and can I reduce mess?
Not directly. Birdseed and small pieces can fall out as the ornament wears, so you should plan for an initial cleanup and occasional topping of nearby ground debris. If you want a cleaner setup, choose heavier, whole seeds like black oil sunflower and avoid tiny blends that powder off easily.
How can I stop cookie-cutter feeders from breaking off at thin points or edges?
A simple way is to choose a deeper cutter and press harder with consistent pressure. Also, avoid designs with narrow channels and thin spikes, because those sections are more likely to detach when you unmold or when the feeder swings.
How do I know when to remove and replace a feeder that is getting weathered?
If the feeder has become soft, discolored, or feels tacky, take it down. For mold prevention, replace faster in humid weather, and don’t rely on “it still looks okay” because mold often starts internally and can spread through the ornament quickly.
What is the safest placement if I want to hang cookie-cutter feeders near a window?
If you are consistently getting birds hitting glass, use the safest distance rule rather than relying only on decals. Hang it either within about 3 feet of the window or more than 10 feet away, and keep it away from reflective glare spots.
Are there better options for hot climates or summer days than gelatin?
Yes, if you use the right binder and timing. Agar can work better above roughly 50°F, and freezing a suet-based mixture for a couple of hours can help the feeder hold its shape when temperatures rise. Avoid using gelatin outdoors in warm, direct sun.
Can I spray insecticide near the feeder if ants are a problem?
Do not. Insect sprays or residual chemicals can contaminate the seed surface that birds peck at, and birds can get exposed even if you spray “near” the feeder. If ants are the issue, use a wire-hang plus an ant guard or a petroleum jelly barrier on the supporting wire above the feeder.
Next Article
Bird Feeders You Can Make at Home: Easy DIY Plans
Step-by-step DIY bird feeders using bottles, pinecones, and wood, plus setup, cleaning, and pest-proofing tips.