A bird feeder ring is a circular-perimeter feeder where birds land and feed all the way around the outside of a ring-shaped structure, with seed held inside or underneath. You can build a solid one in an afternoon using hardware cloth, a wooden base, and a few basic tools. The result is a sturdy, open-access feeder that works especially well for finches, chickadees, and sparrows, and can be rigged to resist squirrels with a baffle and smart placement.
How to Make a Bird Feeder Ring: Step-by-Step Guide

Marcus Brennan
16 May 2026
What exactly is a bird feeder ring, and do you need one?
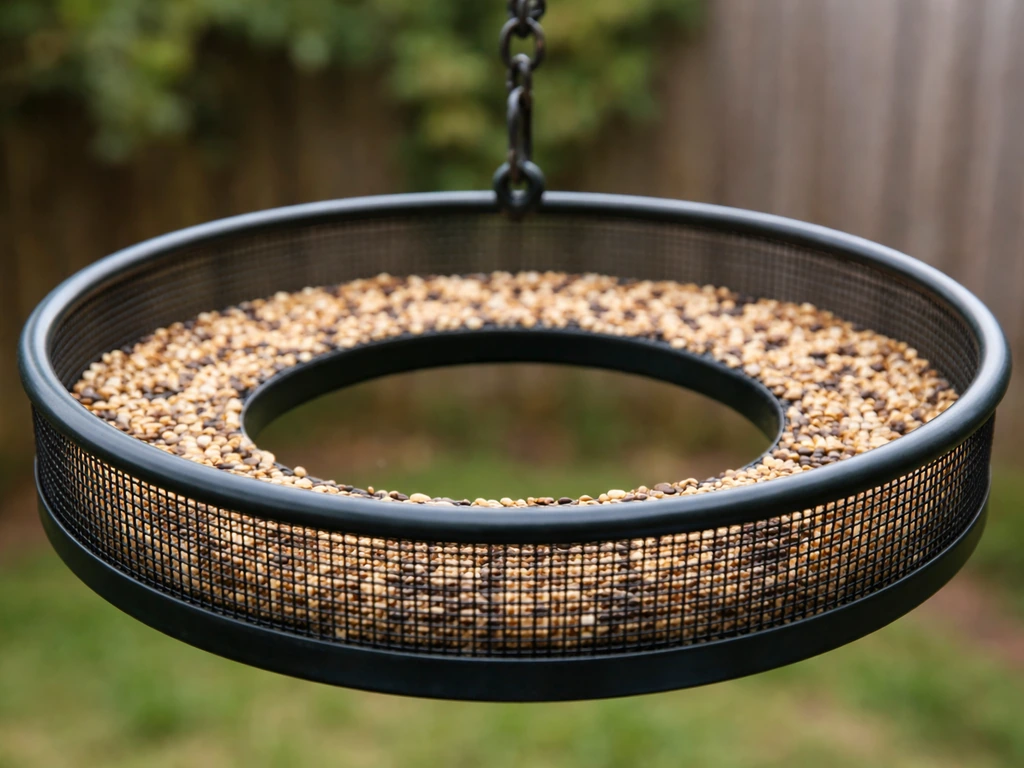
A bird feeder ring is exactly what it sounds like: a feeder built around a circular or cylindrical shape that gives birds perimeter access to seed. Instead of a single port or an open tray, the ring design lets multiple birds feed simultaneously from different spots around the circle. Seed sits inside the ring (in a mesh cylinder or a tray tucked below the rim), and birds perch on the outer edge or on attached perches to reach it through the mesh.
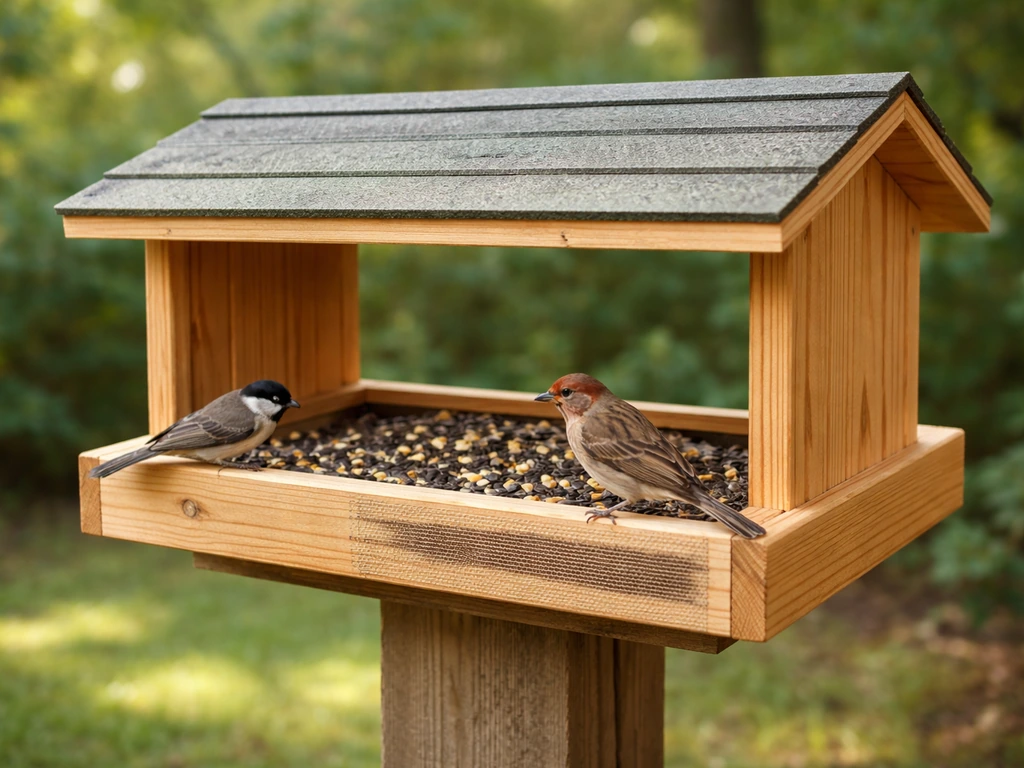
This design is different from a dome feeder, a ball feeder, or a covered tray feeder. If you want a different style like a bird feeder ball, the same general approach applies: build a durable shell, add perches or access for birds, and keep it protected from rain and squirrels. If you're thinking about those other formats, they each solve a slightly different problem. The ring feeder's strength is its 360-degree access: several birds can feed at once without fighting over a single port, which makes it a great choice for active backyards with lots of small bird traffic.
The downside is that the open ring geometry is very easy for squirrels to exploit if you don't plan around it. The fix is in placement and baffling, which I'll cover thoroughly below.
What you'll need: materials and tools
The core of a DIY ring feeder is a cylinder of hardware cloth bent into a circle, capped with a wooden base and a simple roof. If you want to make it more weatherproof, add a bird feeder cover so rain and damp air are kept off the seed. Everything on this list is available at a hardware store for under $20, and if you have scrap wood lying around, you can get it even cheaper.
Materials
- Hardware cloth (galvanized wire mesh): 1/2-inch (12mm x 12mm) spacing or smaller. This keeps seed in and prevents sharp-edge injuries. For nyjer/thistle aimed at finches, go as small as 1/4-inch mesh.
- Untreated pine, cedar, or plywood for the base disk and roof: cedar is ideal because it naturally resists moisture. Never use pressure-treated or chemically treated lumber. It contains pesticide residues that are harmful to birds.
- Non-toxic wood glue or food-safe waterproof sealant for joints.
- Galvanized wire or stainless steel wire (18–20 gauge) for binding mesh edges and forming the hanging loop.
- Zip ties or hog rings to close the mesh cylinder.
- A few stainless steel screws (1-inch) for attaching the base disk.
- Sandpaper (medium grit) to smooth all cut wood edges.
- Optional: a metal or acrylic rain guard disk to sit above the feeder as a roof.
Tools
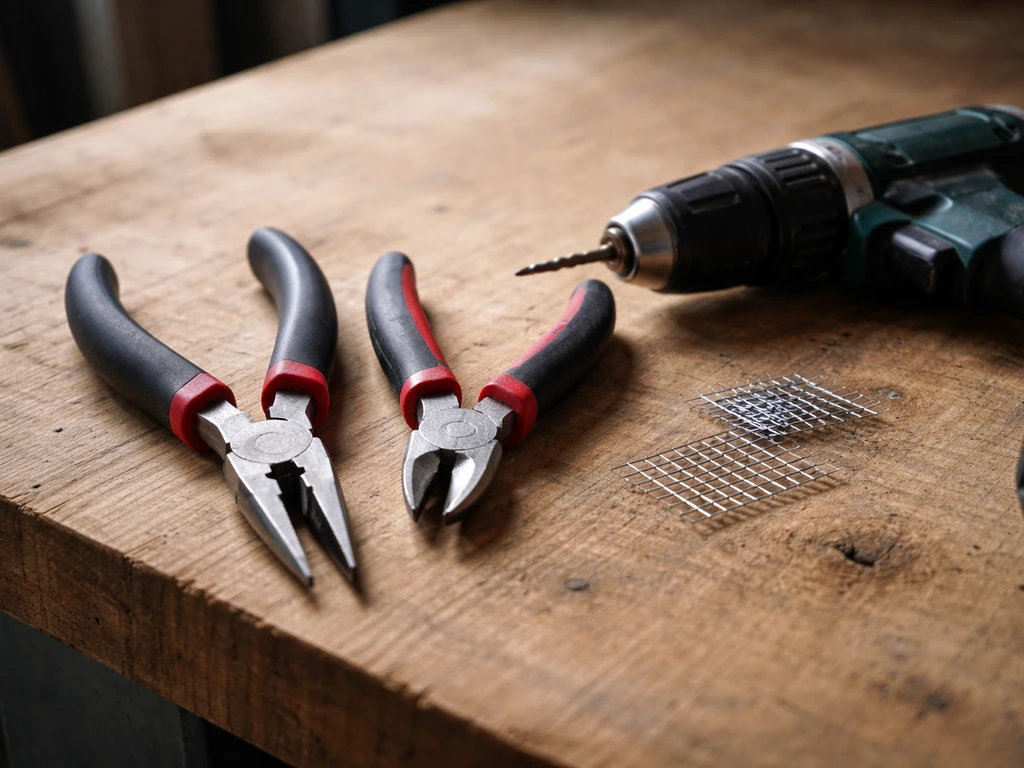
- Wire cutters and pliers (needle-nose for bending edges)
- Jigsaw or handsaw for cutting the wooden disk
- Drill with a small bit for pilot holes
- Measuring tape
- Work gloves (cut hardware cloth edges are sharp)
How to build it: step-by-step
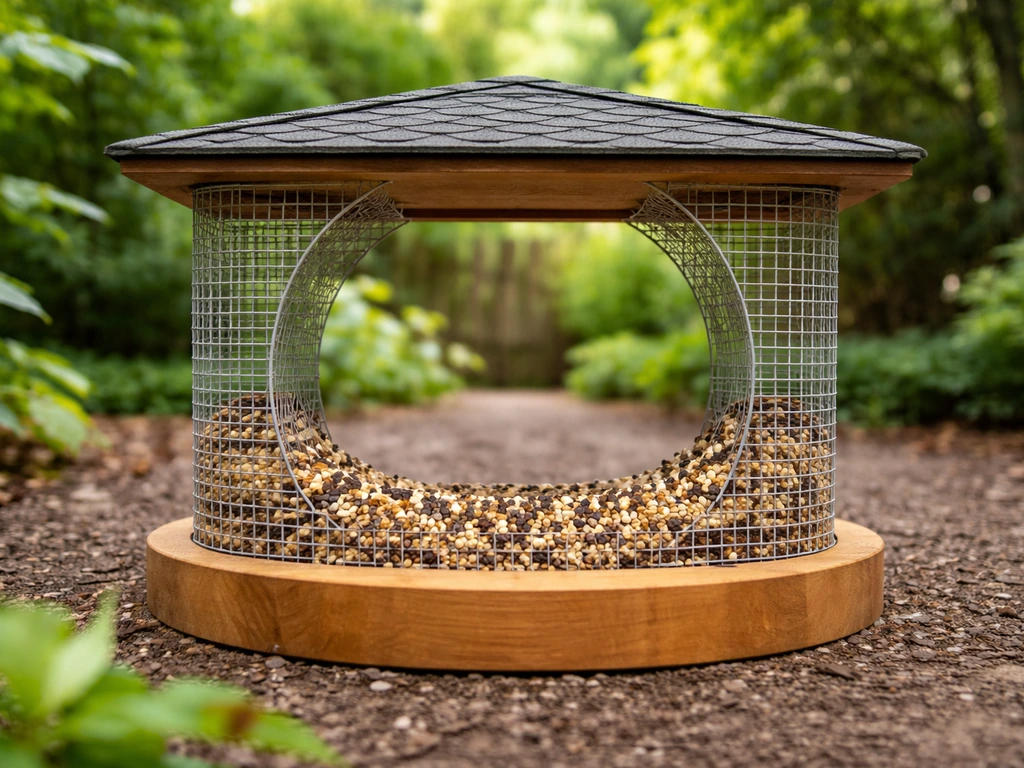
Plan for about 90 minutes if you've done basic DIY before, or two hours if this is your first time working with wire mesh. The finished feeder will be roughly 6 to 8 inches in diameter and 8 to 10 inches tall, which is a practical size for most backyard seed mixes.
- Cut a strip of 1/2-inch hardware cloth that is 10 inches tall and about 22 inches long. This will form a cylinder roughly 7 inches in diameter when you close it into a ring. Use wire cutters and wear gloves. After cutting, fold all cut edges back with pliers so there are no exposed sharp points.
- Bend the mesh strip into a cylinder and overlap the ends by about 1 inch. Use zip ties or hog rings every 2 inches along the seam to lock it closed. Check that the circle is even by setting it upright on a flat surface.
- Cut a wooden disk from your untreated wood to match the inner diameter of the cylinder (roughly 6 to 7 inches across). Sand all edges smooth. This becomes the base that holds seed inside the ring.
- Drill three small pilot holes evenly spaced around the disk's edge. Set the disk inside the bottom of the mesh cylinder and drive 1-inch screws outward through the mesh and into the wood edge to fix the base in place. Add a thin bead of waterproof wood glue around the joint for extra stability.
- For the roof, cut a second disk that is about 2 inches wider in diameter than the cylinder (so it overhangs the seed area like an eave). Drill a centered hole through this roof disk for your hanging wire. Sand it smooth and optionally treat it with a bird-safe waterproof finish or just leave cedar bare to weather naturally.
- Thread a doubled length of galvanized wire through the roof hole and twist it into a secure loop at the top. Run the wire down through the interior of the mesh cylinder and attach it to the base disk with a screw-eye or by looping it through the mesh at the bottom. This keeps the whole structure from separating when loaded.
- Test the structure by gently loading about a half-cup of seed. Check that the base doesn't flex and that seed sits cleanly inside without falling through the mesh. If seed falls through 1/2-inch mesh, line the lower 3 inches of the interior with a second layer of 1/4-inch mesh before adding seed.
Hanging it right: height, location, and window safety
Placement does more work than people expect. Get it wrong and you'll either have no birds, constant squirrel raids, or window-strike casualties. Here's what actually works.
Height and distance from launch points
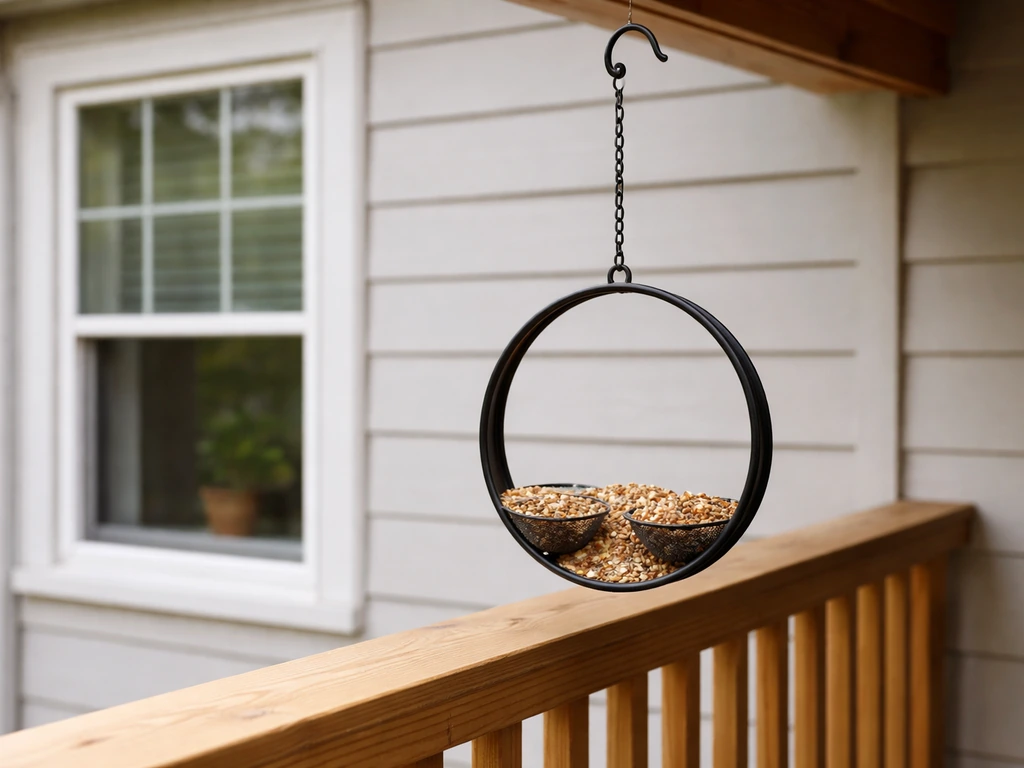
Hang the feeder at least 4 to 5 feet off the ground. Squirrels can leap horizontally up to 8 to 10 feet from a tree limb, fence rail, or roof edge, so position the feeder at least 10 feet away from any of those launch points. If you're hanging from a pole rather than a branch, add a pole-mounted squirrel baffle at least 4 feet up the pole. A hanging baffle (like a wide inverted dome, roughly 17 inches in diameter) directly above the feeder is even more effective because it blocks the drop-down approach squirrels use when they climb down a line.
Window collision safety
If you're hanging the feeder near a window, the rule is straightforward: either get within 3 feet of the glass or go farther than 30 feet away from it. Feeders placed in the 3-to-30-foot danger zone give birds enough runway to hit the glass at full speed. Within 3 feet, a bird that does flush from the feeder can't build enough momentum to injure itself. On a deck or patio, hanging the ring feeder from a shepherd's hook bracket close to the house and within arm's reach of a window is both collision-safe and easy to refill.
Indoor setups
Ring feeders can be used indoors in aviary or sunroom setups where you're keeping parakeets or similar birds. In that case, the same material rules apply (no treated wood, no sharp edges), but placement is easier since squirrels aren't a factor. Just make sure the feeder hangs where droppings and hulls won't land on furniture, and that ventilation is adequate.
What to put in it: seeds, suet, and mixes
The ring format is versatile, but it works best with specific food types depending on who you want to attract.
| Food type | Best for | Notes for ring feeders |
|---|---|---|
| Nyjer (thistle) seed | Finches, siskins, redpolls | Requires 1/4-inch mesh or a fine nyjer sock insert inside the ring; seed is tiny and falls through 1/2-inch mesh |
| Black-oil sunflower seed | Chickadees, nuthatches, finches, cardinals | Works well with 1/2-inch mesh; most versatile choice for a general ring feeder |
| Sunflower chips (hulled) | Smaller birds, reduces shell waste | No hulls to accumulate under the feeder; great if you want a tidy setup |
| Mixed seed (millet, milo, safflower) | Sparrows, juncos, doves | Fine for ring trays; avoid cheap mixes heavy in milo, which most birds ignore |
| Suet cake or suet nuggets | Woodpeckers, wrens, nuthatches | Can be added to the ring interior in a suet cage insert; not ideal as primary fill for mesh rings |
Load only as much seed as birds will eat in two to three days. Overfilling is the main reason seed goes stale and clumps. A half-cup to one cup of seed is plenty for most ring feeders. In rainy or humid weather, cut that down even more.
Keeping it in good shape: weatherproofing, cleaning, and maintenance
Weatherproofing the build
The roof overhang you built is the first line of defense. Make sure it extends at least an inch past the mesh on all sides. If your setup gets a lot of driving rain, consider adding a second wider disk above the first as a double eave. The galvanized mesh itself is weather-resistant, but check the cut edges after the first season; if rust spots appear, snip those sections and replace with a fresh piece of mesh. Cedar wood left unfinished will silver naturally and hold up for years. If you used pine, apply one coat of a bird-safe exterior waterproofing finish and let it cure completely (at least 48 hours) before loading seed.
Cleaning routine
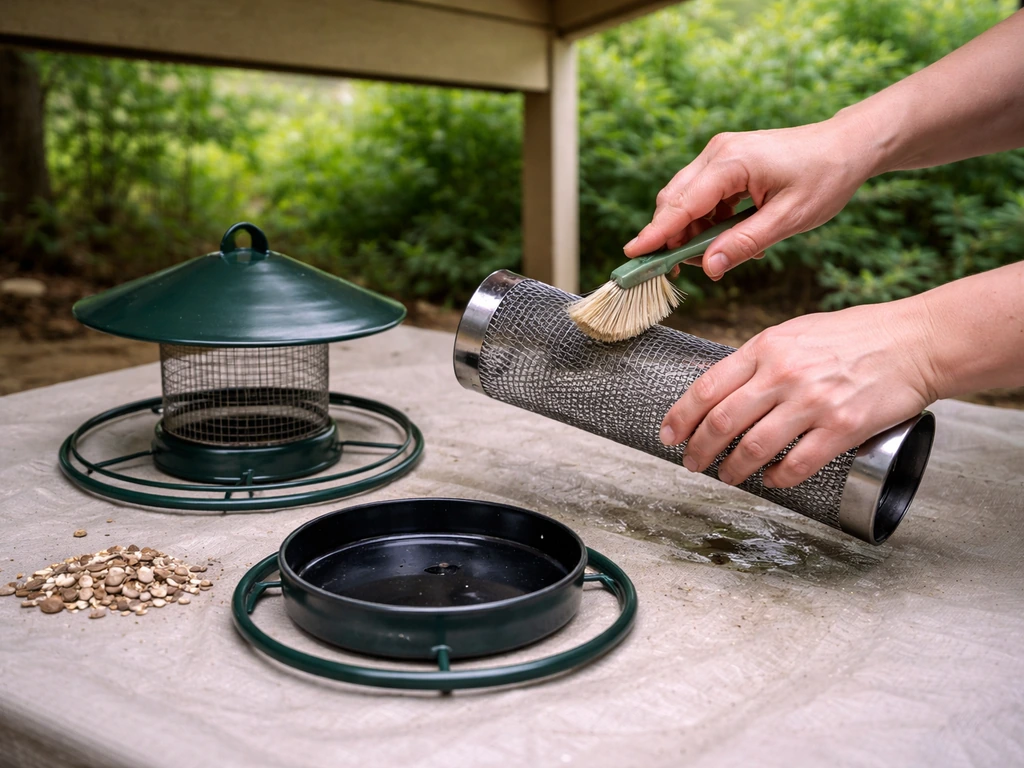
Clean the feeder once a month minimum, and more often in warm, humid months when mold grows fast. The protocol recommended by wildlife extension services is simple: mix 1 part bleach to 9 parts water, soak the feeder for 10 minutes, scrub with a bottle brush to get into the mesh, rinse thoroughly until there's no bleach smell, then let it air-dry completely in the sun before refilling. Do not refill a damp feeder. Moisture on leftover seed hulls creates the slimy, smelly buildup that can make birds sick.
Between full cleanings, shake out old seed and hulls every time you refill. If you see any seed that looks clumped, dark, or smells musty, dump all of it, wipe the interior with a damp cloth, and let it dry before adding fresh seed.
Fixing common problems after setup
Birds aren't coming to the feeder
Give it a week. Birds need time to discover a new feeder, especially in a new location. If nothing is happening after 7 to 10 days, try sprinkling a small amount of seed on the flat roof disk or on the ground directly below to make the food more visible. Also double-check that the feeder isn't placed so close to a shrub or structure that predators (cats especially) can hide within pouncing range.
Larger birds are taking over
Ring feeders with 1/2-inch mesh openings are accessible to grackles, starlings, and other larger birds. If that's a problem, switch to 1/4-inch mesh on the lower half of the cylinder. Smaller birds like finches can still squeeze their bills through; larger birds can't. You can also shorten the perch width if you've added external perch dowels, since smaller birds are comfortable on very slim perches (3/8-inch diameter) that larger birds avoid.
Squirrels are raiding the feeder
First, measure your clearance. If the feeder is within 10 feet of a tree, fence, or roof edge, squirrels are jumping to it. Move it or reposition the hanging point. Add a hanging baffle above the feeder (a wide inverted dome, at least 17 inches in diameter) so squirrels can't climb down the line. If the feeder is pole-mounted, the baffle goes on the pole at 4 feet minimum height. A weight-activated baffle is another option: when a squirrel steps on it, the baffle tilts and slides the squirrel off before it can reach the seed.
Seed is clumping or getting wet
This is almost always a roof or loading problem. Check that the roof disk fully covers the top of the mesh cylinder with at least a 1-inch overhang on all sides. If rain is still reaching the seed, add a second wider disk 2 to 3 inches above the first. Also reduce how much seed you load at once so it gets eaten before it can absorb moisture. Hulled sunflower chips help here because they don't hold moisture the way whole seeds with shells do.
Seed is falling out the bottom
If seed is falling through the base mesh or slipping past the wooden disk, add a thin sheet of aluminum flashing or a cut-down plastic tray glued inside the base as a seed catch. You only need about 1/2 inch of solid lip around the base interior to keep smaller seeds from sifting through. Check that the base disk screws are still snug and that the glue joint hasn't cracked after weathering.
Once you've got your ring feeder running smoothly, you might find yourself curious about variations: a spinning feeder that physically discourages squirrels, a ball-style feeder for suet or fat balls, or a covered dome that gives even more rain protection. If you want even more rain and splash protection, you can switch to a covered dome style and adapt the same materials and basic construction steps. All of those builds share the same material principles (untreated wood, galvanized hardware, bird-safe finishes), so the skills you used here transfer directly.
FAQ
What seed should I use in a bird feeder ring, and what should I avoid?
Use mixes that are meant for small perching birds, such as black oil sunflower (whole or hulled), safflower, and millet. Avoid seed blends with lots of cracked corn or very fine dust, because fines collect in the bottom area and get damp faster, increasing mold risk.
How do I stop bigger birds from taking over the ring feeder?
If grackles or starlings are dominating, switch to a smaller opening strategy, use 1/4-inch mesh on the lower half, and consider making the outer perch area narrower so larger birds do not feel stable while smaller finches can still reach the seed.
My feeder attracts squirrels. Besides a baffle, what else helps?
Reduce attractants by using smaller, frequent refills instead of large loads, keep the roof overhang tight (at least 1 inch past the mesh), and place the feeder so there are no nearby hiding spots within jump distance, especially thick shrubs and fence posts.
Can I make the ring feeder bigger or smaller than the typical 6 to 8 inch diameter?
Yes, but keep the geometry in proportion. If you scale up, ensure the roof overhang fully covers the top ring and plan for stronger base support so the hardware cloth does not sag under seed weight. If you scale down too far, birds may not perch comfortably and larger species may not reach.
What is the best way to protect the seed from rain without blocking birds?
Make the roof extend at least 1 inch beyond the mesh on all sides, and if your area gets driving rain, add a second wider disk 2 to 3 inches above the first. Keep the entrance area open around the perimeter so birds can still feed from multiple sides.
How often should I clean a ring feeder, and do I need to rinse after using bleach?
Clean at least monthly, and more often in warm or humid weather. After the bleach soak, rinse thoroughly until there is no bleach odor, then air-dry completely in direct sun or a well-ventilated area before refilling.
What should I do if birds start ignoring the feeder after I move it?
Give it 7 to 10 days for discovery. During that time, you can increase visibility by adding a small amount of seed on the top roof disk or the ground below. Also check for predator cover near the new placement, since cats hide cover close to feeding areas.
How can I tell if moisture has gotten into the seed?
Look for clumping, dark patches, or a musty smell. If you see any of these signs, discard the affected seed, wipe the interior, and let the feeder dry before adding fresh seed.
Can I use the feeder indoors for aviary birds?
Yes, but avoid treated wood and keep all edges smooth to prevent injuries. Because squirrels are not a factor indoors, focus on ventilation and placement so droppings and hulls do not land on furniture, and consider placing it over a removable tray for easier cleanup.
Is it okay to leave the feeder outside during winter?
Generally yes if materials are weather-resistant, but expect more frequent checks. Before loading in wet weather, inspect cut edges of the hardware cloth for early rust, and confirm the roof overhang still blocks splash and direct rain.
Next Article
How to Make a Bird Feeder Cover: Step by Step Guide
Step-by-step plan to build a covered platform bird feeder with roof, drainage, secure mounting, and easy maintenance.