The fastest fix for a wobbling bird feeder pole is almost always the same: it isn't buried deep enough. For most standard poles, you need at least 12 inches in the ground, and closer to 20 inches if you're dealing with loose or sandy soil, heavy feeders, or regular wind. Get the depth right first, and half your stability problems disappear. If that's already done and the pole still moves, the cause is usually a loose base socket, soft soil, or a feeder that's creating too much leverage at the top. All of those are fixable with the right approach.
How to Stabilize a Bird Feeder Pole: Step-by-Step Fixes

Marcus Brennan
1 May 2026
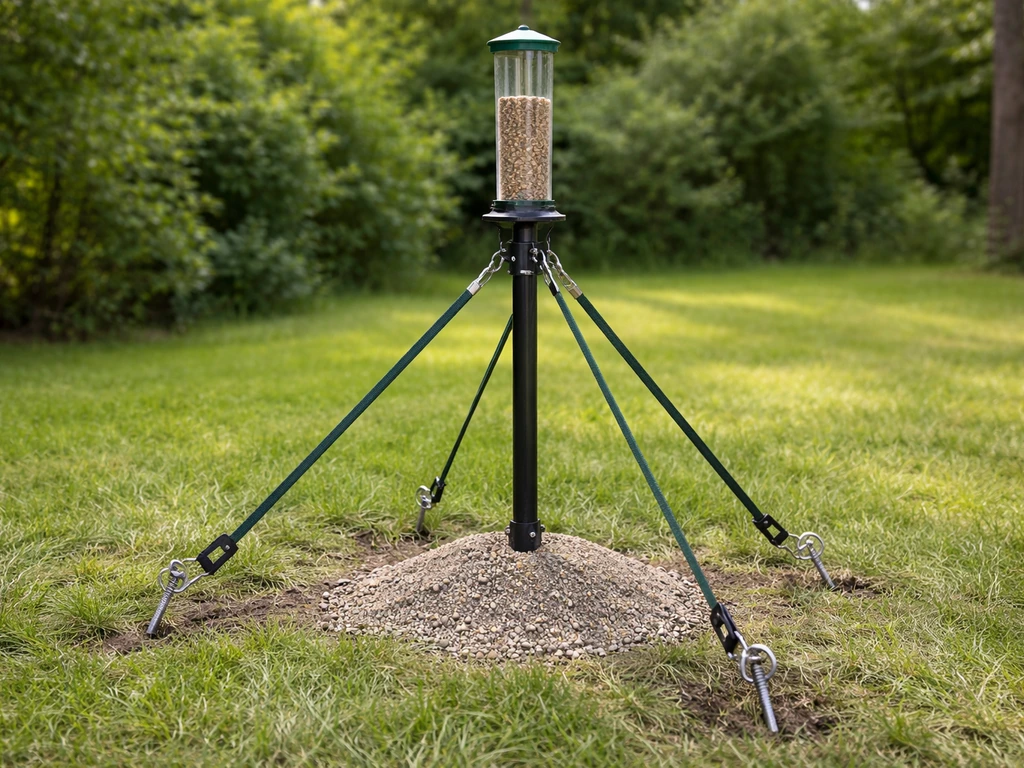
Figure out why your pole is wobbling first
Before you grab extra stakes or concrete, spend two minutes diagnosing the actual problem. A wobble that comes from soft soil needs a completely different fix than one caused by a loose coupler or an overloaded feeder arm. Misdiagnosing it means you'll fix the wrong thing and the pole will still lean come next windstorm.
Try to rock the pole by hand. If the whole thing moves at ground level, the issue is underground, either not deep enough or the soil around it has loosened. If the pole itself stays firm but the upper section sways, the problem is likely a loose joint, a coupler that needs tightening, or feeder weight that's pulling the top off-center. If the pole leans in one direction without much rocking, the install wasn't perfectly vertical to begin with, which compounds over time as the soil shifts.
- Rocks at ground level: not deep enough, or soil has loosened around the base
- Upper section sways but base is firm: loose coupler, joint, or unbalanced feeder weight
- Leans in one direction: was installed off-vertical, or soil has eroded on one side
- Wobbles only in wind: insufficient depth for the pole height and feeder load
- Tipping after rain: soil softens around the base and loses grip
Also look at the feeder itself. A large, heavy feeder or a multi-arm setup creates leverage the same way a sail does, and even a well-installed pole can be overwhelmed if the weight ratio is off. This is especially true with wire-hung feeders that swing freely and create oscillating load on the pole. If you need to adjust the hardware length while you do this, see how to shorten bird feeder wire as a related option for reducing excess swing.
Pick the right pole base and location before you dig
Where and how you set the base determines everything else. Once you choose the right spot, follow a step-by-step guide for how to put a bird feeder pole in the ground so it stays stable as the soil settles. A pole that's perfectly stabilized in the wrong spot will just need to be moved later. Aim for ground that has some natural firmness to it. Hard-packed native soil, loam, or turf is ideal. Avoid spots near drainage paths where water pools, close to large tree roots that will make driving the pole impossible, or on top of loose fill or freshly turned garden beds where there's no compaction to grip.
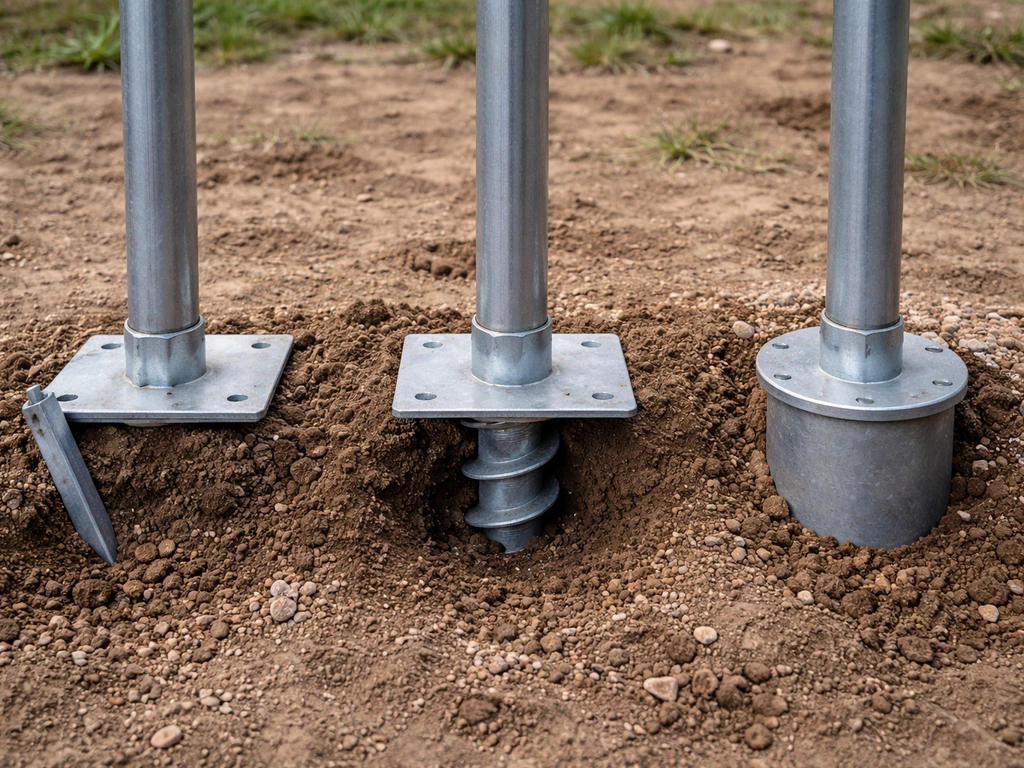
The base type matters too. Threaded ground sockets and auger-style bases grip much better than simple pointed spike bases, especially in softer ground. If you're setting up a new pole system and stability is a priority, an auger socket is worth the modest extra cost. If you already have a spike-style base that's wobbling, don't just push it deeper with a mallet. You'll likely bend it. Instead, look at the add-on solutions covered below.
| Ground Type | Best Base Style | Notes |
|---|---|---|
| Hard-packed lawn or clay | Spike base or auger socket | Spike works fine with enough depth; auger gives extra hold |
| Loose or sandy soil | Auger socket (20-inch depth) | Spike bases pull out easily; auger is much more reliable |
| Rocky or hard ground | Surface mount plate or sleeve with concrete | Driving any spike is difficult; pour a small concrete collar instead |
| Soft garden bed or mulch | Auger socket with concrete collar or sleeve | No natural compaction; need added structure |
| Patio or deck | Weighted base or flange-mount to surface | In-ground options aren't available; use ballast or bolt down |
Ground-mount stabilization: stakes, augers, and sleeves
This is the most reliable category of fixes because it addresses the root cause directly. The goal is to get more pole or more anchor material into the ground so the surrounding soil has more to grip.
Auger ground sockets
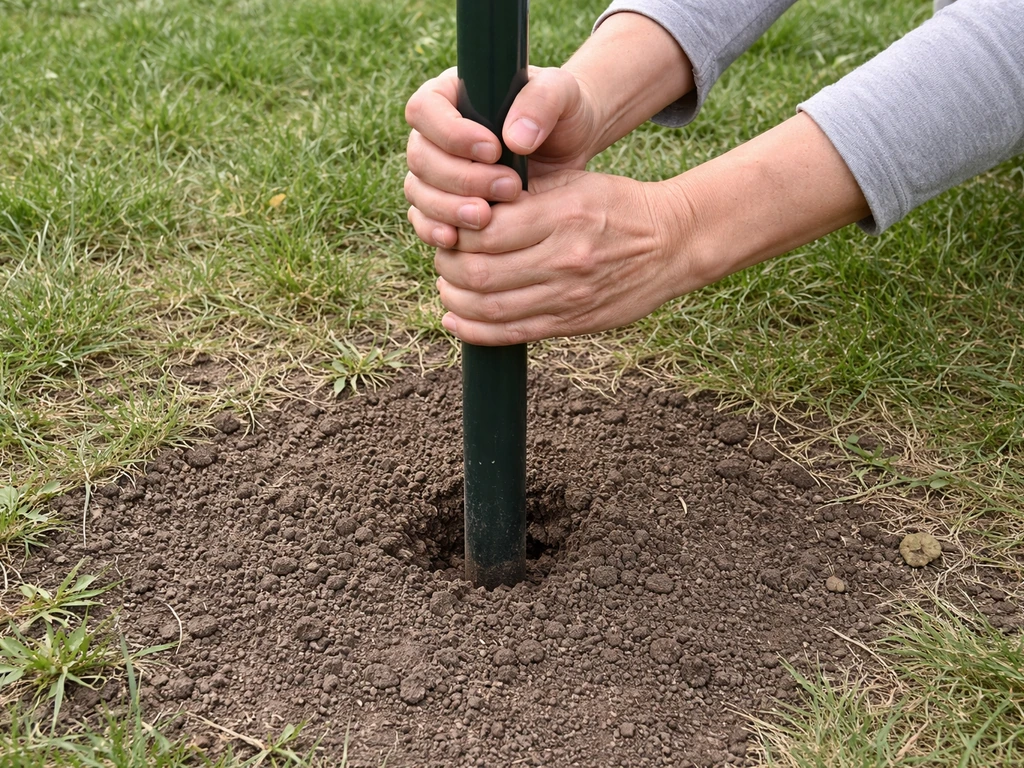
An auger-style ground socket is the best single upgrade you can make to an unstable pole setup. Products like the Erva Twister twist 20 inches into the ground and include a set screw that tightens against the pole to lock it in place. To install one, you use the built-in leverage holes to twist it in by hand or with a bar. Because it's threaded, it pulls soil inward as it goes rather than just displacing it like a spike.
The result is a grip that's significantly more resistant to both lateral wobble and vertical pull-out. For most lawn and garden soils, 20 inches is enough. In very loose or sandy ground, pair the auger with a concrete collar at the top for extra support.
Driving deeper with stakes
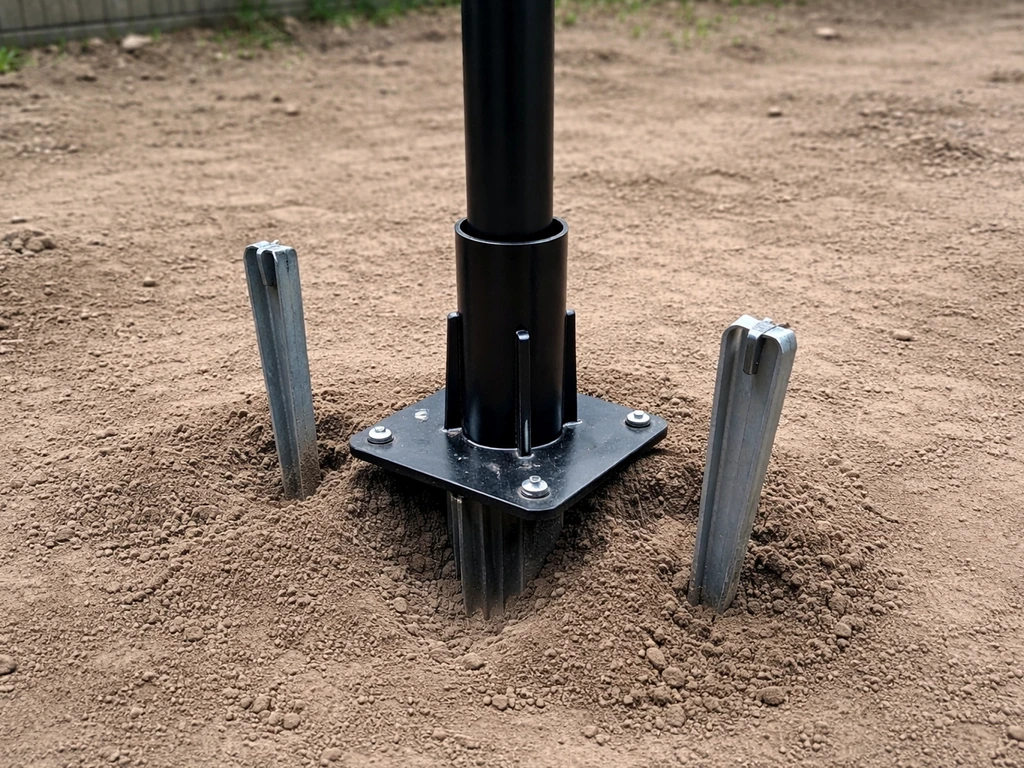
If you're working with a simple spike pole and don't want to replace the base, the next best option is adding supplemental stakes. Drive two or three heavy steel ground stakes (the kind used for fencing or electric fence posts) into the ground within a few inches of the pole, then wire or clamp them to the pole shaft.
Heavy steel T-posts work especially well for this: drive them so the pole is effectively sandwiched between two posts, then use hose clamps or heavy wire to lash them together tightly. This approach won't look elegant, but it works very well for poles in open areas with persistent wind. The key is to drive the posts as deeply as you can. Shallow stakes just give the wobble more pivot points.
Ground sleeves and concrete
For a permanent or semi-permanent setup, a buried sleeve is the most solid option. You dig or bore a hole at least 12 to 18 inches deep, drop in a length of larger-diameter steel pipe or a purpose-built sleeve, and then either pack it with compacted gravel or pour a concrete collar around it. Your feeder pole then slides into the sleeve. This setup also makes it easy to remove or reposition the pole seasonally without disturbing the anchor.
In areas with harsh winters or sustained high winds, this approach with a concrete pour is really the only setup that doesn't need annual re-tightening. The one thing to get right is making sure the sleeve is perfectly plumb before the concrete sets. Use a level and brace it temporarily while the mix cures.
Use ballast and lower the center of gravity
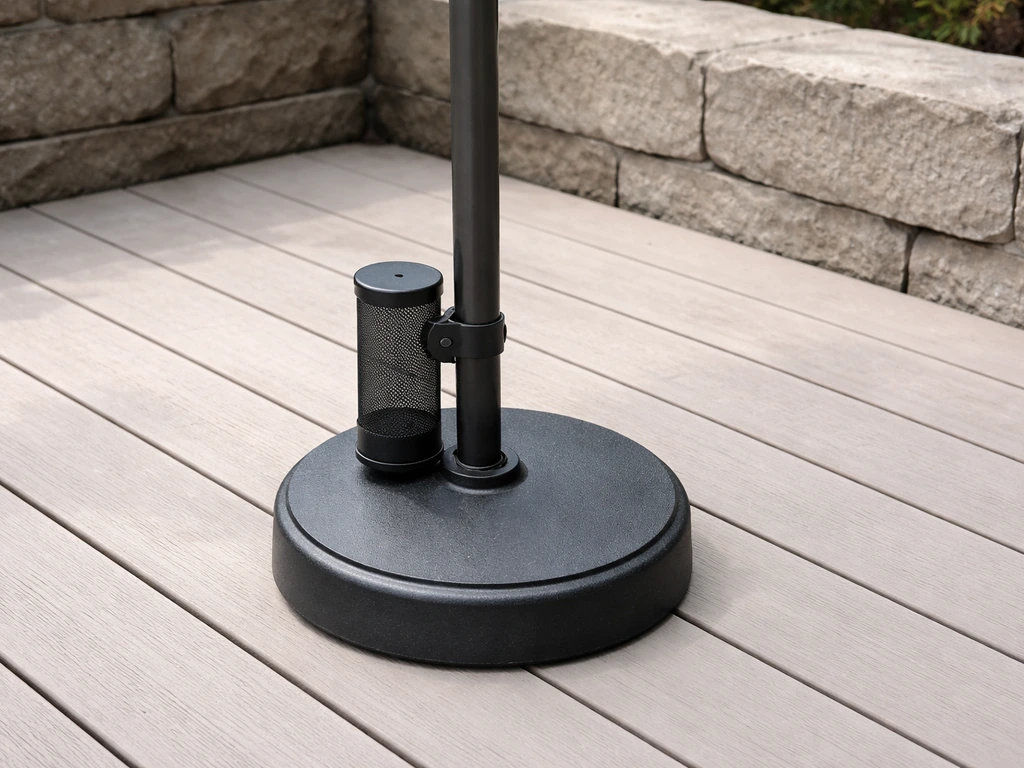
Sometimes you can't go deeper into the ground, especially on patios, decks, or rocky spots. In that case, adding weight at the base and keeping the feeder lower on the pole both help significantly. Physics works in your favor here: a lower center of gravity means the whole system is harder to tip, and more mass at the base resists lateral movement.
For surface-mounted poles, use a weighted deck base or fill a planter base with concrete, gravel, or sand. Heavy stone planters work well because they're easy to find and add serious mass. A 30 to 50-pound base will handle most feeders in moderate wind without needing any ground anchoring at all. If you're mounting on a deck railing or fence post, use double clamps spaced at least 12 inches apart vertically rather than a single point mount. That spacing creates a moment arm that resists tilting.
On the pole itself, try mounting the feeder lower. A feeder hung at the very top of a tall pole acts like a pendulum weight at the end of a long lever. Dropping it even 6 to 12 inches reduces the effective torque on the base noticeably. This is especially worth doing if you have multiple feeders on the same pole and they're all near the top.
Bracing, guy-wires, and structural supports
For taller poles or setups in very exposed locations, lateral bracing is the most reliable way to stop sway that underground anchoring alone can't solve. The idea is to connect the pole to nearby fixed points so that wind load is distributed rather than absorbed entirely by the ground.
The simplest approach is attaching an auxiliary support: a second pole, a length of lumber, or a metal bracket secured to a fence post, shed wall, or other fixed structure. Use hose clamps or heavy wire to lash the two together. This doesn't need to be pretty to work well. Wire attached diagonally from the upper portion of the feeder pole down to a ground stake also works well, essentially the same principle as a guy-wire on a radio tower.
If you do use guy-wires, there's one important thing to know: they can be a hazard to birds, especially during low-light conditions when birds fly fast and at low angles. The Bureau of Land Management and APLIC guidance on utility structures recommends marking guy-wires with spiral vibration dampers or flight diverters to make them visible to birds in flight.
A peer-reviewed meta-analysis found that adding marked wire or bird flight diverters increases wire visibility and reduces avian collision risk [marking guy-wires with spiral vibration dampers or flight diverters](https://pubmed. ncbi. nlm. nih.
gov/21676031/). Guidance from ScienceDirect discusses how flight diverter designs, including spiral markers, are used to reduce bird collisions by increasing the visibility of wires spiral vibration dampers or flight diverters.
In a backyard setting, wrapping the wires with brightly colored tape or attaching small reflective markers is an easy way to address this. It's a small extra step that makes a real difference.
For a cleaner structural solution, the two-T-post sandwich method mentioned earlier works extremely well for tall poles in open yards. Drive two 7 to 8-foot heavy steel T-posts into the ground so the feeder pole sits between them, then clamp the assembly together at two heights. This essentially creates a tripod-style base that resists movement in every direction without any visible wires.
Lock the feeder down to stop tilt and swing
Even a rock-solid pole can end up with a tilting or spinning feeder if the mounting hardware isn't right. This is often overlooked because people assume the pole is the only variable, but a feeder that hangs off-center or rotates freely in wind adds stress to everything below it.
Start by checking that the feeder is centered on the mounting hook or arm. An asymmetrical load, like a feeder that's heavier on one side because of how it fills, pulls the arm sideways over time. If your pole uses a hook, make sure the feeder's hanger is seated fully and can't slide to one side.
For pole-mounted feeders that attach with a bracket, use the manufacturer's installation sequence: typically that means attaching the bracket to the pole first, verifying it's level, and then hanging the feeder. Birdfy's pole system, for example, uses hose clips for this kind of secure, repeatable attachment. If you still need help mounting items like a slinky-style accessory, follow a step-by-step guide on how to put a slinky on a bird feeder pole.
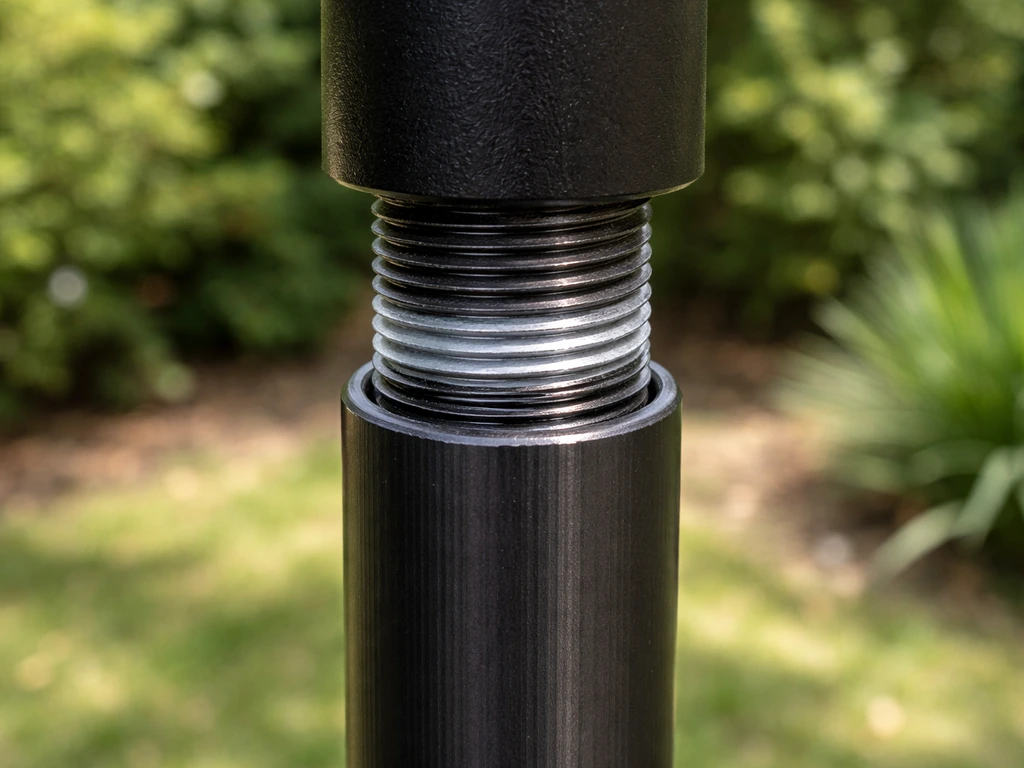
Check all set screws and couplers on the pole itself. A loose coupler between pole sections is a very common source of upper-section wobble that gets misdiagnosed as a ground problem. Tighten every joint by hand first, then use a wrench to add a firm quarter-turn. Don't overtighten on thin-walled poles or you'll deform the tube. If a set screw is stripped, replace it before reassembly rather than trying to work around it.
For feeders that sway excessively in wind, consider switching from a hanging hook mount to a direct bracket or clamp mount that holds the feeder rigid against the pole. A Reddit thread in r/howto also recommends immobilizing a pivoting feeder by adding friction at contact points, such as rubber, and securing the hardware with clamps or fasteners switching from a hanging hook mount to a direct bracket or clamp mount. This eliminates the pendulum effect entirely. It means birds can't rotate the feeder to feed from all sides, but it's worth it in exposed or windy locations.
Weatherproofing and keeping things stable long-term
Stabilization isn't a one-time job. Soil shifts with frost and thaw cycles, metal components corrode, and hardware loosens over time. Building in a short maintenance routine means you catch small problems before they turn into a toppled feeder.
Early spring is the ideal time for a full inspection, especially after a winter with freeze-thaw cycles that can heave and loosen even well-set poles. Check that the pole is still plumb by holding a level against it. Push it gently in each direction and feel for any give at ground level. If there's movement, pull the pole and re-set or tighten the base before continuing the season.
One thing to be careful about during maintenance: don't use grease or oil on the pole as a squirrel deterrent. Both the University of Nebraska-Lincoln and Wild Birds Unlimited have specifically flagged this as harmful to wildlife. Grease can coat feathers and fur, causing real harm to the animals you're trying to manage. There are much better options for keeping squirrels off the pole, including baffles, smooth-sleeve designs, and proper pole placement.
For metal poles, check for rust at ground level every spring. That's where moisture concentrates, and where corrosion weakens the pole fastest. A light coat of rust-inhibiting paint on the below-ground section before installation adds years to the pole's life. For any concrete collar, check for cracking. A small crack can let water in, which freezes and expands, and within a season or two you'll have a much larger problem.
- Check plumb every spring and after severe storms
- Tighten all set screws and couplers at the start of each season
- Inspect the ground-level section for corrosion or soft soil
- Look for cracks in any concrete collar and fill them with exterior sealant
- Verify guy-wires or braces are still taut and markers are visible
- Repack loose soil around the base with compacted gravel if needed
- Do not apply grease or oil to the pole at any time
Which method should you do first: a quick decision guide
Here's how to decide where to start, based on what's actually causing the problem. If the pole rocks at ground level, dig it out and either go deeper, switch to an auger socket, or set a sleeve with concrete. If you still want a quick, reliable way to keep bird feeder pole straight after adjustments, review the step-by-step stabilization options below. That's the fix.
If the pole is solid at ground level but the upper section sways, tighten all couplers and set screws and check the feeder's mounting hardware. If the pole is on a hard surface and can't go in the ground, add a heavy weighted base and mount the feeder lower on the pole. If you're in an exposed, windy spot and depth alone isn't enough, add the two-T-post brace or a guy-wire setup with visible markers.
Before you head to the hardware store, here's a quick checklist to verify stability after you've made your fix:
- Push the pole firmly in four directions at ground level. There should be no movement.
- Hold a level against the pole and confirm it's plumb in both axes.
- Check every coupler and set screw is tight along the full length of the pole.
- Hang the feeder and verify it sits level and centered, not tilting to one side.
- Return after the first rain or wind event and repeat the push test. Soil that looked firm can loosen quickly when wet.
- If you used concrete, wait at least 24 to 48 hours before loading the pole with feeders.
Getting the pole solid is the foundation for everything else you'll do with your feeding setup. Once it's stable, you can focus on the more fun stuff: placement, baffle selection, and what to put on the pole to attract the birds you want. If you want ideas on what to put on your bird feeder pole, focus on safe, balanced feeders and accessories that don't add extra leverage or sway what to put on the pole.
If you're also working through how to keep the pole straight over time or figuring out what to mount on it, both of those topics connect closely to what's covered here and are worth a look once the wobble is sorted. If you still need to stop squirrels from climbing, our guide on how to make a bird feeder pole slippery can help you choose the safest deterrent for your setup how to make bird feeder pole slippery.
FAQ
How can I tell if the wobble is from the ground versus the feeder hardware?
Do a two-step test, first with the feeder empty. If the pole still rocks at the base when the feeder is removed, the issue is underground or the socket. If the base is firm but the upper section moves with the feeder on, focus on couplers, set screws, and how the feeder hanger is seated and centered.
What’s the right way to “tighten” couplers and set screws without damaging the pole?
Tighten by hand first, then use a wrench for a small additional turn (about a quarter-turn). Stop if the pole feels like it’s deforming or if the set screw starts to bind, overtightening can crush thin-walled tubing and create a new wobble later.
Can I fix a wobbly spike-base pole just by pushing it deeper?
Usually not. If the pole is in a soft or shifting area, driving a spike deeper can bend the base or change the angle while the surrounding soil remains loose. A better approach is to add supplemental stakes near the pole, or switch to a threaded/auger socket or a buried sleeve if you want a more permanent anchor.
How deep should I install an auger socket if my soil is sandy or very loose?
If the install target is typically around 20 inches for loose conditions, use that as your starting point. Also consider adding a concrete collar at the top, because sandy soil can hold the auger thread well at first but still allow movement as surface layers dry, loosen, or erode.
What should I do if my pole leans more in one direction over time?
That often points to a slightly off-vertical install, then compounding as soil shifts. Check plumb with a level, then reposition or reset the base before tightening everything else. If you skip the plumb correction, tighter hardware may reduce noise but not stop the lean.
Is a guy-wire or diagonal brace safe and effective for backyard use?
It can be very effective at reducing sway, but visibility is critical. Mark any wire or brace with flight diverters or bright reflective markers so birds can see it, and avoid placing it where birds regularly pass at low height near the feeder.
How do I prevent a swinging wire-hung feeder from creating extra leverage?
Reduce the pendulum effect by shortening the wire so the feeder sits lower, and limit how freely it can swing sideways. If your system allows it, switch to a more rigid bracket or clamp mount in high-wind areas so the feeder does not rotate freely.
Will adding weight at the base help if I can’t dig deeper (patios or decks)?
Yes, as long as the mount is secure. Use a heavy weighted deck base or planter base, and for railing or fence mounting, use double clamps spaced vertically rather than a single clamp point. This increases resistance to tilting under wind loads.
How often should I inspect and re-tighten a stabilized feeder pole?
At least once in early spring after freeze-thaw cycles, then quickly check mid-season if your area has frequent storms. Feel for any ground-level give by pushing gently in different directions, and re-tighten only if you detect fresh movement or loosened joints.
Is it ever okay to use lubricant, oil, or grease on the pole or hardware?
Avoid it. Lubes can create unsafe residue for wildlife by coating feathers or fur, and some products can attract grime that makes set screws harder to grip. If squirrels are the problem, use baffles and proper anti-climb solutions instead of treating the pole surface.
What’s the best way to handle a pole that turns or the feeder that rotates in wind?
First, confirm the feeder is centered and fully seated on the hanger or bracket. Then check couplers and set screws, a slight off-center load can make the rotation progressively worse. If your current mount lets the feeder swing, consider changing to a rigid clamp or bracket mount.
Should I worry about rust or concrete collar cracking even if the pole seems stable?
Yes. Rust at ground level can weaken the pole from the inside over time, and small cracks in a concrete collar can let water in. That water can freeze and expand, creating movement later, so inspect these areas even when the pole looks straight.
Next Articles
Best Grease for Bird Feeder Pole: Safe Options and How to Apply
Find the safest grease for bird feeder poles, when to grease, and step-by-step application to stop sticking and pests.

How to Put a Slinky on a Bird Feeder Pole
Step-by-step guide to install a slinky on a bird feeder pole to deter climbing pests, with placement, tools, fixes, and
How to Make a Tube Bird Feeder Step by Step
Step-by-step how to make a tube bird feeder with materials, safe mounting, maintenance, and fixes for leaks and clogs.