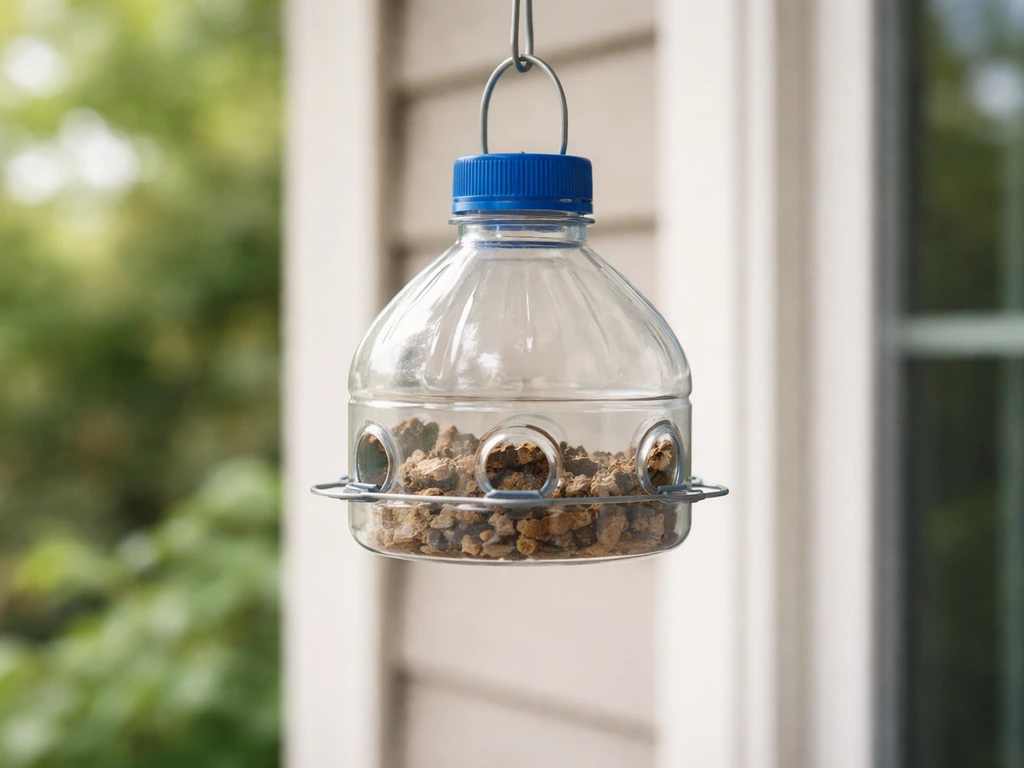
The IIT bottle top bird feeder with hanger is a kit that turns a used plastic bottle into a working hanging feeder. You screw the IIT feeder top onto a standard bottle, cut or use pre-formed feeding ports in the body, fill the bottle at least halfway with birdseed, and hang the whole thing from the integrated hanger. That's the core of it. The rest is about doing it right so birds can actually eat, the feeder doesn't spin or drip seed everywhere, and squirrels don't clean it out before sunrise.
IIT Bottle Top Bird Feeder With Hanger: DIY Guide

Marcus Brennan
30 Apr 2026
What the IIT bottle top feeder actually includes

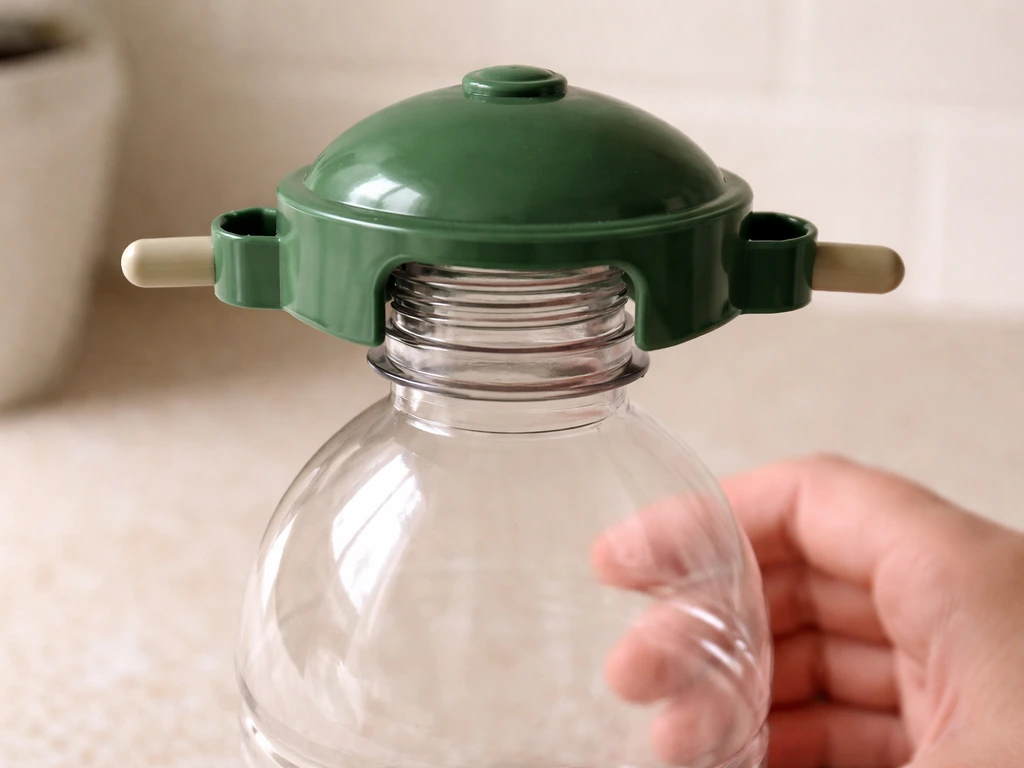
The IIT kit is designed around one simple idea: the plastic bottle you already have at home becomes the seed reservoir, and the IIT top replaces its original cap. The kit typically includes a feeder top unit (which screws onto the bottle neck), a built-in or attached hanger loop or wire for suspension, and feeding ports or openings built into the top or sides of the assembly. Some versions include a small tray or lip to catch seed so birds have somewhere to land and eat without flinging seed to the ground.
The bottle itself is not supplied because the whole point is reusing one you have. A standard 16 oz or 2-liter bottle both work, though a 2-liter gives you more seed capacity and means fewer refills. The feeder top controls how seed flows out, so the bottle is really just a gravity-fed storage tank. Understanding that relationship makes the whole assembly much easier to troubleshoot later.
What you'll need before you start
Gather everything before you begin. The assembly goes fast once you have it in front of you, but hunting for scissors mid-build is annoying.
- IIT bottle top bird feeder kit (the feeder top with integrated hanger)
- A clean, dry plastic bottle (16 oz, 1-liter, or 2-liter; wider bottles give better seed flow)
- A sharp craft knife or scissors (for cutting feeding holes if your bottle doesn't have them yet)
- A marker pen or pencil (for marking hole positions)
- A coin or washer as a sizing guide for the feeding holes (aim for roughly coin-sized openings)
- Birdseed appropriate for your local birds (black oil sunflower seed works for a wide range)
- A sturdy hanging point: a shepherd's hook, tree branch, or porch hook rated for at least 5–6 lbs
- Optional: monofilament fishing line or wire for extra hanger security
- Optional: a small plastic tray or saucer to catch fallen seed beneath the feeder
One note on seed choice: fine seeds like millet or nyjer can clog the ports faster than coarser seeds. Black oil sunflower is the most forgiving for a bottle-top style feeder because the seeds are small enough to flow freely but not so tiny that they pour out uncontrolled.
Building and assembling the feeder
This build takes about 15 minutes from start to finish. The main thing you can get wrong is the hole size and placement, so read through before you cut anything.
- Wash and dry your bottle completely. Any moisture inside will cause seed to clump and mold quickly.
- Hold the bottle upright and mark two feeding holes on opposite sides near the bottom third of the bottle. Opposite placement keeps the feeder balanced when it hangs.
- Cut the holes using a craft knife or the tip of your scissors. Size them to roughly the diameter of a large coin. Too small and seed won't flow; too large and seed pours out without birds controlling the rate. If the IIT top already has integrated ports, skip this step.
- Smooth any rough plastic edges around the holes with the back of your scissors or a nail file. Sharp edges can injure birds.
- If your bottle doesn't have a perch, thread a short wooden dowel (a pencil works in a pinch) through two small holes punched directly below each feeding port. The dowel should extend about 3 inches on each side.
- Fill the bottle at least halfway with birdseed before attaching the feeder top. Filling to at least half keeps enough weight in the bottle that it hangs with stability rather than swinging empty.
- Screw the IIT feeder top firmly onto the bottle neck. Make sure it's hand-tight and won't unscrew from its own weight when hanging.
- Turn the bottle upside down (the feeder top now faces down) and check that seed flows gently to the ports without pouring out in a rush. If it pours, your holes are too large; cover part of them with a small strip of tape and retest.
Attaching the hanger and choosing where to hang it
Connecting the hanger to the feeder
The IIT top includes a hanger loop or attachment point. Before you hang the feeder outside, tug the hanger firmly with both hands while the filled bottle is attached. The same basic hanger-tug and secure-connection checks also apply when you are figuring out how to hang an Mr. Bird WildFeast wreath.
It should hold at least a couple of pounds without flexing or pulling loose. If you also want the hanging part to work reliably, follow these tips on how to make bird seed hangers so the connection stays secure. If you are building your own hanging setup, the same principles apply: use a secure connection and sturdy hardware so the feeder stays stable follow these tips on how to make bird seed hangers. If the connection feels weak, reinforce it by wrapping a loop of wire or strong zip tie around the bottle neck just below the feeder top and threading that through the hanger loop as a backup.
Height and placement
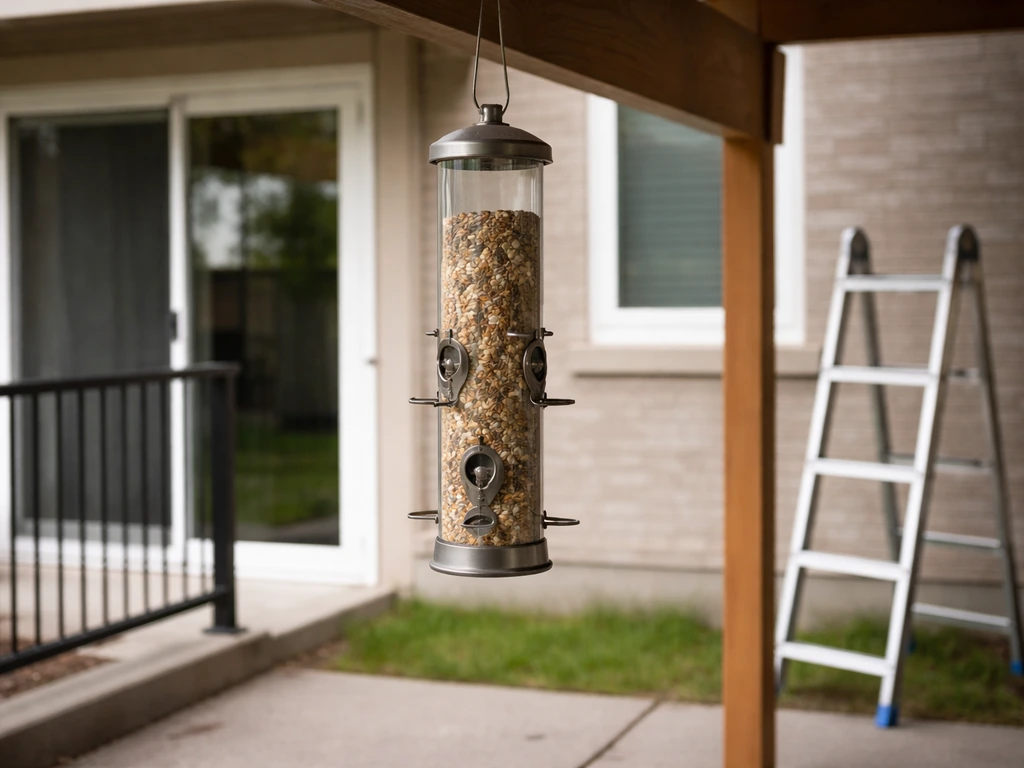
Hang the feeder so the feeding ports sit between 5 and 6 feet off the ground. That height keeps it accessible for you to refill without a ladder, puts it high enough to deter ground-level predators, and matches what birds are naturally comfortable approaching. If you're mounting on a pole rather than a tree branch, Audubon recommends at least 5 feet off the ground with a cone baffle below.
Window placement matters too. Position the feeder either within 3 feet of a window or more than 30 feet away from one. That sounds counterintuitive, but feeders right next to glass don't give birds enough flight speed to injure themselves on impact, while feeders farther away give birds time to redirect before they reach the glass. The dangerous zone is the 4- to 29-foot range.
Stopping the spin
Hanging feeders almost always spin in the wind, and a spinning bottle feeder throws seed. Fix this by using two anchor points instead of one: run a second thin wire from a lower point on the bottle down to a nearby branch or hook at a slight outward angle. It doesn't need to be tight, just enough to dampen rotation. Alternatively, hang the feeder inside a covered area like a porch or pergola where wind is reduced.
Filling it right, bird access, and spillage problems
Always fill the bottle while it's upright (feeder top off), then screw the top on and invert it to hang. Trying to fill an inverted bottle through the ports is how you end up with seed on your shoes. Fill to at least half capacity so the feeder has enough weight to hang steadily, but leave a small air gap at the top so seed can settle without pressure-locking against the ports.
If seed is constantly spilling out without birds eating it, the ports are too large or the seed type is too fine for those openings. You can temporarily reduce port size by applying a strip of weatherproof tape across part of the hole and testing again. Sunflower chips and fine nyjer seed both tend to pour rather than trickle, so size your ports for the seed you actually use.
Balance is the other common issue. If the feeder leans to one side, the perch or the ports aren't symmetrically placed. Birds feeding from one side only will shift the center of gravity and cause the bottle to tilt. Rebuild any asymmetrical holes by patching with a scrap of plastic and cutting new ones directly opposite each other.
To reduce waste from dropped seed, place a small tray or saucer at least 5 feet off the ground directly beneath the feeder. This catches the overflow and actually creates a second feeding surface for birds that prefer a platform. Just clean that tray as regularly as the feeder itself.
Keeping squirrels and other pests out
No feeder design is fully squirrel-proof, and a lightweight plastic bottle feeder is an especially easy target. To deter ants, use physical ant barriers like ant moats or insect guards around the feeder and avoid drips or residue that can create trails for ants to follow. The honest approach is layers of deterrence rather than expecting one trick to solve it.
- Placement is your first defense: hang the feeder at least 8 to 10 feet from any solid launch point like a tree trunk, fence, roof edge, or building wall. Squirrels can jump surprisingly far horizontally.
- If you're using a pole mount, add a cone-shaped baffle at least 17 inches in diameter below the feeder and position it at least 4 feet off the ground so squirrels can't reach over it.
- Avoid hanging from tree branches directly, since squirrels will just walk down the branch. A freestanding shepherd's hook in the middle of an open area is harder to reach.
- For ants, apply a thin coat of petroleum jelly or use a commercial ant guard on the hanger wire above the feeder. Ants follow the wire down; breaking their trail keeps them off the seed.
- Don't use cayenne pepper in the seed as a squirrel deterrent. It can irritate birds' respiratory systems and isn't worth the risk.
Check the feeder and hanger hardware monthly for gnaw marks or chewed plastic. Squirrels will enlarge ports if they can grip the feeder, so any widened holes should be repaired or the bottle replaced before it becomes a full spillage problem.
Cleaning, seasonal upkeep, and when to replace parts
How to clean it
Clean your feeder at least once a month, and more often in hot, humid weather when mold and bacteria grow fast. The cleaning process is straightforward: disassemble the feeder top from the bottle, empty any remaining seed, and wash both parts with warm soapy water. Then soak everything in a solution of 9 parts water to 1 part bleach for 10 minutes. Rinse thoroughly until you can't smell bleach at all, and let both parts air-dry completely before refilling and reassembling. Never put seed into a damp feeder.
A bottle brush is the right tool for scrubbing the inside of the bottle where seed oils and debris stick to the walls. The ports and around the feeder top threads are the two spots most likely to harbor mold, so pay extra attention there. If the plastic has developed a grey or black discoloration that doesn't scrub off, it's time to swap in a new bottle. The IIT feeder top is reusable; the bottle is replaceable for free.
Seasonal adjustments
| Season | Main Challenge | What to Do |
|---|---|---|
| Spring | Mold from rain and humidity | Clean every 2 weeks; use a smaller bottle so seed turns over faster |
| Summer | Seed spoiling quickly in heat | Refill with smaller amounts more often; hang in partial shade |
| Fall | High bird traffic before migration | Increase fill frequency; check hanger hardware for wear |
| Winter | Seed freezing or clumping in ports | Use oil-rich seeds like black oil sunflower; bring feeder in overnight if temperatures drop below freezing regularly |
In winter, check the hanger wire and the feeder top connection monthly. Cold temperatures make plastic brittle, and a cracked bottle neck won't hold the feeder top securely. If the feeder top feels loose or the bottle shows cracks around the neck, replace the bottle before the feeder comes apart mid-hang.
When to replace components
The bottle should be replaced any time it cracks, discolors badly, or develops an odor that doesn't wash out. Because bottles are free, there's no reason to keep a compromised one in service. The IIT feeder top itself is more durable, but inspect the hanger attachment point and port edges every few months. If the hanger loop shows stress cracks or the connection to the top feels loose, reach out to the manufacturer or replace the kit. A feeder that drops from 5 feet onto a bird or a pet is not a minor inconvenience.
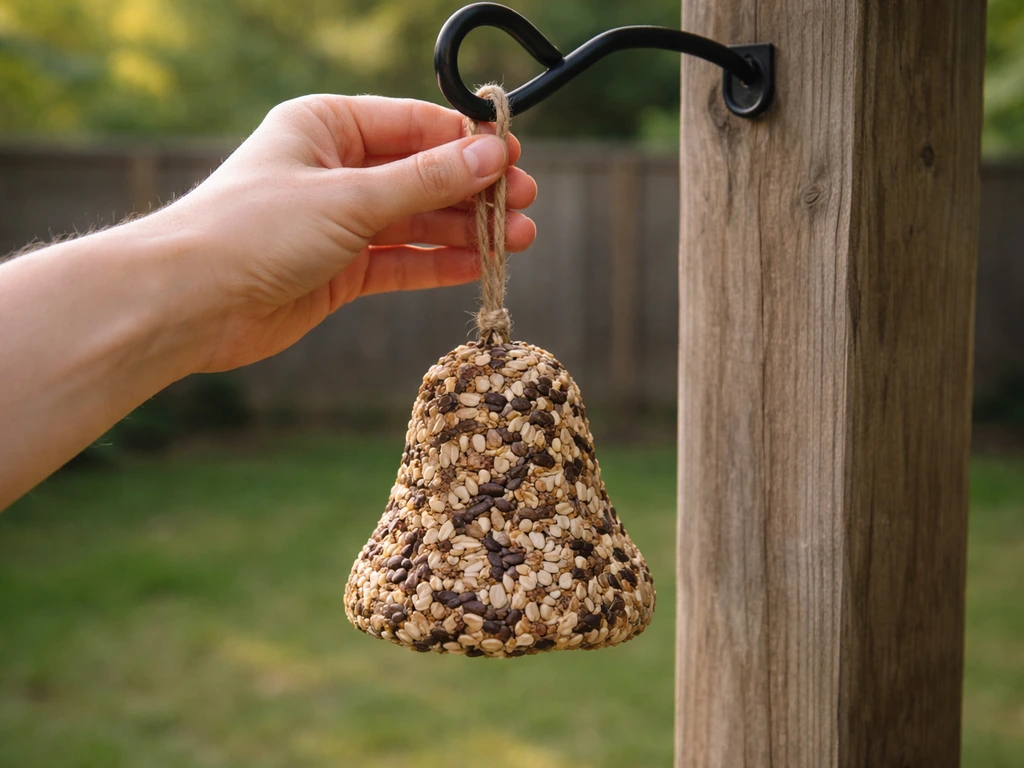
If you get interested in other hanging feeder formats beyond the bottle-top style, many of the same placement and hanger principles apply to seed bells, seed wreaths, and other DIY designs. The core logic of height, launch-point clearance, and regular cleaning carries across all of them. But the bottle-top feeder is a genuinely practical starting point: low cost, easy to clean, and simple enough to rebuild in 15 minutes if something goes wrong. If you want a more festive project, you can also use similar hanging-feed basics to make a Christmas wreath bird feeder that attracts birds during the holidays.
FAQ
Can I use this bottle-top feeder for wet or homemade bird mixes?
Yes, but only if you can keep the ports from being constantly wet and clogged. Use coarser, drier ingredients (like sunflower chips) and avoid sugary mixes, because liquids can run through the ports and spoil quickly. If you do run a wet feed, clean more often and stop using it at the first sign of sour smell or residue.
What seeds are most reliable in the iit bottle top bird feeder with hanger?
It usually works, but you need to match the ports to the seed size. Fine seeds like nyjer and millet tend to bridge or pour out uncontrollably, so test with short sessions and adjust port size or tape coverage. For easiest flow, stick with black oil sunflower or sunflower chips.
Why does my feeder keep leaking seed even after setup?
If you see seed leaking when no birds are feeding, it is typically a port sizing issue or seed settling too aggressively. Check that you left an air gap at the top, confirm the feeder is level when hung, and verify the bottle is not overfilled. Temporary tape across part of a port hole can help you dial in the flow before doing a full rebuild.
How long will it take birds to start using a new bottle-top feeder?
Birds will take longer to find it if it is new or cleaned recently, so start with a small amount and place it in a consistent, safe location. Once birds start using it, refill promptly and avoid changing seed types every week, because switching can reset how quickly birds learn the routine.
Can I hang the feeder under a roof or eave to reduce wind?
Yes, but avoid covering the whole feeding area in a way that traps moisture. A porch roof or pergola is ideal because it reduces wind rotation while still allowing airflow. If you use any cover, keep ports unobstructed and clean more frequently, since sheltered spots can stay damp.
My feeder spins in the wind, what is the best fix?
Don’t rely on a single hanger point if you notice spinning. Use the two-anchor method (a second wire from a lower bottle point to a nearby hook) and confirm the second connection has just enough tension to dampen motion. Also, make sure the bottle neck and feeder top connection are tight before you hang it.
How can I confirm the hanger and feeder top connection are strong enough before outdoor use?
Use a “test hang” indoors or in a garage first, then do a careful outdoor check. If the feeder top feels loose when tugged with the bottle filled, re-seat the connection and add the backup wrap (wire or a strong zip tie) around the bottle neck just below the top. Never hang it if the hanger loop flexes or the feeder top twists.
What causes the feeder to tilt or feed mostly from one side?
If the bottle-top kit lets you choose port placement, keep holes close to the feeder top’s intended feed zone and cut matching openings on opposite sides. Rebuild asymmetry by patching and cutting again, because even small side imbalances can tilt the bottle and cause uneven feeding and waste.
How do I decide whether to keep or replace a stained bottle?
If the bottle shows grey or black staining that scrubs off, you can often clean thoroughly. If the discoloration does not come off after proper scrubbing and drying, replace the bottle, since oils can become embedded in plastic and keep attracting residue. Also sniff it after cleaning, if it still smells, retire it.
How often should I clean the iit bottle top bird feeder with hanger in hot weather?
A clean, dry feeder holds up much better. In hot weather, increase cleaning frequency because mold forms faster in warm conditions and when moisture collects around ports. When in doubt, empty it and wash rather than topping it off.
What should I do if squirrels are taking over the feeder?
If squirrels are enlarging ports or chewing the bottle, repair widened holes quickly or replace the bottle, because damage grows fast. Improve the deterrence stack by adding a catch tray, keeping the feeder placement at recommended heights, and checking hardware monthly for gnaw marks.
What winter checks matter most for this bottle-top hanging feeder?
Seasonally inspect at the hanger attachment and the bottle neck connection, especially in winter. Cold makes plastic more brittle, so if you see cracks around the neck or the feeder top does not feel firm, replace the bottle before it becomes a fall risk.
Next Article
How to Hang a Bird Seed Bell: Step-by-Step Guide
Step-by-step how to hang a bird seed bell feeder, choosing location, height, hardware, secure attachment, and safe stabi