You can make a functional bird water feeder in about 20 minutes using a plastic bottle or milk jug, a shallow dish or tray, and a few basic tools. If you want to build a hopper-style feeder instead, you can use the same general sizing and safety ideas but with a design that dispenses food from a raised reservoir bird water feeder. The key is keeping the water shallow (no more than 1 to 2 inches deep), stable enough that it won't tip in a breeze, and easy to refill and clean. Birds aren't picky about the container, they care about safe, accessible water with a gentle slope to wade in from the edge.
How to Make a Bird Water Feeder From Household Items

Marcus Brennan
23 Apr 2026

Drinking feeder vs. bathing station: pick the right design first
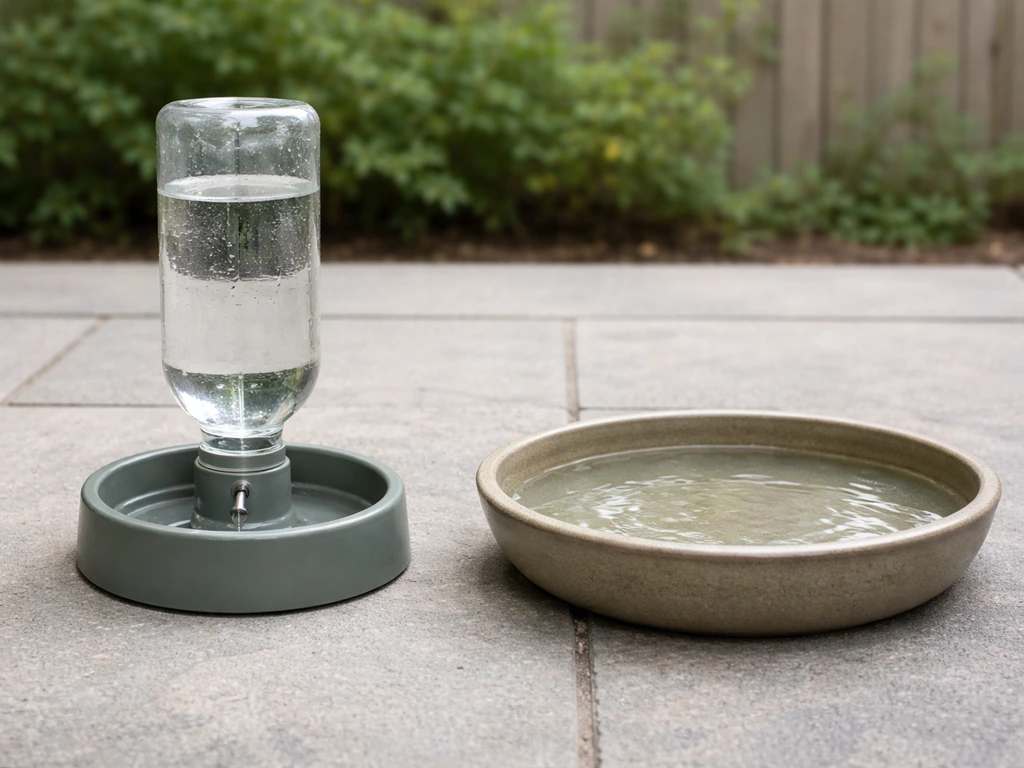
Before you start cutting anything, decide what you're actually building. A drinking feeder delivers a slow drip or trickle that birds can sip from, usually via a bottle inverted over a shallow tray. A bathing station is a wider, open dish where birds can wade in, splash around, and drink at the same time. Both work well, but they serve slightly different purposes and suit different yard setups.
If you have a small yard, a fence, or a deck railing, a drinking feeder (bottle-fed tray style) is your best bet. It takes up almost no space, keeps water cleaner because the supply is enclosed, and refills itself as the tray empties. If you have an open garden bed or a post you can mount something on, a wider bathing dish will attract more bird species and more activity overall. Most of the builds below work as both, depending on how wide a dish you use.
What you probably already have at home
You don't need to buy much for this. The best bird water feeders I've made came from things I was about to recycle. Here's what to look for:
- A clean plastic bottle (1-liter or 2-liter soda bottle, or a 1-gallon milk jug) — this becomes your reservoir
- A shallow dish, plant pot saucer, or plastic container lid — this is the actual drinking/bathing tray
- A drill or a nail and hammer (to make a small hole in the bottle cap)
- A length of wire, zip ties, or twine (for hanging or securing)
- Waterproof adhesive or silicone sealant if you want a leak-proof seal between the bottle and dish
- Coarse sand, pebbles, or river stones to line the tray bottom (gives birds grip and helps control depth)
- Optional: a wooden dowel, stick, or short perch piece if you want a landing spot near the edge
Avoid anything with sharp edges after cutting, any painted or varnished surfaces inside the water contact area, and containers that previously held cleaning products or chemicals. Even after washing, residue can harm birds. Stick to food-grade plastics and unfinished wood or natural materials for any parts that touch the water.
How to build it: two simple DIY builds
Build 1: inverted plastic bottle feeder (beginner, about 15 minutes)
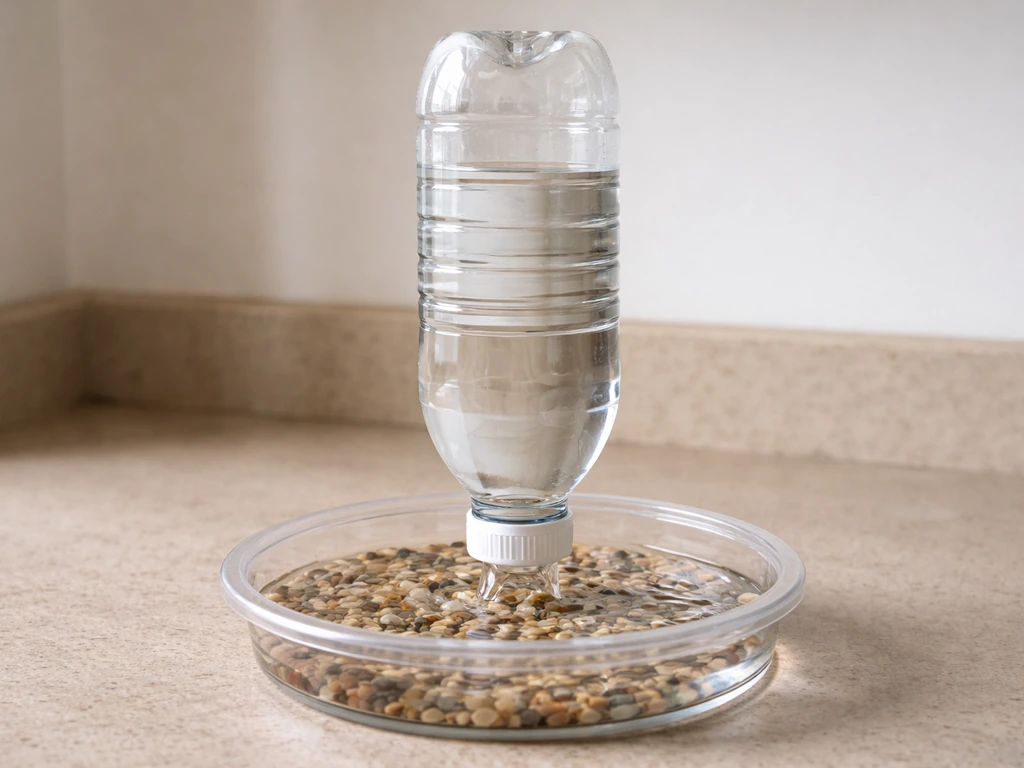
This is the easiest build and the one I'd recommend to anyone trying this for the first time. If you're experimenting with other feeder types, you can also follow the same DIY approach in how to make a jelly bird feeder, just with a different style of food and container. The bottle acts as a gravity-fed reservoir, slowly releasing water into a shallow tray as birds drink. Here are the key steps for building an automatic style so it keeps refilling and stays usable gravity-fed reservoir. You can also follow similar build steps for a nectar feeder, just use nectar-safe materials and keep the station easy to clean how to make a nectar bird feeder.
- Take a clean 1-liter or 2-liter plastic bottle and rinse it thoroughly. Remove any labels.
- Use a nail or small drill bit (around 1/16 inch) to poke one small hole in the bottle cap. This controls the drip rate — one hole is enough.
- Fill the bottle with fresh water and screw the cap on tightly.
- Find a shallow plant saucer or plastic lid that's at least 6 to 8 inches wide. Place a handful of small pebbles or coarse sand in the bottom to give birds traction.
- Turn the bottle upside down and rest the cap end inside the center of your tray. The water will slowly drip out and fill the tray to a shallow level, then stop when the water level covers the hole (basic vacuum pressure keeps it controlled).
- Secure the bottle upright so it won't tip — you can wire it to a post, use a zip tie through a hanging bracket, or wedge it between two bricks if it's sitting on a surface.
- Check the depth in your tray. You want about 1 inch at the edges and no more than 2 inches in the center. Add more pebbles if it's filling too deep.
That's genuinely it. This feeder works on the same principle as a self-watering plant pot. Once you've got the pebble depth right, it stays at a safe level on its own until the bottle runs dry.
Build 2: milk jug reservoir feeder (a bit more hands-on, about 30 minutes)
A gallon milk jug holds more water and lasts longer between refills, which is great if you're going away for a day or two. This version takes a little more cutting but gives you more control over the access opening.
- Rinse your milk jug completely. Cut a large rectangular opening on one of the wider flat sides of the jug, starting about 3 to 4 inches up from the base. Leave the bottom 3 inches intact — this becomes your water basin.
- Smooth any rough cut edges with sandpaper or a lighter (carefully melt the plastic edge just enough to remove sharp points).
- Drill or poke two small drainage holes in the very bottom corners of the jug to prevent stagnant overflow pooling after rain.
- Add pebbles or coarse sand to the basin area (the uncut bottom section) to bring the effective water depth to about 1 to 1.5 inches.
- Fill the jug by pouring water through the top opening. The basin area holds the shallow water, and the jug walls keep it contained.
- Hang using the jug's existing handle — thread wire or paracord through it, or hang it from a hook on a fence post.
- Make sure the jug sits level. Tilt it slightly forward if needed so water pools toward the open side where birds will access it.
The milk jug version is also easier to refill without dismantling anything, just pour water into the top. The downside is that the open design means more exposure to debris and bird droppings, so it needs cleaning a bit more often than the bottle version.
Getting the depth, stability, and access right
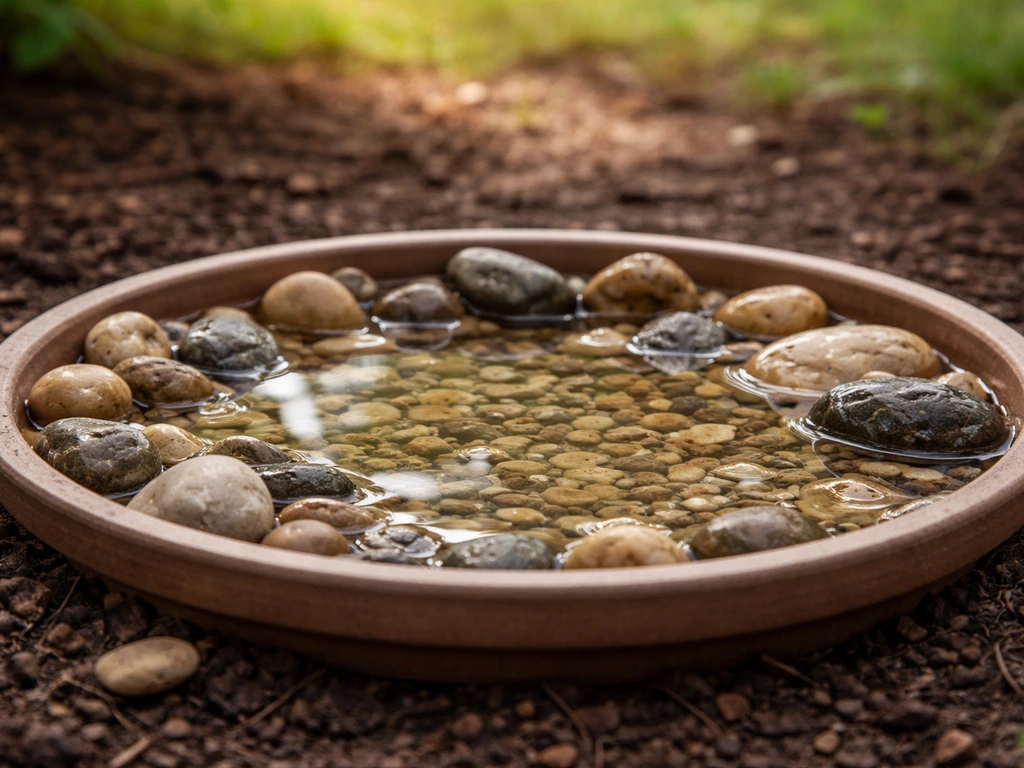
This is where most homemade water feeders go wrong. Too deep and small birds won't use it (there's a real drowning risk for tiny birds like wrens and finches). Too shallow and it evaporates before anyone shows up. Here's what the research consistently shows: keep the edge depth at about 1 inch and the center depth at no more than 2 inches. Wild Birds Unlimited specifically recommends a maximum of 1.5 inches for small songbirds. The Chicago Bird Alliance puts it well: gentle slope from the edge to the middle, with one inch at the rim and two inches at the deepest point.
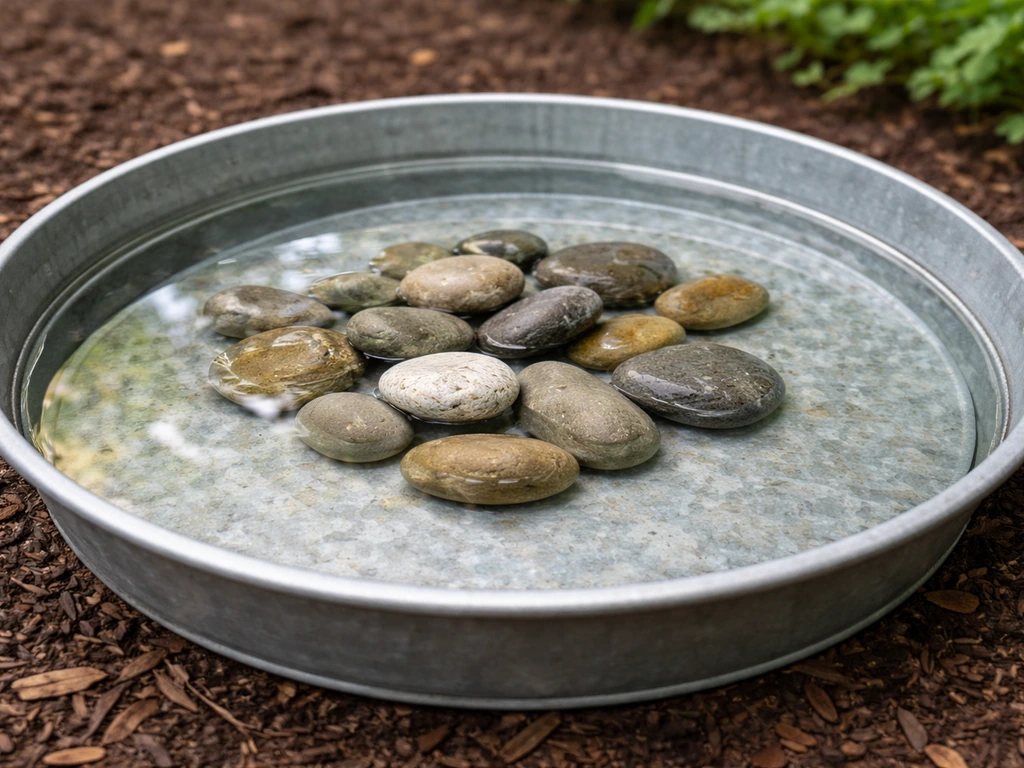
Pebbles and stones are your best tool here. Fill the tray to the right depth, then add stones until the water sits at the right level. Stones also give birds something to grip so they don't slip in. A layer of coarse sand works too, though it can get murky faster.
Stability matters more than most people think. A feeder that rocks, tips, or spills when a bird lands on the edge will get ignored after the first visit. If your setup is freestanding, make sure the base is wider than the container. If it's hanging, use at least two anchor points so it doesn't spin or swing. Even a slight wobble makes birds nervous.
Where to put it in your yard
Location can make or break how much bird traffic you get. The ideal spot balances a few competing needs: birds want to feel safe while drinking (vulnerable when their head is down), but you also don't want it so exposed that they never feel comfortable landing.
- Place it within 10 feet of shrubs or trees so birds have somewhere to retreat quickly, but not directly under dense cover where cats can hide
- Avoid placing it directly under your main seed feeder — droppings and seed husks will foul the water fast
- A height of 2 to 3 feet off the ground works well for most backyard birds and makes it harder for cats to approach unnoticed
- Morning sun helps warm the water slightly and discourages algae growth, but full afternoon sun will cause fast evaporation and green water — partial shade is ideal
- If you live in a colder climate, a spot that gets some morning sun also helps slow ice formation in early spring and late fall
Audubon recommends keeping the bath some distance from dense cover specifically because lurking predators (mostly cats) use it as an ambush point. A few feet of open ground between the feeder and the nearest bushes gives birds enough warning time to escape. I've moved my feeder three times to find the sweet spot, and it made a noticeable difference in how many birds actually used it consistently.
Keeping the water clean: a realistic maintenance schedule
This is the part people underestimate. Bird water feeders get dirty faster than seed feeders because of bird droppings, algae, and mosquito larvae. A good-looking setup that hasn't been cleaned in a week can actually harm birds, spreading bacteria or parasites. Here's what actually works:
| Task | Frequency | Why it matters |
|---|---|---|
| Refill with fresh water | Every 1 to 2 days | Stagnant water breeds bacteria and mosquitoes within 48 hours |
| Rinse and scrub the tray | Every 2 to 3 days | Removes algae, droppings, and biofilm before they build up |
| Full clean with dilute vinegar or 9:1 bleach solution | Once a week | Kills any remaining bacteria; rinse very thoroughly before refilling |
| Check and clear pebbles/stones | Weekly | Debris settles between stones and can trap contaminants |
| Inspect bottle or jug for cracks or discoloration | Monthly | UV exposure degrades plastic over time; replace when cracked |
For the weekly clean, a diluted bleach solution (roughly one part bleach to nine parts water) works well. Let it sit for a few minutes, scrub with a dedicated brush (not the one you use for dishes), then rinse with clean water at least three times before refilling. White vinegar is a gentler option for routine cleaning, especially if you're near a water source you'd rather not introduce bleach runoff to. Don't use dish soap, it leaves a residue that can affect bird feathers and is hard to fully rinse out of textured surfaces.
In summer heat, bump up your refill frequency to daily. Water sitting in direct sun above 75°F can grow algae and become a mosquito breeding site in as little as 36 hours. Dumping and refilling daily eliminates that risk completely without needing any chemicals.
What to do when things go wrong
The water keeps spilling
Usually a stability or depth issue. If the tray is full to the brim, birds landing on the edge will slosh water out. Lower your water level (add more stones) and make sure the feeder is hanging level or sitting on a flat surface. For hanging feeders, adding a second anchor point stops spinning and swinging that causes spills in wind.
The bottle or jug is leaking
On the inverted bottle build, leaking usually means the hole in the cap is too large or there are micro-cracks in the cap from over-tightening. Try a new cap or cover the existing hole with a small piece of waterproof tape and re-poke a smaller hole with a pin. For the milk jug build, check where the walls meet the base, a thin bead of waterproof silicone sealant along the inside seam fixes most slow leaks.
Mosquitoes are breeding in it
This is the most common problem and the easiest to fix: dump and refill every 48 hours. Mosquitoes need standing water for about 3 to 7 days to complete their larval stage, so regular turnover breaks the cycle entirely. If that's not practical for your schedule, a small Bti (Bacillus thuringiensis israelensis) dunk works well, it's a natural bacterial larvicide that's completely safe for birds, mammals, and beneficial insects. You can find dunk tablets at most garden centers.
The water keeps going green (algae)
Green water means too much sunlight combined with infrequent cleaning. Move the feeder to a shadier spot, clean more frequently, and consider using a dark-colored tray, darker surfaces absorb less light and slow algae growth. Adding a few copper pennies (minted before 1982, which are mostly copper) to the tray is a popular folk remedy; copper ions do have some algae-inhibiting effect, though it's mild. Regular cleaning is more reliable.
Squirrels or other pests are draining or fouling it
Squirrels will drink from and sit in bird water feeders, which muddies the water and scares birds off. Hanging the feeder from a wire with a baffle (a cone or tube that blocks climbing) is the most effective deterrent. A simple homemade baffle can be made from a plastic bottle cut into a cone shape and threaded onto the hanging wire above the feeder. The same baffle techniques used for seed feeders apply here.
Birds aren't using it
Give it a few days, birds are cautious about new additions to their territory. If no one has shown up after a week, try moving it closer to existing cover, add more perching pebbles at the rim edge, or add a drip by poking a tiny extra hole in a second bottle and suspending it above the tray. The sound and movement of dripping water is the single best way to attract birds to a new water source. Even a gentle drip from a hanging bottle above the tray can dramatically increase how quickly birds find and start using a new feeder.
Once you've got a working water feeder up, it's worth thinking about pairing it with a proper food feeder nearby. If you want to build a simple window version specifically, start with a stable, easy-to-refill design and mount it securely so it doesn't wobble. A water source next to a seed or suet feeder creates a complete station that birds return to repeatedly throughout the day. If you want to expand into more specialized feeder types, the same basic build principles apply whether you're working with glass, ceramic, or more elaborate hopper-style designs, the water feeder is a great starting point because it teaches you the fundamentals of depth, stability, and placement that carry over to every other feeder project. Ceramic bird feeders use the same “shallow, stable water” principles, but you will need to seal and glaze the ceramic parts so they stay safe and easy to clean how to make a ceramic bird feeder. You can use the same “shallow, stable water” ideas for a willow bird feeder too how to make a willow bird feeder. If you're specifically interested in a glass bird feeder, the same depth and stability rules will help you keep it safe and usable for small birds how to make a glass bird feeder.
FAQ
Can I add anything to the water, like electrolytes or algae treatments?
Use clean, shallow water first (no soap or additives). If you need to adjust depth, add more pebbles or stones rather than filling higher, since many issues come from being too deep for small songbirds.
What should I do to keep my DIY bird water feeder usable in freezing weather?
Yes, but treat it like a water-hazard. If you choose to winterize, keep the container sheltered and use lukewarm water at refill time, then monitor frequently so it doesn’t freeze into a hard block that birds cannot access.
Is it okay to seal or paint the parts of the feeder that touch the water?
For safety, avoid paints, glazes, sealants, and resins anywhere birds can contact the water. If you use wood, only unfinished natural material (or parts you are not expecting to be wet for long) is safest, because sealants can leach even after drying.
How do I keep it safe if I want to add more stones or a larger wading area?
Make sure the water line is still within the 1 inch rim and no more than about 2 inches in the deepest point, then keep the tray stable. If you’re adding pebbles, use stones that won’t shift, and give birds a clear wading path from the edge.
How often should I clean it if birds are using it heavily?
Clean whenever you see scum, green film, cloudy water, or anything that looks like buildup, not just on a fixed schedule. In warm weather, daily changes are usually safer than weekly cleaning.
Is bleach safe for birds if I clean the feeder with it?
Even if you use bleach, rinse thoroughly and let it air-dry completely before refilling. Also avoid cooking or mixing other cleaners with bleach, since fumes and residues can be harmful to birds and you.
Do I need to scrub the feeder after disinfecting, or is rinsing enough?
Don’t rely on the “old rinse” method. Disinfect, scrub with a dedicated brush, then rinse at least several times with plain water so no residue remains in grooves and textured plastics where birds can contact it.
Why do birds ignore my feeder even though the water is the right depth?
If the feeder is freestanding, widen the base (a larger plate, tray, or weighted base under the container) and keep the water level slightly below the edge. For hanging setups, use two anchor points so it cannot twist and spill.
What should I do if the water looks oily or smells like detergent?
If you see bubbles, oily sheen, or a chemical smell, discard the water, thoroughly rinse, and restart with fresh plain water. Re-check that the bottle and tray were not from chemical containers and that you avoided dish soap.
Will a drinking-style feeder also work as a bird bath?
Yes, but prevent deep pooling. Even a drinking-style bottle over a tray can become a bath if the tray is wide enough, so keep the rim depth low and add a pebble layer to create footing.
How can I stop water from spilling or splashing out in the wind?
To reduce splashing, keep the water slightly low, avoid fully filling the tray, and make sure stones create stable footing. If it’s hanging, ensure it sits level and that the cap hole and flow rate are not causing overfill.
Do copper pennies actually prevent algae, or are they just a gimmick?
Copper can help only mildly, so don’t depend on it to prevent algae. If you use copper, keep it minimal and always prioritize more frequent cleaning and lower sun exposure.
Next Article
How to Make a Tube Bird Feeder Step by Step
Step-by-step how to make a tube bird feeder with materials, safe mounting, maintenance, and fixes for leaks and clogs.