You can make a working ceramic bird feeder in a single afternoon by repurposing a glazed ceramic planter saucer or bowl as your seed dish, adding a few drainage holes, and hanging it with sturdy wire or rope. That is the fastest route and it works well. If you want to go all the way from raw clay to a fired, glazed feeder you made yourself, that is absolutely doable too, but it takes kiln access, a few extra days, and a bit more planning. Both paths are covered below, starting with the quick build.
How to Make a Ceramic Bird Feeder: Step by Step

Marcus Brennan
7 May 2026
Choosing a ceramic bird feeder design you can actually build
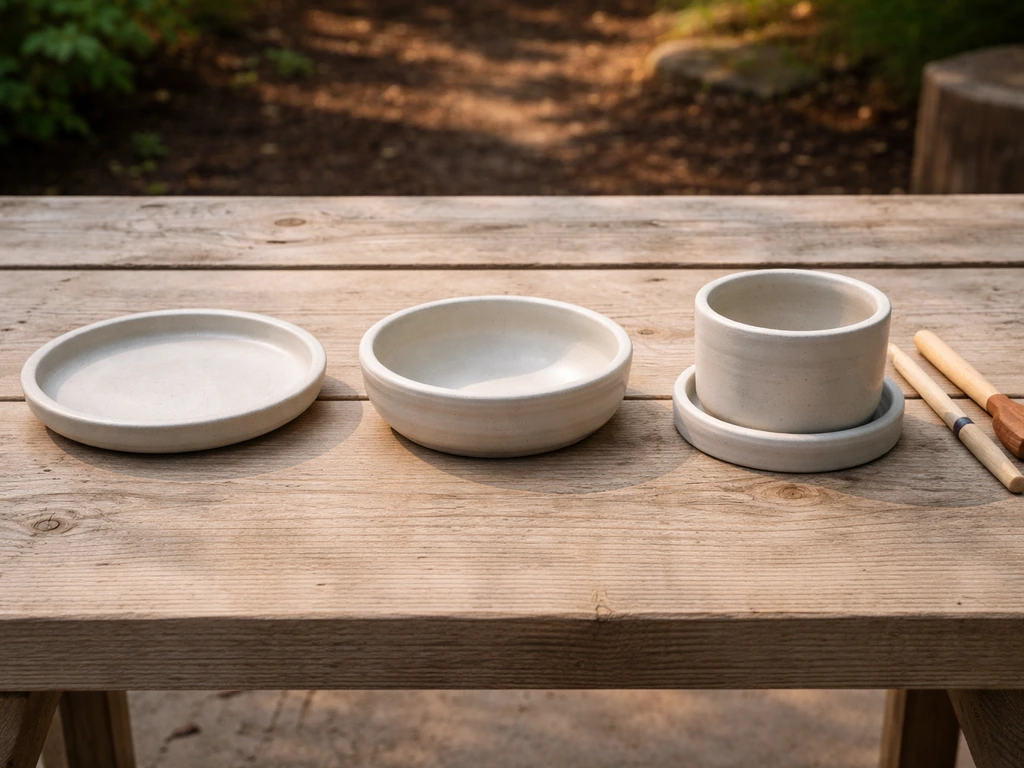
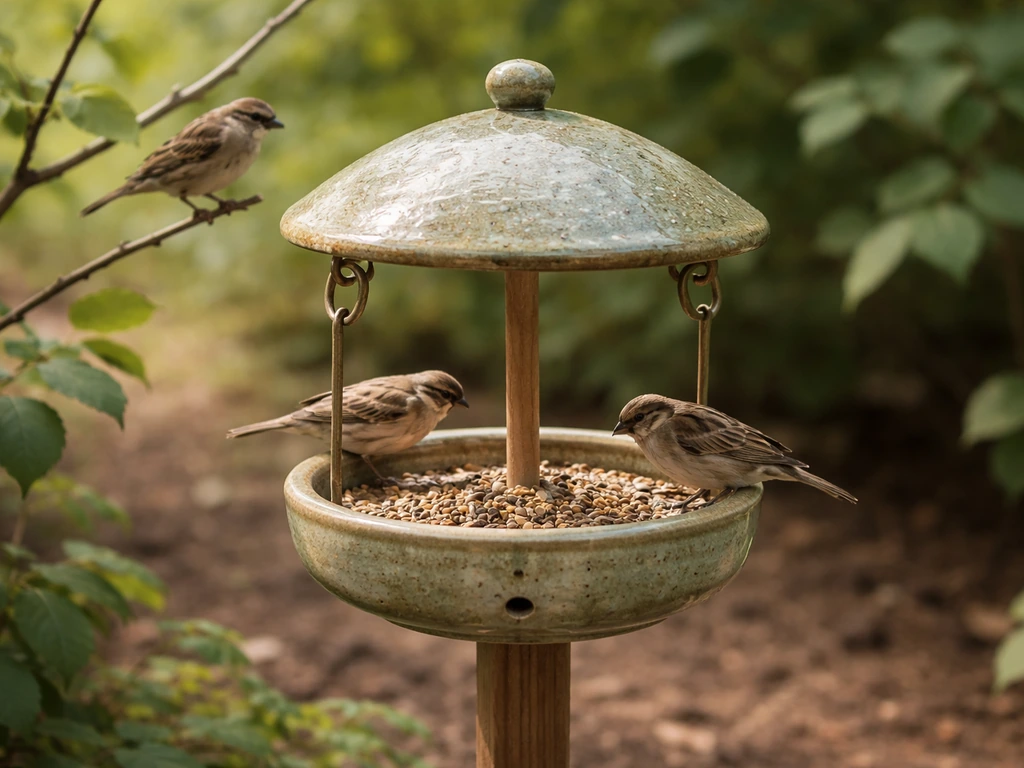
Ceramic feeders fall into three realistic categories for a DIY build. The first is a dish or saucer style, a shallow bowl that holds seed on a flat surface. It is the simplest to assemble from existing ceramic pieces and the easiest to clean. The second is a vessel or cup style, where a deeper ceramic container holds a larger seed reservoir, sometimes with a shallow lip or perch ring around it. The third is a platform feeder made from a ceramic tile or slab set on a stand or hung flat. For most people reading this, the dish or saucer style is the smartest starting point. It requires no clay skills, costs almost nothing if you already have a planter saucer lying around, and birds genuinely use it. The clay-from-scratch approach lets you sculpt a more custom piece with built-in perches or a domed roof, but it requires a kiln or access to a community ceramics studio.
Before you commit to a design, think about which birds you are trying to attract. Sparrows, juncos, and doves feed low and prefer open platform or dish styles. Chickadees and nuthatches are comfortable with small hanging cups. If you also want to offer water alongside seed, a two-dish setup works well, and the concept overlaps with making a bird water feeder, which is essentially the same build with a slightly deeper dish and no seed. Keep your first ceramic feeder simple. You can always build a more elaborate second version once you know what works in your yard.
Materials and tools you will need
Fast path: assembling from existing ceramic pieces
- One glazed ceramic planter saucer or bowl, 8 to 12 inches wide (check thrift stores, dollar stores, or your own garage)
- Diamond-tipped drill bit, 1/4-inch diameter (a standard twist bit will crack ceramic)
- Cordless drill set to low speed
- Water in a small tub or spray bottle for cooling the bit while drilling
- Masking tape to reduce chip-out on the glaze surface
- Rustproof wire (14 or 16 gauge), sturdy nylon rope, or a hanging basket bracket
- S-hooks or swivel clips for hanging
- Food-safe, lead-free silicone sealant if you are bonding a ceramic dish to another piece (DAP Silicone Ultra or similar, which fully cures in about 24 hours)
- Fine-grit sandpaper (220 grit) to smooth any drilled edges
Slow path: clay to fired ceramic
- Cone 5 or 6 stoneware clay (commonly recommended for functional ware because of its durability and low water absorption after firing)
- Basic sculpting tools: wire tool, sponge, wooden rib, needle tool
- Kiln access (a local ceramics studio, community college, or makerspace usually rents kiln space by the shelf or the load)
- Lead-free, food-safe glaze rated for your clay's cone range (cone 5/6 glaze on cone 5/6 clay)
- Kiln wash and kiln furniture (shelves and posts) if you are firing yourself
- Underglazes for decoration if desired, again verified lead-free
- The same diamond drill bit and drill setup listed above for adding drainage holes after bisque firing
A safety note on glazes: lead is not authorized as a food-contact additive, and FDA guidance is clear that even pieces labeled lead-free can carry contamination if they were fired in a kiln previously used for lead-containing glazes. When buying pre-glazed ceramicware or commercial glaze products, look for explicit lead-free labeling and, if you are using a shared community kiln, ask whether the studio has a strict no-lead-glaze policy. For outdoor feeders this matters because birds pick seed directly off the surface. Stick with glazes specifically marketed as food-safe or non-toxic.
Fast path build: assemble a ceramic dish feeder in an afternoon
- Choose your ceramic dish. A glazed planter saucer with a flat bottom and a rim at least 3/4 inch tall works perfectly. Aim for 8 to 12 inches across so you can fit enough seed to make birds want to stop.
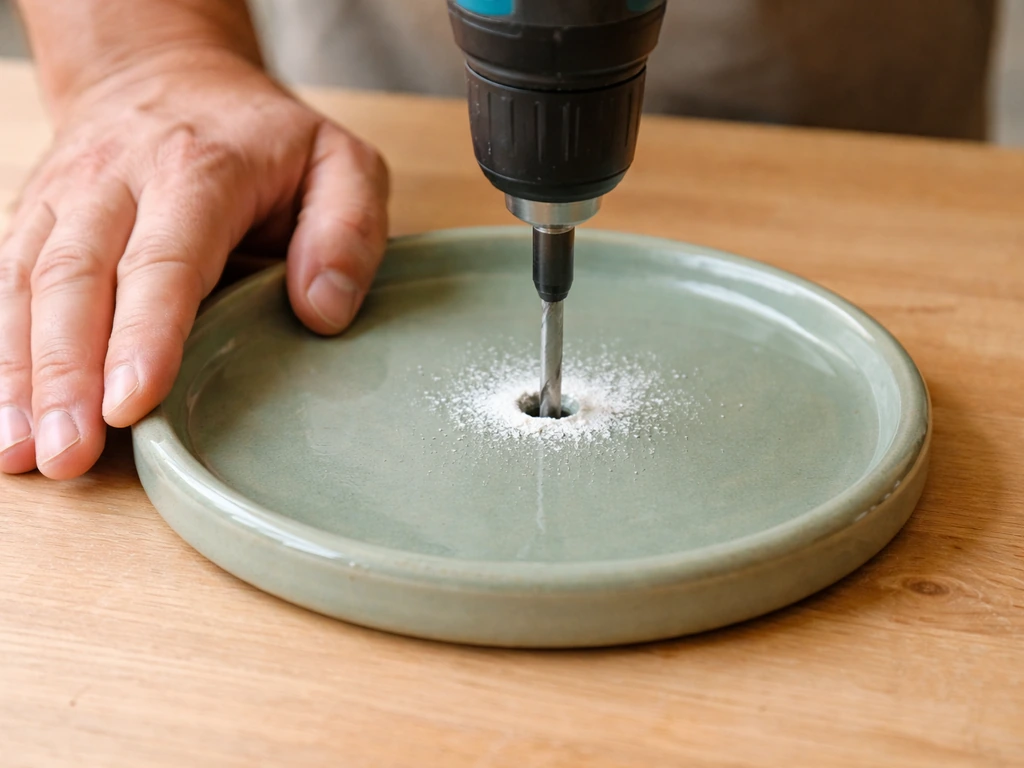
- Place masking tape over each spot you plan to drill. This reduces glaze chip-out significantly.
- Drill three to four 1/4-inch drainage holes spaced evenly around the lowest points of the dish. Use your diamond bit at the lowest speed your drill offers, apply steady but gentle pressure, and keep the bit wet with water throughout. Never use a hammer drill setting. Drill slowly and let the bit do the work.
- Remove the tape and use 220-grit sandpaper to smooth any rough edges around each hole. Rough ceramic edges can injure birds' feet and beaks.
- If you want to attach the dish to a base or second ceramic piece (for example, a ceramic pot as a pedestal), apply a bead of food-safe silicone sealant around the contact surface, press the pieces together, and let it cure for a full 24 hours before use.
- Thread your hanging wire or rope through three evenly spaced points around the rim. You can drill small holes at the rim for wire, or wrap wire around the outside of the rim using three anchor points at 120-degree intervals. Make sure the load is balanced so the dish hangs level.
- Test the hang indoors, add a small handful of seed, and check that water drains freely through the holes before taking it outside.
Total build time for this path is roughly one to two hours, including cure time for any sealant. It is genuinely beginner-friendly and the result looks good and lasts for years if you choose a quality glazed piece.
Slow path build: clay to fired ceramic feeder
Step 1: Choose and prepare your clay
Use cone 5 or 6 stoneware. It is dense, absorbs very little water once fired to maturity, and holds up well outdoors through temperature changes. Earthenware (low-fire clay) is softer and more porous, which means it soaks up water and can crack in freezing weather. Wedge your clay thoroughly before starting to remove air pockets, which cause explosions in the kiln.
Step 2: Build the seed bowl and body
The simplest hand-building method is pinching or coil-building. For a pinch-pot dish, start with a ball of clay about the size of a softball, push your thumb into the center, and slowly pinch the walls outward and upward to form a shallow bowl 8 to 10 inches wide with walls about 1/2 inch thick. Thicker walls crack less during drying and firing. If you want a deeper vessel with a separate seed dish, build both pieces separately and score and slip them together while both are leather-hard. Add a perch ring by rolling a coil of clay about 3/8 inch thick, attaching it around the outer rim of the seed dish, and blending the seam well.
Step 3: Add drainage and hanging features before firing
While the clay is still leather-hard (firm but not fully dry), use a needle tool to pierce three to four drainage holes at the lowest points of the seed dish, each about 1/4 inch in diameter. This Old House notes that for planters, a drilled drainage-hole diameter around 1/4 to 1/2 inch is generally sufficient for many containers each about 1/4 inch in diameter. This is much easier than drilling after firing. Also, if you want wire-hanging holes, pierce two or three evenly spaced holes around the upper rim now. Let the piece dry completely and slowly, ideally a week or more, before bisque firing. Rushing the drying step causes cracking.
Step 4: Bisque fire, then glaze fire
Bisque firing burns off organic material and makes the clay hard enough to handle. For cone 5/6 stoneware, bisque is typically done around cone 06 (roughly 1800 to 1830 degrees Fahrenheit). A standard bisque or low-fire kiln cycle runs about 5 to 7 hours. After bisque firing, apply your lead-free, food-safe glaze rated for cone 5 or 6. Make sure the glaze and clay body are matched in thermal expansion (called glaze fit). A mismatch causes crazing, where the glaze develops a network of fine cracks that trap dirt and moisture. Your glaze supplier can confirm compatibility. Leave the bottom 1/4 inch of the piece unglazed so it does not fuse to the kiln shelf. Glaze fire to cone 5 or 6, then let the kiln cool fully before unloading.
Step 5: Post-firing finishing
After firing, inspect all edges. The rims and any perch surfaces should be smooth. If there are rough spots, use a diamond hand pad or fine-grit wet-dry sandpaper to smooth them. A bird landing on a sharp glaze edge can get cut. If you did not pre-pierce your hanging holes before firing, drill them now using the same diamond bit and wet-drilling technique described in the fast path.
Drilling, mounting, and bird-safe finishing details
Whether you are working with a thrift-store saucer or a piece you fired yourself, the drilling approach is the same. Use a diamond-tipped bit, not a standard masonry or tile bit. Keep the bit wet throughout the drill to prevent heat buildup, which is the main cause of cracking and chipping. Run your drill at its lowest speed and apply light, consistent downward pressure. Pressing hard does not speed things up; it just cracks the piece. Stick masking tape over your drill point before you start to help the bit stay on target and reduce surface chip-out.
For mounting hardware, avoid anything that puts concentrated point pressure on the ceramic, like a bolt tightened without a wide washer. When threading wire through rim holes, use a rubber grommet or wrap the wire with a short length of rubber tubing at each contact point. This protects the glaze from wear and absorbs vibration. If you are setting a dish feeder on a pole or pedestal, use a rubber pad between the ceramic and the mount surface for the same reason.
Check your finished feeder for any rough glaze edges, sharp protrusions, or drilled edges that were not sanded smooth. Run your fingertip around every surface a bird will contact. If it catches on your skin, it will catch on a bird. Smooth it down before the feeder goes outside.
Hanging and placement for weather and bird success
Most backyard birds are comfortable visiting a feeder hung between 5 and 8 feet off the ground. Ground-feeding species like doves and sparrows prefer the lower end of that range, while chickadees and finches are fine at 6 to 8 feet. Hanging at this height also makes it easier for you to refill and clean the feeder without a ladder.
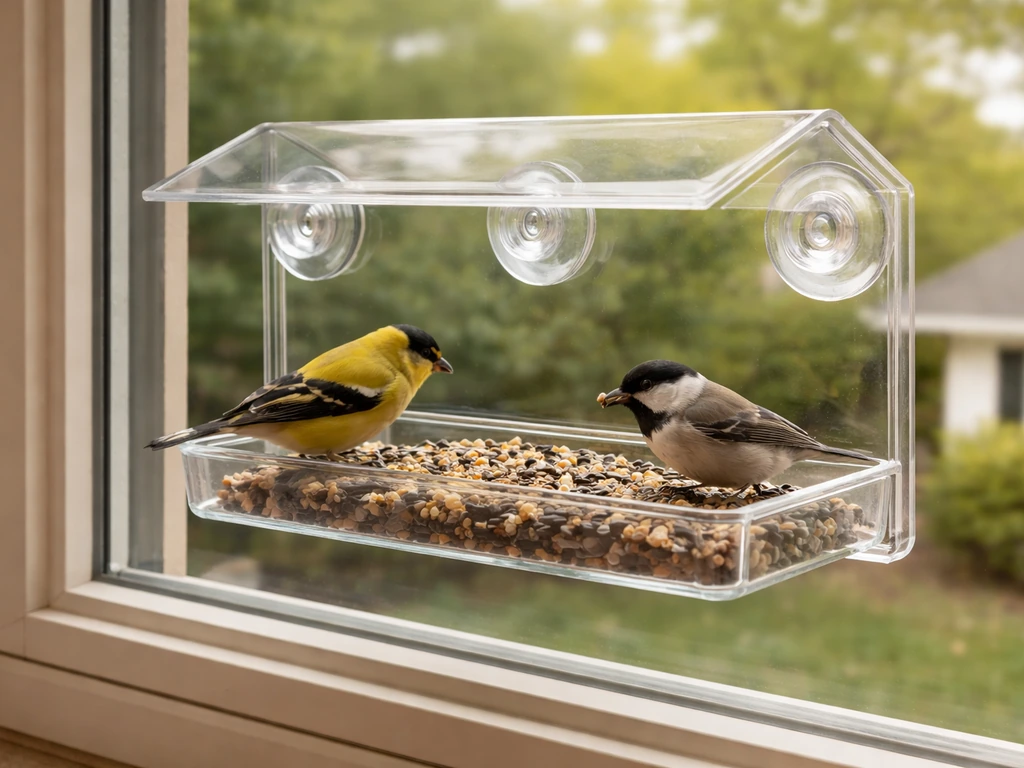
Placement matters as much as height. Put the feeder blank" rel="noopener noreferrer">within about 3 feet of a window or more than 30 feet away from one. If you are building a window bird feeder from a ceramic dish, place it near the glass safely and keep it easy to refill and clean. The reason is collision risk. Birds that are startled from a feeder at mid-distance build up enough speed to be killed hitting a window, but a feeder very close to the glass means a bird cannot reach dangerous velocity. A spot near shrubs or low tree branches gives birds a perch to wait and watch before approaching.
Ceramic is heavier than wood or plastic, so your hanging hardware needs to be rated for the weight. A loaded ceramic dish can weigh 3 to 5 pounds depending on size. Use a hanging basket bracket rated for at least 10 pounds, and connect to a structural support like a screw-eye in a wooden beam or a purpose-made shepherd's hook stake driven at least 18 inches into the ground. Avoid hanging ceramic feeders from thin branches that sway heavily in the wind. The swinging and impact of a ceramic feeder against a hard surface is a common cause of cracking.
If your region gets hard winters, bring ceramic feeders indoors when temperatures will drop below freezing for multiple consecutive nights. Water trapped in micro-pores can freeze, expand, and crack even well-fired stoneware. Low-fire earthenware is especially vulnerable to this.
Cleaning, maintenance, pest-proofing, and troubleshooting
Cleaning schedule that actually prevents problems
Clean your ceramic feeder every one to two weeks during active use, or immediately after rain events that leave seed wet for more than a day. Wet seed is where mold and bacteria grow fast, and birds can get sick from contaminated feeders. Empty the dish, rinse it with hot water, scrub with a stiff brush, then soak for a few minutes in a diluted bleach solution (one part bleach to nine parts water). Rinse thoroughly and let it air-dry completely before refilling. The non-porous glazed surface of a properly fired ceramic feeder is much easier to clean than wood or rough concrete, which is one of its biggest practical advantages.
Preventing standing water and seed spoilage
Those drainage holes you drilled are doing real work here. Make sure none of them get blocked by seed hulls or debris, which happens quickly with sunflower seeds. Check them every time you refill. If your dish design creates a low spot where water pools even with drainage holes, tip the dish very slightly when you hang it so water runs toward the holes. A slight angle of even 5 degrees is enough. Keeping seed dry is the single biggest factor in preventing spoilage and discouraging rodents.
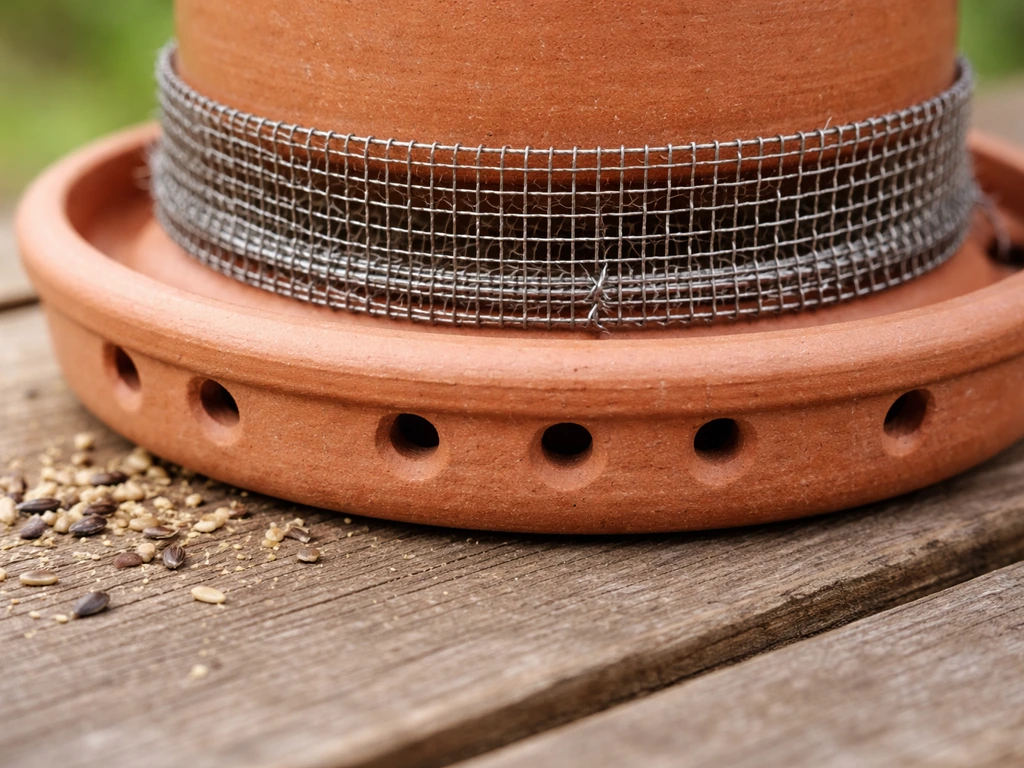
Pest-proofing a ceramic feeder
Squirrels are the most common problem. Mounting your feeder on a shepherd's hook with a baffle (a cone-shaped squirrel guard placed below the feeder) is the most effective deterrent for a ground-hung setup. If you are hanging from a tree branch, add a squirrel baffle above the feeder on the line. For a ceramic dish on a pole, wrap the pole itself with a metal squirrel baffle at least 18 inches from the ground. Ceramic feeders have an advantage here because squirrels cannot chew through them the way they chew through wood or plastic feeders, but they will absolutely knock them off a mount, so make sure the feeder is secured firmly and cannot easily be dislodged.
Troubleshooting common ceramic feeder failures
| Problem | Most likely cause | Fix or prevention |
|---|---|---|
| Cracks from drilling | Using wrong bit type or too much speed/pressure | Switch to a diamond bit, use lowest drill speed, keep bit wet throughout |
| Glaze crazing (fine crack network) | Glaze and clay body have mismatched thermal expansion | Use glazes rated for your clay's cone; confirm glaze fit with supplier |
| Glaze chipping at edges | Mechanical impact or drilling without tape | Add rubber grommets at all wire/mounting contact points; tape before drilling |
| Water pooling and seed rot | Drainage holes blocked or dish level | Clear holes at every refill; hang with a slight angle toward the drain holes |
| Birds not using the feeder | Location too exposed, wrong seed, or feeder still smells like sealant | Move feeder near cover; wait full 48 hours after silicone cure; try black-oil sunflower seed |
| Squirrels raiding the feeder | No baffle in place | Add a squirrel baffle below or above the feeder depending on mounting type |
| Feeder cracking in winter | Trapped moisture freezing in pores | Bring inside when sustained freezing temps are forecast; use mature high-fire stoneware |
Which build path is right for you
If you want a feeder working this weekend, go with the fast path using a glazed ceramic saucer or planter dish. If you want a quick, step-by-step guide specifically on how to make a willow bird feeder, follow the instructions in our related walkthrough fast path using a glazed ceramic saucer or planter dish. You can even adapt the same ceramic feeder ideas to build an automatic bird feeder that dispenses seed on a schedule. It takes a couple of hours, costs almost nothing, and birds will use it. If you have ceramics experience or access to a kiln and want to make something truly your own, the clay-to-fired path is rewarding and produces a more custom result. If you want a more advanced option that dispenses seed automatically, see how to make a hopper bird feeder as a related build idea. Just budget at least a week from start to finish for drying and firing time, and confirm you are using a lead-free, food-safe glaze matched to your clay body. Either way, the drainage holes, smooth edges, and secure mounting are non-negotiable regardless of which path you take.
Once your ceramic feeder is up and running, you might find yourself wanting to expand the setup. A matching ceramic dish for water placed nearby works really well alongside a seed feeder since birds that stop to drink tend to also stop to eat. If you want to attract hummingbirds or orioles, a nectar feeder is a natural next step, though ceramic alone is harder to adapt for liquid nectar without a proper stopper or tube system. To learn how to make a nectar bird feeder, follow a nectar-specific design so liquid stays contained and the feeder is easy to clean. For now, a well-made ceramic seed dish is a genuinely durable, attractive, and easy-to-clean addition to any backyard. If you want the glass-bird-feeder look, you can adapt the same seed-dish and bird-safe mounting ideas to a glass build ceramic seed dish.
FAQ
How can I tell whether a pre-glazed planter saucer is safe for birds to eat from?
If you are using thrift-store ceramic, do not assume it is safe just because it says “lead-free.” Look for explicit lead-free labeling, and if the piece was made by someone else, avoid any glazed item that does not clearly document its firing and glaze source. When in doubt, use a non-food-contact configuration (seed in a separate liner or tray) rather than letting birds peck directly at the old glaze.
What should I do if the feeder gets wet and the seed turns clumpy?
Ceramic can dry out, but the risk is mostly from seed staying wet, not from the ceramic itself. If you see clumping, sour smell, or slimy residue on the seed, empty the feeder, scrub it, and switch to drier seed until the next rain-free stretch.
Can I use seeds other than sunflower in a ceramic dish feeder?
Yes, but adjust the seed type and feeding schedule. Use a design that can drain freely (clear holes, slightly tilted for runoff) and clean more often, because wet hulled seed tends to block drainage and grows mold quickly. If you are planning to use peanuts or suet, avoid designs that rely on small surface dishes only, since heavy foods can collect at the low points.
Why would a clay bird feeder crack before firing, and how do I prevent it?
If your feeder cracks during drying, the most common causes are uneven wall thickness and rushing the drying step. For the fix, start over with more consistent wall thickness, let it dry slowly (cover loosely to slow evaporation), and ensure any thicker perch or rim sections also dry at the same rate.
What does glaze crazing mean, and should I use the feeder anyway?
If the glaze develops fine crack lines (crazing), birds will still sometimes use the feeder, but it is a sign of poor glaze fit. The practical next step is to stop using it for direct seed contact if the crazing holds residue and moisture. For a new build, confirm thermal expansion match with your glaze supplier before glazing.
How do I know whether the perch height and rim design will work for different birds?
Birds need perches that are comfortable to land on, especially for smaller species. After firing, test the perch ring height by holding the feeder where it will hang, then observe whether birds can grip without hopping. If you drilled or built a perch too high, birds may avoid it, so correct by adding a second, slightly lower perch for the next iteration.
Should I hang my ceramic bird feeder higher or lower for ground-feeders versus clingy perching birds?
The easiest way is to choose the right setup for the ground-feeding species you want. For doves and sparrows, keep the hanging height toward the low end of the range and ensure the dish is shallow enough for easy landing. For chickadees and nuthatches, slightly higher and more sheltered mounting helps them feel secure and reduces how much they have to reach.
How do I drill drainage and hanging holes without chipping the glaze?
To drill without causing damage, tape the spot, keep the ceramic wet, and use a diamond bit at the lowest speed. If you see chipping at the surface, reduce pressure further and slow down, then let the bit keep cutting gradually. Also, avoid drilling through an already-fractured area or a thin edge.
Why is water pooling in my dish even though it has drainage holes?
If the seed is consistently sitting in a puddle even after drainage holes, the feeder is likely not level or it has a true low spot. Tip the feeder slightly so gravity carries water toward the holes, but also check that the holes are fully open and not blocked by seed hulls during use.
What’s the best way to stop squirrels from knocking the feeder off?
For squirrels, location plus baffle height matters. Keep the feeder where a squirrel cannot reach it from a nearby branch or rail, and install a baffle so it blocks the climbing path, not just the fall path. If squirrels keep knocking it off, tighten the mount and use a mount that resists twisting from wind sway.
Can I combine water and seed in the same ceramic feeder bowl?
If you want a second feeder, pair seed with water using two separate dishes rather than trying to store water in the seed bowl. Birds drink more safely when water is not mixed with seed debris, and the separate-dish approach makes cleaning easier after rain or heavy use.