You can build a solid, functional bird feeder box in an afternoon using a few pieces of scrap wood and basic tools, no prior carpentry experience needed. The classic style is a small open or partially enclosed wooden box with a roof, a seed tray, and a couple of perch dowels. If wood isn't available, a clean plastic bottle or milk jug works just as well for getting started. Either way, the keys to success are drainage so seeds don't rot, a roof or overhang that keeps rain out, and a placement that makes birds feel safe enough to actually show up. An egg carton bird feeder is a fun, beginner-friendly alternative if you want a quick craft build before moving to sturdier materials how to make a bird feeder out of egg carton.
How to Make a Bird Feeder Box Step by Step

Marcus Brennan
7 May 2026
Choosing the right bird feeder box design
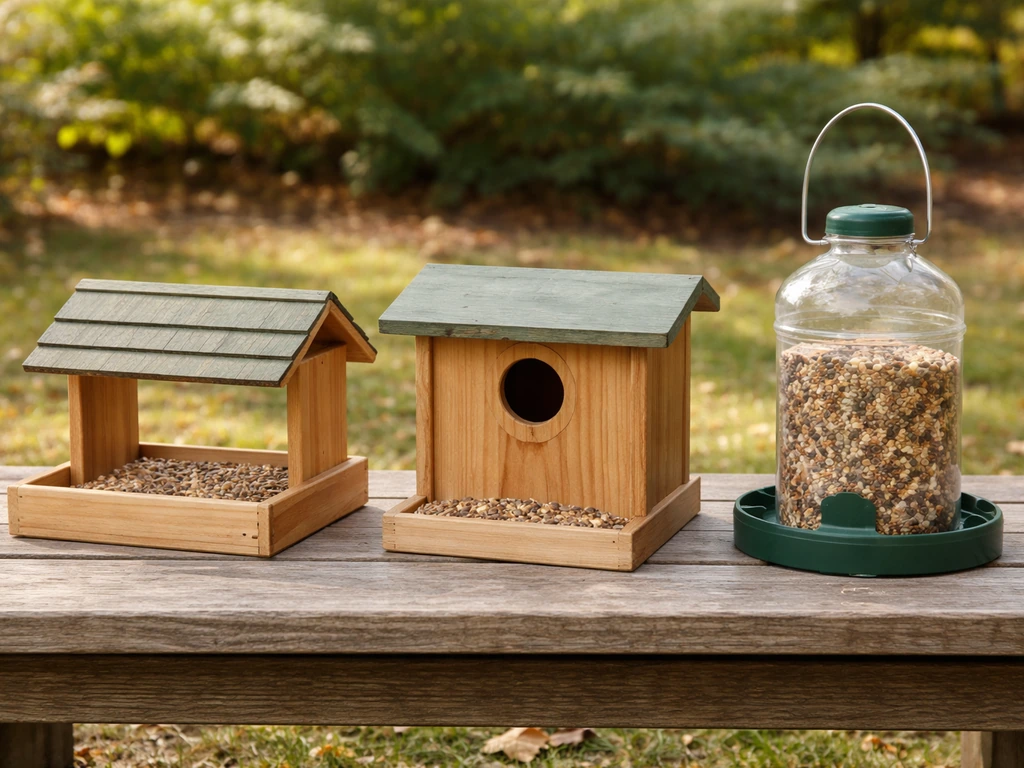
Before you cut anything, pick a design that matches your time, tools, and the birds you want to attract. There are three main styles worth considering for a first build.
| Design | Best For | Build Time | Cost Range | Skill Level |
|---|---|---|---|---|
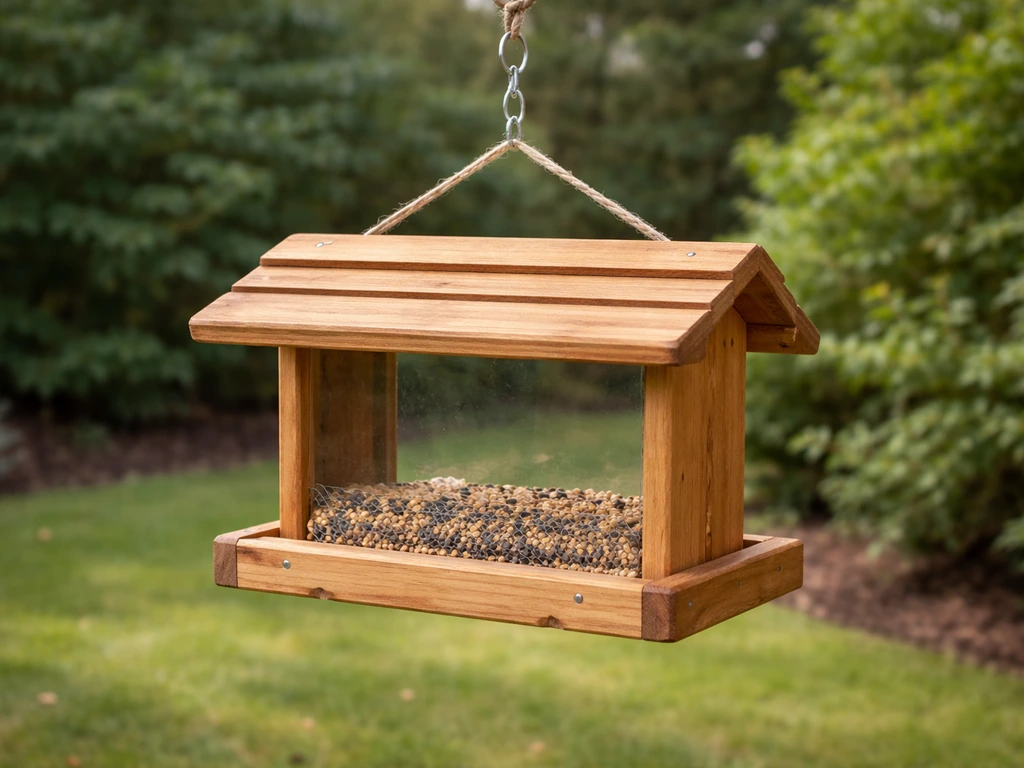
| Open wood box (tray style with roof) | Most backyard species, long-term use | 2–3 hours | $5–$15 | Beginner |
| Hopper box (enclosed seed chamber) | Cardinals, finches, larger birds | 3–5 hours | $10–$25 | Intermediate |
| Plastic bottle or milk jug container | Quick start, zero-cost option | 20–30 minutes | $0 | Complete beginner |
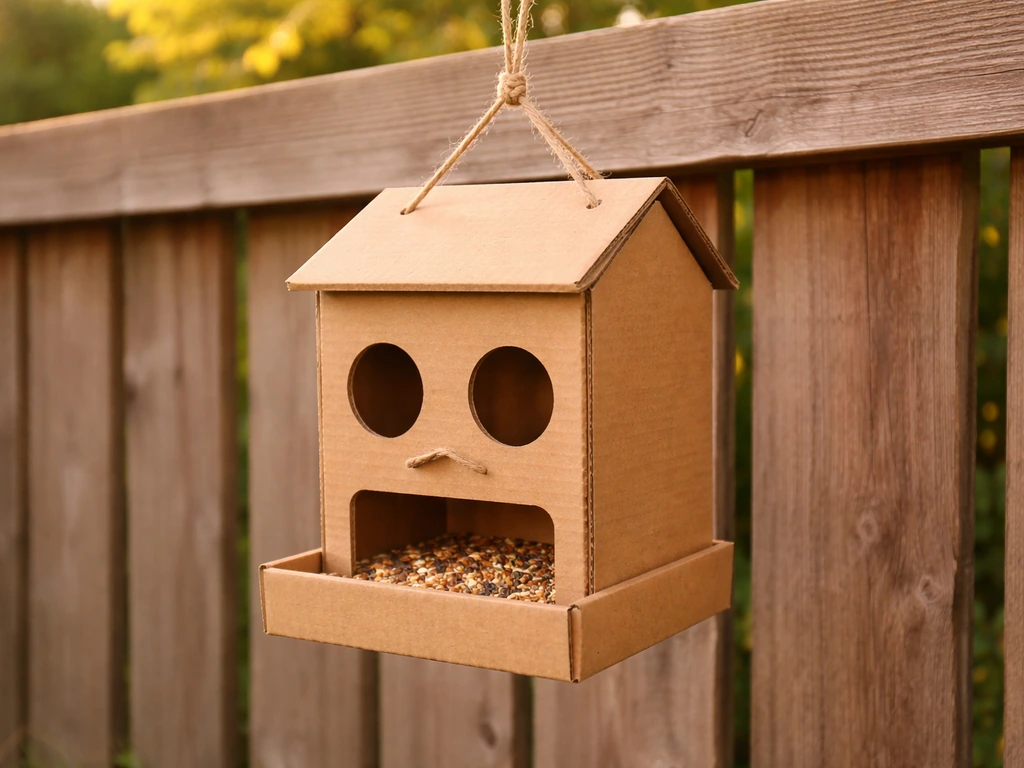
The open wood box with a simple peaked roof is the best starting point for most people. It's forgiving to build, easy to refill, and straightforward to clean. If you want something that holds more seed and requires less frequent refilling, a hopper box is the step up, it has an enclosed seed chamber that gravity-feeds seed down to the tray. For a same-day project with no tools or budget, a repurposed plastic bottle or milk jug gets birds coming while you plan a proper wood build. Cardboard and shoe box versions exist too, but they degrade quickly outdoors and are better treated as temporary or indoor craft projects. If you want a cardboard bird feeder for a quick craft, use it indoors or as a short-term project and monitor it for moisture and wear. A simple cardboard or shoe box setup can also be the quickest way to learn how to make a bird feeder, then upgrade later.
Materials and tools for a DIY feeder box
Here's what you'll need for the wood open-box style, which is the main build this guide walks through. The plastic bottle alternative is listed separately at the end of the build section.
Wood feeder box: materials checklist
- One cedar or pine board, roughly 1x6 inches x 6 feet (cedar resists rot and is ideal; untreated pine works fine)
- One thin piece of wood for the roof, about 8x10 inches, or two pieces to form a peak (plywood or a cedar shingle works)
- Two 3/8-inch wooden dowels, 8–10 inches long (for perches)
- Small box of 1.5-inch exterior wood screws or galvanized nails
- Two small screw eyes or a heavy-duty staple and wire for hanging
- Exterior wood glue (optional, adds strength)
- Sandpaper, 80- and 120-grit
- Outdoor wood sealant, paint, or stain (water-based exterior formula)
Tools you'll need
- Saw (a hand saw works; a circular or miter saw speeds things up)
- Drill with 3/8-inch bit (for perch holes) and screwdriver bit
- Measuring tape and pencil
- Clamps (helpful but not essential)
- Paintbrush for sealant
Total material cost for the wood version runs $5 to $15 if you're buying new lumber, and often $0 if you have scrap wood around. Buy untreated wood only, pressure-treated lumber contains chemicals that can harm birds.
Step-by-step build instructions
Wood open-box feeder (the main build)
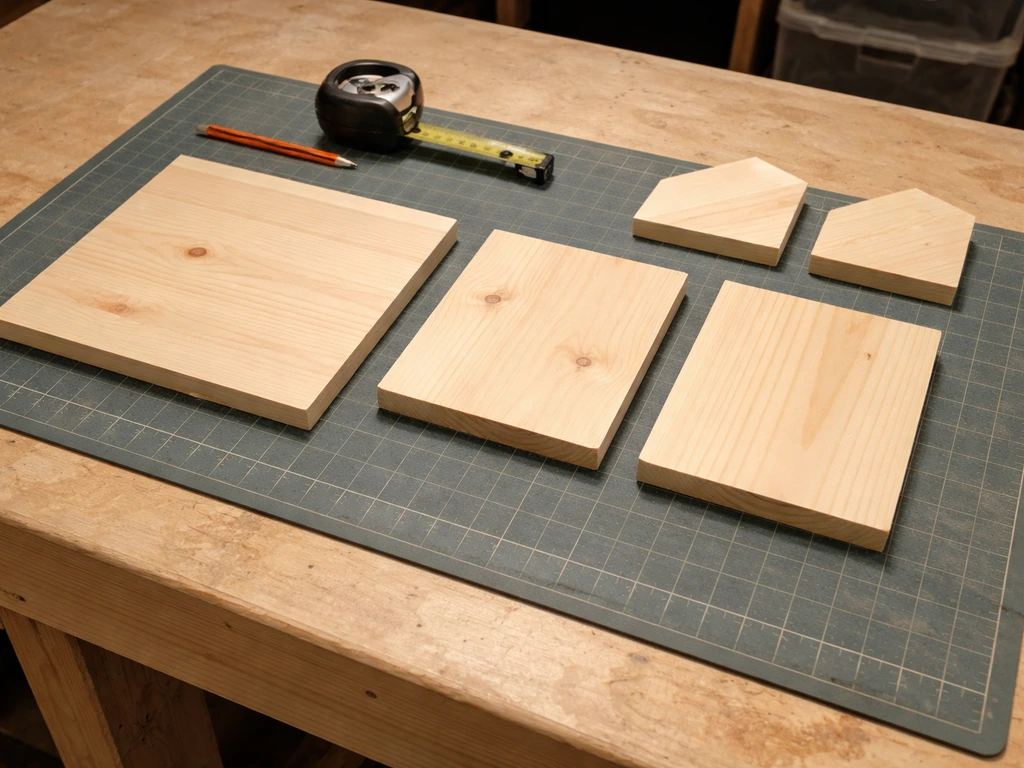
- Cut your pieces. From your 1x6 board, cut: a base (8x10 inches), two side walls (6x6 inches), and two end walls (6x5 inches). These don't have to be exact — close is fine for a first build.
- Drill drainage holes. Before assembling the base, drill 4–6 small holes (1/4 inch) across the bottom of the tray so rainwater drains out instead of pooling and rotting the seed.
- Sand all edges smooth with 80-grit, then 120-grit. Birds land on these edges, so splinters matter.
- Assemble the box. Attach the two side walls to the long edges of the base using screws or nails. Then fit the end walls in between. Use exterior wood glue on the joints if you want extra strength. Leave the top fully open — the roof attaches separately.
- Drill perch holes. About 1 inch up from the base on each end wall, drill one 3/8-inch hole per wall. Push a dowel through both holes so it extends about 2 inches on each side. A dab of wood glue keeps it in place.
- Make the roof. Cut two pieces of wood at a slight angle so they meet at a peak, or use a single flat piece angled forward. The roof should overhang the front by at least 3 inches to block rain from blowing into the seed tray. Attach the roof to the top of the side walls with screws.
- Apply exterior sealant or paint. Coat all outer surfaces and let dry fully (usually 24 hours) before adding seed. Leave the interior tray surface untreated or use a food-safe finish.
- Add hanging hardware. Screw two small screw eyes into the top of the roof, spaced about 6 inches apart, and thread wire or heavy cord through them for hanging.
Total build time is roughly 2 to 3 hours including drying time for glue. If you're working with a hand saw and no clamps, give yourself a little extra time. Imperfect cuts are fine, gaps under 1/4 inch won't affect function.
Plastic bottle or milk jug alternative
If you want birds visiting today with zero budget, a clean 2-liter plastic bottle or gallon milk jug works well. Cut two or three small openings about 1.5 inches wide and 1 inch tall on the sides of the bottle, positioned above the base so seed doesn't spill out immediately. Thread a wooden chopstick or dowel through holes just below each opening to serve as a perch. Fill the bottom with seed, then hang it from the cap end using wire looped through a hole in the lid. It's not as durable or attractive as a wood feeder, but birds will find it. This type of container feeder is especially useful as a test-run while you build the wood version, you'll get a feel for where birds like to feed in your yard.
Weatherproofing, drainage, and cleaning-friendly design
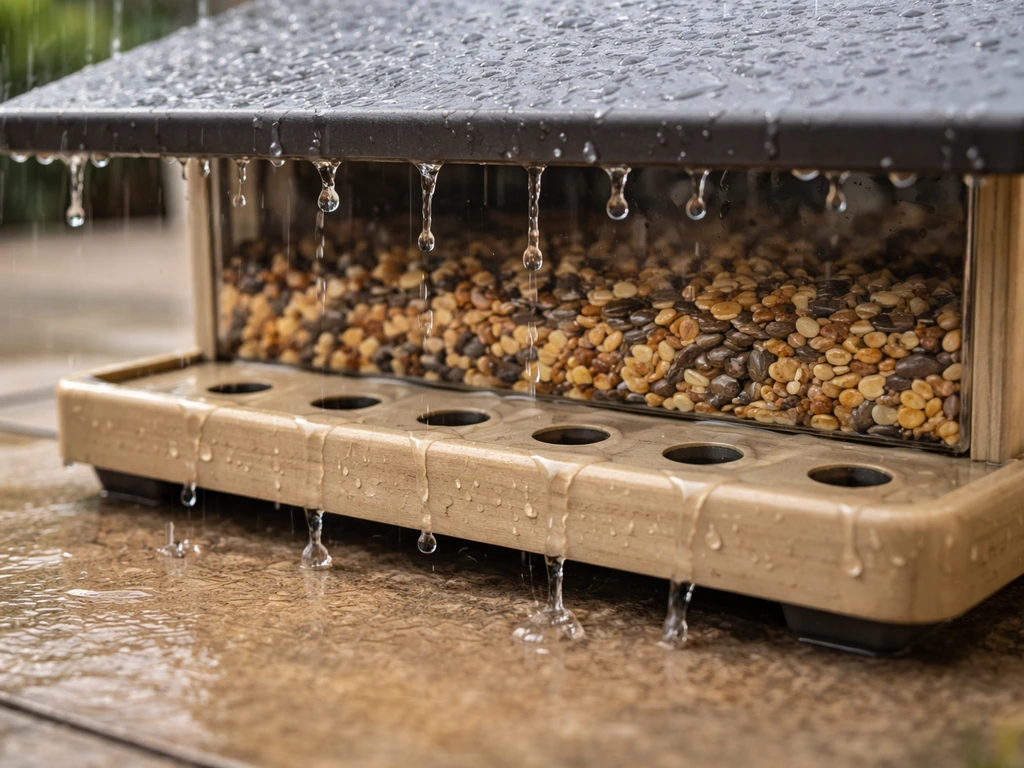
Wet seed is the biggest problem with DIY feeders. It clumps, molds, and can make birds sick, so designing against moisture from the start saves you constant maintenance headaches later.
- Drainage holes in the base are non-negotiable. At least four 1/4-inch holes let rainwater escape before it soaks into the seed layer.
- A roof overhang of 3 inches on the front and sides blocks most rain angles. If you're in a very rainy climate, extend that to 4–5 inches.
- Seal all exterior wood surfaces with a water-based exterior sealant or paint. This keeps the wood from absorbing moisture and warping.
- Avoid flat roofs. A slight pitch (even 10 to 15 degrees) sheds water instead of pooling it.
- Make the tray removable if you can. Even just attaching the base with two screws instead of four means you can pop it off, dump old seed, and rinse it quickly.
For cleaning, the Cornell Lab, Project FeederWatch, and the U.S. Fish and Wildlife Service all recommend cleaning seed feeders every two weeks, and more often during wet weather or if you spot sick birds visiting. blank" rel="noopener noreferrer">A 1:9 bleach-to-water solution (one part bleach, nine parts water) is the recommended disinfectant from the National Wildlife Health Center, as cited by Audubon. South Carolina DNR also recommends cleaning seed feeders with a 1 part liquid chlorine bleach to 9 parts hot water solution, soaking for 10 minutes, then rinsing thoroughly to remove chemical residue blank" rel="noopener noreferrer">1:9 bleach-to-water solution (one part bleach, nine parts water) is the recommended disinfectant. Scrub the tray and any interior surfaces, rinse thoroughly, and let the feeder dry completely before refilling. Wet wood plus leftover bleach residue can harm birds, so the rinse and dry steps matter.
Placement and hanging: where to put it and how high
Even a perfectly built feeder won't get used if it's in the wrong spot. Birds need to feel safe, and they have specific preferences about height, cover, and sun exposure.
Height and distance from cover
Hang or mount your feeder between 4 and 6 feet off the ground. This puts it in the natural foraging zone for most backyard species and makes it easier for you to refill and clean. Position it within 10 feet of shrubs or trees so birds have somewhere to retreat when startled, but keep it at least 3 to 4 feet away from branches that squirrels can jump from.
Sun, shade, and wind
Avoid placing the feeder in full afternoon sun, especially in summer. Direct sun heats the seed, speeds up oil breakdown in sunflower seeds and suet, and encourages mold. A spot with morning sun and afternoon shade is ideal. Also consider wind direction: a feeder that swings violently in the wind discourages use. If your yard is exposed, mount the feeder on a pole rather than hanging it freely, or use a sturdier hanging wire with a short length so it doesn't swing as much.
Window collision safety
Keep feeders either within 3 feet of a window or more than 30 feet away. The middle range (3 to 30 feet) is the danger zone where birds build up enough speed to injure themselves on glass. Close feeders are actually safer because birds don't reach dangerous velocity before a potential collision.
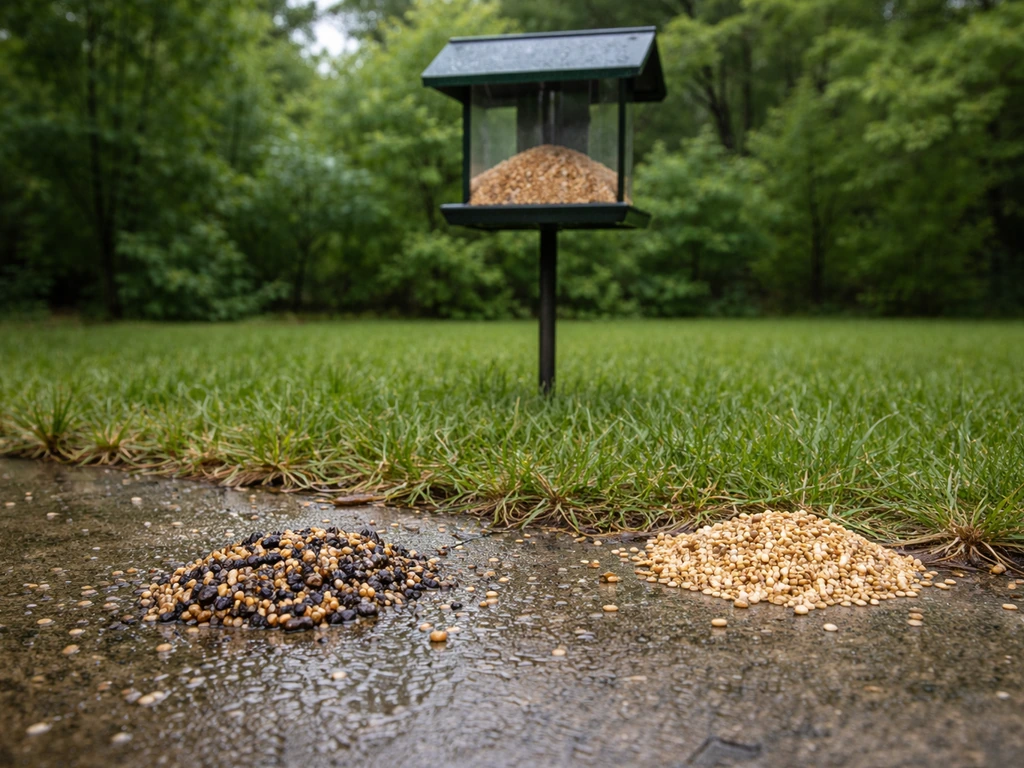
Attracting the right birds: seed pairing and feed types
The feeder design matters, but the seed you put in it matters just as much. Different species have strong preferences, and the wrong seed mostly attracts house sparrows and starlings while the birds you want pass by.
| Seed Type | Birds It Attracts | Notes |
|---|---|---|
| Black-oil sunflower seeds | Chickadees, nuthatches, finches, cardinals, blue jays | Best all-around seed; thin shell is easy for small birds |
| Safflower seeds | Cardinals, house finches, chickadees | Squirrels and starlings tend to avoid it |
| White millet | Sparrows, juncos, doves, towhees | Best offered in a tray or scattered on the ground |
| Nyjer (thistle) seed | Goldfinches, siskins, redpolls | Requires a specialized feeder with small ports; doesn't suit a box feeder well |
| Shelled peanuts or peanut pieces | Blue jays, woodpeckers, nuthatches | Avoid salted or flavored peanuts |
For a basic wood box feeder, black-oil sunflower seed is the single best starting choice. It attracts the widest variety of birds and works well in an open tray. If cardinals are your target, safflower is worth mixing in, and a slightly larger, lower tray helps since cardinals prefer to feed at platform level. You can use this cardinals-friendly seed and tray setup as a starting point for a feeder designed specifically for how to make a cardinal bird feeder. If you're interested in building a feeder specifically tuned for cardinals, that's a worthwhile separate project with its own design considerations.
Avoid mixed "wild bird" blends that contain milo, wheat, or oats. Most desirable backyard birds ignore these fillers, and they end up on the ground where they mold and attract rodents. You pay for seed no bird you actually want will eat.
Also think about a seed catcher tray below your feeder. A tray catches the hulls and scattered seed that birds kick out, keeps your lawn cleaner, and gives ground-feeding species like juncos and doves a second feeding surface. It's a genuinely useful addition to any feeder setup.
Pest-proofing and troubleshooting common problems
This is where most first-time feeders run into trouble. Here are the problems you're most likely to face and what actually works.
Squirrels raiding the feeder
Squirrels are persistent, and if you hang your feeder from a branch they can reach, they will empty it daily. The most effective solution is a pole-mounted setup with a squirrel baffle: a dome- or cone-shaped guard installed below the feeder on the pole. The baffle needs to be at least 17 inches in diameter and positioned 4 to 5 feet off the ground to be effective. Keep the feeder at least 10 feet horizontally from anything a squirrel can leap from. Hanging feeders from a wire strung between two poles, with baffles on each pole, also works well.
Seed getting wet and clumping
If seed is clumping even with drainage holes and a roof, check whether the roof overhang is long enough and whether your feeder is positioned in a spot that gets driven rain from the side. Also try filling the tray with only a day or two's worth of seed at a time rather than a full load, so fresh seed replaces old seed before it has time to absorb moisture. In very wet climates, switching to shelled sunflower pieces instead of whole seeds reduces clumping because there's no shell to trap moisture.
Birds not using the feeder
New feeders sometimes sit ignored for one to three weeks before birds find them. This is normal, especially in fall and winter when birds already have established routes. Speed things up by placing a small pile of seed on top of the feeder or on the ground directly below it, scattering a handful in the open. Once one bird finds it, others follow. Also double-check your placement: if the feeder is too exposed with no nearby shrubs or trees, birds will avoid it. Try moving it closer to cover and giving it another week.
Raccoons and mice
Raccoons are strong and clever enough to take down most feeders if they can reach them. A pole mount with a wide baffle handles raccoons too, as long as the feeder is away from anything they can climb and approach from above. For mice, the main issue is seed on the ground. Use a tray to catch fallen seed and empty it daily, or sweep up seed hulls at least every few days. Avoid leaving seed out overnight if rodents are a known problem in your yard.
Perches that birds avoid
If birds land briefly and leave without feeding, check the perch diameter. A 3/8-inch dowel suits small to medium birds (chickadees, sparrows, finches) well. Larger birds like blue jays prefer a wider surface, so adding a wider ledge or extending the front of the tray slightly can help them grip comfortably. Also check that the perch is positioned close enough to the seed level, if birds have to reach or stretch awkwardly, they'll skip your feeder for one that's easier.
After you build it: testing and next steps
Once the sealant is dry and the feeder is hung, add your first batch of seed (keep it shallow, about an inch deep) and give it three to seven days before deciding anything about placement or design. Note where birds land first, whether seed is staying dry, and whether any squirrels or raccoons are getting in. Adjust location before you adjust anything structural.
Set a calendar reminder for two weeks out to do your first full cleaning: remove remaining seed, scrub the tray with the 1:9 bleach-water solution, rinse completely, dry, and refill. Build this into your routine. A clean feeder is the single most important thing you can do for the birds that visit it, and it also keeps your yard from becoming a disease vector for the local bird population.
If you want to keep expanding, a seed catcher tray below the box and a separate tray feeder mounted lower down for ground-feeding species are both easy weekend additions that dramatically increase the variety of birds you'll see. From there, it's a short step to more specialized feeders tuned for particular species, and once you've got the woodworking basics from this first build, those projects feel a lot more approachable.
FAQ
What wood should I use to make a bird feeder box, and what should I avoid?
Use untreated lumber meant for outdoor projects (commonly cedar, pine, or other natural wood). Avoid pressure-treated wood and any scrap that may be coated, painted, or stained with unknown chemicals, since residue can harm birds even after it dries.
How big should the tray and openings be for a first feeder build?
Aim for a shallow seed tray so birds can access seed without digging, and size the feeding opening so seed stays on the tray even when the feeder sways. A practical rule is to keep tray depth around an inch for wood boxes, and keep openings small enough that birds are feeding from a stable platform rather than reaching in deeply.
Do I need ventilation holes in the feeder box?
Not in most basic designs if you build in proper drainage and use a roof or overhang to stop direct rain. Add vents only if your box still traps moisture, because extra holes can increase rain intrusion during wind-driven storms.
How do I prevent rusting or corroding hardware on a homemade feeder?
If you add screws, wire, or brackets, use exterior-rated hardware (galvanized or stainless steel). Check regularly for red or flaky buildup, especially in humid climates, and replace corroding parts since they can create sharp edges or contaminate seed.
Can I use hot glue, super glue, or regular craft glue for the box?
For outdoor use, prioritize exterior wood glue, and let it cure fully before filling. Hot glue and many craft adhesives soften in sun and rain, which can loosen joints and create gaps where moisture and old seed build up.
How can I tell if my feeder design is too small or too shallow?
If birds arrive but only peck briefly, the perch may be uncomfortable or the tray may be too shallow so seed is out of reach. Refill after a day or two and observe feeding behavior, if birds repeatedly land and leave, adjust perch height and tray location before changing seed.
What seed should I choose if I want to attract both small and larger birds?
Start with black-oil sunflower for broad appeal. If larger visitors struggle to grip, increase perch surface area or slightly extend the tray lip rather than switching seeds immediately, since perch comfort often determines who uses the feeder.
Why does my feeder still get moldy even with drainage holes?
Mold usually means rain is reaching the tray from the side or the feeder is in harsh afternoon sun. Check roof overhang length, rotate or relocate if wind-driven rain hits it, and keep seed shallow so older seed is not sitting long enough to absorb moisture.
How often should I refill and how much seed should I add at once?
Refill in small amounts, especially during rainy weather. Adding only what birds will consume in a day or two reduces the chance of clumping and keeps you from cycling out stale, moisture-affected seed.
What’s the best way to clean a homemade feeder if I’ve had sick birds visiting?
Do a full clean, remove all remaining seed, scrub interior surfaces and the tray, rinse thoroughly, and let it dry completely. If you notice ongoing illness signs, increase cleaning frequency and remove old seed immediately instead of topping off.
Can I leave the seed out overnight in a yard with rodents?
It’s better not to. Use a seed catcher tray to limit waste on the ground, empty dropped seed daily, and avoid leaving large amounts overnight when mice or rats are active.
How do I stop squirrels without overcomplicating the project?
Use a pole mount with a properly sized baffle, the guard should be large enough (often at least 17 inches in diameter) and positioned several feet above the ground. Also keep the feeder away from jump-off points like nearby branches, fences, or ledges.
My feeder is ignored for a while, what can I do besides moving it?
Try a short “access ramp” approach, add a small pile of seed directly below the feeder and onto the top surface so the first bird has an obvious spot to start. Once activity begins, fine-tune placement closer to cover, and wait about a week before redesigning anything.
Will birds hit windows at my feeder location, and how should I choose the distance?
Yes, the risk is highest in the middle distance range where birds can build speed. If possible, keep feeders very close to a window or far enough away that collisions are less likely, and consider using window decals if you cannot change distance.
What perch diameter works best for different backyard birds?
A thinner dowel suits smaller birds, and a wider grip surface helps larger birds. If you see birds landing and not feeding, try changing the perch width or adding a small flat ledge so feet can grip naturally at seed level.
Next Article
How to Make a Cardboard Bird Feeder Step by Step
Step-by-step cardboard bird feeder build with supplies, safe assembly, hanging tips, weatherproofing, and maintenance fi