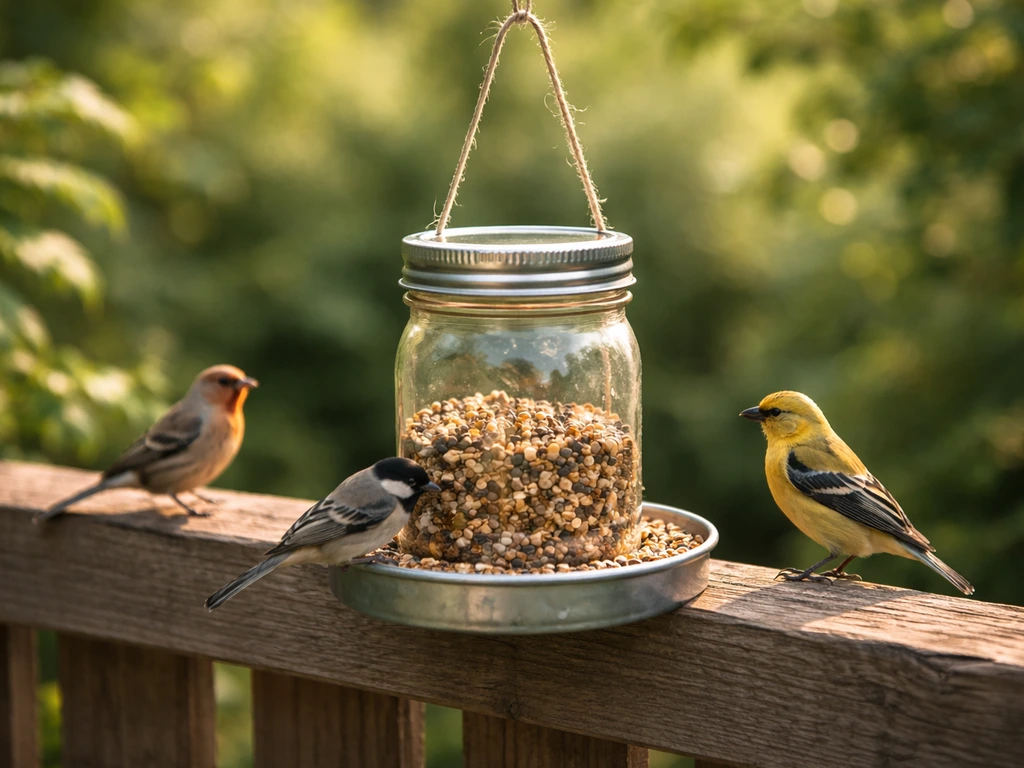
You can build a working mason-jar bird feeder in about 30 minutes using a 1-quart wide-mouth mason jar, a few basic hardware pieces, and either a drill or no tools at all depending on the style you choose. If you want an alternative project, you can also learn how to make a bird feeder out of an orange. The simplest version inverts the jar over a tray or platform so seed gravity-feeds into a dish as birds eat it.
How to Make Bird Feeders Out of Mason Jars Step by Step

Marcus Brennan
16 May 2026
A hanging version adds a wire or rope cradle around the jar. Either way, the wide-mouth jar is the right choice: it gives birds better access to the seed, fits standard hardware store parts, and is easier to clean than narrow-mouth jars.
What you need before you start
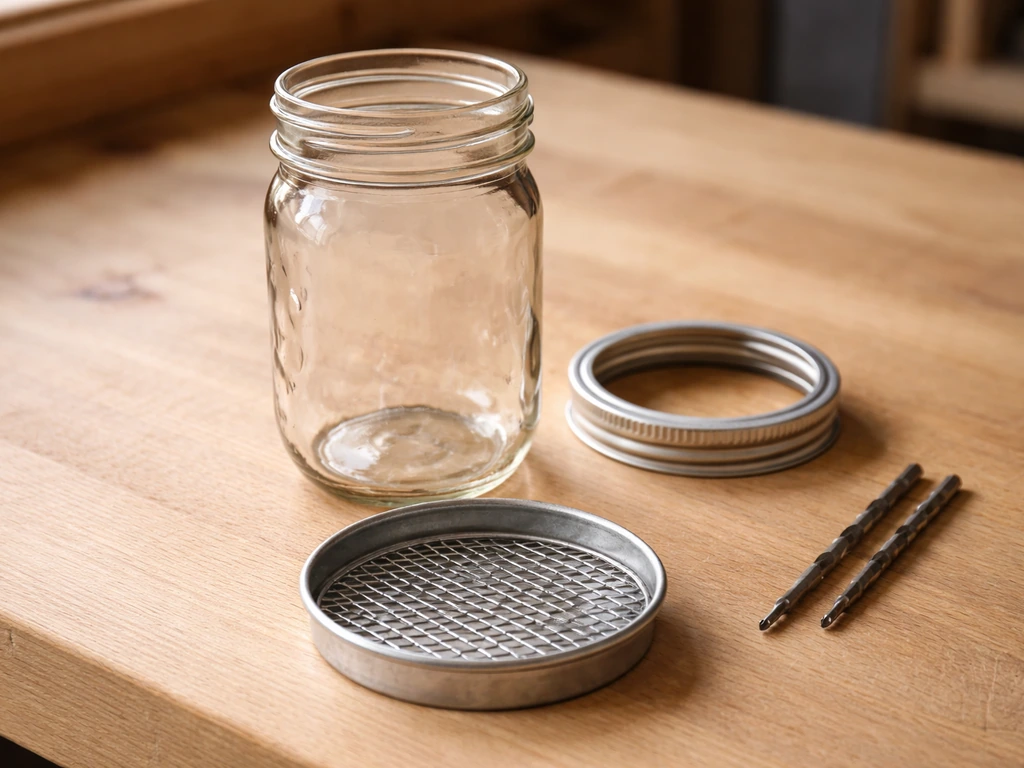
Most of this stuff is already in your house or costs a couple of dollars at the hardware store. Here is everything you might need depending on which build style you go with.
- 1-quart wide-mouth mason jar (Ball, Kerr, or any generic brand works fine)
- Mason jar lid ring (the band, not the flat disc center) — you likely already have one
- Wooden or metal tray or saucer, roughly 6 to 8 inches wide, to act as the seed dish
- Heavy-gauge wire (14 or 16 gauge), zip ties, or jute twine for a hanging cradle
- Screw eye hook or S-hook for hanging
- Small bolt and nut set (3/16 inch works well) if you want to bolt the tray to the lid ring
- Diamond-tipped drill bit sized for glass if you plan to drill the jar base for drainage or a hanging hook
- Variable-speed drill (important for glass drilling — more on that below)
- Lubricating oil or water for cooling the drill bit during glass drilling
- Fine-grit sandpaper or a small file to smooth any drilled edges
- Safety glasses and work gloves for any drilling steps
One honest note on drilling glass: if you have never done it before, plan on going slowly and accepting that your first attempt may crack the jar. Buy an extra jar or two. The good news is that mason jars are cheap, and most versions of this feeder do not require any drilling at all.
Pick your style before you build
Mason-jar feeders come in a few practical configurations, and the one you choose affects what hardware you need and which birds you will attract. Here is a quick breakdown to help you decide.
| Style | Best for | Drilling needed? | Seed or suet? | Difficulty |
|---|---|---|---|---|
| Inverted jar over tray (gravity feeder) | Sunflower, safflower, millet | No | Seed | Beginner |
| Hanging wire cradle | Most small songbirds | Optional (for drainage) | Seed | Beginner |
| Lid-ring + bolt platform (pedestal) | Chickadees, finches, sparrows | Yes (tray attachment) | Seed | Intermediate |
| Suet cage insert in wide-mouth lid | Woodpeckers, nuthatches | No | Suet cake | Beginner |
The inverted gravity feeder is the most popular DIY mason-jar style and the one most beginner builds use. The jar sits upside-down on a tray or saucer, seed fills the tray through the jar opening by gravity, and birds feed from the tray. It is stable, easy to refill, and requires zero drilling. If you want something that hangs freely and looks clean in the yard, the wire cradle version is the next step up and still very doable for a first-timer.
Step-by-step build instructions
Option 1: Inverted gravity feeder (no drilling required)
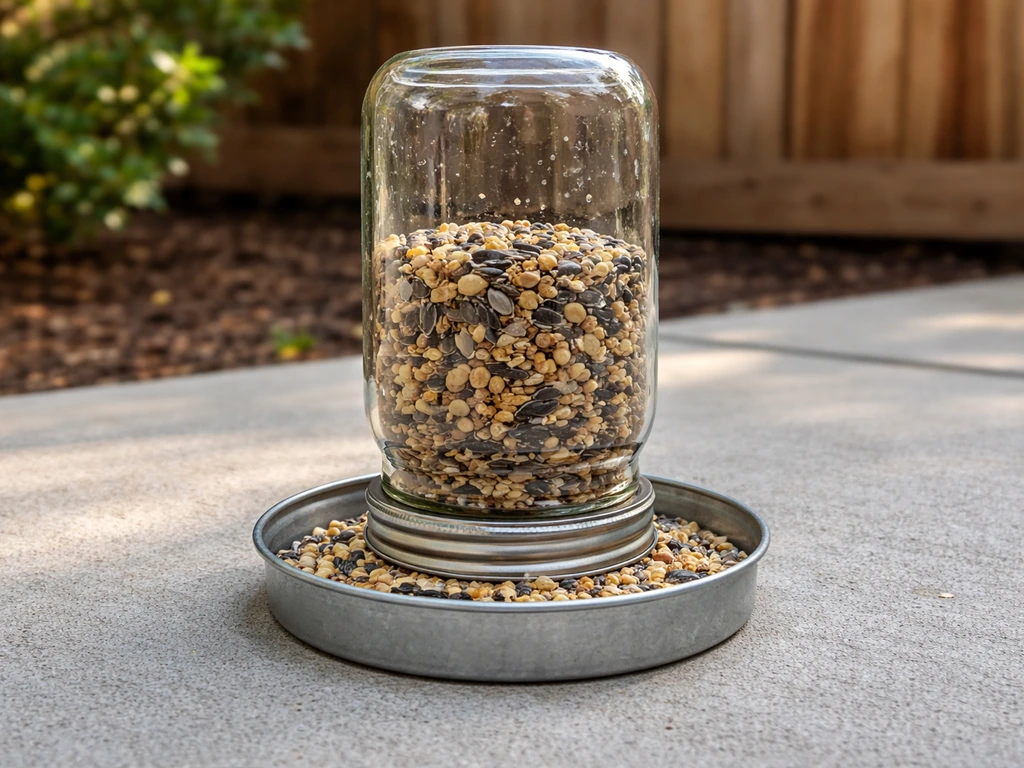
- Fill your wide-mouth mason jar about two-thirds full with birdseed. Sunflower seeds, safflower, or a basic wild-bird mix all work well.
- Place the lid ring over the mouth of the jar but skip the flat disc center. The open ring creates a lip that helps seat the jar on your tray.
- Hold a wooden or metal saucer tightly against the open mouth of the jar. The saucer should be wider than the jar opening — about 6 to 8 inches diameter is ideal.
- Flip the jar and tray together as one unit in a smooth, confident motion. Keep the tray pressed firmly against the jar mouth as you turn it.
- Set the inverted jar on a flat surface or a pedestal post. Seed will gravity-feed into the tray as birds eat from it.
- To secure the jar to the tray permanently, drill a small hole through the center of the saucer and use a bolt and washer to clamp it to the lid ring before flipping. This keeps everything stable in wind.
Option 2: Hanging wire cradle feeder
- Cut two lengths of heavy-gauge wire, each about 24 inches long.
- Cross the two wires at the center to form an X shape. Twist them together at the center point a few times to lock the cross.
- Place the jar upright in the center of the X. Bend each wire arm up along the sides of the jar, spacing them evenly like a cage.
- Gather the wire ends at the base of the jar and twist them together under the base to create a cradle that cups the bottom of the jar.
- At the top (jar base), bring all four wire ends together above the jar bottom and twist them into a loop. This loop is your hanging point.
- Attach an S-hook or screw eye to the loop and hang from a shepherd's hook, tree branch, or bracket.
- If you want drainage holes in the bottom of the jar (now the top of the hanging feeder), drill one or two small holes using a diamond drill bit at low speed with lubrication before assembling the cradle. More on drilling safely below.
How to drill glass safely (when you need to)
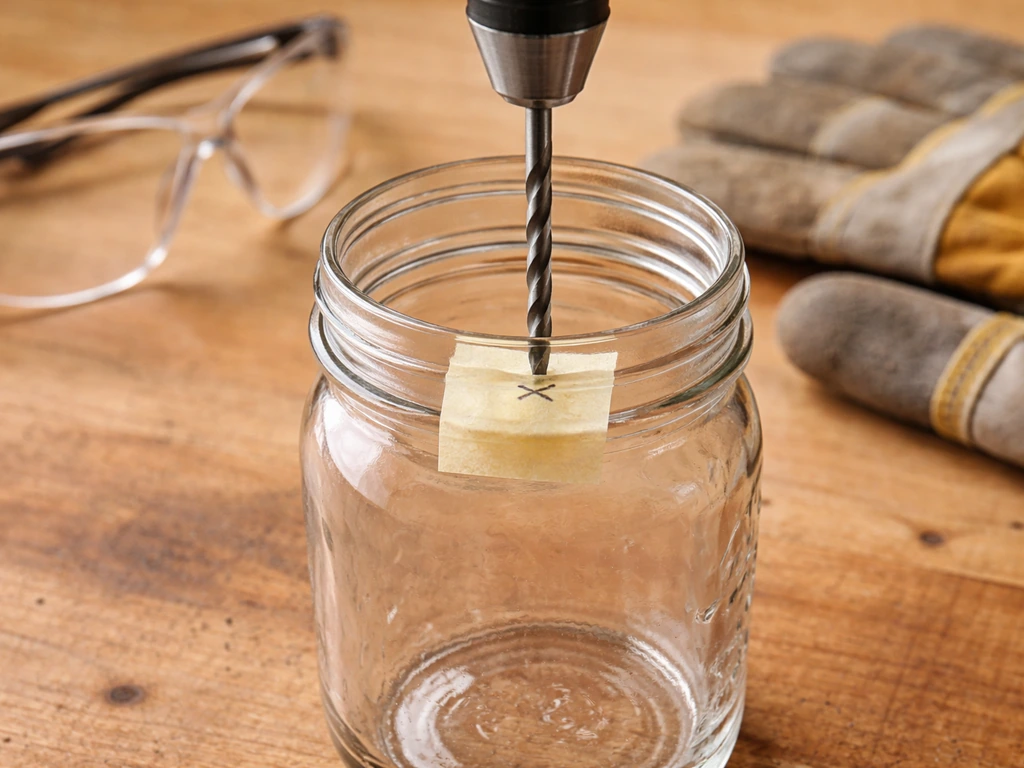
Drilling a mason jar is optional for most builds, but if you want drainage holes or a hanging bolt through the base, here is how to do it without cracking the jar. The two most important rules are: use a diamond-tipped drill bit (not carbide or high-speed steel, which tend to fracture glass), and keep the drill tip cool with lubrication the entire time.
- Mark your drill point with a small piece of masking tape on the glass. The tape gives the bit a surface to grip and helps prevent it from skating.
- Fill a small ring of plumber's putty or modeling clay around the drill point to create a tiny reservoir. Fill that reservoir with water or a drop of oil to lubricate the bit as you drill.
- Set your variable-speed drill to a low speed, around 800 RPM or lower. Slow and steady is the rule with glass.
- Apply gentle, steady pressure and keep the drill as perpendicular to the glass surface as possible. Let the bit do the work.
- Add more water or oil every 10 to 15 seconds to keep the tip cool. Heat is what cracks glass, not pressure.
- When you feel the bit break through, ease off pressure completely and let the bit finish the hole slowly.
- Smooth any rough edges with fine-grit sandpaper or a small file, then rinse the jar thoroughly before using it.
Where to hang it for the best results
Placement matters more than most first-time feeder builders expect. Get it wrong and you end up with squirrel visitors, spooked birds, or worse, window collisions. Here is what actually works.
For window safety, keep feeders blank" rel="noopener noreferrer">either within 3 feet of a window or more than 30 feet away. That might sound counterintuitive, but blank" rel="noopener noreferrer">feeders very close to windows actually cause fewer fatal collisions because birds cannot build up enough speed in that short distance to seriously injure themselves. The danger zone is roughly 15 to 30 feet from glass, where birds have enough distance to reach dangerous speeds.
For squirrel control, the geometry of your placement is everything. A baffle on your pole or shepherd's hook should sit between 4 and 5 feet off the ground. The feeder also needs to hang far enough from any nearby tree trunk, fence, or structure that a squirrel cannot simply jump past the baffle. Think of it as a clearance problem: squirrels can jump horizontally about 10 feet, so keep the feeder that far from anything they can launch off. A baffle plus correct spacing is the least frustrating long-term solution for squirrel management.
A few other placement tips worth following: hang the feeder at eye level or slightly above so you can actually enjoy watching birds, position it near a shrub or small tree within about 10 feet so birds have cover to retreat to between visits, and keep it out of direct afternoon sun to slow seed spoilage in summer.
Keeping it clean so birds stay healthy
This is the part most people skip, and it is the part that matters most for bird health. Wet birdseed inside a feeder is a fast track to mold and bacteria, both of which can make birds seriously sick. Mason jars are actually easier to clean than most feeders because you can fully disassemble them and run them through a dishwasher or hand-wash them without fighting around awkward corners.
The recommended cleaning schedule for a standard seed feeder is every one to two weeks. Wipe out old seed and debris, then disinfect. The go-to solution from multiple wildlife extension services is a 1:9 bleach-to-water mix (one part bleach, nine parts water). Soak the jar, lid ring, and tray for 10 to 15 minutes, scrub with a brush, rinse thoroughly, and let everything air dry completely before refilling. Do not skip the drying step. Putting seed into a damp feeder is what causes the mold problem you were trying to prevent.
If you prefer to skip bleach, hot soapy water followed by a rinse with boiling water is also effective. Some sources note that both methods work equally well as long as you scrub all surfaces and rinse completely. A dishwasher on a hot setting handles the glass jar itself well, but check that your tray or wire hardware is dishwasher-safe before tossing it in.
Troubleshooting: when things go wrong
The jar is leaking seed everywhere
This is the most common complaint with the inverted gravity design. If seed is pouring out instead of gravity-feeding slowly, the tray is too shallow or the jar opening is too far above the tray surface. The seed should sit in the tray at roughly the same level as the jar rim, creating an air seal that regulates the flow. Try a deeper tray or raise the jar on a small bolt spacer so it sits closer to the tray surface.
The jar cracked during drilling
Cracks almost always come from one of three things: too much speed, not enough lubrication, or too much downward pressure. If it cracked, grab another jar and slow everything down. Start at the lowest speed your drill allows and add more water or oil than you think you need. You can also try placing the jar in a tray of water while drilling to keep the bit continuously cooled. Do not try to salvage a cracked jar as a feeder.
Seed is getting wet and clumping
Wet seed usually means either rain is getting into the feeder, condensation is forming inside the jar, or you are not cleaning and refilling frequently enough. For rain, a simple fix is adding a small roof: a frisbee, a terracotta saucer, or a flat piece of cedar hung a few inches above the feeder works well. Drill a hole in the center, run your hanging wire through it, and you have a functional rain guard. For condensation, make sure the jar is fully dry before refilling, and consider drilling a small drainage hole in the tray if water is pooling there.
Squirrels keep raiding it
A mason-jar feeder is actually somewhat squirrel-resistant by design since glass is slippery and the jar shape offers few grip points. But squirrels are persistent. A pole-mounted baffle at 4 to 5 feet off the ground is your most reliable fix. Make sure the feeder hangs far enough from nearby structures that squirrels cannot bypass the baffle entirely with a jump. Also clean up fallen seed under the feeder regularly: accumulated shells and spilled seed attract squirrels and other mammals to the area in the first place, and once they know food is nearby they will keep trying.
Birds are not coming to the feeder
Give it one to two weeks after first putting up any new feeder. Birds are cautious about new objects in their environment. Make sure you are offering the right seed for your area (black-oil sunflower seed attracts the widest variety of birds in most of North America), and check that the feeder is placed near some cover like shrubs or low branches where birds feel safe approaching. If you want to attract orioles specifically, you can build a dedicated feeder using the same gravity or cradle-mount ideas described in how to make an oriole bird feeder. If other feeders in your yard are getting traffic but this one is not, try moving it closer to an established feeding area.
A few finishing thoughts
Mason-jar feeders punch above their weight for how simple and cheap they are to build. They look good in a yard, they are easy to clean because the jar is fully removable, and the wide-mouth design gives you solid options for both seed capacity and bird access. If you enjoy working with repurposed materials, mason jars fit naturally alongside other container-based builds like tin-can feeders and bottle feeders, which follow similar gravity-feed or cradle-mount principles.
Once you have this one sorted, it is worth experimenting with seed types or adding a second feeder nearby to attract a wider mix of species. The basic skills you used here, hanging hardware, placement geometry, and a cleaning routine, apply to every feeder you add after this one.
If you want a simpler build instead, you can also learn how to make a bird feeder from a 2l bottle and reuse the same placement and cleaning basics hanging hardware, placement geometry, and a cleaning routine. If you want a different DIY option, you can also learn how to make a bird feeder from a coke bottle using simple household tools.
If you want a different DIY twist, you can also learn how to make a bird feeder out of a gourd using similar hanging and seed-access principles. If you want to try something different, you can also learn how to make a bird feeder out of wine corks for a fun DIY project.
FAQ
Do I need to drill holes in the mason jar to make it work?
No, the classic inverted design works without drilling because the jar opening feeds seed into a tray by gravity. If you want holes, limit them to the tray for drainage (so water can’t collect) rather than punching extra holes in the jar itself, since that can weaken the glass and increase leaks.
What’s the best tray depth and jar height for preventing overflow or clogging?
Aim for the seed level in the tray to sit close to the jar rim once filled, so it forms a more consistent “air seal.” If you see a flood, use a deeper tray or add a small spacer to bring the jar closer to the tray surface. If it barely feeds, lower the jar slightly or switch to a wider, deeper tray that keeps the opening submerged enough for steady gravity flow.
How can I keep ants and other insects out of the feeder?
Remove and clean the tray promptly, since wet seed and crumbs attract insects. For an extra barrier, hang the feeder from a hook or rope and place a small ant moat (a shallow barrier container) around the support line, then wipe any seed stuck to the hardware so insects do not bridge the gap.
Can I use any mason jar size, or is 1-quart the only option?
1-quart wide-mouth is the easiest starting point because hardware parts and bird access are straightforward. Smaller jars (like 12 to 16 oz) tend to refill more often and can run out quickly, while larger jars can be heavier when full, requiring sturdier hanging hardware to prevent wobble and seed spilling.
What seed should I use if I’m not seeing birds after the first week?
Start with black-oil sunflower seed for broad attraction, then fine-tune based on what your feeder neighbors are bringing. If you’re only getting a few species, switch to seeds those species prefer (for example, mixed seed for generalists, sunflower chips for finches) and keep the feeder clean during the changeover so birds learn the new food source.
How do I stop mold if I live in a humid area?
Shorten the cleaning cycle to weekly, and consider using trays that let moisture drain instead of pooling. If you see condensation inside the jar, make sure everything is fully dry before refilling and consider placing the feeder where it gets less direct late-afternoon sun, which can drive temperature swings and increase condensation.
Is bleach safe for bird feeders, and how do I avoid leaving residue?
Bleach solutions are effective, but you must rinse thoroughly after soaking so no strong odor or residue remains on the jar, lid ring, and tray. After rinsing, air dry completely before adding seed, and handle the feeder carefully at refill time, since small damp bleach smells can discourage birds.
Will squirrels still get the feeder if I already use a baffle?
A baffle helps most, but squirrels can still reach if the feeder is too close to a launch point. Keep the feeder far from tree trunks, fences, and overhanging branches, and clean spilled seed underneath regularly so squirrels do not associate the ground area with consistent food.
What’s the safest placement to avoid bird-window collisions?
Use the “very close or very far” rule: keep the feeder either within 3 feet of the window or more than 30 feet away. If you cannot meet either, reposition so birds can access cover (like shrubs) immediately near the feeder, because fewer direct, fast approaches reduce risky trajectories.
How can I reduce seed spillage and keep the area cleaner?
Ensure the jar sits at the correct height so the seed level in the tray stabilizes near the jar rim. Also check that the tray and any cradle hardware are level, since slanted trays dump seed faster. Using a tray with slightly raised edges can further contain “scatter” as birds land and hop.
Can I run this feeder outside year-round?
Yes, but adjust maintenance. In cold weather, keep an eye out for freezing seed in the tray, and in warm months prioritize more frequent cleaning to prevent spoilage. If you use drilling, inspect hardware connections after storms since vibration can loosen cradles and wires over time.