You can turn almost any bottle into a working bird feeder in under an hour with a drill, some basic hardware, and a bag of seed. A wine bottle makes the most durable and best-looking version, but a plastic water bottle or pop bottle works just as well if you want to skip the glass drilling entirely. The core build is the same across all bottle types: drill or cut feeding ports, add a perch, hang it securely, fill with seed, and position it where birds will actually find it. Once you understand the bottle basics, you can turn a teacup into a feeder by adding a simple mounting, drainage, and a way for birds to access the seed how to make teacup bird feeder. A simple way to make a bird feeder out of a plastic bottle is to cut ports, add a perch, and hang it securely so rain and seed spillage are minimized bottle types. Here's exactly how to do each step.
How to Make a Wine Bottle Bird Feeder Step by Step

Materials and tools checklist
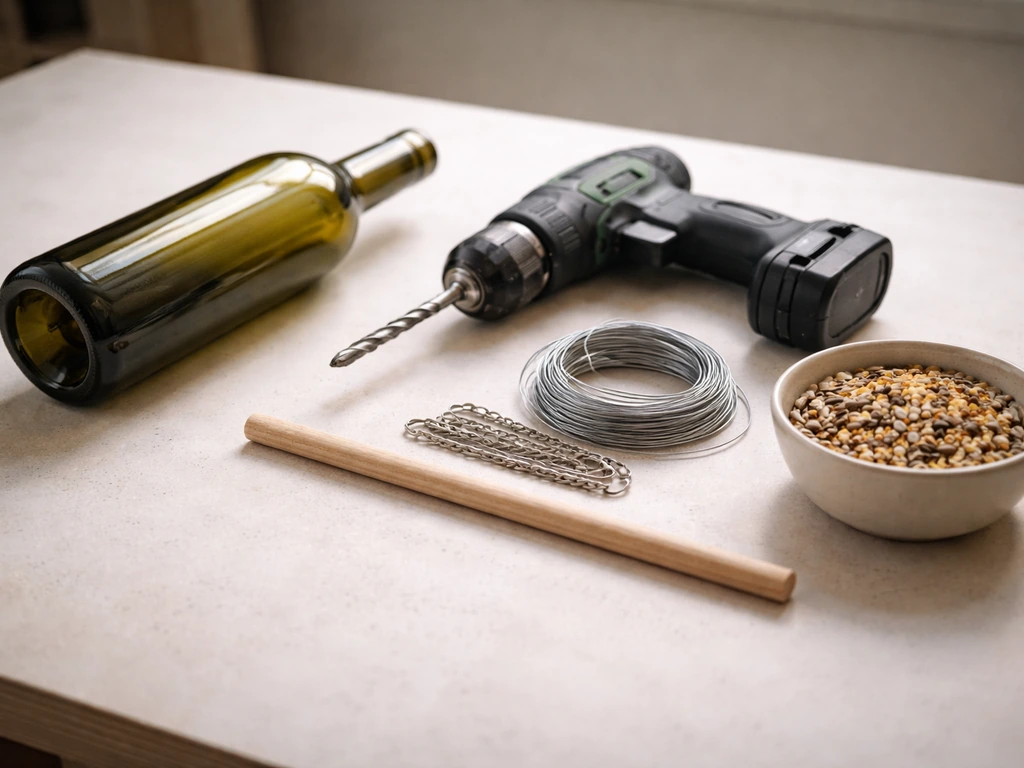
Before you start, pull everything together. Nothing is more frustrating than getting halfway through drilling and realizing you're missing a key piece. Here's what you need, split by bottle type.
For wine bottles and glass bottles
- Clean, dry wine bottle or glass bottle (any size)
- Diamond-tipped or carbide-tipped drill bit, 3/8 inch to 1/2 inch for seed ports
- Variable-speed drill
- Water in a spray bottle or small tray for cooling while drilling
- Cutting oil or lubricating oil (optional but recommended)
- Safety glasses and heavy work gloves
- Wooden dowel, 1/4 inch diameter, cut to about 6 inches for perch
- Copper wire, chain, or rope for hanging (18-gauge wire works well)
- Waterproof sealant or clear epoxy (for sealing around the dowel and ports)
- Needle-nose pliers
- Tape to mark drilling positions
For plastic water bottles and pop bottles
- Clean plastic bottle, 1 liter or larger (2-liter pop bottles are ideal)
- Standard drill bit or craft knife/scissors for cutting ports
- Wooden skewer or dowel for perches
- Paracord, twine, or wire for hanging
- Waterproof craft glue or hot glue gun for sealing perches
- Hole punch (optional, for cleaner port edges on thin plastic)
- Safety glasses
Common items across all builds: birdseed appropriate for your target species, a measuring tape, and about 30 to 60 minutes depending on whether you're drilling glass or cutting plastic.
Step-by-step build instructions
The instructions branch depending on whether you're working with glass or plastic. Start with whichever matches your bottle. If this is your first DIY feeder project, plastic is genuinely easier and there's no shame in starting there before graduating to glass.
Building a wine bottle or glass bottle feeder
- Wash the bottle thoroughly with hot soapy water and let it dry completely. Any residue inside can attract mold once you add seed.
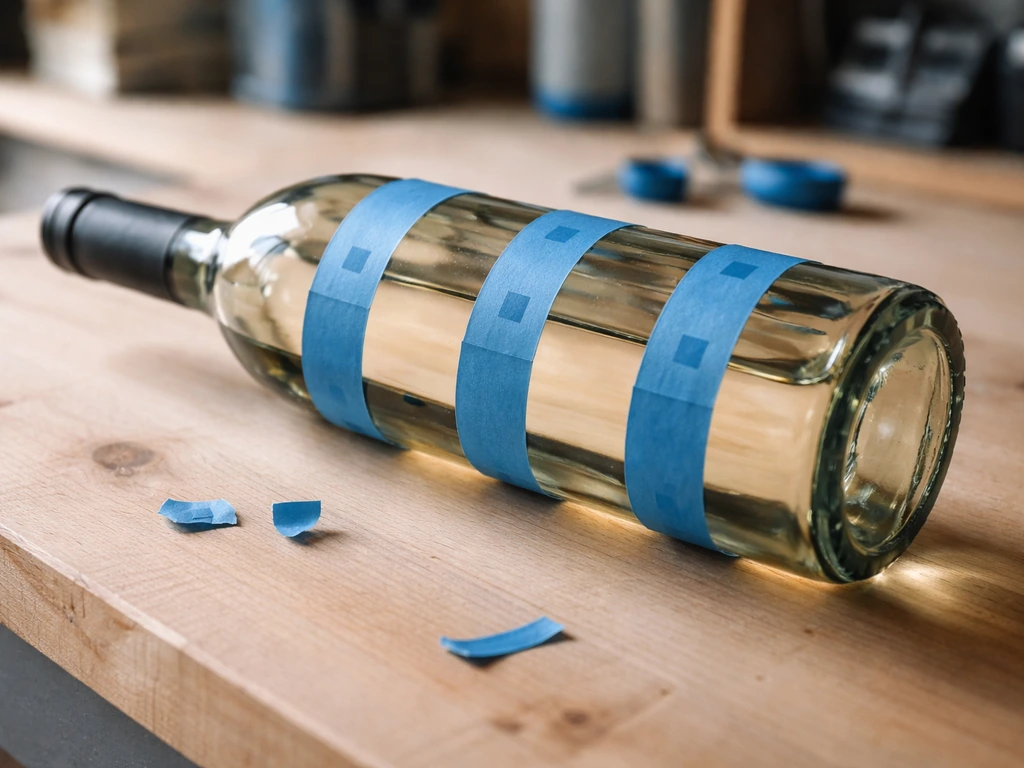
- Mark your drilling spots with tape. You want two seed ports on opposite sides of the bottle, about one-third up from the base. Mark a second pair of holes just below each port for the perch dowel to pass through.
- Put on your safety glasses and gloves before touching the drill. Glass shards are sharp and tiny fragments can fly unpredictably.
- Fill a shallow tray with about half an inch of water and rest the bottle in it while you drill, or keep a spray bottle of water nearby to mist the drill point every few seconds. Drilling heats glass fast and can cause cracking if you don't keep it cool. Use cutting oil or water as your lubricant throughout.
- Set your drill to a low speed and apply light, steady pressure. Don't force it. If the bit starts squealing or the glass feels hot to the touch, stop, mist the area, and let it cool for 30 seconds before continuing. Take frequent breaks.
- Once all four holes are drilled, slide the wooden dowel through the two lower perch holes so it extends about 2 inches on each side of the bottle. Apply a small bead of waterproof sealant or clear epoxy around each hole where the dowel meets the glass. This seals out moisture and locks the perch in place. Let it cure fully before continuing.
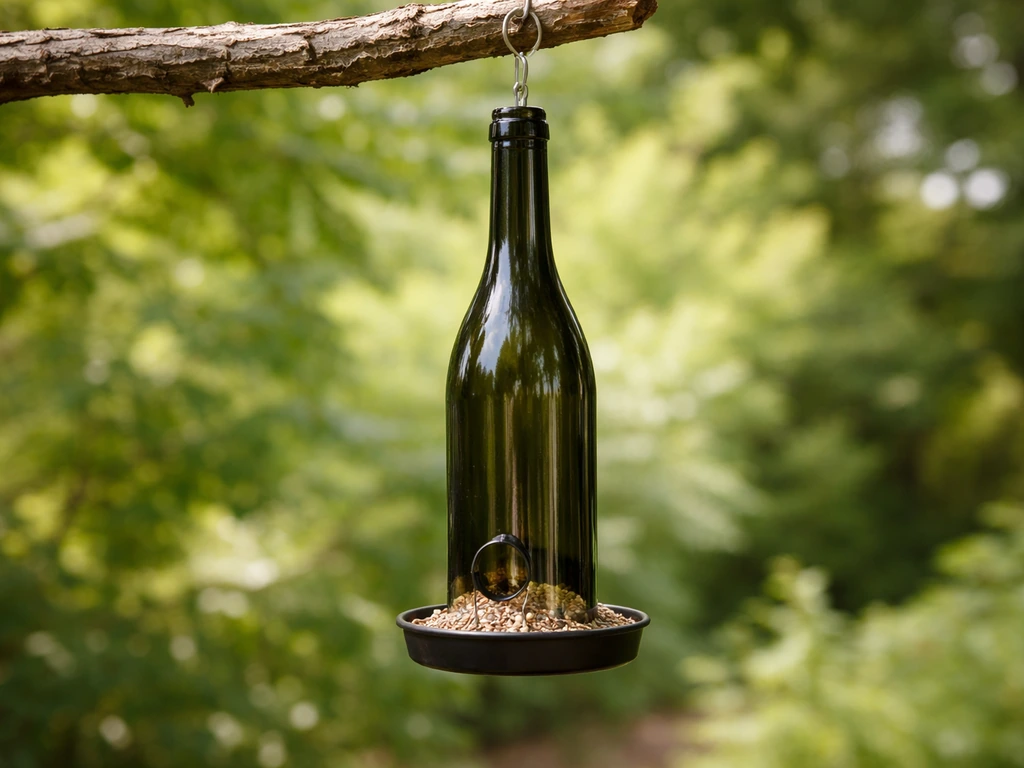
- For hanging, wrap 18-gauge copper wire tightly around the neck of the bottle just below the lip. Make at least three loops and twist the ends together securely. Form a loop at the top large enough to attach a hook or chain. Alternatively, you can use a bottle cage or bracket mount (more on that below).
- Fill the bottle with seed through the mouth, then cap it or leave it open depending on your design. Invert the bottle slightly on its side or at a downward angle so seed trickles into the ports by gravity.
Building a plastic water bottle or pop bottle feeder
- Rinse the bottle and remove any labels. A 2-liter pop bottle gives you more seed capacity and is sturdier than a standard water bottle.
- Use a drill bit or the tip of a heated craft knife to cut two oval feeding ports on opposite sides, roughly one-third up from the base. Make each port about 1.5 inches wide and 1 inch tall, just large enough for seed to be accessible without pouring out.
- Poke a small hole below each port using a skewer. Thread a wooden skewer or short dowel through both lower holes to create a perch. A drop of hot glue on each side keeps it anchored.
- For plastic, one useful tip is to spin the drill bit in reverse when making the initial hole. This creates a cleaner edge without cracking or tearing the plastic as badly.
- Punch or drill a small drainage hole at the very bottom of the bottle to let any water that gets in drain out rather than sitting and soaking your seed.
- Poke two holes through the bottle cap and thread paracord or wire through, knotting it on the inside so it can't pull through. This becomes your hanging attachment. Screw the cap back onto the filled bottle and invert it for hanging.
Which bottle type is actually better?
| Feature | Wine/Glass Bottle | Plastic Water/Pop Bottle |
|---|---|---|
| Durability outdoors | Excellent, won't degrade in UV | Moderate, plastic yellows and cracks over time |
| Ease of drilling/cutting | Harder, requires diamond bit and cooling | Easy, standard bit or craft knife |
| Looks | Attractive, decorative | Functional but plain |
| Seed capacity | Moderate (750ml standard wine bottle) | High (2-liter pop bottle) |
| Cost | Free if reusing, or under $5 | Free if reusing |
| Sharp edge risk | Yes, requires careful handling | Minimal |
| Weatherproofing needed | Seal dowel holes with epoxy | Seal dowel holes with hot glue |
If you want something that lasts multiple seasons and looks good on a patio or garden post, go with a wine bottle. If you want to build one this afternoon with your kids or just test the concept before committing, start with a pop bottle. Both actually work well for birds.
Mounting and hanging options
How you hang or mount the feeder matters more than most people realize. A poorly secured feeder swings wildly in the wind, spills seed constantly, and can fall and shatter if it's glass. Here are the most practical options.
Wire or chain hanging
This is the most common approach for bottle feeders. Wrap 18-gauge copper or galvanized wire around the neck of a wine bottle or through the cap of a plastic bottle and suspend it from a tree branch, shepherd's hook, or wall-mounted bracket. Use at least 12 to 18 inches of drop so the feeder swings freely without hitting surfaces. Chain gives you more adjustability since you can clip it at different link lengths.
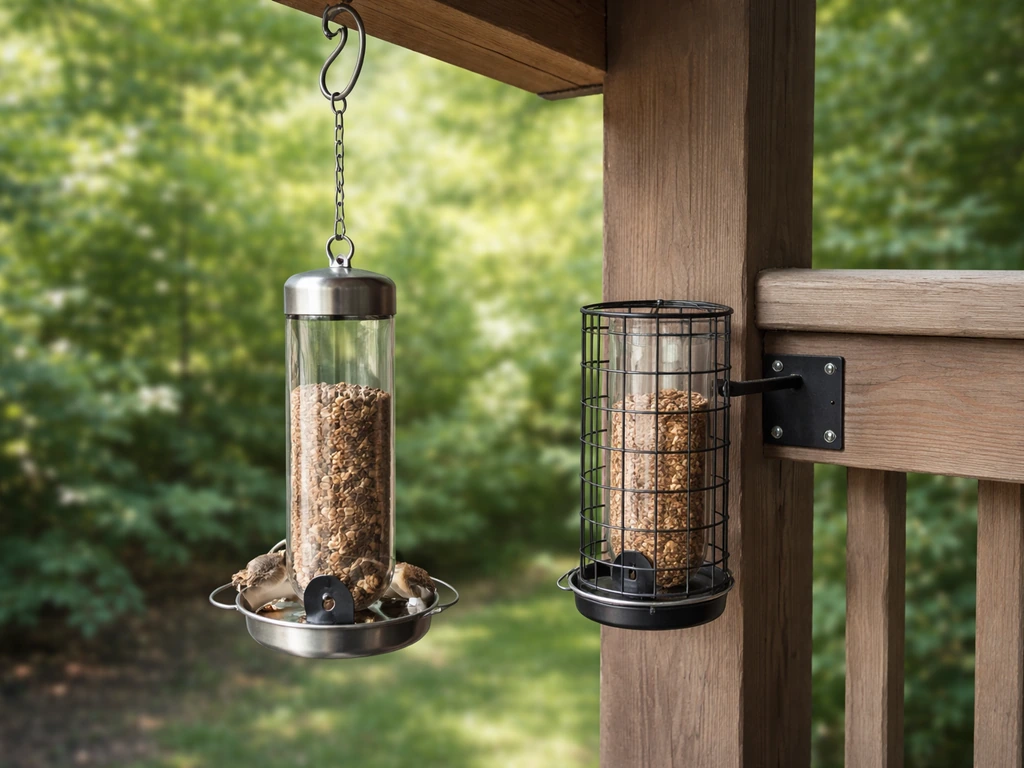
Bracket or cage mounts
Bottle cage brackets designed for wine bottles are sold at most garden centers and online for around $5 to $15. These cradle the bottle horizontally or at a slight downward angle, which is actually ideal for seed flow through the ports. Screw the bracket to a fence post, deck railing, or wooden post and drop the bottle in. This method is far more stable than wire hanging in windy areas and lets you remove and refill the bottle easily.
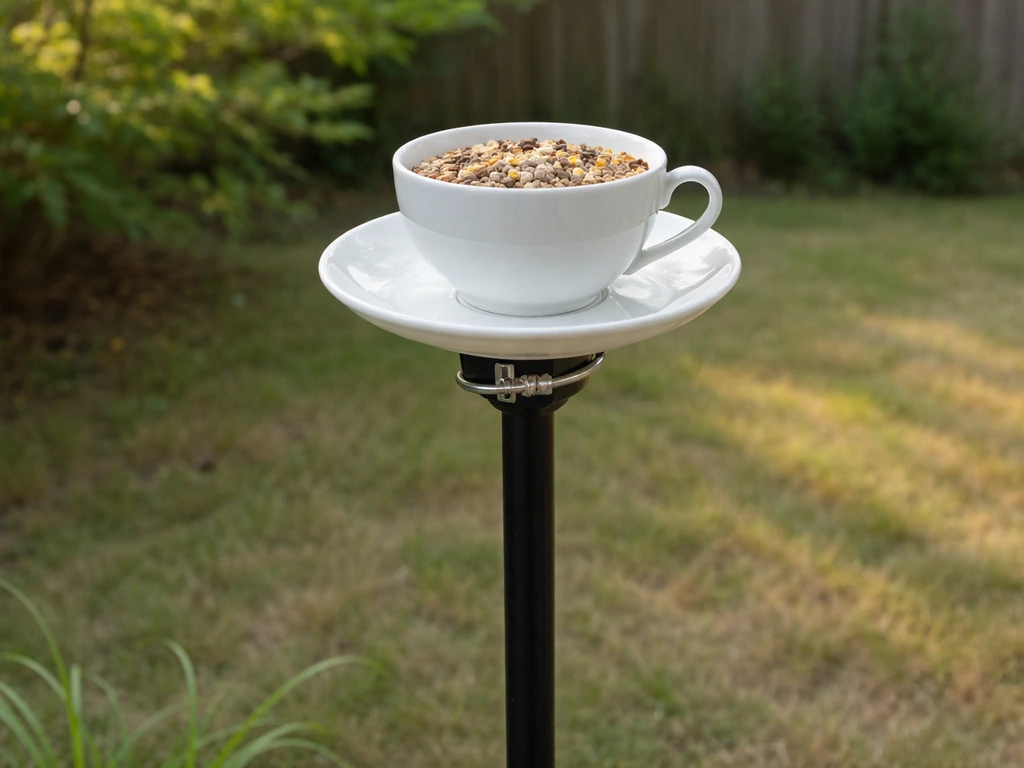
Pole or post mounting
If you want a freestanding setup, attach a bottle cage bracket to a 4 to 6-foot wooden or metal post sunk about 12 inches into the ground. If you want a teacup bird feeder on a pole, attach the teacup to a sturdy pole mount and add a perch just like you would with a bottle feeder Pole or post mounting. A baffled pole (with a squirrel guard around the post) is worth the extra $10 to $15 if squirrels are a problem in your yard. This setup also makes the feeder easier to reach for refilling without needing a ladder or stool.
Window and railing mounts
Suction-cup window mounts designed for standard tube feeders usually won't hold a glass wine bottle safely since they're too heavy. Stick to lightweight plastic bottle feeders for window placement. For deck railings, clamp-style hooks work well for both glass and plastic.
What to put in it and how to prevent leaks and spillage
Best seed choices
The narrow opening and small seed ports on bottle feeders work best with smaller seeds that flow freely. Black oil sunflower seed is the top choice because it attracts the widest variety of birds and flows well without clogging. Nyjer (thistle) seed is excellent if you're specifically targeting finches. Avoid large mixed blends with corn, peanuts, or big sunflower pieces because they'll jam the ports and frustrate birds. Millet works well in plastic bottle feeders with larger port cuts.
Preventing leaks and seed dumps
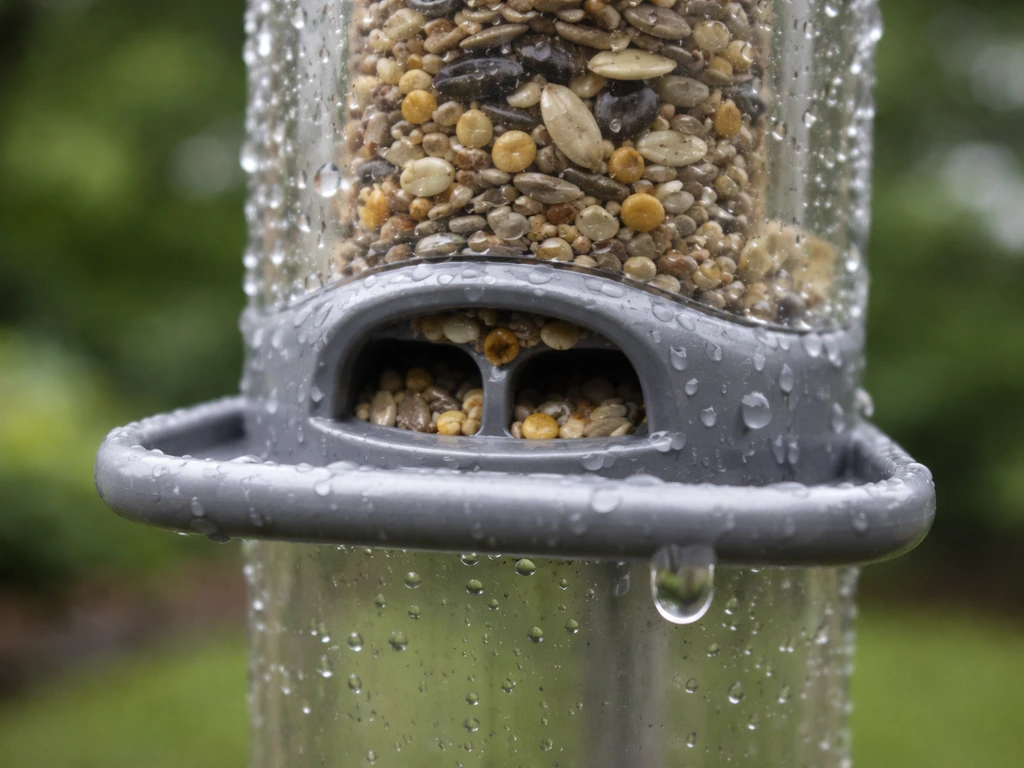
The biggest practical problem with bottle feeders is seed pouring out when it rains or when birds jostle the feeder. A few things that actually help: keep the seed port holes small and just slightly larger than the seed itself, angle the bottle at about 30 to 45 degrees downward rather than completely horizontal so gravity does the dispensing work without overdoing it, and use a waterproof sealant around all drilled or cut edges so rain can't wick in. Adding a small roof or cap over the feeder opening (a plastic lid works fine) reduces rain intrusion dramatically. For plastic bottles, that small drainage hole at the base is essential so pooled water doesn't ruin the seed.
Where to put it: placement tips that actually attract birds
Location makes or breaks whether birds use your feeder. Place it near natural cover like shrubs, a hedgerow, or a tree within about 10 feet so birds have somewhere to perch and watch before approaching. Completely open placements in the middle of a yard take much longer to attract birds because they feel exposed.
Window collision distance is something a lot of people overlook. The safest placement is either very close to a window (under 3 feet) or well away from one (over 10 feet, with 30 feet being ideal). The dangerous middle zone is roughly 3 to 10 feet from glass: birds approach with enough speed to be injured but not enough room to course-correct. If your only mounting options are in that middle zone, apply window collision tape or decals to the nearby glass. For reducing bird-window collisions, Audubon recommends using window markings or patterns on reflective glass where birds might fly into it, and notes that spacing and quantity matter window collision tape or decals.
For pest reduction, position the feeder on a baffled pole or hang it at least 5 feet off the ground where possible. Keep it away from fence lines and overhanging branches that give squirrels a direct launch point. A ground-level seed catcher tray below the feeder can reduce the mess that attracts rats and raccoons, but empty it regularly.
Cleaning, maintenance, and safety
How often to clean
For a standard seed feeder like this, clean it every two weeks at minimum. If you see wet or clumped seed, moldy residue, or bird droppings on or near the feeder, clean it immediately regardless of schedule. Only fill the bottle with as much seed as birds will consume before your next cleaning day. Leaving old, wet seed sitting for weeks is the fastest way to spread disease.
How to clean it properly
- Empty any remaining seed and dispose of it rather than dumping it back into your seed bag.
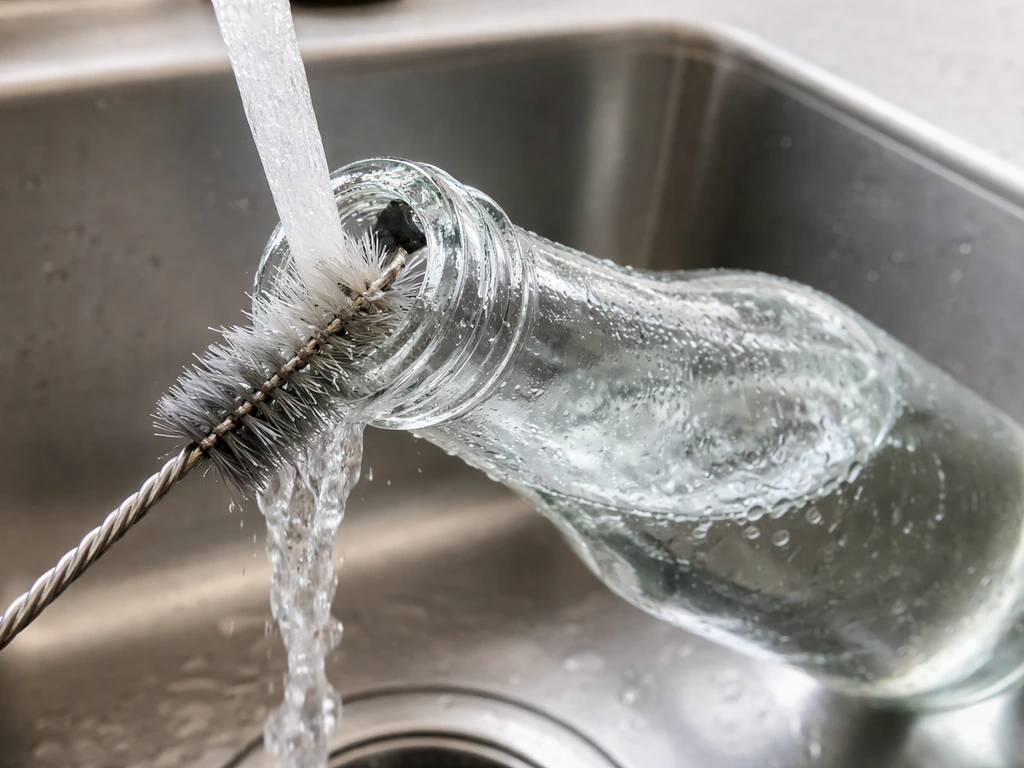
- Rinse the bottle with hot water to loosen debris. A bottle brush is essential here since you can't reach the inside easily otherwise.
- Mix a cleaning solution of 1 part bleach to 9 parts water. Soak the bottle in this solution for 10 to 15 minutes.
- Scrub the inside with a bottle brush, paying attention to any ports or crevices where seed debris collects.
- Rinse thoroughly with clean water multiple times. Bleach residue can harm birds, so don't rush the rinsing step.
- Allow the feeder to dry completely before refilling. A damp feeder causes seed to clump and mold almost immediately.
Handling sharp glass edges safely
Drilled glass edges are sharp. After drilling your wine bottle, run a small piece of fine sandpaper (220 grit) around the inside edge of each hole to dull it. This protects birds' feet when they land near the ports and protects your fingers when refilling. Always wear work gloves when handling a drilled glass bottle until the edges are smoothed. If the bottle ever cracks or chips, retire it from use as a feeder. A cracked glass feeder is a real hazard to birds and not worth patching.
Weatherproofing and long-term upkeep
Glass bottles hold up outdoors almost indefinitely but the hardware around them won't. Check your wire wrapping or cage bracket every few months and replace any rusted or weakened connections before they fail. Reapply waterproof sealant around the perch dowel holes each spring. Plastic bottle feeders typically degrade after one to two seasons in the sun; UV exposure makes the plastic brittle and discolored, and at that point it's easier to just build a new one than try to repair it. That's actually one advantage of the wine bottle version: a small upfront effort on the glass drilling pays off because you won't be rebuilding it every year.
If you enjoy this kind of project, the same basic techniques apply to other bottle-style builds. Plastic bottle feeders and milk jug feeders follow a very similar cutting and hanging process, while decorative versions like teacup feeders take things in a totally different aesthetic direction. But for pure durability and backyard presence, the wine bottle version is hard to beat.
FAQ
Can I use this feeder in winter or during rainy weather without ruining the seed?
Yes, but you should avoid seed that expands or clumps in moisture. Opt for flow-friendly seed like black oil sunflower, keep the port openings small, and add the small roof or cap plus waterproof sealant to reduce rain contact. If you have to use a wetter seed type, plan to clean more often and dump what is left after storms.
What should I do if birds won’t land or eat from my wine bottle feeder?
If you see birds hovering but not landing, the issue is usually access. Make sure the perch is positioned so birds can comfortably land near the port, and consider adding a second perch or a lower landing point on the opposite side for different bird sizes. Also dull the drilled edges so birds can grip and do not avoid the area near the ports.
How much seed should I put in, and how do I avoid overfilling?
Most people overfill. Fill only enough seed for about 1 to 2 weeks (or less in rainy climates) so you do not end up with a wet, stale layer that clogs the ports. Use a funnel to prevent spilling down the neck area, then wipe the bottle opening clean before hanging it back up.
How long does it usually take for birds to start using the feeder?
Yes. A short break-in period helps, especially if your yard has limited feeders currently. Start by placing the feeder near shrubs or a tree within about 10 feet, then add small amounts of favorite seed daily for a couple of days. Once birds are using it consistently, switch back to your normal fill and cleaning rhythm.
Can I mount a glass wine bottle feeder on a window using suction cups?
Do not use suction-cup window mounts for a glass wine bottle. The safest window option for heavier glass is a hook or clamp-style mounting on a railing, or mounting via a cage bracket on a post. If you must mount near a window, prioritize stability to prevent swinging and accidental collisions.
What causes the feeder ports to clog, and how do I fix it?
If you drilled ports and seed keeps jamming, the port size is likely too small for the seed pieces you chose, or you have oil-rich residue building up. Switch to smaller, free-flowing seeds, remove the bottle and clear ports with a thin brush, and make sure drilled edges are sanded so seed does not catch on rough spots.
Will putting a tray under the feeder help with rats and raccoons, and how often should I clean it?
A ground-level seed tray helps reduce mess, but it should be cleaned at least as often as the feeder, otherwise spilled seed attracts pests. Use a shallow tray, keep it positioned directly under the ports, and empty it promptly, especially after rain.
Which birdseed works best for a wine bottle feeder?
Yes, if you target specific birds. Use black oil sunflower for the broadest turnout and best flow. Use nyjer if you specifically want finches. Avoid larger mixed blends with corn or big pieces because they are more likely to jam the ports.
How can I stop squirrels from emptying the feeder or stealing all the seed?
If squirrels are reaching it, switch to a baffled pole setup (with a squirrel guard) or hang higher, ideally at least 5 feet off the ground. Also avoid placing it near fence lines or branches that give squirrels an easy launch route.
How often should I clean the wine bottle bird feeder, and what signs mean it’s time right now?
Clean immediately if you notice wet or clumped seed, moldy residue, or bird droppings. If it looks fine, a practical baseline is every two weeks for standard use, but in humid weather or after heavy rain, shorten the interval to prevent disease buildup.
My wine bottle has a chip or crack. Can I patch it or keep using it?
For glass, you can’t safely “patch” structural cracks. If the bottle chips or cracks, retire it from use. For the drilling work, keep gloves on during handling, sand the hole edges with 220 grit, and re-check hardware for looseness after impacts or seasonal wind.
How to Make Teacup Bird Feeder on a Pole: Step-by-Step
Step-by-step guide to build a teacup bird feeder on a pole, mount it safely, deter pests, and maintain it.