You can build a working DIY bird feeder today, if you’re wondering how do you make bird feeders, this guide walks you through every real-world build option, including do it yourself bird feeder kits. A plastic bottle, a milk jug, a few sticks, or a scrap piece of wood are genuinely all you need to get started. I've tried most of these builds myself, and the honest truth is that the birds don't care how fancy the feeder looks. They care whether the seed is fresh, the feeder is in a good spot, and they can land safely. This guide walks you through every real-world build option, from a five-minute pinecone feeder to a proper wooden platform feeder, plus how to set up a homemade water station and a charming teacup feeder. It also covers where to hang everything, how to keep it clean, and how to deal with the squirrels that will absolutely show up.
Do It Yourself Bird Feeder Guide: DIY Seed, Water, More
Best DIY bird feeder options, from dead simple to more involved
Before you pick up a tool, it helps to know which style matches your time, materials, and the birds you want to attract. Before you pick up a tool, it helps to know which style matches your time, materials, and the birds you want to attract. Here's a quick breakdown of the main [DIY feeder types](/diy-bird-feeders/how-to-make-heart-shaped-bird-feeders) and what each one is actually good for.
| Feeder Type | Best For | Materials Needed | Build Time | Skill Level |
|---|---|---|---|---|
| Pinecone feeder | Beginners, kids, clinging birds (chickadees, nuthatches) | Pinecone, peanut butter, birdseed, string | 5–10 minutes | Beginner |
| Plastic bottle feeder | Small songbirds, limited budgets | Plastic bottle, wooden dowels or chopsticks, string or wire | 15–20 minutes | Beginner |
| Milk jug feeder | Multiple birds, quick build | 1-gallon milk jug, scissors or knife, string | 10–15 minutes | Beginner |
| Teacup feeder | Decorative, small birds, patios | Teacup and saucer, metal rod or dowel, epoxy or waterproof adhesive | 30–45 minutes | Beginner–Intermediate |
| Wooden platform feeder | Most bird species, durability | Untreated lumber, screws, drill, sandpaper, rope or chain | 1–2 hours | Intermediate |
| Homemade water station | All bird species, year-round use | Shallow dish, pedestal or hanging bracket, rocks or marbles | 15–30 minutes | Beginner |
My honest recommendation if you're just starting out: build a milk jug or bottle feeder first to get birds comfortable with a spot in your yard, then graduate to a wooden platform or teacup feeder once you know where the birds like to gather. You'll waste less time guessing on placement.
Step-by-step builds: bottle, milk jug, wood, and pinecone feeders
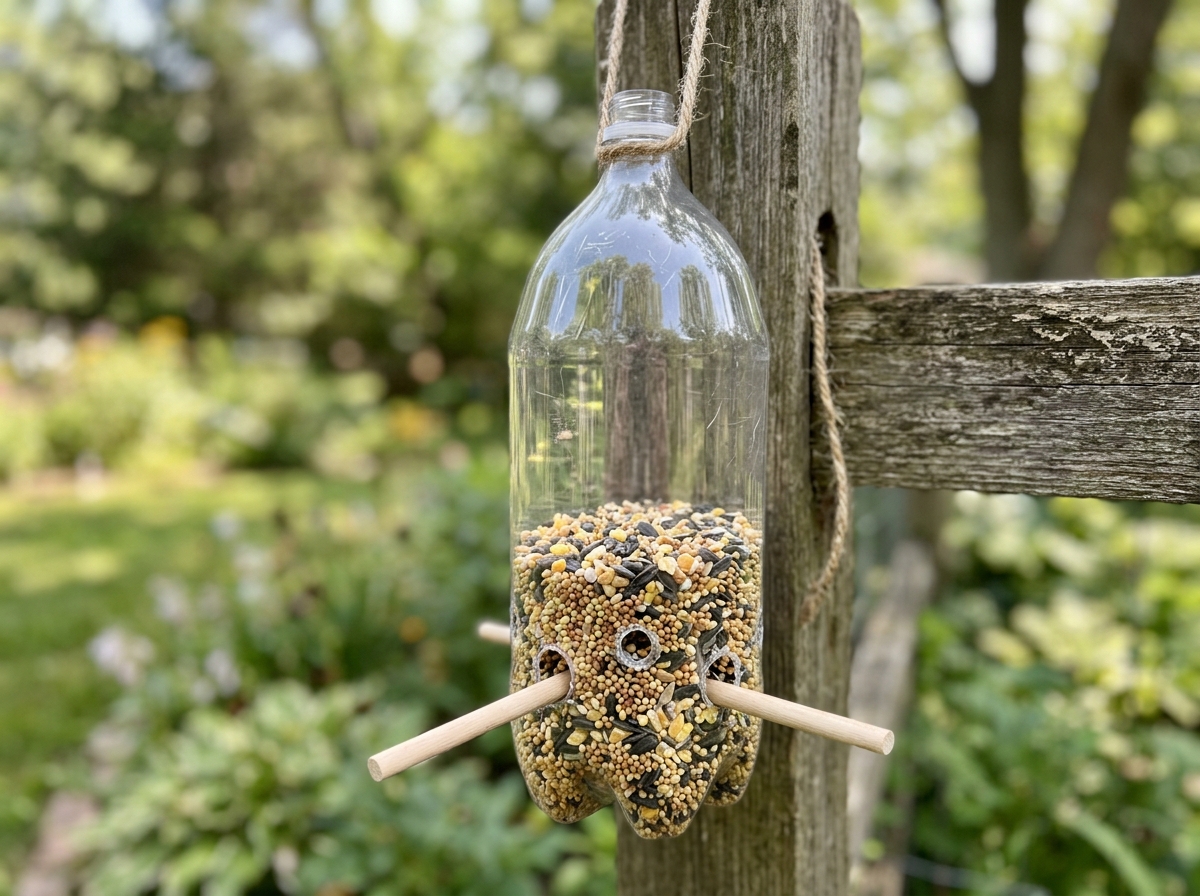
Plastic bottle feeder
This is probably the most popular DIY bird feeder because it costs almost nothing and takes under 20 minutes. A clean 2-liter soda bottle or large water bottle works perfectly.
- Clean and dry the bottle completely. Any residue can mold and contaminate seed.
- Use a sharp knife or heated skewer to poke two small holes on opposite sides of the bottle, about 2 inches from the bottom. Make them just wide enough for a wooden chopstick or 1/4-inch dowel to pass through snugly.
- Push the dowel or chopstick all the way through both holes so it sticks out a couple of inches on each side. This is the perch.
- Poke a small seed port just above each perch end, about 1/4 inch in diameter. Birds will pull seed through these holes.
- Add a second set of perches and ports at a 90-degree angle, a few inches higher, if you want more feeding stations.
- Poke two small holes near the bottle cap end and thread sturdy string, twine, or wire through to create a hanging loop.
- Fill with seed (nyjer for finches, sunflower for most other small songbirds), screw the cap back on, and hang it up.
One thing I learned the hard way: make the seed ports small. If they're too large, seed spills out fast and you'll be refilling constantly while also creating a mess on the ground that attracts rodents.
Milk jug feeder
A 1-gallon plastic milk jug makes an excellent open-style feeder that holds a decent amount of seed. It's a bit more sheltered than a platform feeder, which means seed stays drier longer.
- Rinse the jug thoroughly and let it dry. Milk residue inside a feeder is a real problem, so rinse several times.
- Use scissors to cut a large window opening on one or two sides of the jug, starting about 3 inches from the bottom. Leave the bottom 3 inches intact to hold seed.
- Smooth any sharp plastic edges with sandpaper or electrical tape so birds don't nick their feet.
- Poke a hole through the handle or near the top of the jug and thread wire or strong twine through for hanging.
- Add a few small drainage holes in the very bottom in case rain gets in.
- Fill with seed and hang at a comfortable bird-watching height for you, typically 5 to 6 feet off the ground.
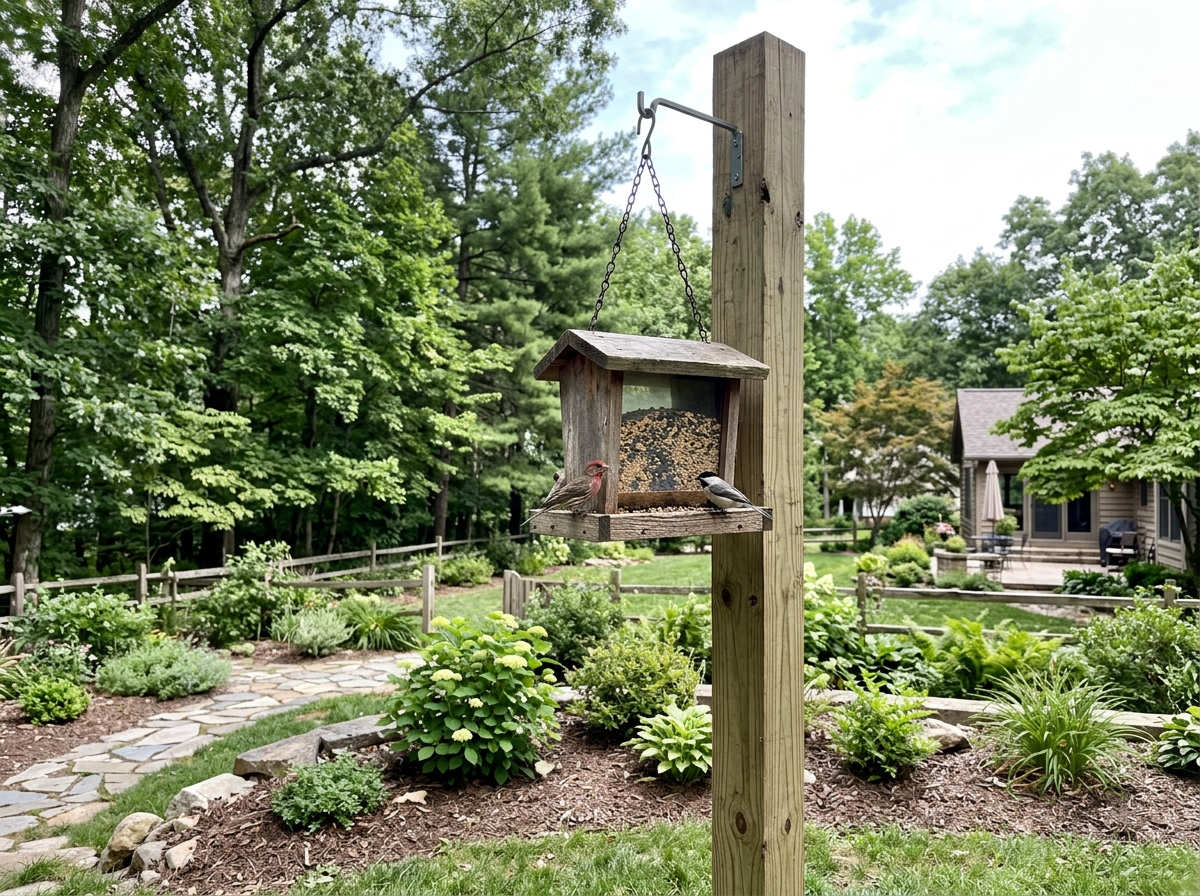
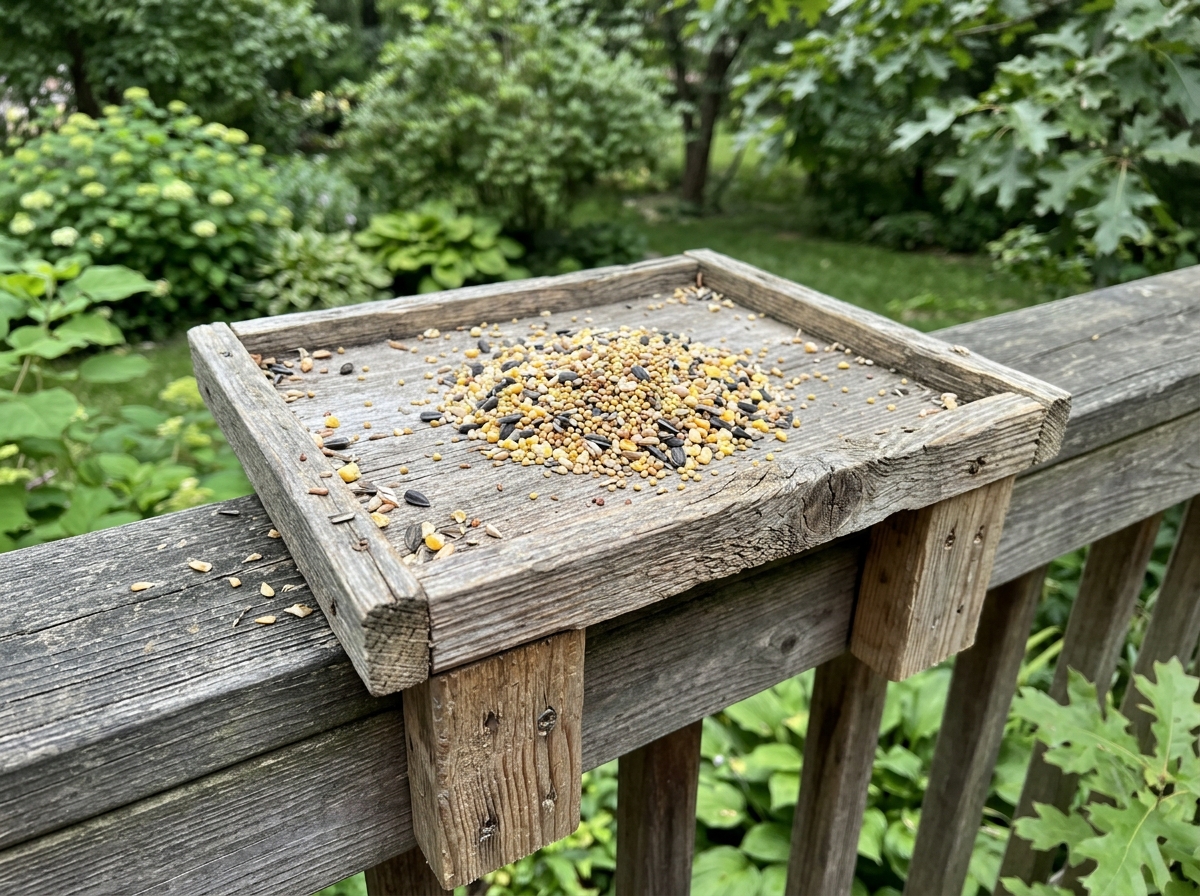
Wooden platform feeder
A flat wooden platform feeder is the most versatile build because it attracts the widest range of birds, including ground-feeders like juncos and doves who prefer open trays. You don't need to be a carpenter. If you can make straight cuts and drive screws, you can build this in an afternoon.
Materials: a piece of untreated cedar or pine (cedar handles weather better) roughly 12 by 16 inches for the tray floor, four strips of the same wood about 1 to 1.5 inches wide for the side rails, waterproof wood glue, exterior screws, a drill, sandpaper, and rope or chain for hanging. Always use untreated wood. Pressure-treated lumber contains chemicals that are harmful to birds.
- Cut your tray floor to size. A 12x16 inch platform is a practical starting point.
- Sand all edges smooth. Birds land on the rim constantly, so rough edges lead to injuries over time.
- Glue and screw the side rails around the perimeter, leaving 1-inch gaps at each corner. These gaps let rainwater drain out instead of pooling and rotting your seed.
- Drill a small drainage hole in the center of the floor as extra insurance against standing water.
- Drill four holes near the corners of the platform and thread rope or chain through each one, then tie the four lines together above the feeder to create an even hanging point.
- Sand the whole thing once more, then let any glue cure fully before filling with seed.
You can add a simple roof by drilling two small posts into opposite ends of the platform and attaching a flat board above the tray. It's not required, but it keeps seed dry in rainy weather and drastically reduces how often you need to dump out wet, molded seed.
Pinecone feeder
This is the one to do with kids. It takes about five minutes, uses stuff you can find outside, and genuinely works to attract chickadees, nuthatches, and woodpeckers. Find a large, open pinecone (bigger is better, at least 4 to 5 inches long), tie a 12-inch length of string or twine firmly around the top, spread peanut butter generously into all the crevices, and then roll or press birdseed into the peanut butter until it's well coated. Hang it from a branch and you're done. Refresh the peanut butter and seed every few days, especially in hot weather when peanut butter can go rancid.
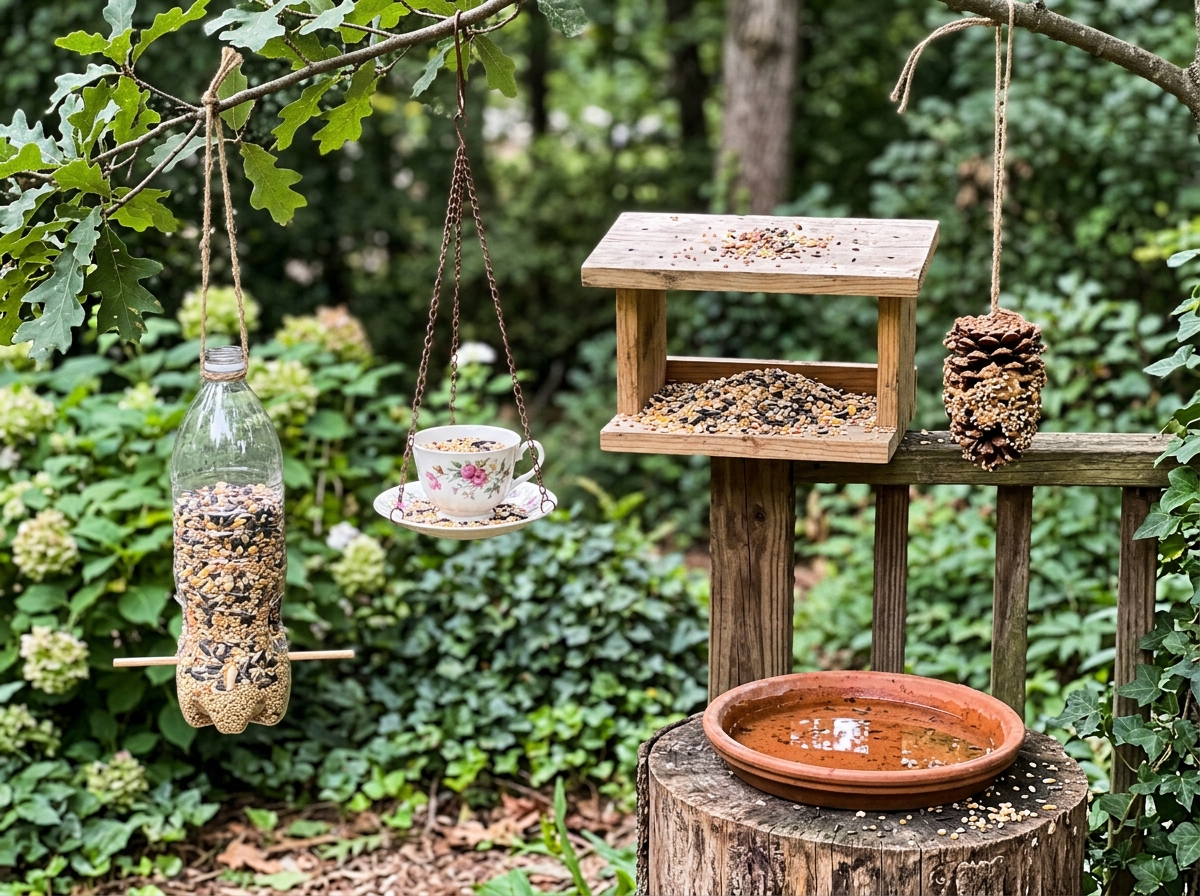
How to build a DIY teacup bird feeder (and keep it safe)
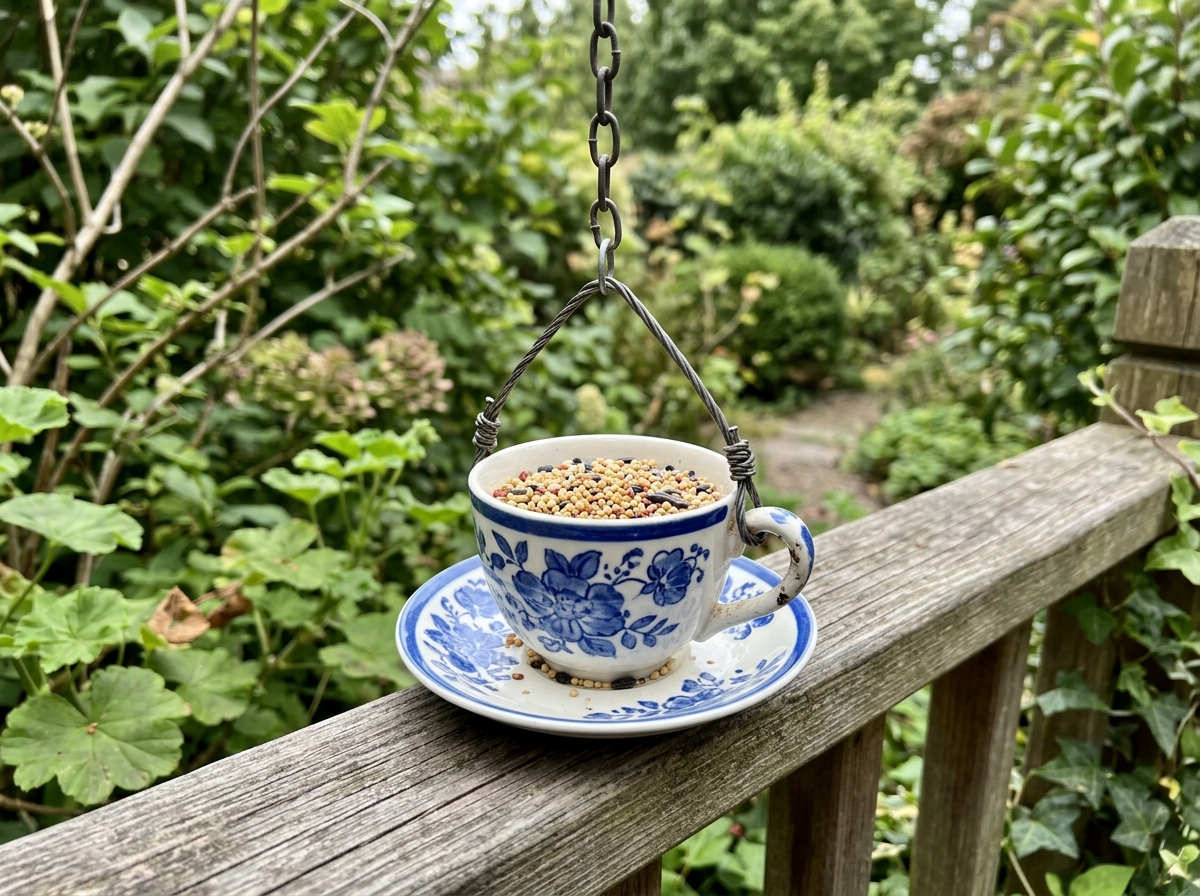
A teacup feeder is one of those projects that looks store-bought when it's done right. It's also genuinely functional as a small seed or water feeder for lighter birds like sparrows, finches, and wrens. The key is making sure the cup is bonded securely and the whole thing is mounted safely.
What you need: a ceramic teacup and saucer (thrift stores are great for this, spend a dollar or two), a metal rod, thick wooden dowel, or garden stake for mounting, waterproof two-part epoxy or outdoor-rated construction adhesive, and either a post to mount it on or a sturdy bracket to attach to a fence or railing.
- Clean the cup and saucer well and let them dry completely. Adhesive won't bond properly to a damp surface.
- Decide on your orientation. The classic look is the cup tipped sideways and glued to the saucer at an angle, with the saucer acting as both a perch and a seed catcher below the cup opening.
- Mix your two-part epoxy according to the instructions and apply it to both the bottom of the cup and the saucer surface where they'll meet. Press firmly and hold for at least a minute.
- Let the epoxy cure for the full time listed on the package, usually 24 hours. Don't rush this step.
- Once cured, attach the saucer to your mounting rod or stake using more epoxy, or use a strong hose clamp or adjustable bracket to secure the saucer to a metal post.
- If mounting to a fence or railing, a flat metal bracket screwed into the wood with the saucer epoxied on top works well.
- Fill the cup loosely with sunflower chips or mixed seed and set the feeder where smaller birds can find it.
Safety tips worth knowing: ceramic feeders can crack in hard freezes, so bring the teacup feeder inside over winter if you live somewhere that gets real cold snaps. Also check the epoxy bond every few weeks by gently pressing on the cup. If it shifts at all, re-bond it before it falls and breaks. A ceramic cup dropping from a fence height onto a patio or onto a bird below isn't a good outcome. Use UV-resistant, waterproof epoxy rated for outdoor use, not regular superglue, which breaks down quickly in sun and rain.
DIY bird water feeder ideas and how to keep it clean
Birds need water just as much as they need seed, and a homemade water station can attract species that never visit seed feeders at all, including warblers, robins, and thrushes. The basic concept is simple: a shallow dish of fresh water set at a safe height. The execution is what makes it actually useful.
Simple water station builds
- Terracotta saucer on a stump or overturned pot: Place a large terracotta plant saucer (12 to 16 inches wide, 1 to 2 inches deep) on top of a flat stump or an overturned pot at a stable height of about 2 to 3 feet. Add a few flat stones or marbles to give birds a landing surface inside the dish and to give insects somewhere to escape.
- Hanging shallow dish: Use a heavy-duty plastic plant saucer with three evenly spaced holes drilled near the rim. Thread wire through each hole, gather the wires above the dish, and hang from a branch or shepherd's hook. Keep depth under 2 inches so small birds can stand.
- Repurposed garbage can lid: A clean, light-colored plastic garbage can lid placed upside-down in the yard and propped level with a couple of bricks underneath it works surprisingly well as a ground-level water dish for larger birds like robins.
Keeping your water station clean and safe
Stagnant water is a mosquito nursery and a disease risk for birds, so you need to stay on top of it. Change the water every 1 to 2 days in warm weather. Scrub the dish with a stiff brush to remove algae and debris every few days. For deeper cleaning, soak the dish in a diluted bleach solution (1 part bleach to 9 parts water), scrub, rinse thoroughly until you can't smell bleach anymore, and let it dry completely in the sun before refilling. That same bleach ratio is what the U.S. Fish and Wildlife Service recommends for sanitizing bird feeders, and it works equally well for water dishes. Adding a few drops of water from moving a hose over the dish surface or placing a small solar-powered fountain pump in it can help deter mosquitoes and attract more birds, since birds are drawn to the sound of moving water.
Where to hang or place your DIY feeder
Getting the location right matters more than people expect. A feeder in a bad spot will sit ignored for weeks, and then you assume birds just don't come to your yard. Usually they would, but the placement is working against you.
The single most important rule for window safety: place feeders either within 3 feet of a window or more than 30 feet away from one. This sounds counterintuitive, but a feeder within 3 feet of glass means a bird that startles can't build up enough speed to injure itself on impact. Feeders placed at 10 to 20 feet away are the most dangerous distance because birds can reach full flight speed before hitting glass.
For squirrel management and bird comfort, hang feeders at least 5 feet off the ground and at least 8 to 10 feet away from any fence, tree trunk, or structure a squirrel can leap from. Squirrels can jump roughly 8 to 10 feet horizontally and 4 to 5 feet vertically, so if your feeder is within that range of any launch point, they'll reach it. If you're mounting a feeder on a dedicated pole, look into a separate article on DIY bird feeder poles for options on building a do it yourself bird feeder pole setup.
Ideal placement also means near cover but not hidden by it. Birds feel safer feeding when shrubs or trees are within 10 to 15 feet to retreat to if a predator shows up, but they also need clear sightlines so they can see threats coming. A feeder directly inside a dense shrub is actually risky because cats can hide close enough to ambush feeding birds. Keep open space of at least 3 to 4 feet around the feeder in all directions at ground level.
For your homemade water station, place it in partial shade to slow algae growth and reduce evaporation in summer. Keep it separate from your seed feeder by at least a few feet so seed hulls don't fall into the water and foul it quickly.
Troubleshooting, maintenance, and pest-proofing
Birds aren't showing up
Give it at least two weeks before worrying. Birds need time to discover a new food source. If it's been a while with no activity, check whether the seed is fresh (old or wet seed smells rancid and birds avoid it), whether the feeder is in a spot with some natural cover nearby, and whether there's a cat or other predator regularly patrolling the area. Try adding a water dish nearby, since birds scouting for water often discover feeders in the same trip. Sometimes just moving a feeder 10 feet in a different direction is enough to change things.
Squirrels taking over
This is the most common frustration, and there's no single magic fix because squirrels are genuinely persistent problem-solvers. The most reliable combination is a good pole location plus a baffle. If squirrels are reaching the feeder from above by jumping from a branch or roof, a tilting squirrel baffle mounted above the feeder and at least 18 inches in diameter will knock them off when they try to grab the edge. That's the approach recommended by FeederWatch, and it's the one that actually holds up to repeat attempts. Baffles under the feeder on the pole stop climbing. You often need both. Weight-sensitive tube feeders that close the seed ports when anything heavier than a songbird lands are also effective, though they cost more than a basic DIY build.
Mold, rot, and wet seed
Wet seed molds fast and can make birds sick. If you're finding clumped, slimy seed in your feeder regularly, the feeder either lacks drainage or is positioned where rain hits it directly. Drill extra drainage holes in the bottom of any feeder that pools water. For wooden feeders, a small roof overhang helps a lot. In wet seasons, only fill feeders with a day or two's worth of seed at a time so nothing sits long enough to go bad.
Cleaning routine to keep birds healthy
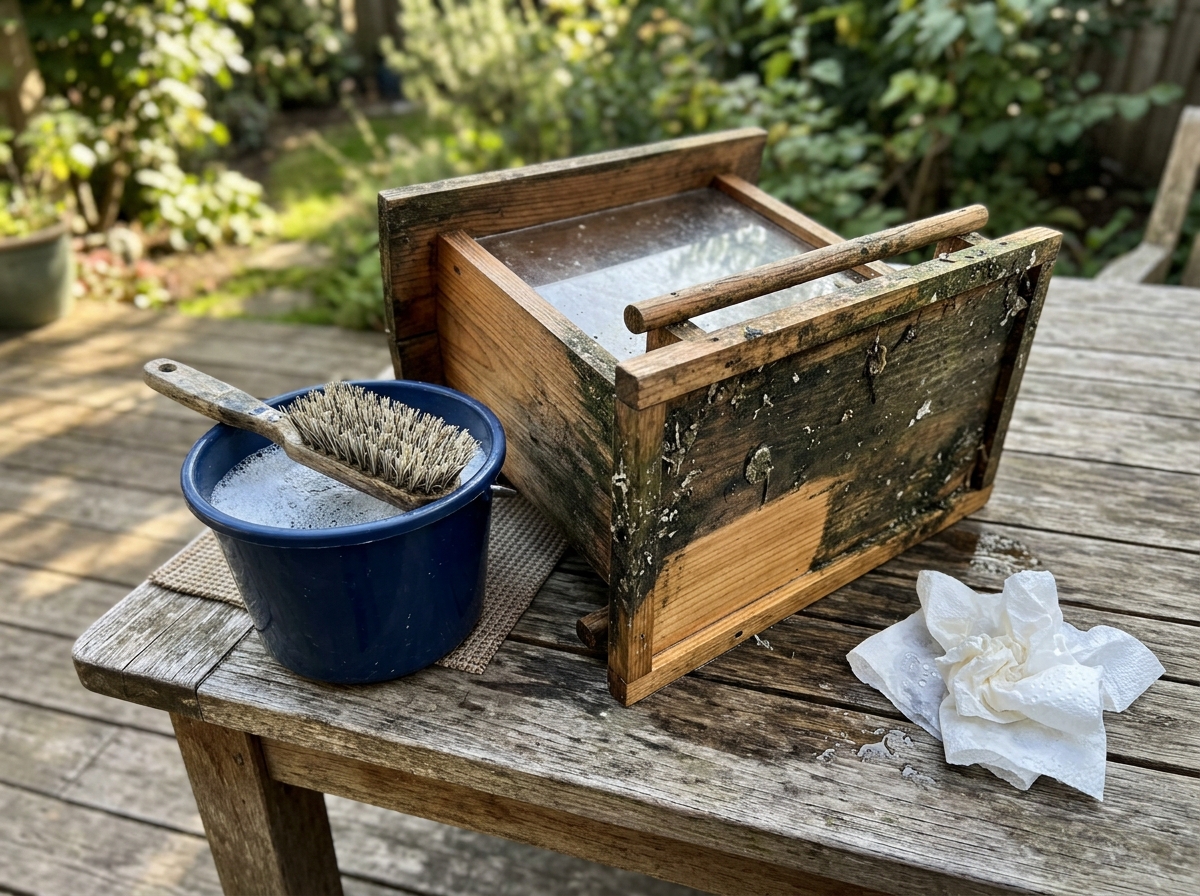
Dirty feeders spread disease, and this is one of those things I don't think gets talked about enough in DIY bird feeder guides. A clean feeder isn't just about aesthetics. It's directly about whether birds stay healthy at your yard. Clean seed feeders every two weeks as a baseline, which is what Project FeederWatch and All About Birds both recommend. Clean more often during heavy use periods, after extended wet weather, or any time you've seen sick-looking birds near the feeder. The cleaning method is straightforward: empty any remaining seed, scrub the feeder with hot soapy water, rinse well, then soak in a 1:9 bleach-to-water solution, scrub again, rinse thoroughly until no bleach smell remains, and let it air dry completely before refilling. Never refill a damp feeder. Moisture turns seed bad fast and undoes the whole cleaning effort.
Ground mess and rodents
Seed shells and spilled seed on the ground are magnets for mice and rats, especially overnight. Rake up ground debris every few days. Switching to no-mess seed blends (hulled sunflower, nyjer, or shelled peanuts) dramatically reduces ground debris since birds eat the whole thing and drop much less. If rodents are already a problem in your yard, move feeders farther from the house and consider using a tray catcher under the feeder to collect fallen seed so you can dispose of it rather than leaving it on the ground.
The bottom line is that a DIY bird feeder doesn't have to be perfect on day one. Start with whatever materials you have, get something up and filled with good seed, and then iterate from there. A recycled bottle feeder in the right spot with fresh seed will outperform a beautiful wooden feeder in a bad location every time. Once you've nailed the basics, there's a lot more you can do, from building your own mounting pole to trying specialty builds for specific species. But just getting something up and working today is the move.
FAQ
What seed should I use in a do it yourself bird feeder (and how do I know if it’s the right one)?
Use feeders that match your local species and weather. If you want general coverage, start with hulled sunflower or a simple mixed blend, then adjust after 1 to 2 weeks by noting which birds actually land. In rainy climates, prioritize mixes that don’t clump when wet (and fill less at a time).
How can I tell when my seed is spoiled in a homemade bird feeder?
Stop using the feeder and remove it until it’s fully cleaned if you see black mold, strong rancid odors, or birds acting lethargic. Old seed that smells sour or “paint-like” usually means it’s breaking down, and mixing it into fresh seed can still keep birds away.
My DIY bottle feeder leaks and makes a mess, what’s the fastest fix?
If you can hear or see seeds leaking, most often it’s oversized ports, no drainage, or a feeder angle that lets water or seed collect. Fix by reducing port size, adding extra drainage holes, and slightly tilting the feeder so any water runs off instead of pooling inside.
What should I check if no birds come to my do it yourself bird feeder?
If you notice less activity after the first few days, don’t assume the birds quit. Check for wet seed and stale food first, then re-check placement (especially distance to windows and nearby cover). Also confirm the feeder is at a reachable height for birds that you want to attract, not just “up high.”
What’s the best way to handle mice and rats around a DIY bird feeder?
Take down seed feeders during heavy pest problems like frequent rat sightings, then switch to “no-mess” foods and clean up spilled seed daily for a week. For safety, avoid stacking feeders near doors or pathways, and consider using a tray catcher under the feeder to keep the area clean.
Can I combine a homemade seed feeder and a water station in the same spot?
Yes, but do it carefully. Keep water stations separate by a few feet so hulls and seed debris do not foul the dish, and use shallow containers that are stable. In cold snaps, replace standing water frequently and remove it if it freezes over into an unsafe ice sheet.
What cleaning products are safe for a DIY bird feeder and water dish?
Avoid regular household cleaners. Use hot soapy water for the main scrub, then sanitize with a 1-to-9 bleach solution (same ratio you use for water dishes), rinse until there is no bleach smell, and let it dry completely in open air before refilling.
How do I protect birds from window strikes with a homemade feeder?
For window safety, your setup should avoid “danger zone” ranges, aim for either very close (within about 3 feet) or far enough away (more than about 30 feet). If you must mount in the middle range, reduce risk by using patterned window film or moving the feeder outward and adding a perch redirecting birds toward the safer area.
How do I prevent squirrels from winning against my DIY bird feeder?
If the feeder keeps getting stripped, it’s often because squirrels have a launch point (branch, roof edge, nearby trunk) or because there is no barrier. A baffle alone helps most when mounted above the feeder and sized correctly, but climbing from below also happens, so use a combination if you see both “grabs” and “climbs.”
My feeder is stocked, but birds still ignore it. What should I change first?
If birds won’t use the feeder after you refill, try changing one variable at a time: fresh seed first, then location by small increments (around 10 feet), then height. Also consider adding water nearby, since birds scouting for water often discover feeders on the same route.
Do I need to take a DIY teacup feeder inside during winter, and how do I avoid bond failure?
Yes, but with safeguards. Only bring the teacup feeder inside during hard freezes, and inspect bonds before returning it outside. For any epoxy-mounted feeder, check the mounting points after temperature swings, especially after a freeze-thaw cycle.
What do I do if my homemade bird water dish gets algae or mosquitoes?
If you see algae growth or heavy mosquito activity, the fastest improvements are partial shade and more frequent water changes. Scrub the dish every few days, refresh every 1 to 2 days in warm weather, and consider a gentle water movement source (like a small solar fountain pump) to deter mosquitoes.
Do It Yourself Bird Feeder Pole: Build and Install Today
Step-by-step guide to build a do it yourself bird feeder pole, install it, and securely attach your feeder.