You can build a working tube bird feeder in an afternoon using a blank" rel="noopener noreferrer">clean plastic bottle, a few wooden dowels, and some basic hardware. For a coconut bird feeder, the same tube-feeder ideas apply, but you'll use coconut-based components for the holding and weather protection parts tube bird feeder. The result is a cylinder that holds seed, has small holes where birds perch and eat, and hangs from a branch or shepherd's hook. It costs almost nothing if you're recycling materials, and birds will find it within a few days once you hang it in the right spot.
How to Make a Tube Bird Feeder Step by Step

Marcus Brennan
8 Jun 2026
What a tube bird feeder is and what you'll need
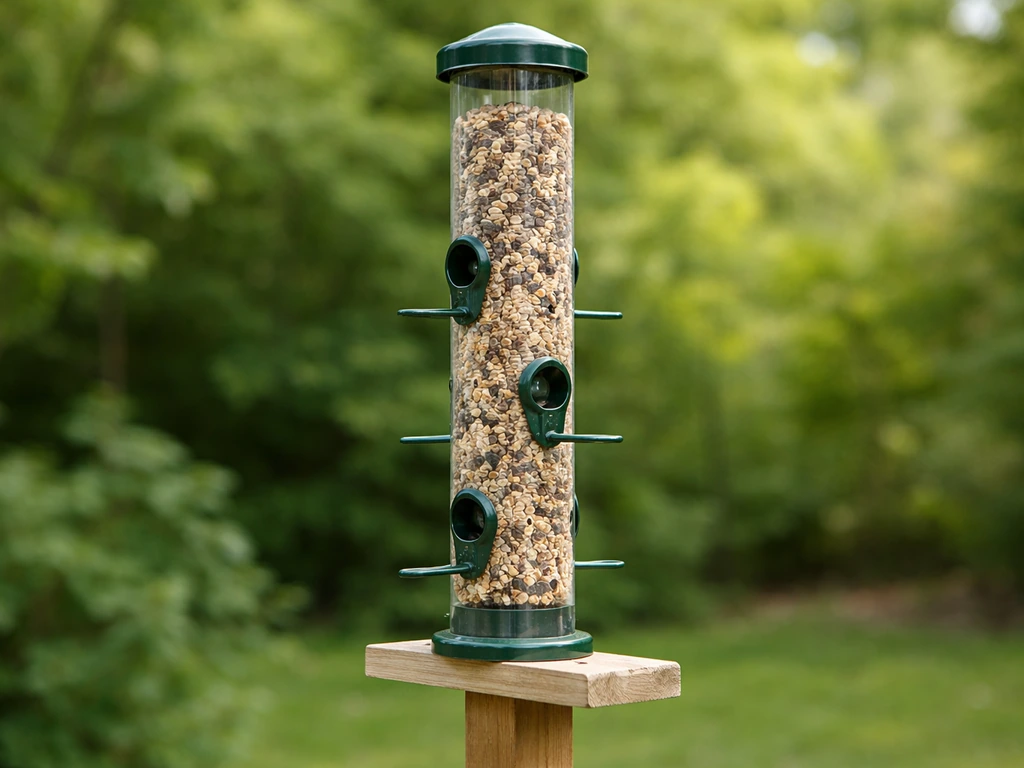
A tube feeder is exactly what it sounds like: a hollow cylinder that holds seed and has feeding ports cut into its sides. Birds land on a small perch at each port and pull seed directly from the reservoir. Project FeederWatch describes them as hollow plastic cylinders with multiple feeding ports and perches, where the port size is matched to the type of seed you're offering. Smaller ports work for nyjer (thistle) and fine mixes; larger ports handle sunflower seeds and mixed blends. The key feature that separates a tube feeder from a tray or hopper design is that seed stays enclosed, which keeps it drier and limits the surface area exposed to bird droppings.
Before you start cutting anything, gather your materials. Here's what you'll need for the most beginner-friendly build using a plastic bottle:
- One large clear plastic bottle (a 2-liter soda bottle or a 64-oz juice bottle works well)
- Two or three wooden dowels, 1/4 inch in diameter, cut to about 6 inches each (these become the perches)
- A sharp craft knife or box cutter
- A drill with a 1/4-inch bit (or a heated nail if you have no drill)
- Aquarium-grade 100% silicone sealant (DAP or similar; look for 'aquarium safe' on the label)
- Sturdy wire, a screw eye, or a length of paracord for hanging
- A funnel for loading seed
- Sunflower seeds, nyjer, or a general mixed seed blend to start
Optional but useful: a small mesh or wire cap for the base to improve drainage, sandpaper for smoothing rough edges around ports, and a zip tie or two for reinforcing the hang point. Total build time is roughly 45 to 60 minutes, plus a few hours for sealant to cure before you load seed.
Choose your tube feeder materials
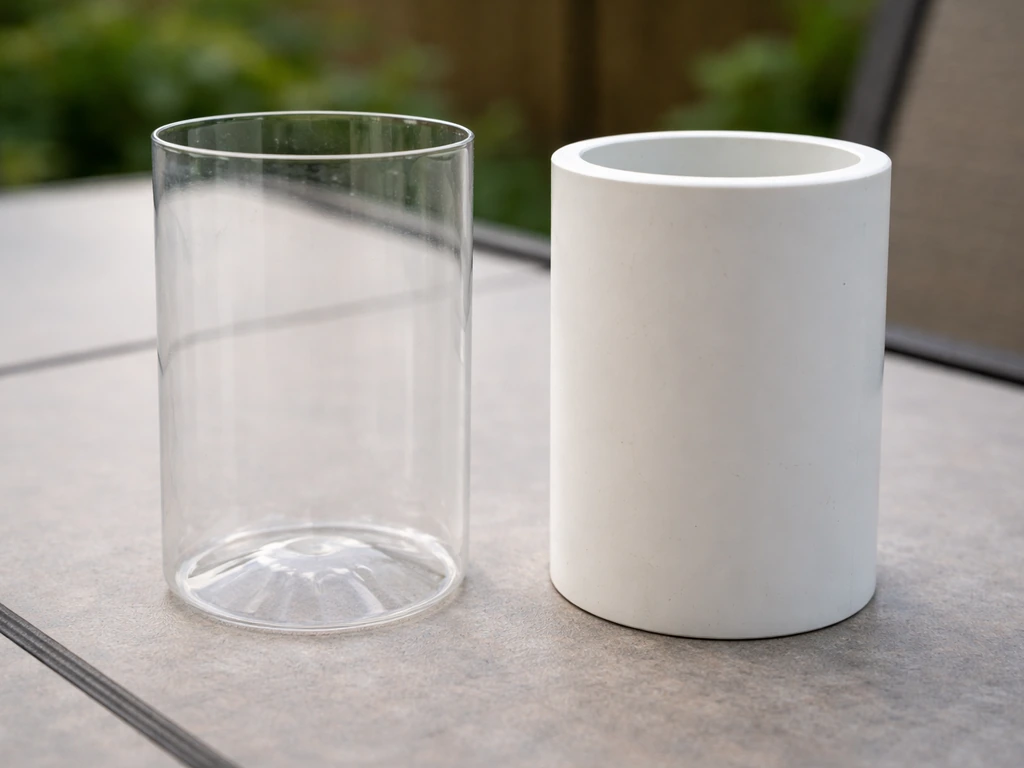
The tube itself is the only real decision you need to make before you start. Each material has trade-offs worth knowing upfront.
| Material | Pros | Cons | Best for |
|---|---|---|---|
| 2-liter plastic bottle | Free, easy to cut, transparent so you can see seed level | Can crack in freezing temps, not as durable long-term | First build, low-commitment test |
| 64-oz juice or detergent bottle | Thicker plastic, wider body holds more seed | Less transparent, may need more effort to cut ports cleanly | Longer-lasting budget build |
| PVC pipe (2–3 inch diameter) | Very durable, weatherproof, easy to clean | Requires end caps and more hardware, small upfront cost | Permanent or semi-permanent installation |
| Milk jug (1-gallon HDPE) | Free, widely available | Opaque, awkward shape for tube-style ports, better as a tray feeder base | Quick prototype only |
If this is your first build, start with a 2-liter bottle. You'll learn exactly what port spacing and perch placement works before committing to a PVC build. If you want something that lasts two or three seasons without cracking, a length of 2-inch PVC pipe with screw-on end caps is worth the few dollars at a hardware store. The build steps below work for either option, with notes where the process differs.
Step-by-step: build the tube and feeding ports
Work through these steps in order and don't rush the sealant cure. Skipping that step is the number-one reason homemade tube feeders leak.
- Clean and dry your bottle or pipe completely. Any residue from the original contents will attract mold fast once seed is inside.
- Mark your feeding port locations. For a 2-liter bottle, plan two or three pairs of ports spaced about 3 inches apart vertically, and offset each pair by 90 degrees around the tube so birds don't crowd each other. Each port should be about 3/4 inch in diameter for sunflower seeds, or 3/8 inch for nyjer.
- Mark your perch holes directly below each port, about 1/2 inch down. The dowel goes through the bottle at these points, sticking out about 2 inches on each side.
- Drill or cut the port holes first. Use a 3/4-inch spade bit for sunflower ports, or your craft knife for finer work. Cut slowly and smooth any sharp edges with sandpaper — rough edges can injure birds.
- Drill the perch holes with a 1/4-inch bit. Push the dowel all the way through so it exits both sides of the bottle. The perch should feel snug, not wobbly.
- Apply a thin bead of aquarium-grade silicone around each perch hole on the inside and outside where the dowel meets the plastic. This seals out moisture and stops seed from trickling down into unintended gaps. DAP 100% silicone or any 'aquarium safe' silicone sealant works here — once cured, it's safe for incidental seed contact.
- Seal the base. If you're using a bottle, the original cap can serve as a plug for the bottom. Drill two or three small drainage holes (1/8 inch) in it before screwing it back on — this prevents water pooling inside. For PVC, glue or screw a solid end cap on the bottom and drill the same small drainage holes.
- Add a hanging mechanism at the top. For a bottle, drill a hole through the neck and thread wire or paracord through it, knotting securely. For PVC, screw a large eye bolt into the center of the top cap.
- Let the sealant cure for at least 4 to 6 hours (check your product label; some need 24 hours in cool weather) before adding seed.
- Fill through the top opening using a funnel, then cap it off. The bottle's original screw-on lid works perfectly for a 2-liter build.
A quick note on port sizing: if you get this wrong, it's easy to fix. Ports that are too small will frustrate birds and leave seed untouched. Ports that are too large let seed pour out in the rain. Start conservatively and enlarge a port by a few millimeters with your craft knife if birds seem to be struggling.
Add attachment, perches, and weather protection
The perches you've already installed are functional, but a few upgrades make the feeder more comfortable for birds and more durable overall. First, check that each dowel perch is level (not tilted downward) so birds can grip it naturally. If a perch feels loose after the sealant cures, add a second bead of silicone and let it re-cure. For a more polished build, you can replace plain dowels with rough-textured wooden skewers or even short sections of twig, which give birds better grip in wet weather.
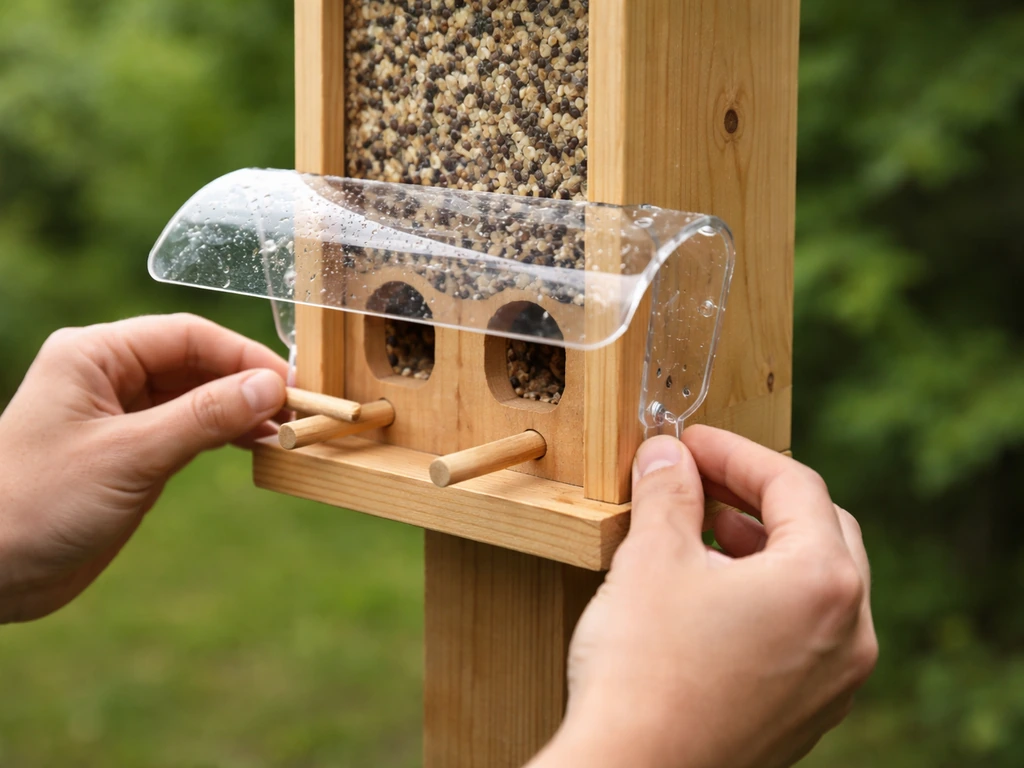
Weather protection matters more than most people expect. Rain is the biggest enemy of homemade tube feeders because wet seed clumps, ferments, and can make birds sick. The simplest fix is a small roof or rain guard. Cut a 6-inch circle from a plastic lid, aluminum pie pan, or thin plywood, drill a hole in the center, and thread it onto your hanging wire about 2 to 3 inches above the top of the feeder. Angle the edges downward slightly so water runs off. For a PVC build, a slightly oversized cap with a slight dome shape does the same job. This one addition will extend how long each fill stays fresh by days.
How to hang and where to place it
Hang the feeder at around 5 to 6 feet off the ground. This height keeps it accessible for maintenance (you can refill without a ladder) while putting it above most roaming cats. Use a shepherd's hook with a smooth metal pole if squirrels are a concern in your yard, since they can't grip a slick pole the way they can a tree branch.
Window proximity is worth taking seriously. All About Birds (citing Project FeederWatch research) is clear on this: place feeders either within 3 feet of a window or more than 30 feet away. Feeders in the 3-to-30-foot danger zone give birds enough distance to build up flying speed, which leads to fatal window strikes. Closer than 3 feet, birds don't have room to accelerate, so collisions are gentle glances rather than deadly impacts. A window-mount tube feeder attached directly to the glass is actually one of the safer options.
For placement beyond window distance, look for spots with nearby cover: a shrub or small tree within 10 to 15 feet gives birds a place to wait and watch before approaching, which encourages use. Avoid placing the feeder directly over a patio or walkway where seed droppings and hulls will pile up. Hanging it over a patch of grass or a garden bed means the dropped seed either gets eaten by ground-feeding birds or decomposes without making a mess.
Maintenance: cleaning, refilling, and long-term care
This is the part most people skip, and it's where tube feeders can become a health hazard for the birds you're trying to help. Project FeederWatch specifically calls out tube feeders as higher-risk for spreading the bacterium that causes conjunctivitis in birds, because multiple birds contact the same small port openings. Regular cleaning is non-negotiable.
Clean your tube feeder every two weeks under normal conditions, and every week during warm or humid weather when bacteria and mold spread faster. Here's the process that actually works:
- Empty all remaining seed and discard it. Don't just top off a feeder that has old seed sitting at the bottom.
- Disassemble as much as possible. For a bottle feeder, remove the cap and pull out the perch dowels if they aren't permanently sealed.
- Scrub all surfaces with a bottle brush and warm soapy water, paying attention to the inside walls and the area around each port where birds' bills make contact.
- Soak the feeder in a dilute bleach solution (1 part bleach to 9 parts water) for 10 to 15 minutes. This is the step recommended by bird rescue organizations for disinfection.
- Rinse thoroughly with clean water at least twice. Any bleach residue is harmful to birds.
- Let it air dry completely before refilling. A wet feeder loaded with seed will turn moldy within days.
One structural issue to watch for: the space between the lowest feeding port and the base of the feeder tends to trap seed that birds can't reach. Avian Report and Home Depot both flag this dead zone as a bacteria and fungus risk.
When you design your build, position your lowest port as close to the bottom of the tube as practical (about 1 inch up), and always check and empty that bottom section when you refill. Emptying the lowest section helps prevent unused seed from accumulating between the bottom port and the base, which can encourage bacteria and fungus growth, as Avian Report notes unused seed accumulation between the lowest port and the base.
To learn how to fill tube bird feeders the right way, use a funnel and leave headspace so the seed doesn't pack against the cap refill. If your feeder design makes this spot hard to reach, that's the first thing to redesign in your next version.
Refilling is simple once the feeder is clean and dry. Use a funnel to avoid spillage and don't overfill: leave about an inch of headspace at the top so seed doesn't pack against the cap and get stuck. If you are using a coconut bird feeder, follow a similar refill approach, but make sure the coconut housing is dry and sealed before you add new seed how to refill coconut bird feeder.
When you’re ready to load, pour the right amount of bird seed into the tube using a funnel so you don’t spill and you don’t overfill how to put bird seed in a bird feeder. For tips on quantities and seed types to use during refills, the process for tube feeders is essentially the same as for any cylindrical feeder design.
Troubleshooting and pest-proofing upgrades
Most problems with homemade tube feeders fall into a few predictable categories. Here's what's likely going wrong and how to fix it.
Birds aren't using the feeder
Give it at least 5 to 7 days before worrying. Birds need time to discover a new feeder, especially if it's in a new location. Sprinkle a small amount of seed on a nearby surface (a fence rail or flat rock) to draw attention to the area. If you're using nyjer seed, make sure your ports are small enough (3/8 inch or less) that the seed doesn't just pour out when birds land, which wastes seed and discourages use. Sunflower seeds in a tube with larger ports get discovered faster in most North American backyards.
Seed is leaking or pouring out
Your ports are too large, or the perch dowels have gaps around them that seed is trickling through. Apply another bead of silicone around any loose perch holes and let it cure fully. For oversized ports, you can't make them smaller without building a new tube, so use a coarser seed blend that won't fall through the gap as easily, then make the ports tighter on your next build.
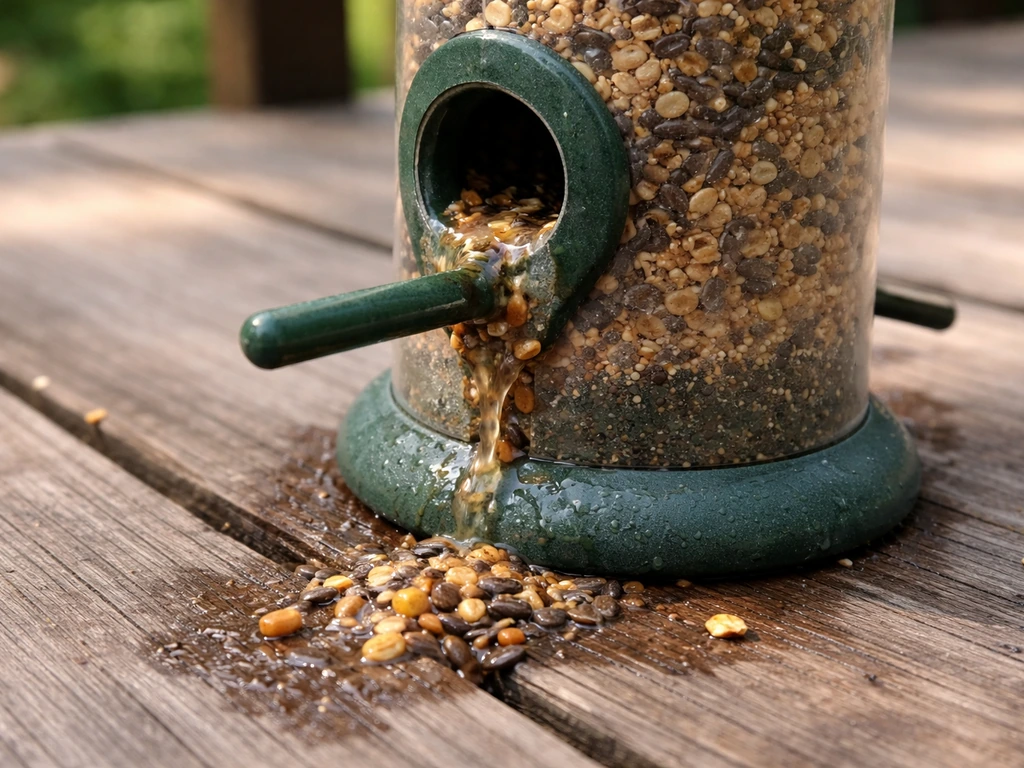
Seed is getting wet and clumping inside
This is almost always a missing or inadequate rain guard. Add the rain guard described in the attachment section above. Also check that your drainage holes at the base are open and not clogged with seed debris. If the problem persists, tilt the feeder very slightly (about 5 degrees) using the hang wire so water naturally runs to one side and out through drainage holes rather than pooling.
Squirrels are raiding the feeder
If you're hanging from a tree branch, squirrels will get to it. The most effective fix is moving to a freestanding shepherd's hook with a smooth metal pole and adding a baffle: a dome-shaped or cylindrical barrier mounted below the feeder on the pole. Baffles work by blocking the squirrel's path up the pole.
Position the baffle at least 4 feet off the ground and make sure the pole is at least 10 feet from any surface a squirrel can jump from. If you're not ready to add hardware, switching to safflower seed or nyjer inside the tube helps, since squirrels tend to ignore both. Mixing in hot pepper (capsaicin) flakes is another option since birds don't have capsaicin receptors and won't notice, but squirrels and other mammals will avoid it.
Ports are clogging
Clogged ports usually mean wet, clumped seed. Empty the feeder, clean it, and dry it fully before refilling. Going forward, don't fill more than you'll use in about a week during humid months. You can also stir the seed gently every few days with a long stick or dowel poked through the top to break up any clumps before they harden against the port openings.
A homemade tube feeder is genuinely one of the most rewarding beginner builds because it works quickly, it's easy to iterate on, and you can see the seed level through a clear plastic bottle without taking anything apart. Once you've run one through a season and noted what you'd change, the upgrade to a PVC version or a purpose-built hanging system feels natural. Start simple, keep it clean, and the birds will do the rest.
FAQ
Can I make a tube bird feeder from a plastic bottle and leave it outside in heavy rain?
Yes, but you need a hard barrier at the bottom. Use a small mesh or wire screen as the base covering and drill multiple drainage holes so wet seed can escape, then keep the lowest port close to that base. If you leave a large empty pocket under the lowest hole, seed rots and increases bacteria growth.
What seed should I match to my port size when I build a tube feeder?
Use a short list rule: nyjer requires very small ports, sunflower and mixes need larger ports. If you are unsure, start with ports that are small-to-medium, then expand gradually in small increments after you observe birds for 1 to 2 days. For fine seed, larger openings usually pour seed out instead of feeding.
How can I test whether my tube feeder will leak before I add seed?
Avoid glue-only fixes. Silicone works best for waterproofing around dowels and seams, but you must fully cure it before loading seed, and you should test for leaks by running water over the feeder outdoors for a minute. Any wetness trapped inside the tube means you likely have pinholes or uncured sealant.
What are common mistakes when cutting the feeding holes (ports) in a bottle?
Cutting ports can weaken the bottle, so leave a margin of material between ports. Smooth sharp edges with sandpaper so birds do not injure their feet, and if a port edge cracks after curing, patch with a small piece of plastic adhered with silicone and let it cure again.
My tube feeder spills a lot of seed. What should I check first?
If birds drop seed faster than they eat it, reduce the exposed surface area and fix drainage and rain protection. First check the rain guard and base drainage holes for clogs, then confirm ports are not oversized. Finally, consider switching to a seed blend that matches your hole size so less seed falls through and piles up.
Why does seed keep collecting at the bottom of my tube feeder?
That is a sign the feeder ports are letting seed reach the bottom pocket where birds cannot reach. Confirm the lowest port is about 1 inch above the bottom, then clean and empty that section at every refill. If your design makes that space hard to access, rebuild with ports placed closer to the base.
What cleaning product should I use, and how do I clean it safely?
Do not use bleach or strong household cleaners on the feeder and then immediately refill. Clean thoroughly, rinse well, and let it fully dry before adding seed. Any lingering residue can contaminate seed and discourage bird use.
How full should I fill a homemade tube bird feeder?
Start with a conservative fill, then top up only what you expect birds to use within about a week in humid weather. Overfilling packs seed against the cap and makes refilling messy, and packed seed clogs ports faster once it gets slightly damp.
Can I hang my tube feeder from a rope instead of wire or a shepherd’s hook?
Yes, but you need to lock down the hang method and prevent rotation. Use zip ties or another secure reinforcement at the suspension point, and make sure perches remain level after the sealant cures. If the tube twists, port openings can point down and cause constant seed pouring.
Birds are avoiding my new feeder. How long should I wait and what can I do?
If you see birds not landing, place it where they can approach and watch (near cover like a shrub within roughly 10 to 15 feet). It also helps to wait a few days before changing anything, then offer a small amount of seed nearby to draw them in. Avoid frequent adjustments, because constant changes make it harder for birds to learn the new location.
How do I stop squirrels from reaching a tube bird feeder on a branch?
If squirrels are getting in, the quickest fix is usually a pole-mounted baffle on a smooth shepherd’s hook. Keep the baffle several feet above the ground and position the pole far from any jump-off surfaces. Switching to nyjer or safflower inside the tube can also reduce squirrel interest.
What should I do if the seed is clumping and clogging the ports?
Use a gentle stirring routine only when needed, and do it through the top opening with a clean stick or dowel. If seed is already clumped, empty, clean, and dry it first, then refill with fresh, dry seed. Ongoing clumps usually mean wet conditions or ports gathering dampness.