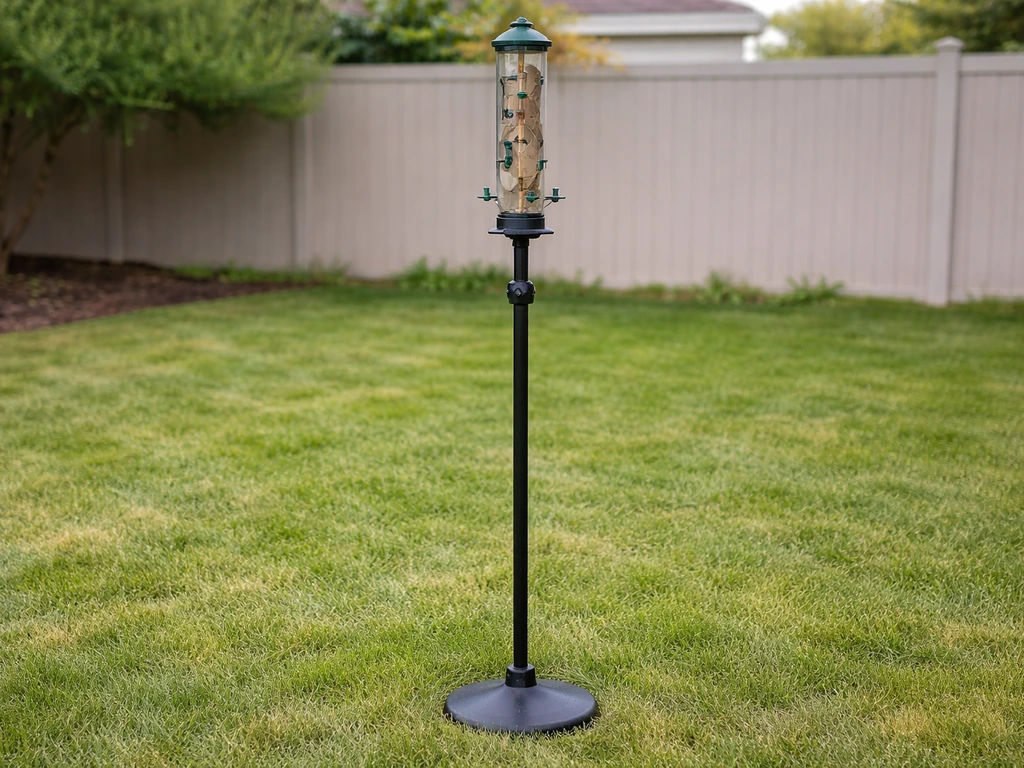
You can hang a bird feeder outside a window in two ways: mount it directly to the window or surrounding wall using a bracket or suction cup hardware, or hang it from a hook or cord anchored near the window frame, overhang, or exterior wall. If you want to mount the feeder on a pole instead of near a window, the spacing and hardware choices are a bit different mount a bird feeder on a pole. If you do not have a suitable tree nearby, focus on window-mounted options and other secure exterior anchors instead how to hang a bird feeder without a tree. Both work well. Which one you choose depends on your window type, how much clearance you have, and whether you want the feeder touching the glass or sitting a few feet out. This guide walks you through both approaches with real installation steps, not just vague suggestions. If you also want to film what the birds do, plan the camera mounting so it doesn’t interfere with feeder clearance or collision deterrents mount bird feeder with camera.
How to Hang a Bird Feeder Outside a Window Safely

Mounting to the window vs. hanging from it: pick the right approach first
The first decision is conceptual: are you attaching the feeder directly to the window surface (or window frame), or are you routing a hanging cord/hook from a nearby anchor point so the feeder swings free outside? Both are valid, but they solve different problems and suit different setups.
Direct window mounting, using suction-cup feeders or a wall-mounted bracket right beside the window, keeps the feeder within about 3 feet of the glass. This is actually the safer choice for preventing bird-window collisions. When a feeder is too close for a bird to build flight momentum, the risk of a fatal strike drops dramatically. Audubon, the U.S. Fish and Wildlife Service, and Canadian wildlife guidelines all point to the same rule: keep feeders either within roughly 3 feet of the glass or push them out beyond 30 feet. Anything in that 3-to-30-foot danger zone gives birds enough runway to hit the window at full speed.
Hanging from the window area (via a bracket arm, a hook screwed into the soffit or window trim, or a cord draped over an overhang) typically puts the feeder 2 to 6 feet out from the glass. That distance lands right in the collision risk zone, so if you go this route you need to add anti-collision measures to the window. More on that in the positioning section. For now, understand that 'to the window' (direct mount, close) is safer for birds by default, while 'from the window area' (hung at a distance) gives you more feeder size flexibility and easier filling access.
Find the right height and location near the window
Height matters for both you and the birds. A feeder you can't comfortably reach to refill will get neglected fast, and a feeder placed too low is an easy target for cats and squirrels. The standard guidance is a minimum of 5 feet off the ground. That keeps most ground-level predators at bay while still letting you reach in from a window or step stool to refill without drama. If you're mounting to a second-floor window, you're already well above that threshold, but then you need to think about how you'll actually get to it for cleaning.
Horizontally, position the feeder where you can see it clearly from inside. This sounds obvious, but a feeder mounted on the very edge of the window frame gives you almost no viewing angle. Centering it in front of a window you actually spend time near (kitchen, home office, living room) means you'll enjoy it more and notice problems sooner. Avoid placing it directly in front of a window that gets strong afternoon sun for hours; the heat spoils seed faster and the glare makes it hard to see birds from inside.
If you have a corner window or a bay window, the side panels are often better anchor points than the main center glass. They give you a mounting surface without blocking the primary view, and the angle still puts the feeder in your sightline. For apartments or rentals where drilling is off the table, focus on suction-cup mounts on the main glass or a tension-rod bracket that fits inside the window frame without fasteners.
Your attachment options: brackets, mounts, and what you actually need
There are three main hardware families for window-adjacent feeders. Each suits a different situation, so here's a plain-language breakdown.
Suction-cup window feeders

These attach directly to the glass with heavy-duty suction cups, usually two or three per feeder. They work best on smooth, clean glass and can hold feeders up to about 2 to 3 pounds when full. Clean the glass with rubbing alcohol before applying, press each cup firmly, and turn any locking tabs. They're renter-friendly and require zero tools. The downside: they can fail on textured or dirty glass, and cheap suction cups lose grip in extreme heat or cold. Spend a little more on feeders that use reinforced cups with a pull-tab locking mechanism rather than basic flat discs.
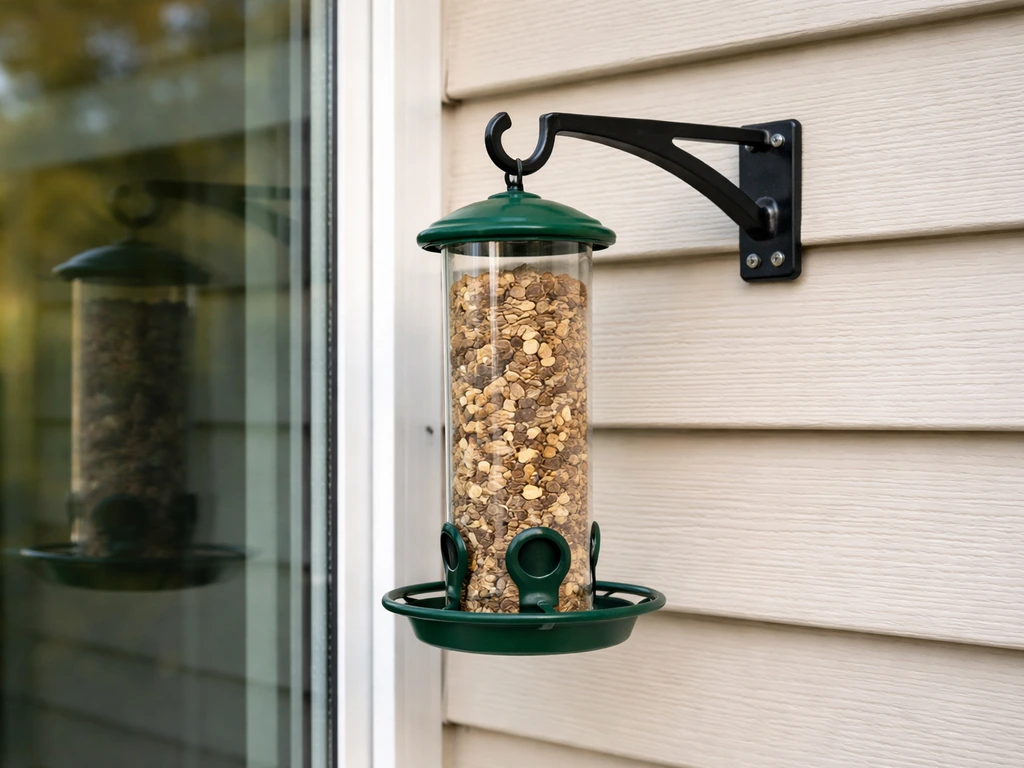
Window-mount bracket arms (screwed to exterior trim or siding)
A bracket arm screwed into the window trim, soffit, or exterior wall is the most secure option for a heavier feeder. You'll need a drill, exterior-grade screws (at least 2.5 inches long to bite into solid wood trim, not just cladding), a level, and optionally wall anchors if you're going into masonry or vinyl. The bracket extends out 8 to 18 inches from the mounting surface, and you hang the feeder from the hook at the end. These can hold 5 to 10 pounds easily and won't fail in the wind the way suction cups can. Just make sure you're driving screws into actual structural trim, not hollow vinyl.
Tension-rod or clamp-style window mounts

These fit inside the window frame or clamp to the sill without any drilling. They're less common for bird feeders specifically but work well for lightweight feeders on double-hung or casement windows with a wide sill. The feeder hangs just outside the closed window, and you open it to refill. Not ideal for heavy tube feeders, but perfectly fine for a small platform or mesh feeder.
| Mount Type | Best For | Weight Capacity | Tools Needed | Renter-Friendly |
|---|---|---|---|---|
| Suction-cup feeder | Smooth glass, small feeders | 2–3 lbs | None | Yes |
| Bracket arm (screwed) | Any feeder size, permanent setup | 5–10+ lbs | Drill, screws, level | No |
| Tension rod / clamp | Lightweight feeders, wide sills | 1–2 lbs | None | Yes |
For most homeowners with a standard double-hung window and wood trim, a screwed bracket arm is the best long-term choice. It's stable, holds any feeder you'd reasonably use, and takes about 20 minutes to install. If you're renting or just want to try it out before committing, start with a suction-cup feeder on the glass itself.
Hanging methods: hooks, cords, and where to anchor them
If you're hanging the feeder from a hook or cord rather than mounting a bracket, the anchor point options near a window are: the soffit or overhang above the window, a hook screwed into the window head casing (the horizontal trim at the top), a shepherd's hook stake in a window box or planter, or a ceiling hook on a covered porch or balcony if the window leads to one.
A screw-in eye hook into solid wood soffit or head casing is the simplest and cheapest hanging anchor. Use a 3/8-inch eye hook in exterior-grade zinc or stainless steel, drill a pilot hole slightly smaller than the screw diameter, and thread it in by hand or with pliers. Then hang the feeder with a short length of coated wire, a metal chain, or a steel cable. Avoid thin monofilament or basic twine outdoors: UV exposure and moisture degrade them within a season, and a dropping feeder is both a mess and a waste.
If you want the feeder to hang further out from the wall (say, 12 to 24 inches) so it clears the window sill or a planter box, use an S-hook on a short length of chain between the anchor and the feeder. This also makes it easy to remove the feeder for cleaning without unscrewing anything. For a feeder that needs to hang further still, a horizontal bracket arm (described above) does the job better than a long cord, which will swing in the wind.
If you're on a balcony and the window faces it, the balcony railing or ceiling is usually a better anchor than the window itself. If you are working with a balcony instead of a window mount, use the railing or ceiling as your anchor and follow the same spacing and safety tips for placement hang a bird feeder on a balcony. That setup is more like a balcony feeder hang than a true window mount. Similarly, if you have a large tree within reaching distance of the window, you've got even more options for getting the feeder into view from the glass without attaching anything to the house. If you want to hang a bird feeder from a tree, use a sturdy branch-safe setup and keep it positioned so birds can feed without risk to nearby windows hang bird feeders from trees.
Step-by-step installation: getting it level, stable, and wobble-free
Here's how to actually do the installation for the most common scenario: a screwed bracket arm or eye-hook anchor on exterior window trim, hanging a tube or platform feeder.
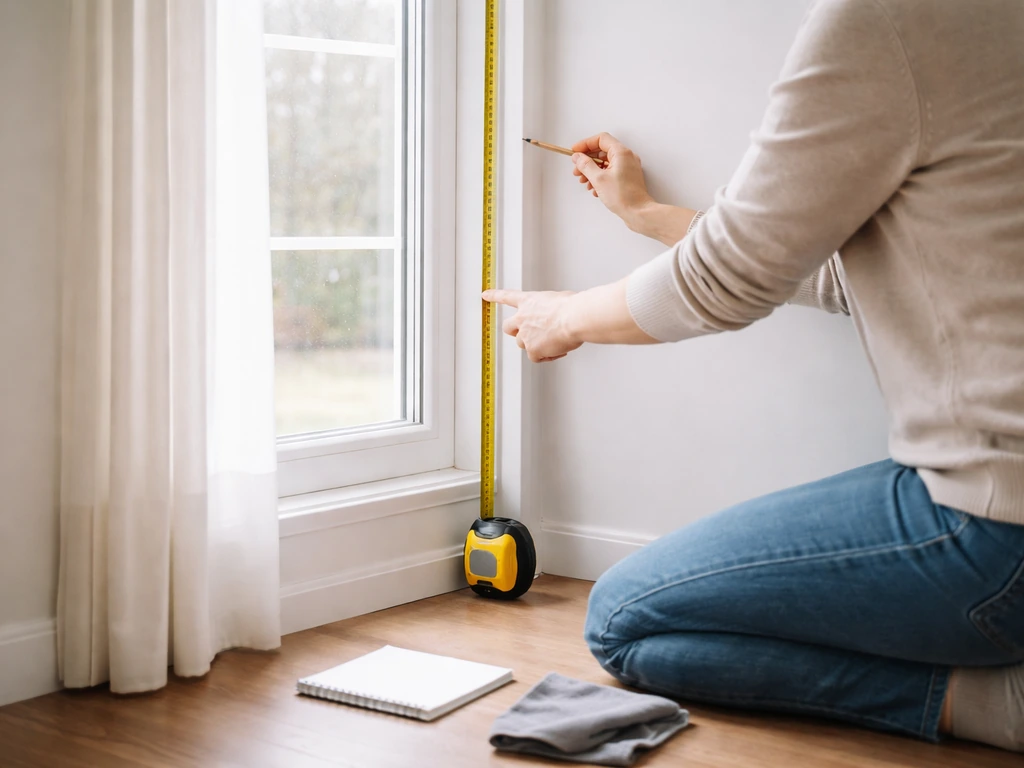
- Gather materials: drill with a bit slightly smaller than your screw diameter, exterior-grade eye hook or bracket screws, a small level (or a level app on your phone), coated wire or chain, zip ties or bungee backer optional, and your feeder. Budget about 20 to 30 minutes.
- Mark your anchor point on the trim or soffit. Hold the bracket or eye hook in position while the feeder is dangling from it (have someone help or use tape to mock the position) and confirm the feeder will sit where you want it before you drill anything.
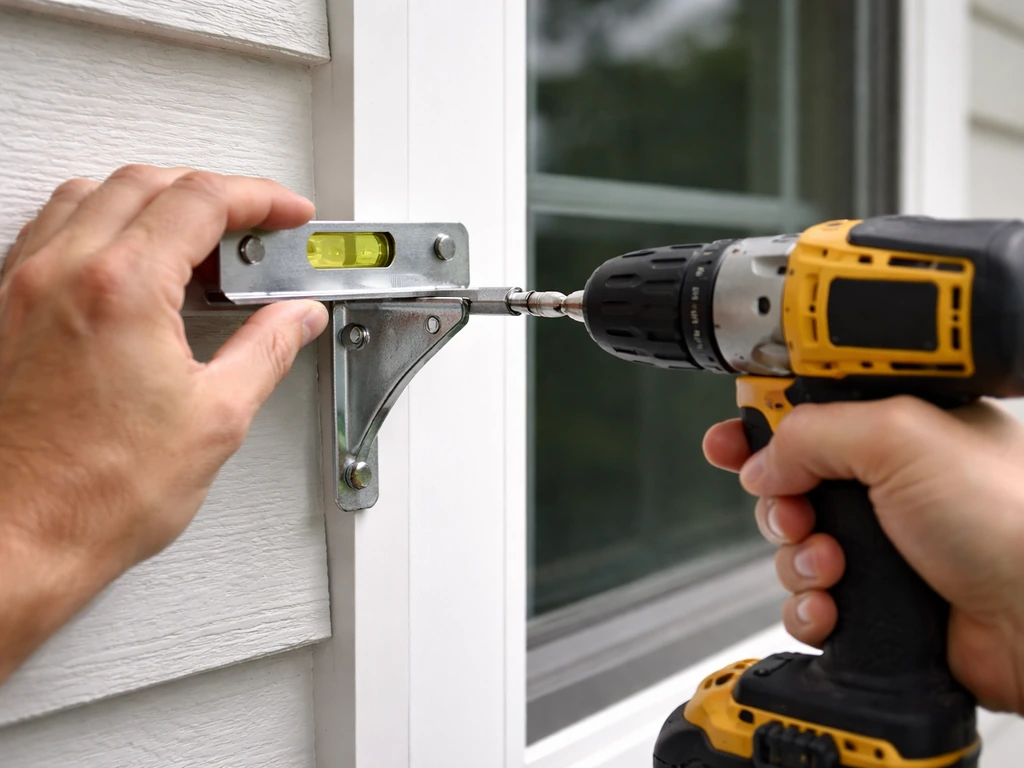
- Drill a pilot hole at your mark. For a 3/8-inch eye hook in pine trim, a 3/16-inch bit works. For a bracket with lag screws, match the bit to the screw shank, not the threads.
- Drive the eye hook in fully by hand or with pliers until the eye sits flush against the trim. For a bracket, hold it level using your level tool before tightening the second screw; one screw in first gives you room to adjust the angle.
- Hang the feeder using chain or coated wire. Add a locking S-hook or clip so it doesn't bounce free in the wind. Tug the feeder downward firmly after hanging to test the anchor before walking away.
- Check clearance: the feeder should clear the window sill by at least 2 to 3 inches so it doesn't bang against the house when it swings. If it's too close, add a link or two of chain to extend it slightly.
- If using a suction-cup feeder: clean the glass with rubbing alcohol and let it dry completely. Press each suction cup firmly against the glass, working out air from the center outward. Lock any tabs. Pull gently sideways (not straight out) to test hold before filling the feeder.
To prevent wobble and sway after installation, the main things to address are cord length and feeder weight distribution. A longer hang cord means more swing in wind. Keep the feeder as close to the anchor as practical. If you have a tube feeder that tilts because one side is heavier, add a few extra seeds to the light side before tightening any set screws. A slightly full feeder is more stable than a nearly empty one because the weight is more evenly distributed. If wind is a real problem at your location, look for feeders with a built-in baffle plate or a wide base that acts as a natural stabilizer.
Position it for bird traffic and protect the window from collisions
This is the section most hanging guides skip, and it's actually critical. Where you place the feeder relative to the glass determines whether birds enjoy it safely or end up hitting the window.
blank" rel="noopener noreferrer">The safest window feeder position is within 3 feet of the glass. At that distance, a bird that startles from the feeder toward the window can't build enough flight speed for a fatal impact. Both Audubon and the U.S. Fish and Wildlife Service back this up. Suction-cup feeders mounted directly on the glass are the extreme version of this strategy and are genuinely effective at collision prevention. The U.S. Geological Survey’s guidance on bird-window collisions summarizes how making windows more visible can help prevent these strikes blank" rel="noopener noreferrer">collision prevention. If your bracket or hook setup puts the feeder further than 3 feet from the glass, you're in the 3-to-30-foot danger zone and you need to treat the window surface.
Treating the window means applying collision deterrents to the outside of the glass. Interior decals, blinds, or curtains don't work reliably for daytime strikes. The markers need to be on the exterior surface. The standard that researchers and the American Bird Conservancy recommend is a pattern spaced no more than 2 inches apart across the window. WindowAlert and similar brands make UV-reflective decals that birds see but humans barely notice. Apply them in a grid no wider than 2 inches between each marker. One or two decals in the corner of a large window won't cut it: you need to cover the full pane in the pattern to close off the gaps birds might try to fly through.
Also think about what's reflected in the glass. Windows that mirror sky or trees on a clear day look like open air to a bird. If your window has a heavy tree reflection, that increases risk even for feeders placed at 3 feet or closer. Angling exterior awnings or window shades slightly can break up the reflection without blocking your view.
After it's up: maintenance, pests, and the fixes you'll actually need
Window feeders need more frequent cleaning than pole-mounted feeders because spillage lands on or near the window sill, where it can stain, attract insects, and create a mold problem on the exterior wall. Plan to wipe down the sill and any feeder tray every one to two weeks, and do a full feeder cleaning with a 10-percent bleach solution or hot soapy water monthly. Rinse completely and let it dry before refilling.
Squirrels are a real problem near windows because they can use the window trim, sill, or even a nearby vine as a highway to the feeder. The standard anti-squirrel move for a bracket mount is adding a baffle below the feeder, but that only works if the feeder is high enough and far enough from any surface a squirrel can leap from. Near a window, the wall itself is the jumping-off point. If squirrels are raiding your window feeder, the most effective fix is switching to a weight-sensitive feeder that closes ports when a heavier animal lands on it, rather than trying to physically block every approach route to a wall-mounted bracket.
Suction-cup feeders that start to slip or tilt are usually a cleaning problem. For Perky-Pet’s Observer Window Feeder, the instructions include guidance on using the suction cup, including how to remove it by lifting the edge and following mounting steps before you place it suction-cup use. Oils from bird feet and seed residue build up on the glass and reduce grip. Take the feeder down, clean both the cups and the glass surface, and reapply. If a cup still fails after cleaning, replace the feeder or the individual cup: stretched or cracked suction cups won't hold reliably no matter how often you reapply them.
For bracket-mounted feeders that start to wobble over time, the most common cause is the screw working loose in wood trim, especially on south-facing walls that go through repeated freeze-thaw cycles. Pull the feeder, remove the bracket, fill the hole with a wooden toothpick and a dab of exterior wood glue, let it cure for a day, then re-drive the screw. It'll hold tighter than the original installation.
If you're seeing repeated window collisions even with decals applied, track the timing and direction of strikes for a week or two. Project FeederWatch's collision study protocol recommends noting which window, the time of day, and what mitigation is in place. Patterns often emerge: morning sun on the east-facing window, a specific tree reflection in afternoon. Once you identify the pattern, you can target additional deterrents or adjust feeder position rather than just adding more decals randomly.
Finally, check your anchor hardware at the start of each season. Exterior screws, eye hooks, and S-hooks are all exposed to weather year-round. A quick tug test on the bracket and a look for rust or cracking in the chain takes two minutes and saves you from finding your feeder on the ground in a windstorm. Replace any hardware that shows surface rust or deformation before the problem gets worse.
FAQ
How close can a bird feeder be to the window and still be safe?
For collision prevention, aim for placement within about 3 feet of the glass. If you cannot keep it that close and it ends up farther out, you will likely need full-pane exterior collision deterrents (a spaced grid), not just a couple of decals in a corner.
Can I use window decals on the inside, like on the glass from my side?
Avoid interior-only decals, blinds, or curtains as the primary solution for daytime strikes. Birds respond to visual cues on the outside surface, so the markers need to be applied externally where the bird sees them during flight paths.
What’s the best way to stop a suction-cup feeder from falling?
First clean the glass and the cup faces thoroughly (seed residue and skin oils reduce adhesion). If it still slips, replace the feeder or the individual cups, since stretched or cracked suction material often fails again after reapplication.
My bracket feels solid at install, but it wobbles later, what should I check first?
Check whether the screw is backing out of the wood trim (especially on walls that experience freeze-thaw cycles). A practical fix is to remove the bracket, plug the hole with a wood toothpick and exterior wood glue, let it cure, then reinstall with a properly set screw.
How do I choose between mounting the feeder to the glass versus hanging it farther out?
If safety is your top priority, direct mounting to the window or window frame with suction or a close bracket is the safer default because it limits the birds’ ability to build flight speed. If you need easier filling access or a larger feeder, hanging farther out can work, but plan on applying exterior deterrents and rechecking placement regularly.
What feeder types work best for window-mounted setups?
Suction or close-to-glass mounts are well-suited to lightweight platform or tube feeders. For heavier feeders, prefer a screwed bracket arm or a sturdy eye-hook/chain setup into solid trim, since suction hardware can lose grip with weather extremes and vibration.
How high should I mount the feeder if I’m putting it near a window?
Use at least 5 feet off the ground as a baseline to reduce cat and ground predator risk. If squirrels are actively reaching it by leaping from nearby surfaces, raising alone may not solve it, because the wall can become the launch point.
I have squirrels taking the feeder, is a baffle always the answer?
Not always. Near windows, squirrels often use the wall, trim, or nearby vines as their route, so a simple baffle under the feeder can miss the real approach path. The most effective alternative is switching to a weight-sensitive feeder that closes ports when a heavier animal lands.
What should I do if birds keep hitting despite deterrents?
Track strikes for 1 to 2 weeks, noting the window and time of day, then identify whether reflections or a specific gap pattern is causing the problem. After that, adjust the feeder position and refine the exterior deterrent coverage instead of adding random decals.
How often should I clean a window-mounted feeder?
Plan on wiping the sill and any tray every 1 to 2 weeks, since spillage lands close to the window where it can stain and attract insects. Do a full monthly clean with either a diluted bleach solution (about 10 percent) or hot soapy water, then rinse completely and dry before refilling.
What’s the safest way to hang a cord or chain from a window area?
Use outdoor-rated coated wire or metal chain, avoid thin twine or monofilament outdoors because UV and moisture degrade it quickly. If you need extra clearance, use a short chain with an S-hook so the feeder detaches cleanly for cleaning without repeatedly unscrewing hardware.
Do I need to worry about wind wobble after mounting?
Yes. Shorten the hang length as much as practical to reduce swing, and balance tube feeders by ensuring the heavier side is not causing constant tilt. If your area is windy, choose a feeder with a wide base or built-in stabilizer so it resists motion.
How do I mount the feeder if my window has limited access for refilling?
Before you finalize hardware, test whether you can reach the feeder safely from your usual access point (inside window reach, step stool, or exterior access). For second-floor or awkward locations, plan cleaning access first, because neglected feeders attract pests and increase spillage near the window.
How to Hang a Bird Feeder Without a Tree: 6 Secure Options
6 secure ways to hang a bird feeder without a tree, with placement tips, stable mounting, and squirrel-proofing.