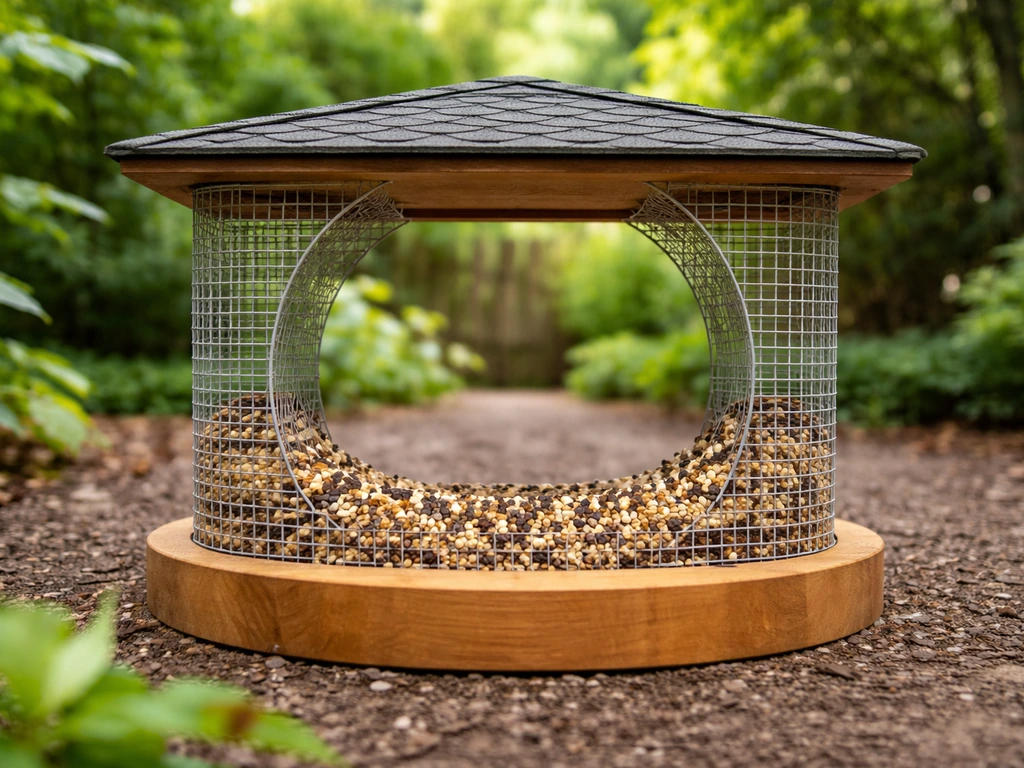
A bird feeder dome is a curved or angled cover you mount above a feeder to keep rain and snow off the seed, reduce seed scatter on the ground, and block squirrels or raccoons from reaching the food from above. You can build a functional one today using a clear plastic bowl, a polycarbonate sheet cut to shape, or even a repurposed salad bowl from a dollar store. The whole project takes about an hour, costs under $10 in materials, and makes a real difference in how dry and fresh your seed stays.
How to Make a Bird Feeder Dome: Step-by-Step Guide
Marcus Brennan
28 May 2026
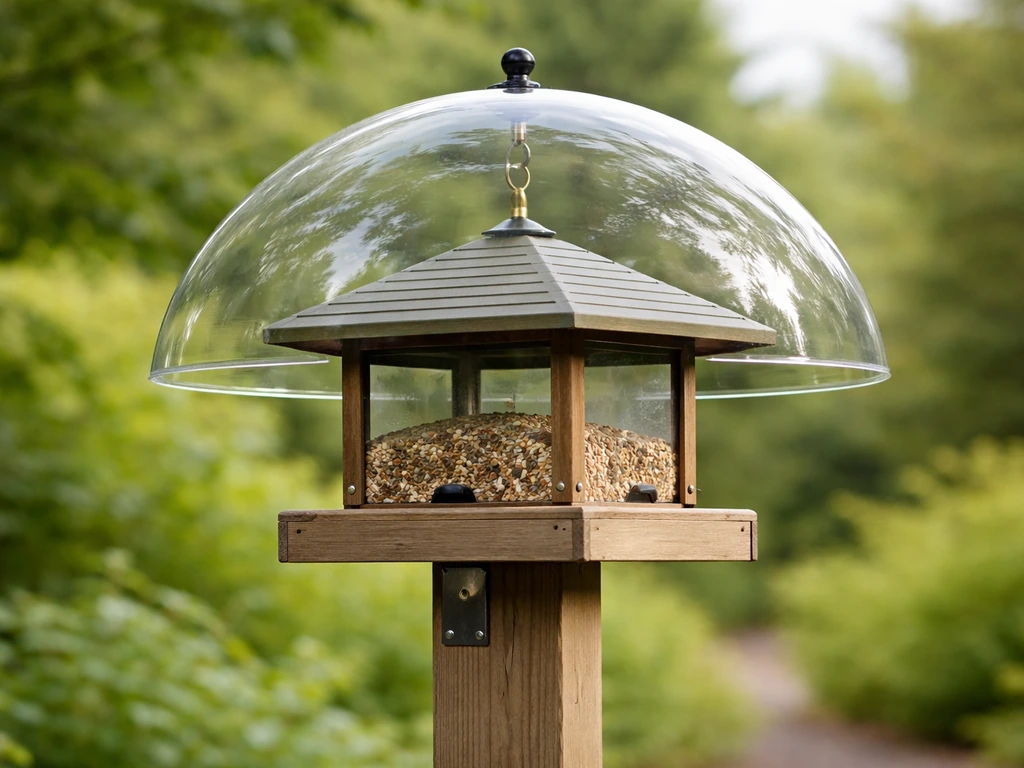
What a bird feeder dome actually does
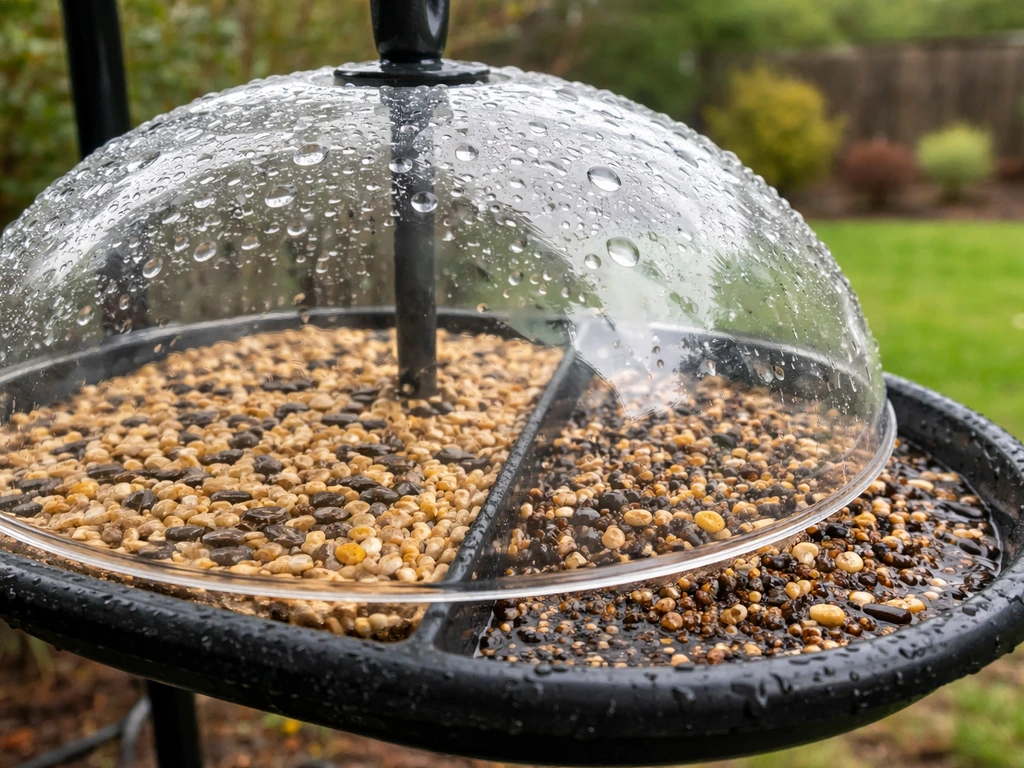
The dome solves three problems at once. First, weather: rain soaks loose seed in minutes, causing it to clump, mold, and ferment. Wet birdseed is a genuine health risk for birds, and the Minnesota DNR specifically flags mold and bacteria on wet seed as a common issue at backyard feeders. A dome deflects rain and snow before it ever reaches the seed port.
Second, mess: a wide dome catches a lot of the scatter and hull debris that birds fling out while feeding, keeping the ground underneath cleaner and reducing the smell that attracts rats. Third, pests: a dome mounted above a hanging feeder acts as a baffle, making it very hard for squirrels to drop down onto the feeder from above. If you have a pole-mounted setup, a dome-style baffle below the feeder works the same way from the bottom up.
The dome does not do everything on its own, but it is one of the most effective single additions you can make to an existing feeder.
It is worth knowing that a dome is closely related to a general feeder cover or roof, which you might also see described as a weather guard. The difference is mostly shape: a dome is curved or hemispherical, while a feeder cover can be flat or peaked like a house roof. Both protect from rain. The dome has the edge when it comes to squirrel-baffling, because there is no flat edge for an animal to grip. If you are also interested in ring-style feeders or spinning feeder designs for pest deterrence, those are separate approaches worth exploring, but the dome is the most versatile single solution.
Pick a dome style and gather your materials
There are three realistic build styles depending on your budget and tools. If you want to make a bird feeder cover, the dome style you choose will determine how well it shields seed from rain and helps deter pests. For a beginner, a large clear plastic mixing bowl or salad bowl (12 to 16 inches in diameter) is the fastest option.
You drill a single center hole, thread a hook or chain through it, and hang it above the feeder. Total cost: $3 to $8 at a dollar store or thrift shop. The second option is a polycarbonate sheet dome, where you cut a circle from a clear polycarbonate or acrylic sheet and heat-form it into a gentle curve. Polycarbonate is tougher than acrylic and resists impact, while acrylic is clearer and cheaper but can crack if you drop it.
For a feeder dome, either works well. [UV-protected polycarbonate is worth the small price difference since it resists yellowing outdoors. ](https://www. tapplastics.
com/product/plastics/plasticsheetsrolls/polycarbonate_sheets/516) The third option is a pre-cut dome baffle kit from a hardware or wild bird store, which you then customize for fit. The kit route takes the measuring and cutting out of the equation but costs more.
| Build Style | Best For | Approximate Cost | Skill Level | Durability |
|---|---|---|---|---|
| Clear plastic bowl | Quick first build, hanging feeders | $3–$8 | Beginner | Good (2–3 seasons) |
| Polycarbonate sheet, cut and formed | Custom fit, any feeder style | $10–$20 | Intermediate | Excellent (5+ seasons) |
| Pre-cut dome baffle kit | Pole-mounted feeders, precise fit | $15–$30 | Beginner | Excellent (5+ seasons) |
| Acrylic sheet, cut and formed | Custom fit, budget-conscious | $8–$15 | Intermediate | Good (3–4 seasons) |
My recommendation for most people: start with a large clear plastic bowl on a hanging feeder. It works, it costs almost nothing, and it teaches you what size and angle actually fits your setup. Once you know what you want, you can upgrade to a formed polycarbonate dome that will last years without yellowing or cracking.
Tools, measurements, and getting the fit right
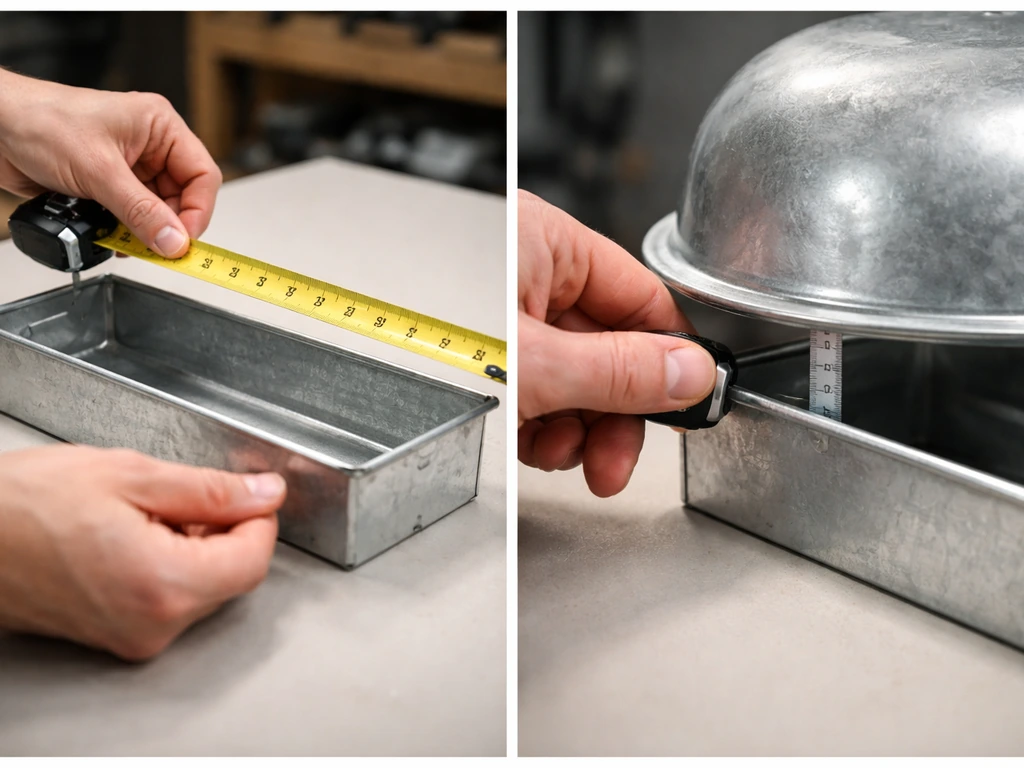
Before you cut anything, measure your feeder. The dome needs to extend at least 3 to 4 inches past the feeder's widest point on all sides. So if your feeder is 8 inches wide, you want a dome that is at least 14 to 16 inches in diameter. For a tube feeder that is 3 to 4 inches in diameter, a 10 to 12 inch dome is the minimum. Droll Yankees, for reference, uses a roughly 10-inch dome on their platform feeders, and that works for compact setups. For larger platform or tray feeders, go wider: 14 to 18 inches keeps rain splash from wetting the edges of the seed tray.
The gap between the bottom edge of the dome and the top of the feeder matters too. You want about 4 to 6 inches of clearance so birds can fly in from the side without the dome blocking them. Too close and birds feel trapped. Too far and the dome loses its weather protection because wind can drive rain sideways under it.
- Tape measure or ruler
- Marker or grease pencil
- Electric drill with a 1/4-inch and a 3/8-inch bit
- Jigsaw or hole saw (for cutting polycarbonate or acrylic sheets)
- Sandpaper (120 grit to smooth cut edges)
- Eye screws or S-hooks rated for at least 5 lbs
- Stainless steel or galvanized wire, or lightweight chain
- Food-safe or NSF-rated silicone sealant (for sealing around any mounting hardware)
- Optional: heat gun or oven (for forming flat polycarbonate into a curve)
How to build your dome feeder cover, step by step
Option A: The plastic bowl dome (beginner, 30–45 minutes)
- Choose a clear or translucent plastic bowl at least 12 inches in diameter with a gentle dome shape. Avoid opaque bowls; you want birds to see through it from above, which reduces their wariness.
- Mark the center of the bowl on the outside bottom. Use a ruler to find it accurately.
- Drill a 3/8-inch hole at the center. Start with the smaller 1/4-inch bit to guide the larger one and avoid cracking the plastic.
- Thread an eye screw through the hole from the inside of the bowl so the eye loop is on the outside (top). Add a washer on the inside face and tighten a nut against it. Apply a small bead of silicone sealant around the hardware on the inside to keep the hole from enlarging over time.
- Attach an S-hook or chain to the eye screw. This is how the dome will hang from your existing hook or shepherd's crook.
- Hang the dome 4 to 6 inches above the top of your feeder. Adjust the chain length until the gap is right.
- Check that the dome rim extends past the widest edge of the feeder by at least 3 inches on all sides. If it does not, you need a larger bowl.
Option B: Polycarbonate sheet dome (intermediate, 60–90 minutes)
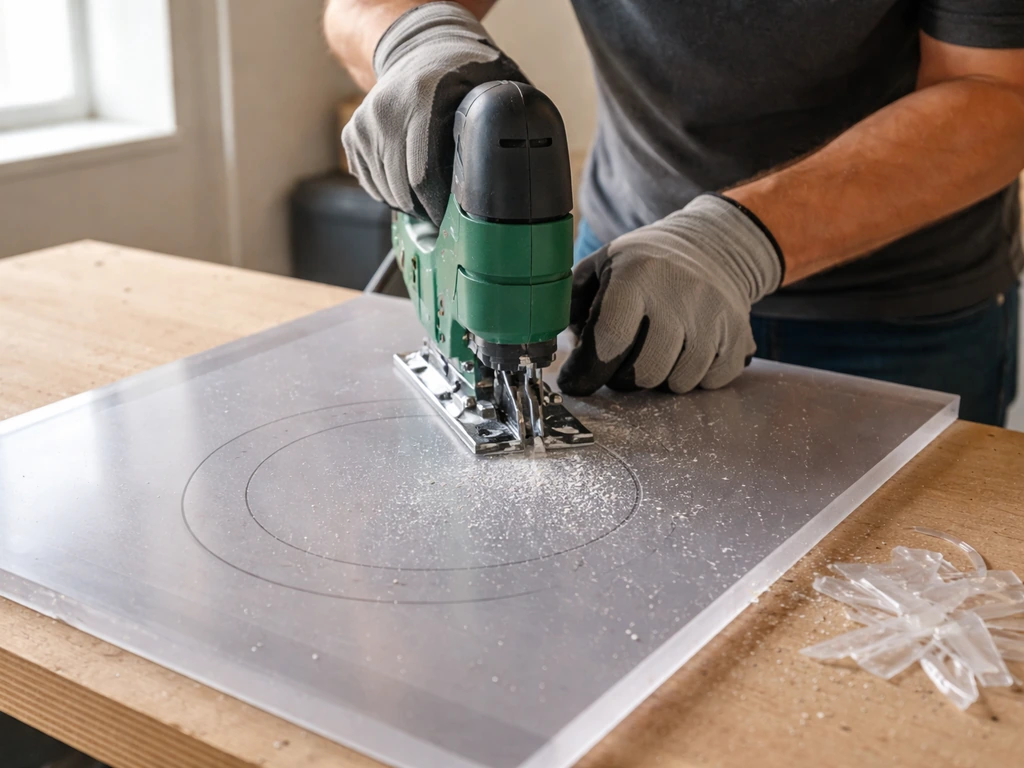
- Buy a 4mm or 6mm solid polycarbonate sheet, UV-protected on both sides. Cut a circle to your target diameter (14 to 18 inches for most feeders) using a jigsaw with a fine-tooth blade. Go slowly to avoid cracking the edges.
- Sand the cut edges with 120-grit sandpaper until smooth. Sharp edges are a bird hazard and also collect dirt.
- To create the dome curve, warm the sheet in an oven at 300°F (150°C) for about 3 to 4 minutes, or use a heat gun evenly across the surface. Handle it with gloves. Lay the warm sheet over a large bowl or round form and press gently to shape. Hold it for 60 seconds as it cools.
- Drill a 3/8-inch center hole once the sheet has fully cooled and hardened in its curved shape.
- Mount an eye screw with a washer and nut through the center hole, and seal with silicone as described in Option A.
- If you want additional drainage or ventilation to prevent condensation, drill 4 to 6 small holes (1/8 inch) near the outer rim of the dome, spaced evenly. This allows humid air to escape instead of condensing on the underside.
- Hang the dome 4 to 6 inches above the feeder using chain or wire, and verify the overhang clears the feeder edges by at least 3 inches all around.
For both options, NestWatch's guidance on birdhouse roofs applies here too: a slight overhang and any edge channel (you can create a shallow lip with a heated bend at the rim) helps direct water away from the feeder rather than letting it drip straight down onto seed. If you want a simpler project instead, there are also easy ways to make a bird feeder ball for hanging from a tree or hook how to make a bird feeder ball. It is a small detail but makes a noticeable difference in heavy rain.
Where and how to hang the dome for best results
Height above the ground matters more than most people realize. For pest control, the bottom of your feeder should sit at least 4 to 5 feet off the ground, which puts the dome itself even higher. Multiple sources from the wild bird feeding community converge on this number: squirrels can jump roughly 4 feet straight up from the ground, so anything below that is reachable. At 4.5 to 5 feet for the feeder bottom, combined with a dome that blocks downward access from above, you cover both attack angles.
Horizontal distance from trees, fences, and walls is equally important. Squirrels can leap 8 to 10 feet horizontally from a branch or ledge. Place your feeder setup at least 8 feet from any jumping-off point. If your yard does not allow that much clearance, a spinning or weighted dome that tilts when a heavy animal lands on it adds another layer of deterrence. If you want to go further, you can also adapt the spinning or weighted idea into your feeder cover plan so it tilts when a heavy animal lands spinning or weighted dome.
For window collision safety, position the feeder either closer than 3 feet to a window or farther than 30 feet away. The middle range, 3 to 30 feet, is where birds build up enough speed to injure themselves if they mistake a reflection for open sky. The dome does not change this risk, but it is worth getting right while you are setting up the whole system.
Aim the open face of the dome slightly away from the prevailing wind direction in your yard. In most of North America that means tilting the setup so the dome shades the feeder from the northwest and west, where storm fronts usually come from. A fixed dome hangs level, but if you are using a chain with multiple attachment points, you can offset the hang slightly to angle the dome.
Keeping the dome clean and the seed fresh
The dome reduces how often you need to clean the feeder, but it does not eliminate it. Plan to clean the entire setup, dome included, at least every two weeks. In wet weather, or if you see any birds looking lethargic near the feeder, clean it immediately and discard any seed that looks damp or clumped. Wet seed can develop mold or bacteria within 24 to 48 hours, and that is a real disease risk for the birds you are trying to help.
For cleaning the dome itself, remove it from the hanging hardware and wash it with warm soapy water. For a deeper clean, use a solution of 2 ounces of bleach per gallon of water (the Minnesota DNR's recommended ratio for feeder cleaning), scrub any residue, rinse thoroughly, and let it air dry completely before re-hanging. Polycarbonate and most hard plastics handle diluted bleach without damage. Do not use abrasive scrubbers on clear polycarbonate or acrylic; they will scratch and cloud the surface.
Condensation on the inside of the dome is a separate issue from rain. It happens when warm, humid air gets trapped under the dome and hits the cooler plastic surface, leaving water droplets that drip onto seed. The fix is ventilation: the small holes drilled near the rim (mentioned in the build steps) allow that warm air to escape. If you skipped the holes, add them now. Four to six 1/8-inch holes around the perimeter of the dome make a real difference without compromising weather protection. Make sure the feeder itself has drainage holes too, so any moisture that does get in can exit rather than pool.
Also make a habit of checking the seed after any heavy rain, even with a dome. If rain was wind-driven, some moisture may have gotten in from the side. Empty the feeder, discard damp seed, let it dry, and refill with fresh seed. Putting fresh seed on top of wet seed is one of the most common ways backyard feeders become disease vectors.
Fixing the most common dome problems
The dome is not stopping seed spill
If hulls and seed are still building up on the ground below your dome, the issue is usually dome diameter, not the dome itself. The dome only catches spill if it extends past the feeder's edges. Measure again: you need at least 3 inches of overhang on every side. A second option is to add a mesh tray or platform below the feeder to catch falling seed. Mesh trays drain water naturally, which solves both the spill and the wet-seed problem at once.
The dome swings and spills seed in wind
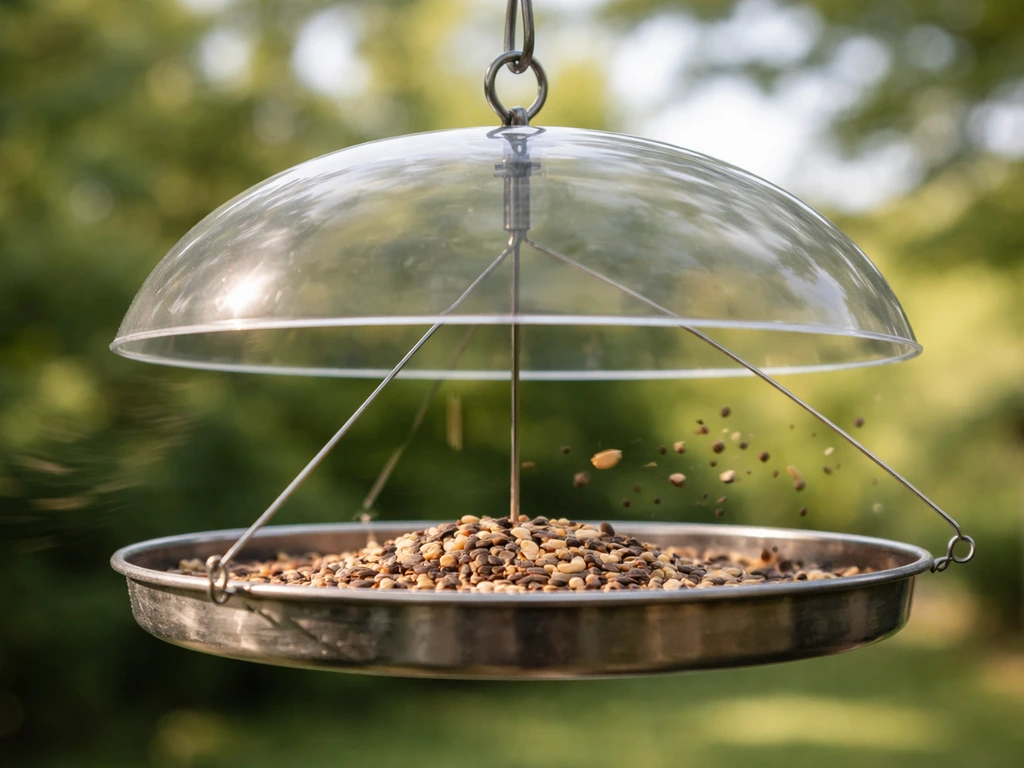
A dome hanging from a single center point will swing. If wind is making the whole feeder system pendulum wildly, add a stabilizer: a second lightweight wire from the rim of the dome down to the feeder body, creating a triangle of support. This keeps the dome from spinning or tilting while still allowing you to detach it easily for cleaning. Alternatively, use a shorter chain length to reduce swing arc.
Squirrels are still getting to the feeder
If squirrels are getting past your dome, check three things in order. First, are they dropping down from above? A dome mounted directly above the feeder should block this; if the dome is too small or the feeder hangs too far below it, squirrels can squeeze past the edge. Second, are they climbing the pole or wire?
The dome only stops top-down access. For pole climbers, you need a separate pole baffle mounted around 4 to 4. 5 feet off the ground on the pole itself. BackyardWildBirds recommends mounting a pole-mounted squirrel or raccoon baffle so the pole is at least 8 feet from trees or walls and placing the baffle around [4 to 4.
5 feet off the ground](https://www. backyardwildbirds. com/squirrel-and-raccoon-stopper-pole-bafflep3302. html).
Third, are there launch points within 8 feet of the feeder? Trim branches, move the pole, or go farther from the fence. All three fixes together make the setup genuinely squirrel-resistant.
The dome is trapping water instead of shedding it
If water is pooling on top of a flat or barely-curved dome, your dome does not have enough curve. A truly flat lid will always pool. The fix is either to add more curve (reheat and re-form a polycarbonate dome) or to drill a small center drain hole, 1/4 inch, so standing water can drip through. Place a small grommet in the hole to protect the hardware and direct the drip away from the center where seed sits below.
Birds are avoiding the dome entirely
This is usually a clearance problem. If the dome hangs too close to the feeder, birds feel enclosed and will not fly in. Raise the dome so there is a full 4 to 6 inches of open space between the dome edge and the feeder's seed ports. Also check that the dome is clear or translucent, not opaque: birds are more confident approaching a setup where they can see through the overhead cover. Give new birds a few days to adjust; some species take a week or two to trust a new setup even when it is perfectly configured.
FAQ
What size dome should I use if my feeder is an irregular shape, like a basket or shallow tray?
Use the widest point you can measure across the feeder (including any handles or side rails), then size the dome so it overhangs that width by at least 3 to 4 inches on every side. If the tray is shorter than it is wide, you may still need extra diameter to cover where wind-driven rain hits the corners, so measure both width and front-to-back depth.
Can I use a dome on a feeder that sits directly on a post or pedestal instead of hanging?
Yes, but you typically mount the dome to a bracket or short hangers so the clearance between the dome edge and the feeder remains 4 to 6 inches. If the dome is fixed too close, birds may avoid it, and if it is too far, wind can push rain underneath and still wet the seed.
Should I drill drainage holes in the dome itself, or will holes let rain into the seed area?
Drain holes are mainly for internal condensation and occasional pooled water on flatter curves. Use small holes near the rim rather than the center so droplets do not drip straight down onto seed, and keep hole size modest (for condensation guidance, 1/8-inch perimeter holes work well). If you see pooling on top, a tiny center drain hole can help, but keep it grommeted and positioned so the drip lands away from the feeding ports.
My clear bowl dome turns cloudy after a few weeks. What’s causing that, and how do I prevent it?
Clouding usually comes from UV exposure, micro-scratches, or residue buildup. Avoid abrasive scrubbers, rinse after bleach cleaning, and let it fully air dry before re-hanging. If the dome is uncoated acrylic or thin plastic, consider switching to UV-protected polycarbonate for better long-term clarity.
How do I angle the dome if it’s hung from a single chain and can’t be easily tilted?
If your chain attaches at the center, the dome will stay level. To improve rain shielding, adjust the hang so the dome face sits slightly farther forward relative to the feeder, or use a multi-attachment chain so one side sits slightly lower. The goal is to shade the feeder during prevailing winds, so observe where rain splashes after a storm and tweak once.
Will a dome stop rats if I’m feeding in a place where rats can reach the ground?
A dome helps reduce scatter and scent pickup from above, but it does not prevent rats from feeding from below if access is available. For better rodent control, pair the dome with a clean-up routine (remove dropped seed under the dome), avoid leaving seed out overnight, and consider a tray or mesh catch so hulls are easier to collect.
How often should I replace seed when I find damp or clumped pieces inside the dome area?
If you find damp, clumped, or darkened seed after heavy rain, discard that seed and dry the feeder and dome. Damp seed can become unsafe quickly, so do not mix fresh seed on top of older wet seed. Refill only after the interior is dry to the touch and any condensation has cleared.
Birds are hovering under the dome but not landing. What should I check first?
Start with clearance and visibility. Confirm there is 4 to 6 inches between the dome edge and the feeder’s seed ports, and make sure the dome is clear enough for birds to see through. Also check that the dome is not blocking the approach path from the side, since many birds need a clear entry lane to drop onto the feeder.
If squirrels still get in, how can I tell whether they are going from the top, side, or by climbing the support?
Look for the entry pattern. If you see them dropping from above, the dome likely does not extend far enough past the feeder edges or hangs too low. If they’re climbing the pole or wire, you need a separate pole baffle positioned around 4 to 4.5 feet off the ground. If you see launch behavior from nearby branches or ledges, move the setup at least 8 feet from those jumping points or trim the branches.
My dome swings in strong wind and scares birds away. What’s the easiest stabilizer fix?
Add a simple triangle support by running a second lightweight wire or line from the dome rim down to the feeder body so the dome cannot spin or pendulum widely. Another low-effort option is reducing chain length to shrink the swing arc. After adjusting, re-check that birds still have the 4 to 6 inch side clearance to enter comfortably.
Is it better to mount the dome over a hanging feeder or to use a baffle style under a pole-mounted feeder?
For hanging feeders, a dome above acts like a top-down baffle, stopping access from above and shielding from weather. For pole-mounted setups, a baffle below can block downward access. Pick the approach that matches how pests are getting to the feeder, since the dome’s protection direction is different depending on whether it sits above or below the feeding point.
Next Article
How to Make a Bird Feeder Ring: Step-by-Step Guide
Build a sturdy ring-style bird feeder with bird-safe materials, pest-proofing, proper placement, filling, cleaning, and