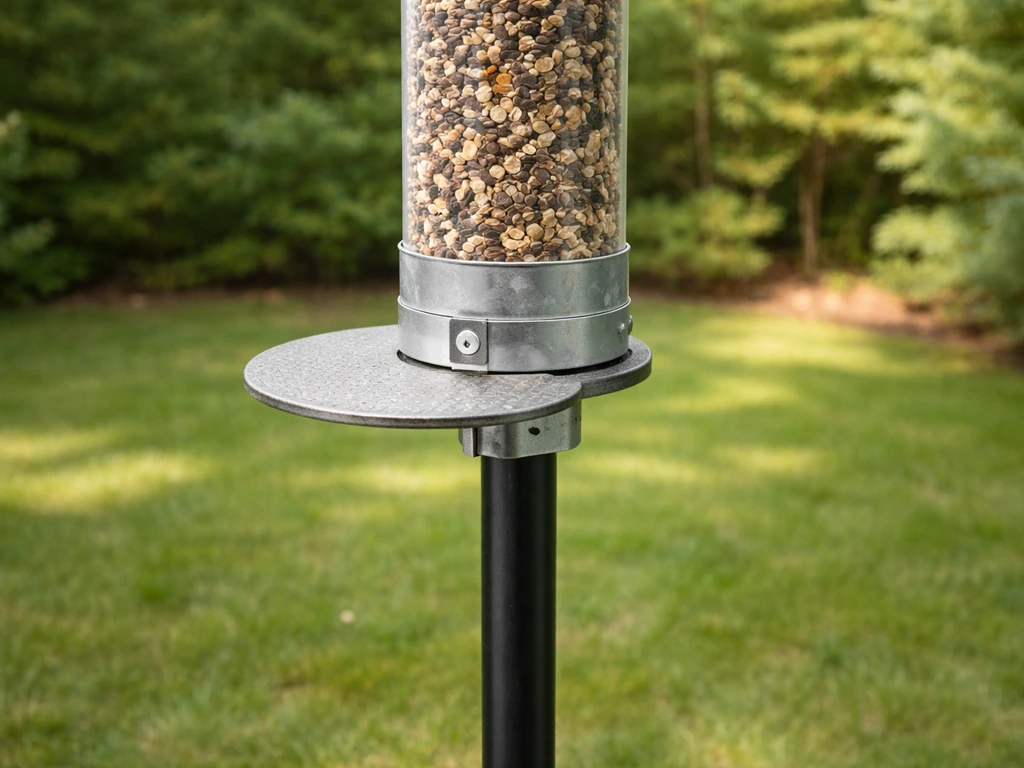
You can build a spinning bird feeder using a tube or bottle body, a low-friction bearing or lazy Susan swivel as the spin mechanism, and a fixed seed-port section that birds reach easily while the rotating outer perch throws squirrels off. The whole thing mounts on a pole with a baffle underneath, and when you get the placement right, it genuinely works. This guide walks you through every step: parts, assembly, hanging, testing, and keeping it spinning smoothly through rain, seeds, and seasons. To make a bird feeder ball instead, follow a similar build process but use a ball-form mold and food-safe binding so it holds together without crumbling.
How to Make a Spinning Bird Feeder Step by Step

Marcus Brennan
7 Jun 2026
What a spinning bird feeder is and why it actually helps
A spinning bird feeder is one where a section of the feeder (usually the outer perch ring or the entire housing) rotates freely on an axle or bearing. When a squirrel lands and tries to grip that rotating surface, it spins underfoot and the squirrel can't stabilize itself long enough to eat. Birds, which are lighter and grip the fixed seed ports from above or between the spinning sections, are largely unaffected. The core mechanic is simple: weight triggers or sustains rotation, and rotation kills stability for heavier pests.
The key thing to understand is that the spinning design alone is not a magic shield. It's one part of a system. The rotation deters squirrels at the feeder itself, but if a squirrel can jump directly onto the seed port or bypass the perch entirely, no amount of spinning helps. That's why placement and a baffle underneath matter just as much as the spin mechanism, and you'll get guidance on all three in this article.
Parts and materials checklist
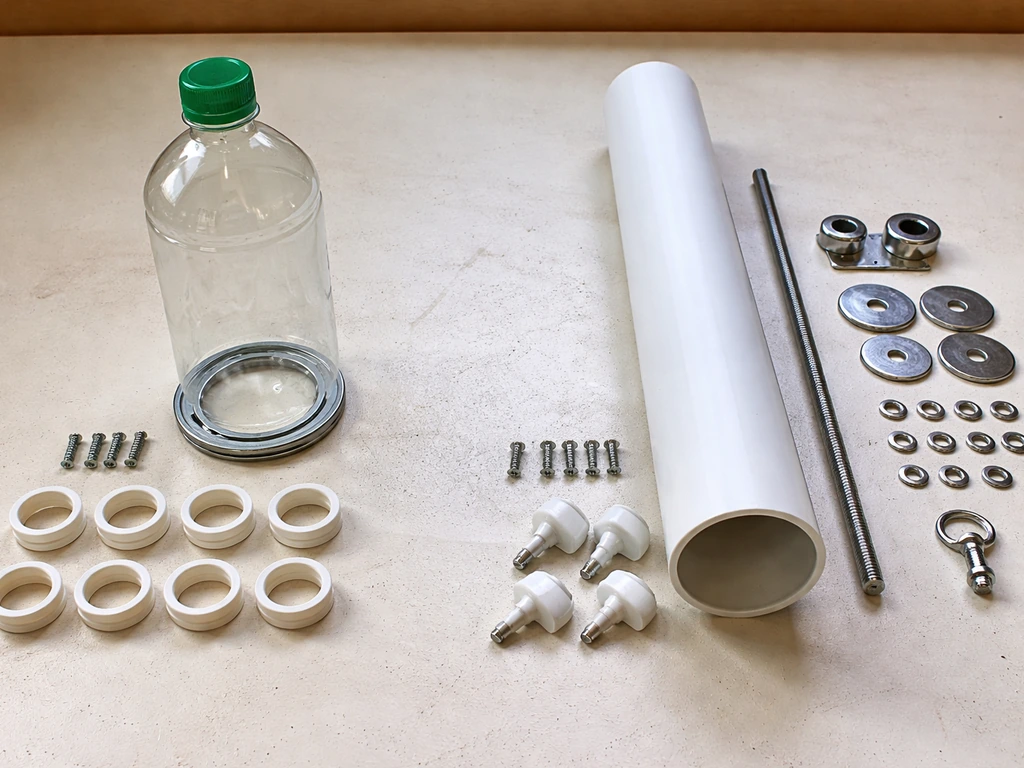
You have two realistic build paths depending on what you already have and how much you want to spend. The simple version uses a lazy Susan swivel bearing and a plastic bottle or PVC tube. The stronger version uses a 608-series skateboard bearing on a metal rod axle, with a more rigid housing. Both work. The stronger version holds up better in wet conditions and stays smoother longer.
| Component | Simple Build | Stronger Build |
|---|---|---|
| Feeder body | Large plastic bottle or 3-inch PVC tube | 4-inch PVC or metal tube with end caps |
| Spin mechanism | Lazy Susan swivel bearing (2–4 inch) | 608 2RS sealed skateboard bearing (8mm bore, 22mm OD, 7mm wide) |
| Axle/rod | 1/4-inch threaded rod or wooden dowel | 8mm stainless steel rod or bolt |
| Perch/spinning ring | Wooden dowel or PVC ring glued to lazy Susan | Aluminum or PVC ring mounted on bearing outer race |
| Seed ports | Holes cut in fixed upper section, ~3/4 inch diameter | Drilled ports in fixed cap or side panel, same diameter |
| Top hook/hanger | Screw eye with washer | Stainless steel screw eye or carabiner clip |
| Mounting hardware | Pole with S-hook and zip ties | Pole with threaded coupler and locking collar |
| Sealing/weatherproofing | Electrical tape or silicone caulk | Marine-grade silicone, UV-resistant sealant |
| Fasteners | Wood screws, zip ties | Stainless steel screws and lock nuts |
For the bearing choice, the 608 2RS format (the '2RS' means rubber-sealed on both sides) is the one to buy. The seals keep moisture and seed dust out, which is exactly the failure mode that kills cheap open bearings outdoors. You can find them at hardware stores, skate shops, or online for under two dollars each. Buy two so you have a spare.
Step-by-step build: body, spin mechanism, and seed ports
Step 1: Build the feeder body
Cut your tube or prepare your bottle to a length of 12 to 16 inches. That's long enough to hold a useful seed capacity without making the feeder so heavy it fights the spin mechanism. Cap or seal the bottom tightly. If you're using PVC, a cemented end cap works great. For a bottle, a tight-fitting plug or a second cap glued in place does the job. The body should be watertight at the bottom and open or plugged at the top (you'll add the hanger there).
Step 2: Install the spin mechanism
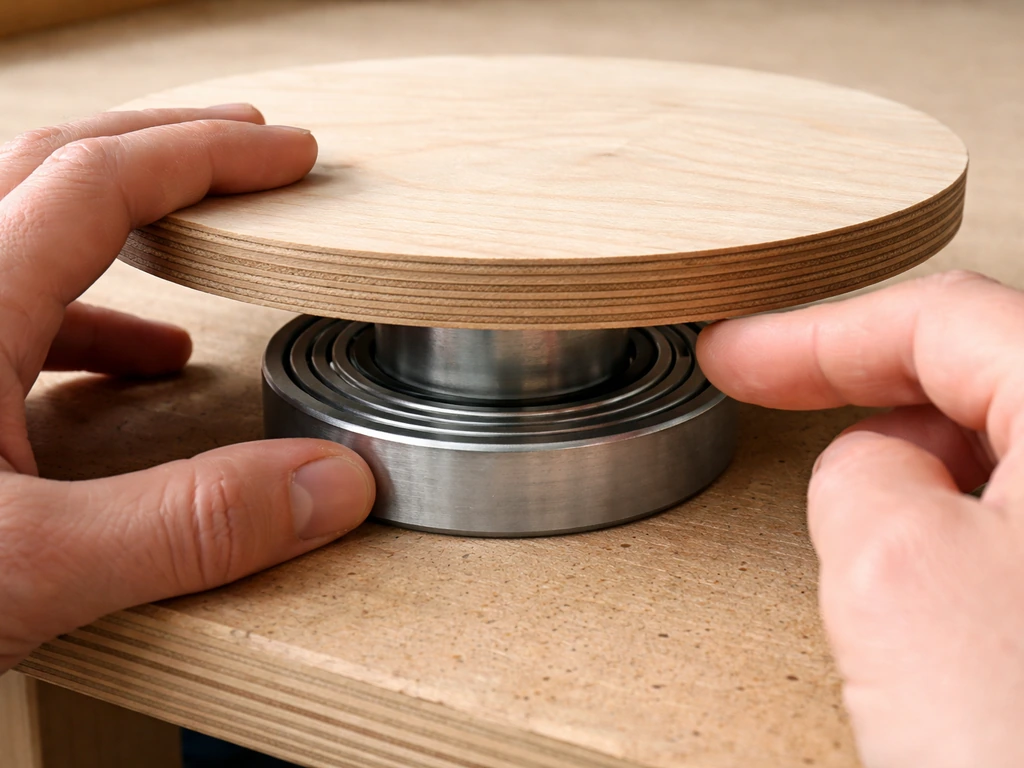
This is the most important part, so take your time. For the simple build, center your lazy Susan bearing at the midpoint of the tube body and attach it so the inner race is fixed to the tube and the outer race is free to spin. The perch ring or platform glues or screws to the outer race. For the stronger build, press or bolt your 608 bearing into a housing or bracket mounted at the midpoint of the tube.
Run your 8mm rod through the inner race of the bearing, fix it firmly to the tube body with lock nuts on both sides, and attach the spinning perch ring to the outer race. The inner race should be dead still. The outer race, and anything attached to it, should spin freely with almost no force.
Test the spin before you go further. Hold the body still and flick the perch ring. It should coast for at least two or three full rotations with no wobble and no catching. If it binds immediately, check that the bearing is seated square and that nothing is pinching the races. A misaligned bearing is the single most common cause of a feeder that won't spin properly.
Step 3: Add seed ports
Seed ports go in the fixed section of the feeder body, above the spinning perch ring, so birds can land on a fixed edge or cling to the port and feed without the port moving under them. Drill or cut holes roughly 3/4 inch in diameter, spaced evenly around the tube, at least 2 to 3 inches above the bearing/perch. Four ports works well for a 3 to 4 inch tube.
Smooth the edges of each hole with sandpaper or a file so birds don't snag their feet or beaks. If you want to add small perch dowels under each port, drill 1/4 inch holes and glue short dowel sections in place. Keep those perch dowels fixed to the body, not to the spinning ring.
Step 4: Add the top hanger
Screw a stainless steel eye bolt through the center of the top cap. Add a washer and lock nut on the inside to keep it from pulling out under the feeder's loaded weight. This is where an S-hook or carabiner will attach to your hanging wire or pole hook. Make sure the whole top is sealed around the eye bolt with silicone so rain doesn't funnel straight into your seed.
How to hang and place it safely
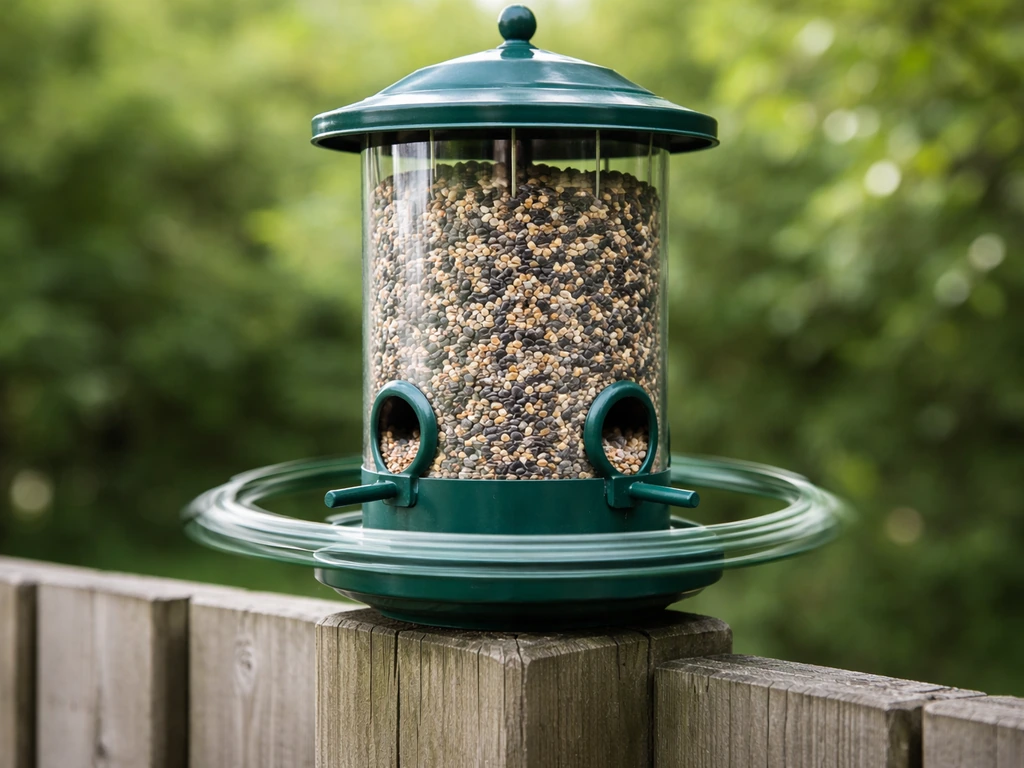
Placement is where most DIY spinning feeders fail, not because of the build, but because the squirrels never have to touch the spinning part in the first place. Get this section right and the whole system works. If you want the easiest route, review the step-by-step instructions for how to make a bird feeder ring and build it to spin reliably. Get it wrong and you'll be watching squirrels eat while completely ignoring the perch.
- Mount on a freestanding pole, not a tree branch or deck railing. A pole gives you full control over baffle placement and keeps squirrels from bypassing the feeder from the side or above.
- Position the pole at least 8 feet away from any fence, tree trunk, deck railing, roof edge, or other surface a squirrel can jump from. Squirrels are athletic; 8 feet is the minimum, not a suggestion.
- Install a squirrel baffle on the pole below the feeder. The top of the baffle should sit at least 4 feet above the ground so squirrels can't simply reach over it.
- Hang the feeder so the seed ports are at a comfortable height for you to refill, typically around 5 to 6 feet off the ground, which also puts it well above the baffle.
- Use a sturdy pole with a stable ground stake or flange mount. A wobbly pole transfers vibration to the bearing and causes binding over time.
- Use an S-hook or locking carabiner between the pole arm and your feeder's eye bolt so you can remove the feeder easily for cleaning without dismantling anything.
Think of it as a system: spinning perch plus baffle plus correct distance from jump points. All three working together is what actually keeps squirrels off. Relying on just the spin mechanism while hanging the feeder from a tree branch a foot away from a fence is a setup that squirrels will defeat every time.
Testing and adjusting for smooth spinning and bird access
Before you fill the feeder with seed, do a dry run. Hang it in position, give it a spin by hand, and watch it from a few feet away. The perch ring should rotate smoothly with a light flick and slow gradually to a stop. If it wobbles side to side, the bearing isn't seated level. If it stops almost immediately, there's friction somewhere, usually a lip of the housing rubbing against the outer race, or the axle is slightly bent. Fix both before adding seed.
Once it passes the dry spin test, fill it about halfway with seed and hang it again. A loaded feeder behaves differently than an empty one. Check that it still spins freely and that the seed ports are angled correctly for birds to reach. If a port is at an awkward angle or too close to the spin ring, birds will avoid it. Reposition or add a small fixed perch dowel to guide them in.
Spend a few days watching which birds visit and how they interact with the feeder. Smaller birds like chickadees and finches adapt quickly. Larger birds like cardinals or jays might need a slightly wider port or a longer fixed perch to feel stable. Adjust port size with a small file or rotary tool if needed. The goal is that birds feed confidently and squirrels trigger the spin every time they try.
Troubleshooting common issues
The perch won't spin or feels stiff
The most common cause is misalignment. Take the feeder down, remove the perch ring, and check that the bearing is seated flat and that both races are clear of debris. Seed husks and moisture are the usual culprits. Clean the bearing area with a dry brush. If you're using an open (unshielded) bearing, replace it with a 2RS sealed version. If the axle rod has any bend in it, replace it. A straight axle is non-negotiable for smooth rotation.
The perch spins but slows down too quickly under squirrel weight
This usually means the bearing has too much friction for the load. First, clean everything and apply one or two drops of light cooking oil or a silicone-based lubricant directly to the bearing. Don't over-lubricate. A tiny amount applied to the gap between the inner and outer race is enough. If the problem persists after cleaning and lubing, the bearing itself may be worn or poorly made. Swap it for a quality sealed 608 bearing and the difference will be immediate.
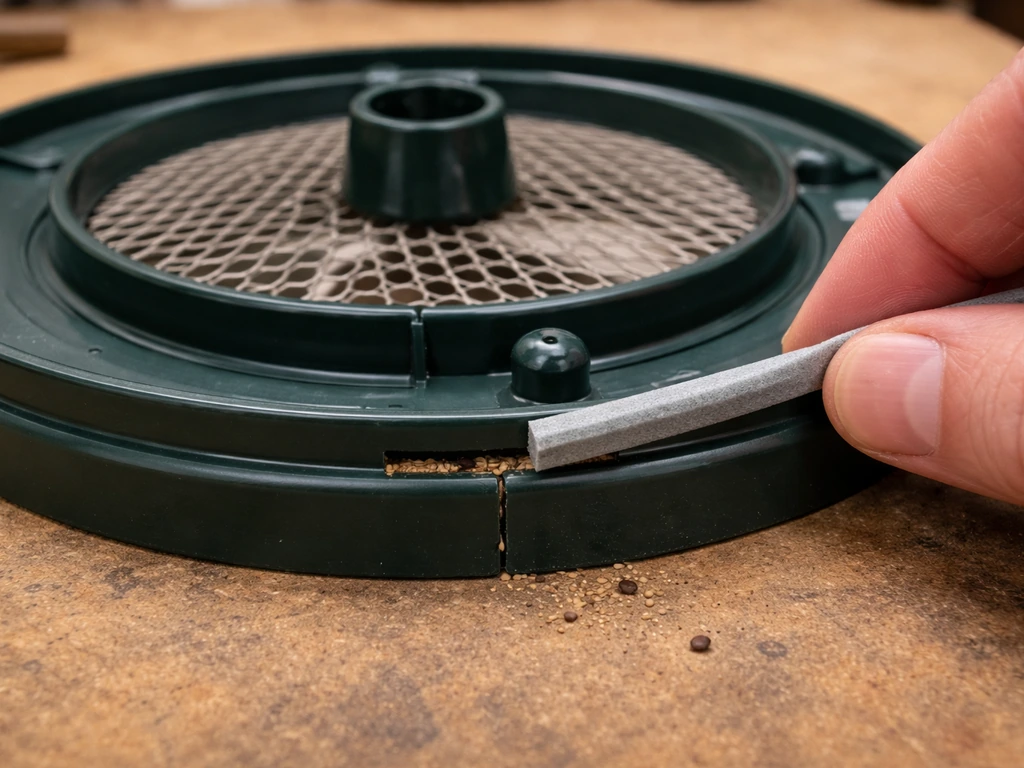
Seed leaks or spills out around the spin ring
This happens when the gap between the rotating ring and the feeder body is too wide, letting seed fall through. Add a thin strip of flexible weatherstripping or a rubber gasket to the inner edge of the spin ring to close the gap without creating friction. Alternatively, redesign the gap so the spin ring overlaps the housing slightly from the outside rather than being flush with it. That overlap acts as a lip that catches falling seed.
The feeder wobbles or swings excessively when birds land
Too much swing usually means the pole arm is too long and flexible, or the hook connection is loose. Shorten the pole arm or add a stabilizing brace. Use a locking carabiner instead of a plain S-hook so the feeder can't swing as freely. A little gentle movement is fine and even natural, but a feeder that swings 6 inches every time a bird lands will deter both birds and your patience.
Maintenance and cleaning for ongoing performance
A spinning feeder needs cleaning at least every two to four weeks, more often in humid weather or if you're using nyjer or millet that tends to clump. Clumped, moldy seed is a health risk for birds and a direct cause of binding in the spin mechanism, since wet seed residue can migrate into the bearing housing and gum things up.
- Remove the feeder from the pole and empty all remaining seed into a bag or trash.
- Disassemble the seed ports and top cap if possible. Rinse the body with hot water, then scrub with a stiff bottle brush and a diluted bleach solution (one part bleach to nine parts water).
- Rinse thoroughly until no bleach smell remains, then let the feeder air dry completely before refilling. Never refill a damp feeder.
- While the body dries, inspect the bearing and spin ring. Brush out any seed debris with a dry brush. If the bearing feels gritty or stiff when you spin it by hand, apply one to two drops of light cooking oil or silicone lubricant to the bearing gap.
- Check the top eye bolt and any screws or fasteners for rust or loosening. Replace any corroded hardware with stainless steel equivalents.
- Inspect the baffle below the feeder and reposition it if it has shifted down the pole. It should sit with its top at or above 4 feet from the ground.
- Reassemble, refill, and rehang. Give the perch a spin by hand before stepping back to confirm everything is running smoothly.
At the start and end of each season, do a more thorough inspection: check the pole for rust, examine the axle rod for any corrosion or bending, and spin-test the bearing fully loaded. If the feeder has been through a cold, wet winter, the bearing seal may have degraded. A fresh 608 2RS bearing costs almost nothing and restores the feeder to like-new performance in five minutes.
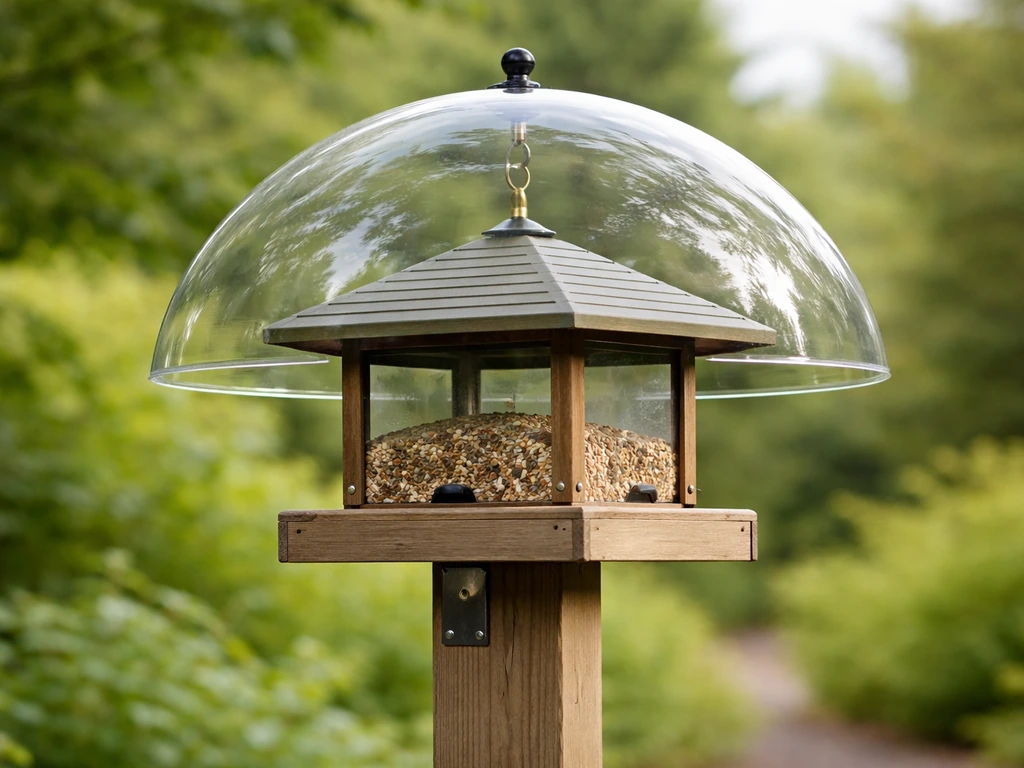
One last thought: the spinning design is one creative approach to pest-proofing, but it works alongside good feeder design more broadly. If you're also thinking about adding a dome or cover to keep rain off the seed and reduce the clumping that accelerates mechanism wear, or a ring-style perch that limits access angles, those additions pair well with a spinning build.
To learn how to make a bird feeder dome that protects seed while still letting birds feed easily, follow the dome build steps in this guide a dome or cover. If you're wondering how to make a bird feeder cover, focus on using materials that block rain while still allowing ventilation so seed stays dry dome or cover. The more layers of your system that reinforce each other, the less work any single component has to do.
FAQ
Can I make a spinning bird feeder with a lazy Susan only, without bearings or an axle rod?
Yes for a basic build, but make sure the lazy Susan’s outer ring is firmly connected to the perch and the inner ring is rigidly fixed to the body. Any movement between the body and the non-spinning part reintroduces wobble under squirrel weight, which usually looks like poor coasting and side-to-side wobbling.
What seed type is easiest for a spinning feeder, and which ones cause the most problems?
Small, free-flowing seeds like black oil sunflower and many mixes tend to work best. Seeds that clump when wet (certain nyjer blends and some millet mixes) can migrate into the bearing area and increase friction, so if you use them, shorten your cleaning intervals and consider a tighter bottom seal to limit moisture intrusion.
How can I tell if my bearing is misaligned before I assemble the whole feeder?
Dry-fit the bearing in the housing (or on the tube midpoint), then spin the outer race by hand while holding the body still. It should start smoothly and coast consistently, without a catch once per rotation. If you feel a repeating notch, reseat the bearing so the race plane is square to the axle.
Is lubrication safe for outdoor bird feeders?
It is if you use very small amounts of light, food-safe or silicone-based lubricant and wipe away excess. The goal is to reduce friction at the bearing, not to coat nearby surfaces. Re-lubricate only after cleaning, and avoid dripping onto seed ports or the inside of the seed container.
How do I stop birds from landing on the spinning ring instead of the fixed seed ports?
Move the seed ports and any fixed dowels farther from the spinning edge, and keep the ports in a fixed section that does not move with the ring. If birds repeatedly grab the rotating perch first, widen or reposition ports so they can grip the fixed edge comfortably, then re-test with the feeder empty to check whether the spin is triggered predictably.
Should the spinning ring be flush with the housing, or is there an advantage to overlapping it?
Overlapping the inner edge of the spin ring with a small protective lip often helps. It reduces the gap where seed falls through, which the article notes can create binding. A flush fit can be perfectly fine, but if you see seed migration, add a thin flexible gasket strip or redesign the overlap.
How tight should the axle be against the bearing inner race, and what causes binding?
The axle should be straight and clamped firmly to the inner race without pinching the bearing. Binding usually comes from a slightly bent rod, over-tight lock nuts that squeeze the bearing, or a housing that twists as you mount it. If the feeder spins well when empty but binds when loaded, check for flex in the pole connection and for rubbing between the ring and housing.
What baffle size or placement matters most for squirrels with a spinning feeder?
The baffle should block squirrels from reaching the seed port from below or from directly jumping onto the ports. The key edge case is when the squirrel can bypass the spinning perch by launching from a nearby jump point (fence, branch, roof edge). If squirrels are still getting seed, rework placement and jump distances rather than only improving the bearing.
How often should I clean a spinning feeder in different climates?
In dry climates, every 4 weeks may be adequate. In humid areas, or with wet seed residue, clean closer to every 2 weeks and always do a quick inspection after storms. If you notice slower coasting or irregular stopping, clean and dry-brush the bearing area immediately rather than waiting for the next scheduled cleaning.
What should I do if the feeder spins well empty but not when half-filled?
First confirm the spin is not rubbing under load (wobble and friction often increase when the housing shifts). Then check that seed ports are positioned so birds are not pushing directly against the spinning ring. Finally, inspect for seed husks or clumps that could be entering the bearing gap when the feeder is filled and exposed to rain.
Can I build a spinning feeder for larger birds like jays or cardinals without sacrificing squirrel-proofing?
Yes, but adjust the fixed seed port stability rather than enlarging the spinning ring. Use a wider or longer fixed perch area near the ports, and consider slightly larger port openings so birds grip confidently. Keep the rotating part smooth and unobstructed so squirrels still lose stability when they contact it.
What’s the best quick test to confirm the feeder is safe and effective before letting birds use it?
Do three tests: a free-spin test (coasts for multiple rotations), a dry placement test (watch from a few feet away for wobble and clearance issues), and a loaded test (fill halfway and confirm continued smooth spin). If any test shows immediate stopping, binding, or side-to-side wobble, fix the mechanical issue before adding more seed.
Next Article
How to Make a Bird Feeder Dome: Step-by-Step Guide
Build a protective bird feeder dome step by step, fit common feeders, mount safely, and keep seed dry and pest-free.