A leaning bird feeder pole almost always comes down to one of three things: it wasn't set deep enough when installed, the soil around the base has loosened over time, or the weight and wind load on top are working against an anchor that was never quite right. The good news is that most of these problems are fixable in an afternoon with basic tools, and a few simple upgrades will keep your pole plumb for years. A well-executed plan for how to stabilize a bird feeder pole usually starts with diagnosing the cause of the lean, then upgrading the anchor if quick fixes fail.
How to Keep Bird Feeder Pole Straight: Fix Wobble Fast

Marcus Brennan
2 May 2026
Why your pole is leaning or wobbling in the first place
Before you grab a shovel, it helps to figure out exactly what's causing the tilt. The fix for loose soil is different from the fix for a pole that's simply too short in the ground, and neither is the same as dealing with a cracked or rotted base. Here are the most common culprits.
- Shallow installation: Most poles need at least 12 to 18 inches in the ground (roughly one-third of the total pole length) to resist tipping. If yours was only pushed in a few inches, wind and feeder weight will win every time.
- Soil settling or softening: Clay-heavy soil expands and contracts with moisture. Sandy or loose soil never grips the pole firmly. After a wet winter or a dry summer, the ground around the base shifts and the pole starts to lean.
- Incorrect or missing ground anchor: A simple push-in stake works in firm turf, but it won't hold in soft garden beds or near garden borders that get watered frequently.
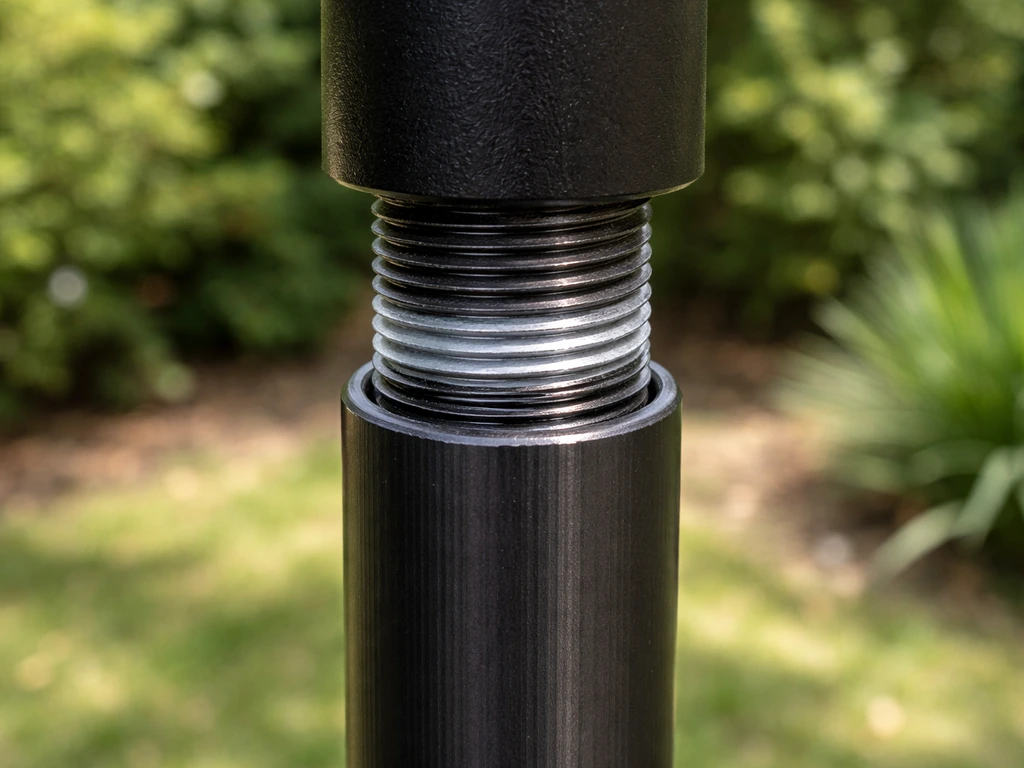
- Loose clamps or collar hardware: Many pole systems use a collar or set-screw clamp where the upper pole meets the lower section. These back off over time and let the pole rock.
- Top-heavy feeder load: A large platform feeder or multiple hanging feeders add significant weight and leverage. If that load is off-center, it acts like a lever and pulls the whole pole sideways.
- Wind exposure: A pole sited in an open yard with no windbreak gets a lot of lateral force. Even a well-anchored pole will wobble if the feeder acts as a sail.
- Water damage or rot at the base: Wooden poles and even some coated steel poles can corrode at ground level where moisture collects, weakening the very spot that needs to be strongest.
- Slippery or uneven ground surface: If the pole sits on a patio, deck, or uneven flagstone, the base can slide under load rather than grip.
Tools and setup checks before you do anything else
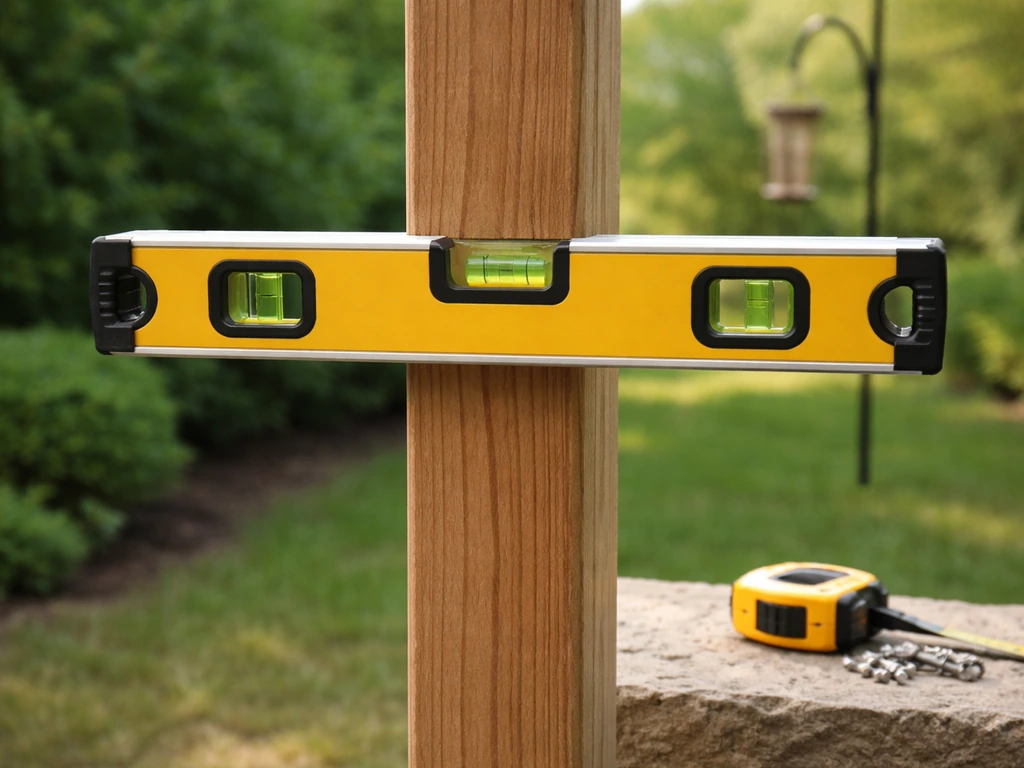
You don't need a lot of gear, but a couple of specific tools make a real difference. A standard 4-foot bubble level is the single most important thing here. When I first set up my own feeder pole, I eyeballed it and thought it looked fine. Three weeks later it had a noticeable lean. After that I always use a level.
- 4-foot bubble level (or a shorter torpedo level for tight spots)
- Tape measure
- Rubber mallet or post driver
- Adjustable wrench or socket set for tightening hardware
- Shovel or hand trowel for checking installation depth
- Marking spray paint or stakes and string to confirm plumb from two directions
Before assuming the pole itself is the problem, check these things first. Hold the level against two sides of the pole at 90 degrees to each other. A pole can look perfectly straight from the front and still be leaning forward or backward. Also measure how much of the pole is actually underground. If you can wiggle the pole by hand at all, the anchor is already compromised. Finally, check the ground itself: push a screwdriver into the soil near the base. If it sinks easily with little resistance, soft soil is part of your problem.
Immediate fixes you can do today
These are the quick wins that take 20 to 45 minutes and don't require buying anything special. Start here before moving on to more involved anchoring solutions.
Re-tighten all hardware first
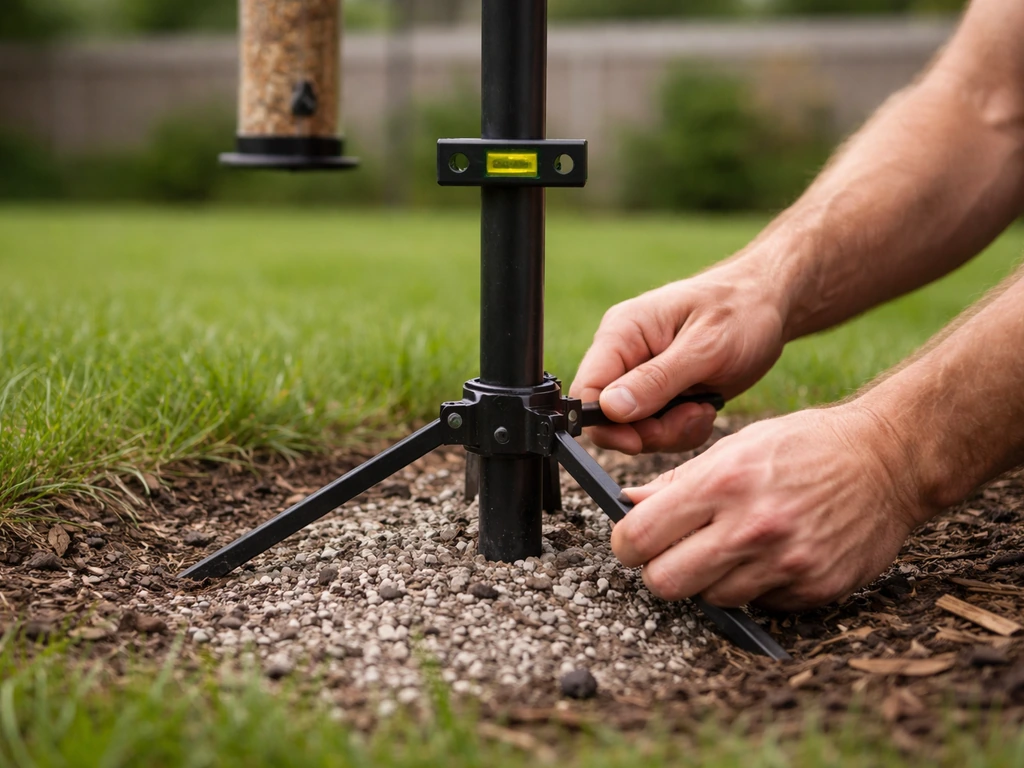
Work your way down the pole from top to bottom. Tighten every set screw, collar bolt, and clamp you can find. On multi-piece telescoping poles, make sure each section is fully seated before you tighten the hardware. A stop bolt in the ground sleeve, if your pole system uses one, should be snug but not overtightened to the point of deforming the sleeve. Once everything is tight, check the level again.
Shim and pack the base
If the pole is only slightly off-plumb and the base is a push-in stake style, you can often correct it by packing soil back around the base. Pull the pole straight (use the level to confirm), then push compacted soil in from the leaning side while a helper holds the pole upright. Tamp it down firmly with your foot or a piece of scrap wood. For sandy or loose soil, mixing a small amount of fast-setting dry concrete into the backfill helps a lot. You don't need to mix it into a slurry; just pour it dry into the hole, pack it in, and wet it down thoroughly. It'll cure solid overnight.
Adjust a freestanding or base-plate mounted pole
If your pole sits in a weighted base or on a ground plate with adjustable feet, check each foot individually. Loosen the lock nuts, adjust the leveling feet until the bubble is centered, then re-lock everything. For base-plate setups screwed into decking or a concrete pad, check whether any of the mounting bolts have worked loose or whether the pad itself has cracked or settled.
Best anchoring options for a permanently straight pole
If the quick fixes don't hold, or if you're starting from scratch, you need to think about the right foundation for your specific setup. The two main approaches are a driven ground stake (or screw anchor) and a poured concrete sleeve or footing. Each has a clear use case.
| Anchoring Method | Best For | Depth/Size | Effort | Durability |
|---|---|---|---|---|
| Push-in stake (included with most pole kits) | Firm turf, light feeders, calm locations | 10 to 14 inches | 5 minutes | Low to moderate |
| Screw-in ground anchor | Soft or sandy soil, medium-weight feeders | 12 to 18 inches | 10 to 15 minutes | Moderate to good |
| Ground sleeve with concrete footing | Heavy setups, windy yards, tall or telescoping poles | 18 to 24 inches deep, 6 to 8 inch diameter hole | 1 to 2 hours plus 24-hour cure | Excellent |
| Concrete pad with embedded bolt plate | Permanent installations on patios or level ground | Varies by pad thickness | Half day or more | Excellent |
Installing a ground sleeve with concrete (the most reliable fix)
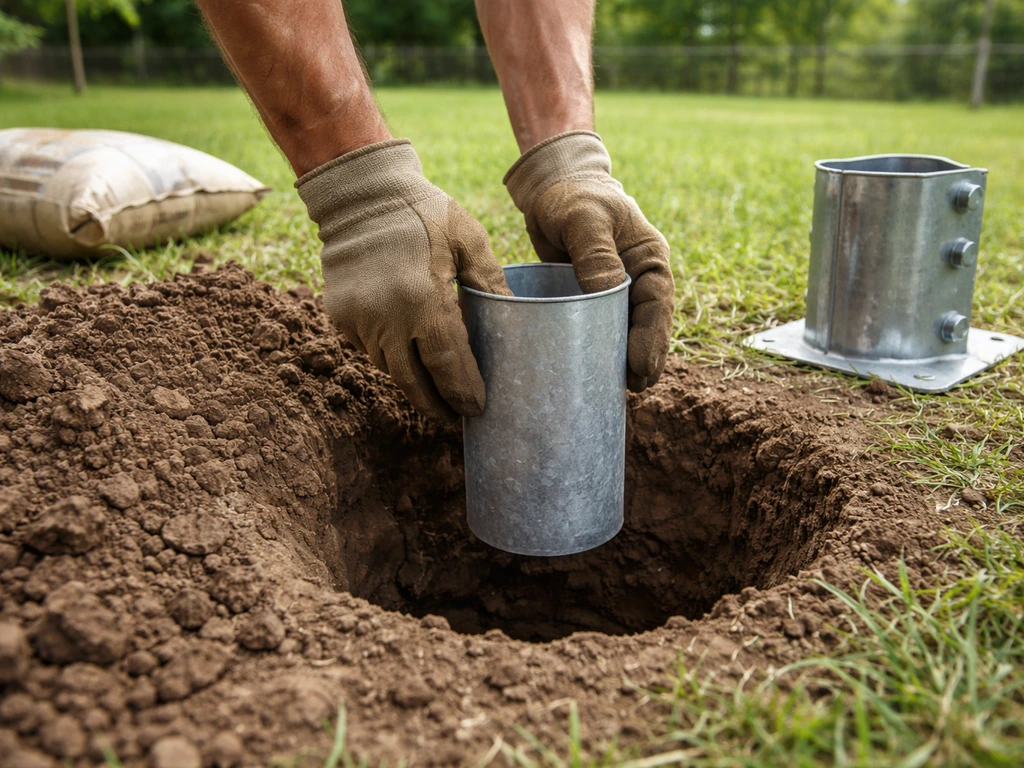
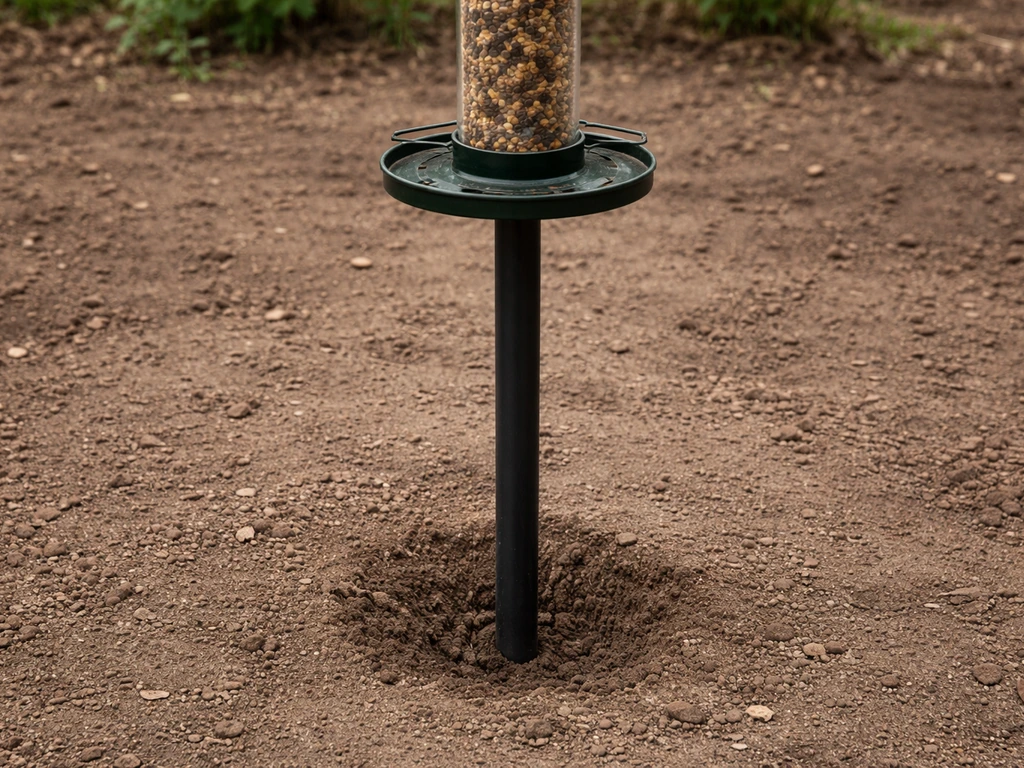
A ground sleeve is a short section of pipe (usually 18 to 24 inches long) that gets set in concrete and acts as a receiver for the main pole. This is what I'd recommend for anyone who's already had their pole lean or who has soft soil. Here's how to do it right.
- Dig a hole 6 to 8 inches in diameter and at least 18 inches deep (24 inches in cold climates where frost heave is a risk).
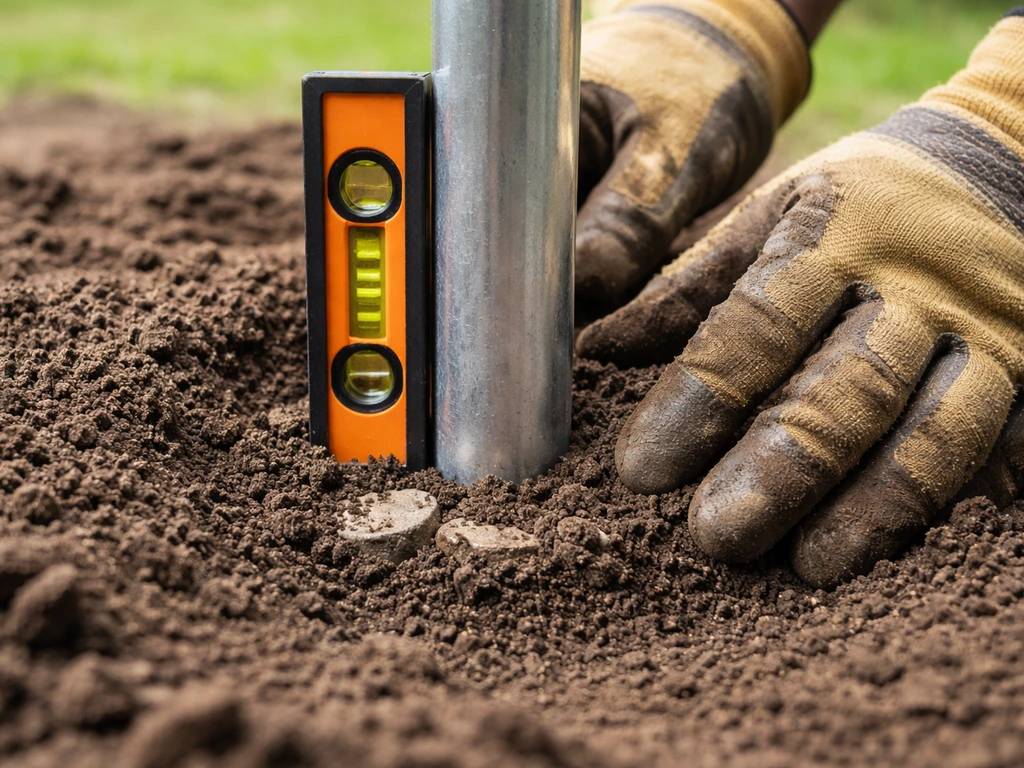
- Set the ground sleeve in the center of the hole. Use a torpedo level on the sleeve itself, not just on the pole. This is the step most people skip and it's where the lean starts.
- Have a helper hold the sleeve plumb while you pour dry-mix concrete around it, or brace it temporarily with scrap stakes and string.
- Fill the hole with concrete, tamping to eliminate air pockets. Crown the concrete slightly above ground level so water drains away from the sleeve.
- Double-check plumb from two directions before walking away. Small adjustments are easy now; they're impossible once the concrete sets.
- Allow at least 24 hours for the concrete to cure before inserting the pole and loading it with feeders.
One thing worth noting: when you insert the pole into the sleeve, install the stop bolt (if your pole system uses one) before checking final alignment with your level. That bolt locks the pole's depth in the sleeve, so if you set it after the fact you may shift the pole slightly and undo your careful leveling.
Wind and weight stability upgrades
Even a well-anchored pole can develop a wobble if the feeder setup on top is working against it. A few upgrades make a big difference, especially in open or windy yards.
Placement and spacing matter more than you'd think
Place your pole at least 10 feet from the nearest tree, fence, or large shrub. That spacing is often cited for squirrel-proofing reasons, but it also means the pole isn't in the turbulent wind shadow behind a structure. Open placement actually gives you cleaner, more predictable wind loads, which a properly anchored pole handles better than the swirling gusts you get near walls and fences.
Balance your feeder load
If you're hanging multiple feeders from a single pole with multiple arms, try to balance the weight symmetrically. An arm with a heavy platform feeder on one side and nothing on the other creates a constant lateral pull. Even spreading feeders to roughly equal weight on each side dramatically reduces the stress on the anchor.
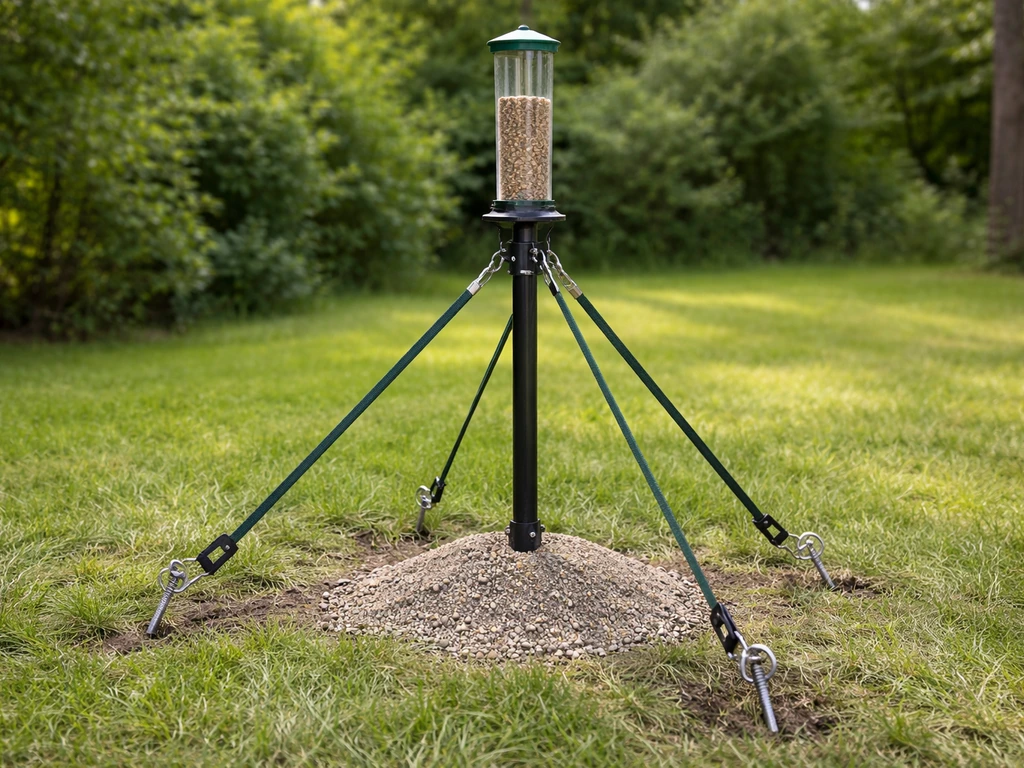
Guy wires for tall or exposed poles
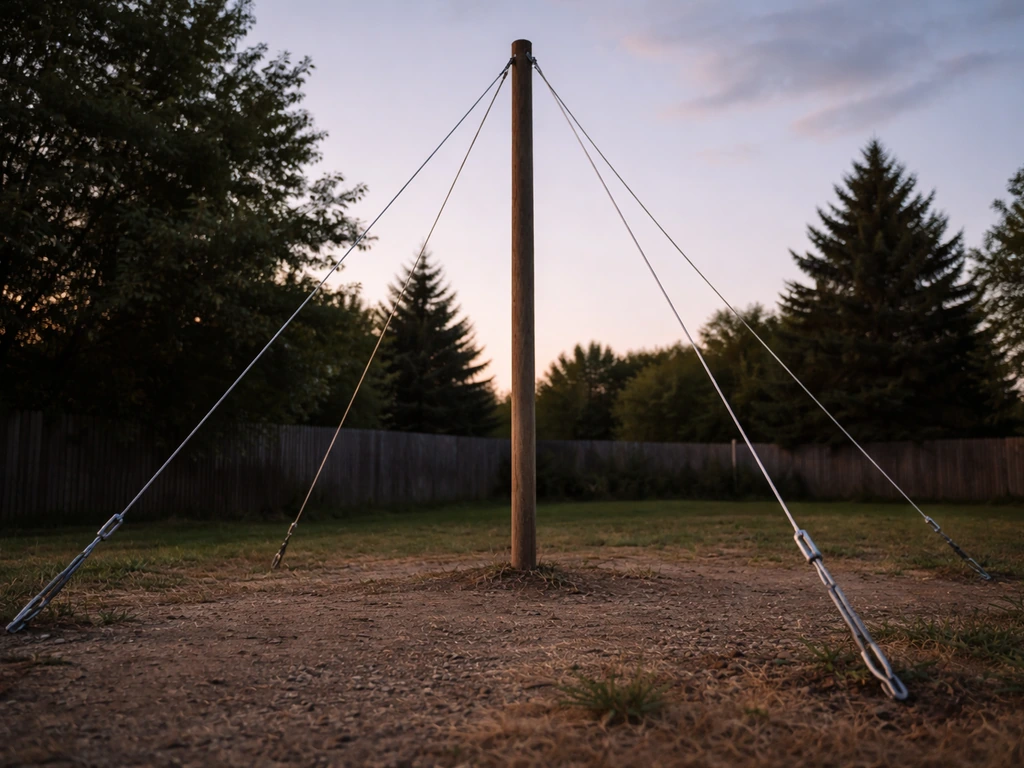
If your pole is over 6 feet above ground or sits in a very exposed location, guy wires are a legitimate option. Use three or four thin stainless steel cables (1/16-inch aircraft cable works well) at about 120-degree intervals, anchored to ground stakes set 3 to 4 feet out from the base. Keep the cables taut but not so tight they stress the pole. Turnbuckles make tensioning easy and allow re-adjustment later. This setup looks more involved than it is, and once everything is painted or weatherproofed it's barely noticeable.
Check your hanging hardware
Wobbly poles are sometimes actually wobbly feeders on solid poles. If the feeder is hanging on a loose S-hook or a low-quality swivel, it swings and sways and makes the whole setup feel unstable even when the pole is perfectly straight. Use locking S-hooks or a short chain with a quick-link carabiner. These are cheap, easy to find, and they eliminate that constant swinging motion that can also gradually work the pole's anchor loose over time.
Ongoing maintenance to prevent future leaning
Getting the pole straight is only half the job. Keeping it that way over seasons takes a small amount of periodic attention, but none of it is difficult.
Check level twice a year
Spring and fall are natural times to do a quick check. Spring is important because freeze-thaw cycles in winter can shift even a well-set concrete footing slightly. Fall is when you want to catch any movement before winter makes it worse. A two-minute level check is all it takes. If you catch a lean early, packing soil against the high side and re-tamping is usually enough to correct it. If you wait until the pole is noticeably off, you may have to reset the whole anchor.
Re-tighten fasteners seasonally
Heat and cold cause metal to expand and contract, which gradually backs off set screws and collar bolts. A quick pass with a wrench each spring and fall takes five minutes and prevents the kind of slow loosening that turns into a wobble you don't notice until the pole is already leaning.
Protect the base from water and rot
The ground-level zone is where poles fail earliest. For metal poles, make sure the paint or coating is intact right at the soil line. If it's chipped or scratched, clean the spot with a wire brush and apply a rust-inhibiting primer before repainting. For wooden poles, a wrap of tar paper or a coat of wood preservative at and just below ground level extends life significantly. Keep mulch and wet debris from piling up around the base; that trapped moisture is the main cause of accelerated rot and corrosion.
Adjust after any major soil disruption
If you've had landscaping work done nearby, installed irrigation, or had a very wet or very dry extended period, check the pole right after. These are the events most likely to shift the soil enough to start a lean. Catching it early means a 10-minute fix instead of a full reset.
Putting it all together
The path from a wobbly pole to a solid one is pretty straightforward: diagnose the actual cause, use a level to confirm what you're working with, do the immediate fixes first, and upgrade the anchor if those fixes don't hold. For example, if you want to put a slinky on a bird feeder pole, make sure the pole is stable first so the added motion does not loosen the anchor over time wobbly pole to a solid one. For most backyard setups, a properly set ground sleeve in concrete is the most reliable long-term solution, and it's a realistic afternoon project. Choosing the best grease for a bird feeder pole helps reduce wear on hardware so the pole stays straight longer properly set ground sleeve in concrete. Pair that with balanced feeder weight, solid hanging hardware, and a twice-yearly maintenance check, and your pole should stay straight through seasons of wind, rain, and feeder loads. If your main goal is a slippery feeder pole for reaching and climbing, use a non-toxic, weather-resistant slick surface material that won't harm birds or other wildlife. If the wire on your bird feeder looks too long for the mount, you can shorten it so the feeder sits at the right height without putting extra stress on the setup feeder loads. If you're also thinking about what to mount on or around the pole itself, those decisions about hardware, squirrel guards, and accessories connect closely to how stable the whole setup needs to be, so it's worth thinking through the full pole system together rather than solving each piece in isolation.
FAQ
How can I tell if the pole is leaning because of the base, or because the feeder hardware is causing sway?
Do a level check with no weight moving the feeder, then grab the pole near the base and gently try to wiggle it. If the pole itself stays solid but the feeder swings, the instability is from the hanging hardware (loose S-hook, low-quality swivel, or an overly long hanging wire). If the pole shifts at the base, focus on the anchor and surrounding soil first.
What’s the best way to level a pole when the ground is uneven?
Use a bubble level in two perpendicular directions (the way you check for side-to-side and front-to-back lean). For adjustable feet or plate bases, set one foot at a time until the bubble is centered, then lock the hardware before tightening the others, so you do not shift alignment while tightening.
Should I add concrete dry or mixed when packing soil back around a push-in stake base?
If you are using the dry concrete method, pour it dry into the hole or packed backfill, then wet it thoroughly so it sets and bonds. Avoid making a soupy slurry unless your product instructions specifically call for it, since weaker set material can wash out during heavy rain and leave the base loosening again.
Why does my pole seem straight for a few weeks, then starts leaning again?
Common causes are set screws that backed off after heat or freeze-thaw movement, telescoping sections that were not fully seated before tightening, or backfill that settled after rain. Re-check the underground depth and tighten all clamps and collars after the first weather cycle, not just during initial install.
Can I straighten an already-leaning pole without resetting the anchor?
Yes, if you can still pull the pole upright with minimal resistance and the base is not cracked or rotted. Confirm you can push a screwdriver into the soil easily and that the base is not wiggling at the anchor. Then pack and tamp soil against the high side, and for loose soil consider dry concrete backfill to prevent later settlement.
How do I know if my soil is too soft for a ground stake anchor?
Push a screwdriver into the ground near the base. If it sinks with very little resistance or the soil feels like it powders up, the stake will struggle to hold over wind and feeder loads. In that case, switching to a sleeve or footing set in concrete is usually more reliable than trying to “overdrive” the stake.
What spacing should I use if I do not have room for the recommended 10 feet from trees and fences?
Aim for the maximum clearance you can, but if the pole must be closer to a structure, compensate by anchoring more aggressively (for example, using guy wires if the pole is tall or exposed). Also avoid mounting feeders where they are likely to brush or partially rub against nearby shrubs or fence elements, since that creates extra lateral forces.
How taut should guy wires be, and how do I prevent overstressing the pole?
Set cables taut enough to stop the pole from moving, but do not crank them to maximum tightness. A practical approach is to tension until wobble is reduced, then fine-tune using turnbuckles after checking with the level. If you see bending at the pole or additional squeaking under load, back off slightly.
What hanging hardware should I use to reduce wobble from the feeder itself?
Use locking S-hooks or a short chain with a quick-link carabiner, and make sure swivels are rated for outdoor use. Replace anything that has visible play, that drifts side-to-side easily by hand, or that has a loose connection point. This reduces feeder swing that can slowly work the anchor loose.
How often should I inspect the pole, and what should I look for each time?
Check in spring and fall, after any major freeze-thaw period, and right after landscaping, irrigation changes, or extended drought or heavy rain. Each time, do a quick two-minute level check, then run a wrench over set screws and collar bolts, and look for coating damage right at the soil line.
What if the sleeve or concrete footing was installed but the stop bolt is making alignment hard?
Install the stop bolt before performing final alignment after inserting the pole into the sleeve. The stop bolt sets depth, so if you adjust after the pole is leveled, you may effectively change where the pole sits in the sleeve and reintroduce a lean.
Next Articles
How to Put a Bird Feeder Pole in the Ground
Step-by-step guide to secure a bird feeder pole in the ground with proper depth, bracing, soil prep, and wobble fixes.
How to Stabilize a Bird Feeder Pole: Step-by-Step Fixes
Diagnose wobble causes and follow step-by-step fixes to stabilize a bird feeder pole with stakes, ballast, bracing, and
Best Grease for Bird Feeder Pole: Safe Options and How to Apply
Find the safest grease for bird feeder poles, when to grease, and step-by-step application to stop sticking and pests.