To mount a bird feeder on a pole, you need to match your feeder's mounting hardware to the pole's outside diameter (usually 1 inch for most standard setups), attach a bracket or pole-mount adapter using corrosion-resistant screws or clamps, set the feeder at 5 to 6 feet off the ground, and secure it so it can't spin or swing loose in the wind. That's the whole job. The details below will make sure you do it right the first time, whether you're working with a wooden post, a metal conduit pole, or a dedicated bird feeder pole system.
How to Mount a Bird Feeder on a Pole Step by Step

Marcus Brennan
23 Apr 2026
Identify your feeder and pole type first
Before you buy any hardware, figure out exactly what you're working with. Not all feeders and poles are compatible, and mismatching them is the number one reason people end up with a wobbly, crooked, or falling feeder. Take two minutes to check these things.
Your feeder's mounting base
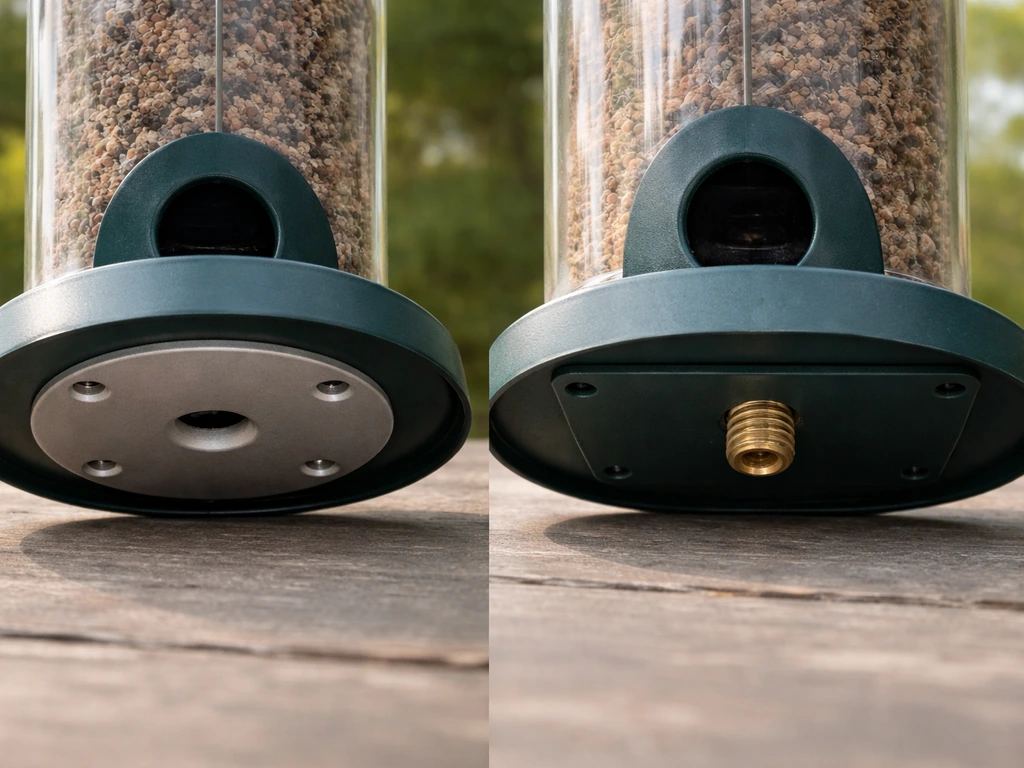
Flip your feeder over or check the manufacturer specs. Most bird feeders fall into one of three mounting categories: they have a pre-drilled mounting plate or flange on the bottom (flat base feeders), a hanging hook or loop at the top (hang-only feeders), or a dedicated pole-mount adapter port that accepts a specific pole diameter. The Brome Mega 600, for example, is designed to blank" rel="noopener noreferrer">drop directly onto any pole with a 1-inch outside diameter. Bird Buddy's universal pole mount uses a collar that clamps onto a 1-inch (2.5 cm) pole. If your feeder doesn't have a built-in pole-mount option, you'll be adding a mounting bracket or platform, which is totally fine and often more flexible.
Your pole type and material
The three most common poles people work with are wooden posts (4x4 or round landscape posts), metal conduit or electrical metallic tubing (EMT), and dedicated bird feeder poles like the Wild Birds Unlimited Advanced Pole System. Each one has different rules for how you attach hardware to it. Metal poles are harder to drill into without the right bit and require stainless or galvanized fasteners to avoid rust. Wooden posts are easiest to work with but need weather sealing around any hardware you add. Dedicated feeder pole systems usually come with proprietary adapters and flanges, which makes life easier.
| Pole Type | Best Mounting Method | Hardware to Use | Watch Out For |
|---|---|---|---|
| Wooden post (4x4, round) | Screw-on bracket or mounting plate | Exterior-grade stainless or galvanized screws | Rot at screw holes; seal with exterior caulk |
| Metal conduit / EMT | Clamp collar or drill-and-bolt | Stainless steel U-bolts or hose clamps | Galvanic corrosion from mismatched metals |
| Dedicated feeder pole (APS, etc.) | Proprietary flange or adapter | Included hardware (often stainless) | Using wrong-brand adapters that don't fit snugly |
| Rebar or garden stake | Heavy-duty hose clamp | Stainless steel clamps | Diameter mismatch; too thin for large feeders |
Choose the right mounting method and hardware
Once you know your feeder type and pole material, picking the right method is straightforward. Here are the four main approaches, along with when each one makes sense.
- Pole-top adapter or drop-on mount: Your feeder slides onto the top of the pole, usually locking via a set screw or friction fit. Works when the pole OD matches the feeder's socket (typically 1 inch). Best for top-heavy tube or hopper feeders.
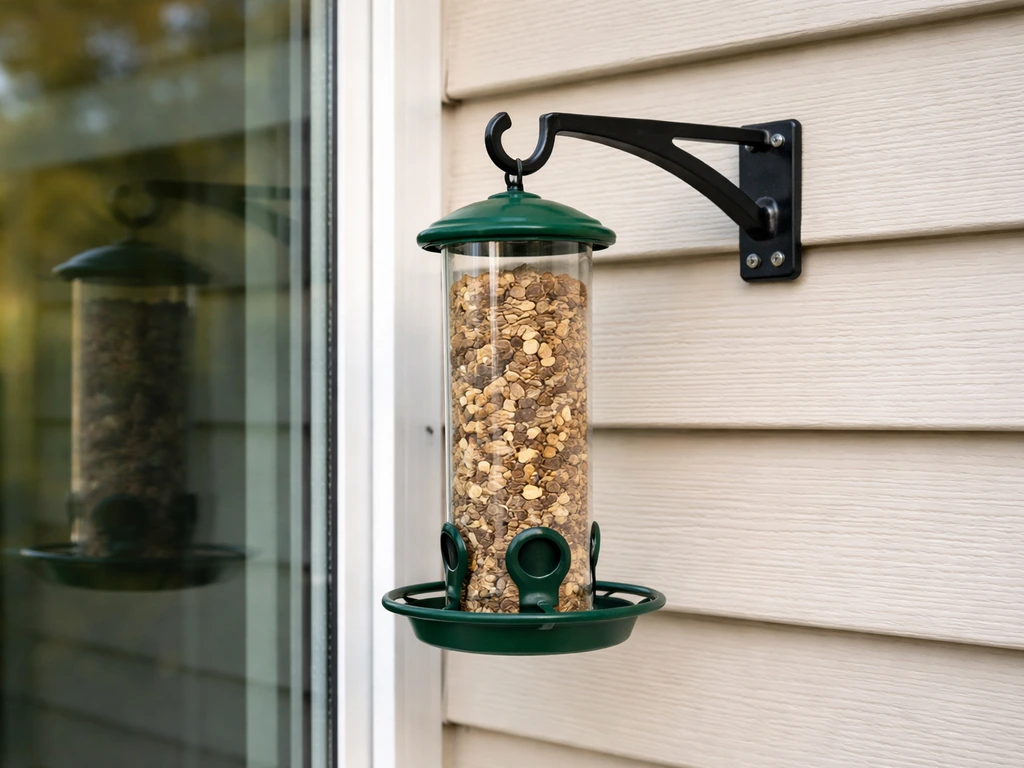
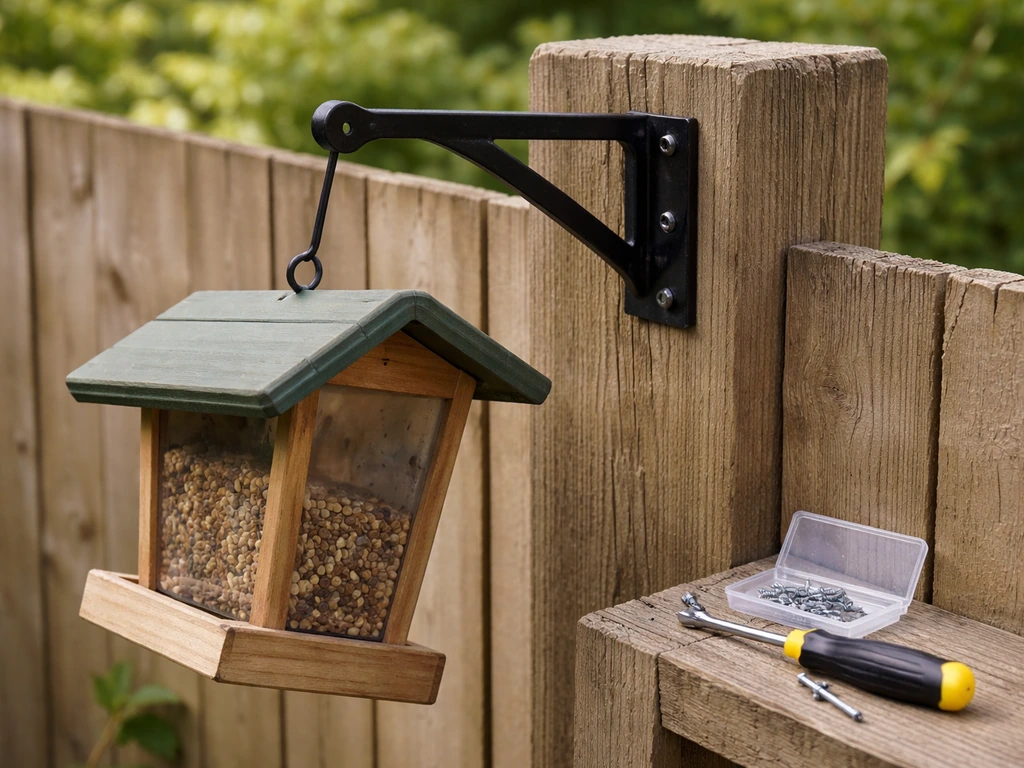
- Screw-on mounting plate or bracket: A flat or L-shaped bracket gets screwed to the side or top of a wooden post, and the feeder is then screwed or hung onto the bracket. Most versatile option for wooden posts.
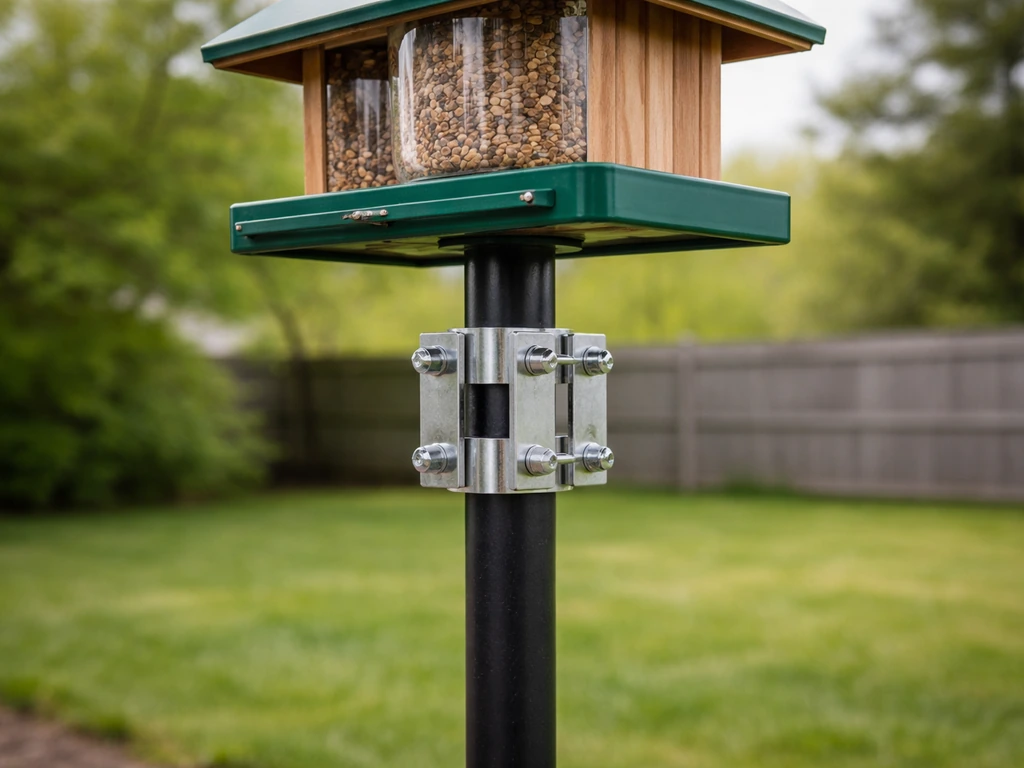
- Clamp collar or U-bolt mount: A metal collar or pair of U-bolts wraps around a metal pole and a bracket is bolted through them. No drilling required, which is ideal for EMT conduit or coated steel poles where drilling risks cracking a protective coating.
- Flange-and-extension system: Systems like Wild Birds Unlimited's Advanced Pole System use a dual-flange design that supports both top-mount feeders and side-mount birdhouses on the same pole. You add extension arms and adapters modularly. Worth the investment if you want multiple feeders on one post.
For hardware, always choose stainless steel (316 grade is best for outdoor use, as Bird Buddy specifies in their pole mount kit) or hot-dip galvanized fasteners. Cheap zinc-plated screws will rust within one season in most climates, and that rust will stain your pole and eventually cause the mount to fail. M4 or #8 size screws are adequate for light feeders; go up to #10 or M5 for feeders that hold more than 3 pounds of seed when full.
Step-by-step: mounting on a standard wooden post or pole
This method covers wooden posts, PVC pipes, and any pole where you can drill freely. Budget about 20 to 30 minutes and gather your materials before you start.
- Exterior-grade mounting bracket or pole-top adapter
- Stainless steel or galvanized screws (at least 1.5 inches long for bracket-to-wood attachment)
- Power drill with appropriate bit
- Level (a small torpedo level works fine)
- Exterior silicone caulk
- Pliers or socket wrench
- Mark your mounting height on the pole. The bottom of the feeder should sit 5 to 6 feet off the ground. Mark where the bracket or adapter will attach, accounting for the feeder's own height.
- Hold the bracket against the pole and use a pencil to mark the screw hole locations. Double-check that the bracket sits level before marking.
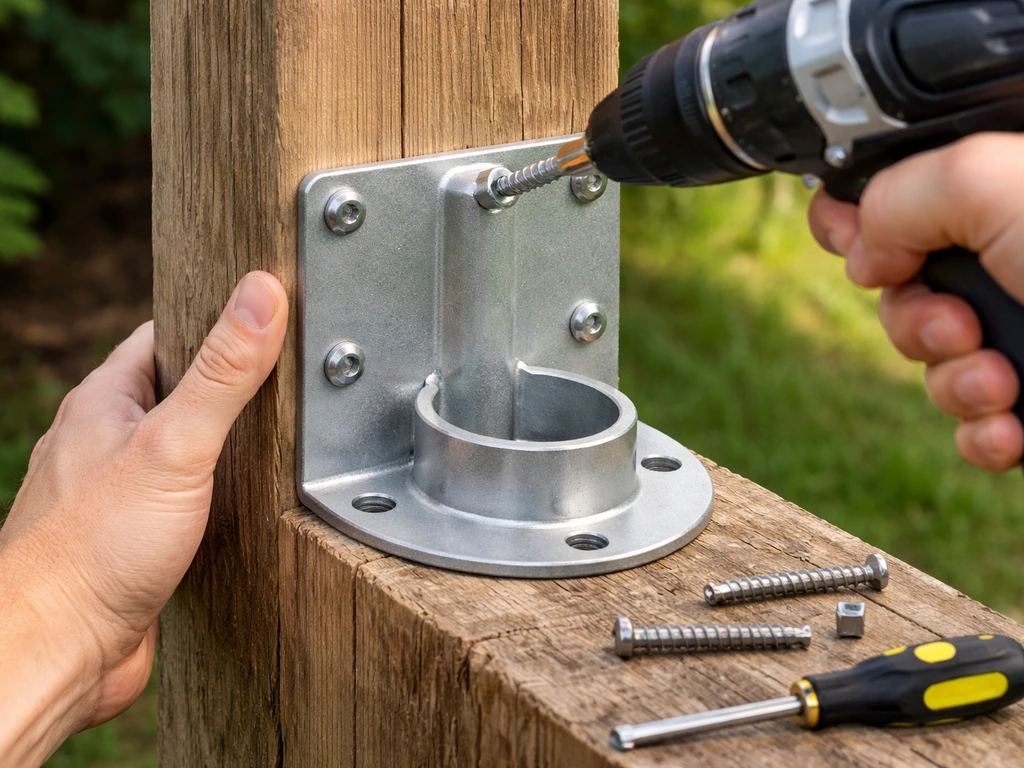
- Pre-drill pilot holes at your marks using a bit that's slightly smaller than your screw diameter. This prevents the wood from splitting and gives you cleaner, more secure attachment.
- Apply a small dab of exterior caulk into each pilot hole before driving the screw. This seals out moisture and prevents rot from starting at the fastener.
- Drive your screws through the bracket into the pilot holes. Snug is what you want: tight enough that the bracket doesn't move at all, but not so tight that you strip the wood.
- Attach your feeder to the bracket per the feeder's instructions. If your feeder has a hanging loop, use a snap hook (not just an S-hook) so it can't accidentally unhook in wind.
- Tug the feeder in every direction to confirm there's zero wobble. If it moves, tighten the bracket screws another quarter turn.
Step-by-step: mounting on a metal pole (drill vs. clamp)
Metal poles require a bit more thought. EMT conduit, copper pipe, and steel feeder poles all have protective coatings or specific wall thicknesses that affect which method you should use. Here's how to approach both options.
Option 1: Clamp collar mount (recommended for most metal poles)
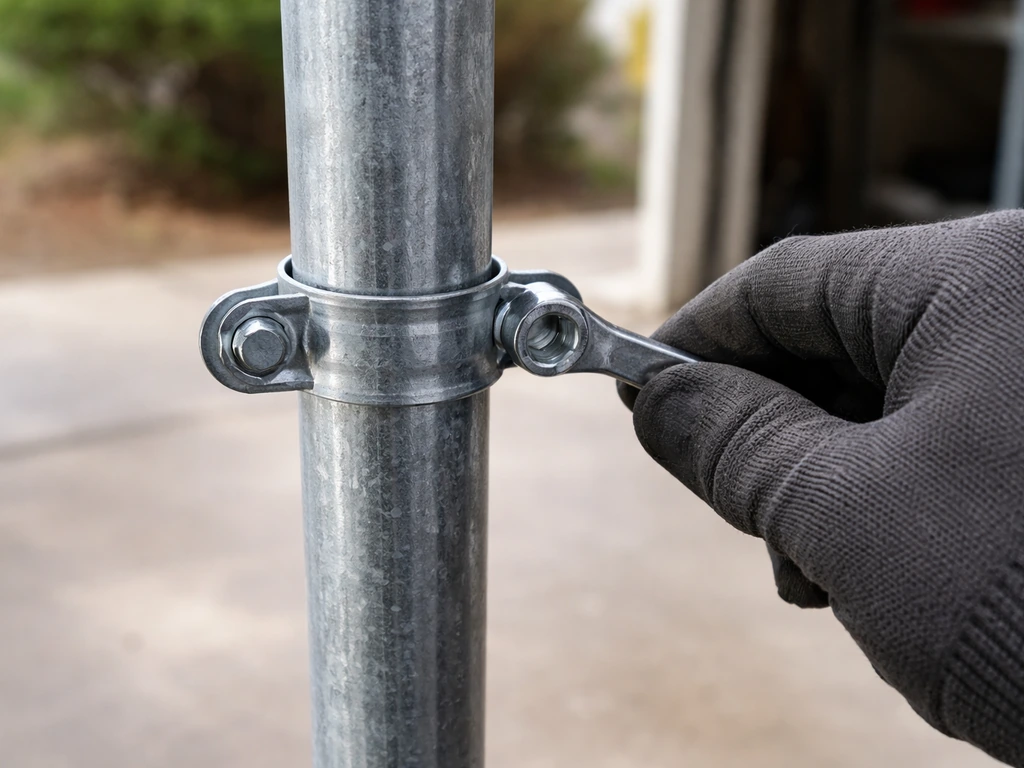
This is the easiest and least invasive method, and it's what I default to for any coated or galvanized metal pole where I don't want to break the protective surface.
- Measure the outside diameter of your pole precisely with calipers or a tape measure. The most common sizes are 1 inch and 1.5 inches OD.
- Purchase a clamp collar or saddle clamp that matches your pole's OD exactly. Oversized clamps will slip; undersized ones won't close properly.
- Slide the collar to your desired mounting height, ideally positioning the top of the feeder at 5 to 6 feet from the ground.
- Insert the mounting bracket arm through the collar's bracket slot, or bolt a flat bracket to the collar's mounting face.
- Tighten the collar's set screws or U-bolt nuts firmly. Use a wrench, not just hand-tight. On smooth metal, add a thin rubber shim (cut from an old rubber glove or inner tube) between the collar and the pole to prevent rotation.
- Hang or screw your feeder onto the bracket. For feeders with a bottom socket, simply press the socket over the pole-top if the collar is at the top of the pole.
Option 2: Drill-and-bolt mount (for bare steel or iron poles)
If you're working with uncoated steel or thick-walled iron pipe and you want a permanent, rock-solid mount, drilling is the most secure approach. You'll need a metal-rated drill bit (cobalt or titanium-nitride coated) and stainless steel bolts.
- Mark your hole locations with a center punch to prevent the drill bit from walking on the smooth metal surface.
- Use a cobalt drill bit sized slightly larger than your bolt's shank diameter. Drill slowly with light pressure and keep the bit cool with a drop of cutting oil.
- Thread a stainless steel bolt through the hole and through the bracket's corresponding hole. Use a stainless lock washer and nut on the back side.
- Tighten with a wrench until snug. Apply a small amount of anti-seize compound to the threads before assembly to prevent galling (where threads fuse together over time on stainless-to-stainless connections).
- Seal the drilled hole edges with a dab of metal-grade primer or exterior paint to prevent rust from forming at the exposed metal edge.
One important note: never mix metals carelessly. Aluminum brackets on steel poles, or copper hardware on iron posts, can cause galvanic corrosion, which eats away the weaker metal over a year or two. If you have to mix metals, use a plastic or rubber isolating washer between the two surfaces.
Get the height and placement right, and stop the wobble
Height and placement aren't just about birds finding the feeder. They're also about keeping the feeder stable and keeping squirrels and cats away. The standard recommendation is to position the feeder so its bottom sits 5 to 6 feet off the ground. This puts it in the comfort zone for most common backyard birds (chickadees, nuthatches, finches, cardinals) and gets it just high enough that a jumping squirrel from the ground has a harder time reaching it, especially if you add a baffle.
For placement, the feeder should be at least 10 feet from the nearest tree branch, fence top, or roofline edge. Squirrels can jump horizontally about 10 feet from a running start. Closer than that and your pole mount becomes a staging platform rather than a deterrent. Also think about wind: a feeder mounted at the end of a long horizontal arm or a very tall unsupported pole will swing significantly in a strong gust. Keep bracket arms to 12 inches or less in length, and if your pole is taller than 7 feet without being set in the ground, consider adding a ground stake anchor or cross-brace.
To prevent a feeder from swinging or rotating on the mount, a snap hook latched to a fixed point is your best friend. Brome specifically recommends this: latch the feeder to the bracket or a fixed hook with a snap hook rather than just resting it on a peg. This stops wind from lifting the feeder off and prevents the rotation that can unthread a screw-on feeder over time. For feeders that sit on a pole-top socket, a single stainless hose clamp around the socket junction will lock it in place permanently.
Weatherproofing, corrosion, pest concerns, and keeping it all working long-term
The biggest maintenance failures I've seen are all predictable: rust at screw holes that weren't sealed, a feeder that got contaminated with mold because water pooled in the mounting base, and squirrel damage to brackets that weren't checked after winter. Here's what to do upfront and on a regular schedule.
Upfront weatherproofing
- Seal every drilled hole in wood with exterior caulk before and after driving screws.
- Use only stainless steel or hot-dip galvanized hardware outdoors. Bright zinc-plated (the cheap silver screws) will rust within a season.
- If your bracket is steel, apply a coat of rust-inhibiting primer to any cut or filed edges before mounting.
- For metal poles with a powder-coat finish, touch up any scratches from drilling or clamping with matching exterior spray paint to prevent rust from starting at the bare spot.
Pest-proofing the mount
A pole-mounted feeder is only squirrel-resistant if the pole itself is squirrel-resistant. A smooth metal pole with a baffle (a dome or cylinder that wraps the pole about 4 feet off the ground) is your best defense. The baffle needs to be at least 17 inches in diameter and mounted so squirrels can't grab the pole above it. Raccoons are trickier: they can climb most poles, so a baffle positioned 3.5 to 4 feet off the ground is important. If you're in an area with bears, a pole-mounted feeder isn't bear-proof no matter how you mount it, and you'll need to bring feeders inside at night.
Maintenance schedule
- Monthly: Tug the feeder and bracket to feel for any loosening. Tighten any screws or clamp bolts that have worked loose.
- Every 3 months: Inspect screws and clamp hardware for surface rust or white oxidation (on aluminum). Wire-brush any spots and apply a dab of rust-inhibiting oil or paint.
- Every 6 months: Remove the feeder from the mount and clean the mounting plate or socket where seed debris and moisture collect. Mold in the mounting base is a real problem with some feeders.
- Annually: Check the pole itself for cracks (wood) or rust pits (metal) at ground level or at any point where water pools. These are structural failure points.
Troubleshooting common mounting problems
Even when you do everything right, things go wrong. Here are the most common issues I've dealt with and how to fix them quickly.
The feeder wobbles or tilts after a few days
This almost always means the bracket screws loosened because the wood dried or expanded. Re-tighten the screws. If the screw hole itself has stripped, don't just drive a bigger screw. Remove the screw, pack the hole with a wooden toothpick and a dab of wood glue, let it dry overnight, then re-drive the original screw. It'll hold as firmly as new wood. On metal, a wobbling clamp collar means the rubber shim has compressed. Add a second layer of rubber shim material and re-tighten.
The feeder swings or spins in the wind
Add a snap hook connecting the feeder's body to a fixed point on the bracket, as Brome recommends in their pole-mounting guidance. For feeders on a pole-top socket, a single worm-drive hose clamp tightened around the socket will stop rotation completely without permanently modifying the feeder.
I can't get hardware to grip a smooth metal pole
Smooth powder-coated or painted metal is notoriously slippery for clamp collars. The fix is adding grip: wrap two or three layers of self-amalgamating (self-fusing) silicone tape around the pole at the mounting point before sliding the collar on. This tape bonds to itself and creates a grippy, weatherproof surface that clamp hardware bites into firmly. It also protects the pole's finish.
The pole-top socket doesn't fit my feeder's base
If your pole OD is slightly larger than your feeder's socket, don't force it. For a Netvue bird feeder, double-check your pole’s outer diameter and use the right adapter if the socket fit is too tight or too loose pole OD. A too-tight fit will crack plastic feeder bases. Instead, mount a flat bracket plate to the top of the pole and screw or strap the feeder's base to the plate. If your pole is smaller than the socket, use a pole adapter sleeve (usually a short plastic or rubber bushing available at hardware stores) to take up the gap.
Rust is forming on my metal pole or hardware
Surface rust on hardware is a warning sign, not an emergency. Wire-brush the spot, apply a rust converter product, then touch up with zinc-rich primer and exterior paint. If the pole itself is rusting through at ground level, that section of pole is structurally compromised and needs to be replaced, not just painted over. Poles set directly in soil rust faster than those set in a concrete footing, so if you're still planning your installation, set the pole in a small concrete base rather than packing it in dirt.
Birds aren't using the feeder even though it's mounted
Give it 1 to 2 weeks. Birds are cautious about new objects in familiar territory. If nothing visits after two weeks, check that the feeder is at least 10 feet from dense shrubs (where cats can hide and ambush), and also check that the feeder isn't too exposed with no nearby perching cover like a shrub or small tree within 10 to 15 feet. Birds want a quick escape route nearby. A feeder mounted in the middle of a wide-open lawn is actually less attractive than one near the edge of a garden bed or fence line.
If you're working in a spot without any trees to anchor a hanging setup, a pole mount is actually the ideal solution for that situation. To attach a bird feeder to a tree, start by choosing a mounting strap or bracket that fits the tree size and use weather-resistant hardware.
If you're trying to hang a bird feeder without a tree, a properly secured pole mount is the closest practical alternative how to hang a bird feeder without a tree. If you want to use a tree as your mounting point instead, follow a dedicated approach for how to attach a bird feeder to a tree securely pole mount.
If you want to use a tree as your mounting point instead, follow a dedicated approach for how to attach a bird feeder to a tree securely pole mount how to hang bird feeder from house (use the house mount or bracket options). If you’re wondering how to mount Netvue bird feeder on a pole, the key is matching the pole diameter and using the correct pole-mount bracket so it stays stable in wind. If you also want to capture video, mount the camera housing securely to the pole alongside the feeder and route the power or battery access so it stays weatherproof mount Netvue bird feeder on a pole.
If you need a hanging setup, this same guidance can help you hang bird feeders from trees securely. Once you pick the right attachment, you can position the feeder for stable feeding and reliable protection from pests hang bird feeders from trees. And if you're mounting on a balcony or want a setup closer to a window for better viewing, the hardware principles here still apply, though the specific brackets and anchor points will differ.
If you're trying to mount a bird feeder with a camera, you can use the same pole-mount stability and placement rules, then choose a bracket setup that keeps the view steady. If you want the feeder closer to a window, focus on secure mounting and a safe clearance to keep birds coming back hanger outside a window. You can hang a bird feeder outside a window by using a stable pole mount and positioning it so birds have safe clearance from the glass hanger outside a window.
If you're wondering how to hang bird feeder on balcony setups, start by choosing the right bracket that matches your balcony railing or wall mounting on a balcony.
FAQ
Can I mount a bird feeder on a pole if my feeder is not designed for pole mounting?
Yes, but only if you match the feeder’s base to the pole type. For pocket-sized, hang-only feeders, use a pole-mount adapter that lets the feeder sit on a collar and then fasten the feeder to the adapter with a latch or clamp to prevent rotation in wind. If the feeder has a bottom flange intended for a flat plate, don’t clamp it directly to a smooth pole, instead add a flat bracket plate on top of the pole and screw the feeder to that plate.
Where exactly on the pole should I place the mount so the feeder doesn’t rattle or jam?
Pick a clamp or bracket location that does not interfere with the feeder’s moving parts. Avoid mounting right over a hopper latch, lid hinge, or seed port, because vibration can cause the lid to shift or the feeder to jam. After installation, manually shake the feeder and confirm the lid stays fully seated and the feeding ports stay aligned.
Is a baffle required, and how does it change the placement of the feeder on the pole?
For a squirrel-resistant setup, the baffle matters as much as the mount. If you’re using a baffle, install it so the feeder opening is at least above the baffle’s top edge, and leave enough clearance that the feeder body cannot be reached by stretching a limb around the baffle. If you skip the baffle, even a perfectly mounted feeder can still be defeated by climbing or jumping.
How do I choose hardware if my feeder is much heavier when full?
If your feeder is heavier when full, size the hardware for the loaded weight, not the empty feeder. A common mistake is using small screws or a flimsy bracket rated for light feeders, then finding the mount slowly loosens after weeks of wind and repeated squirrel impacts. When in doubt, upgrade to larger fasteners, add a second mounting point, and use through-bolts on wood rather than relying on only surface screws.
What’s the best way to prevent rust specifically at the screw holes?
Rust from screw holes usually means water is wicking into the wood or metal at the fastener junction. Seal the area with an exterior-rated sealant or use a gasket washer, then add a dab of exterior sealant under the screw head (where appropriate) before final tightening. After sealing, wipe off excess so it doesn’t interfere with how the bracket sits flat.
What should I do if the pole diameter is slightly larger or smaller than the feeder socket?
Yes, but don’t rely on a “tight fit” alone if the pole diameter is close. If the pole is slightly larger, use the flat plate plus strap/screw method so you don’t crack plastic bases. If the pole is slightly smaller, use a purpose-made adapter sleeve or bushing, and confirm the feeder sits level before tightening anything permanently.
How can I tell if my mount is secure enough before birds start using it?
Use a motion test before leaving the site. After tightening, give the feeder and bracket several firm pushes in different directions, then try to rotate the feeder by hand. If you can twist it more than a few degrees, add a snap-hook latch to a fixed point or add a second clamp, because gradual rotation can loosen threaded parts over time.
How often should I inspect and re-tighten the mount?
In most climates, recheck after the first heavy wind or the first freeze-thaw cycle. A practical schedule is to inspect mounting fasteners, baffle position, and any clamps every 4 to 6 weeks during peak bird season, then again in early spring. If you see paint flaking, squeaking, or a visible gap around the clamp, tighten or add shim immediately.
Can I mount a feeder on a metal pole without drilling?
If you want to avoid drilling metal, consider the non-invasive clamp method, but only on metal types with sufficient smoothness for the clamp to bite. For powder-coated poles, add grip using self-amalgamating silicone tape so the collar doesn’t slip, then retest for rotation. If your clamp keeps walking over time, move the clamp higher or add a second collar at a different position for redundancy.
Should I set the pole in soil or concrete for the most stable feeder mount?
Yes. If your pole is set in soil, it can shift slightly as it settles, which leads to wobble and loosening. Use a small concrete base for stability, then mount after the concrete cures, so you’re not relying on the wood or metal pole to stay perfectly centered. Also make sure the baffle, if used, is installed on the same stable section of the pole.
Next Article
How to Hang a Bird Feeder Outside a Window Safely
Step-by-step ways to hang a bird feeder outside a window safely, with mounts, hooks, setup fixes, and pest-proofing tips