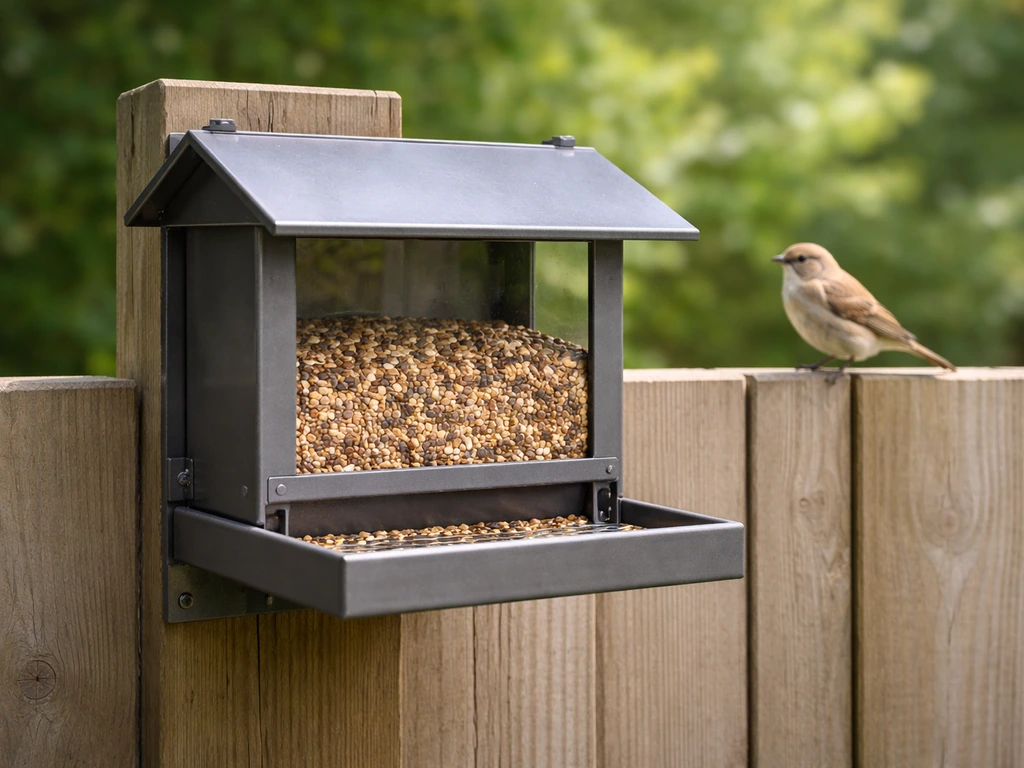
You can build a solid, rust-resistant metal bird feeder at home in a few hours using sheet metal, basic hand tools, and a handful of hardware store supplies. The safest approach for most beginners is a simple hopper or tray-style design cut from galvanized or aluminum sheet metal, riveted or screwed together, sealed with food-safe silicone, and finished with a rust-inhibiting spray paint. It will outlast any plastic feeder by years, squirrels won't chew through it, and it's genuinely easy to clean.
How to Make a Metal Bird Feeder Step by Step

Marcus Brennan
24 May 2026
Decide on your metal feeder design and size
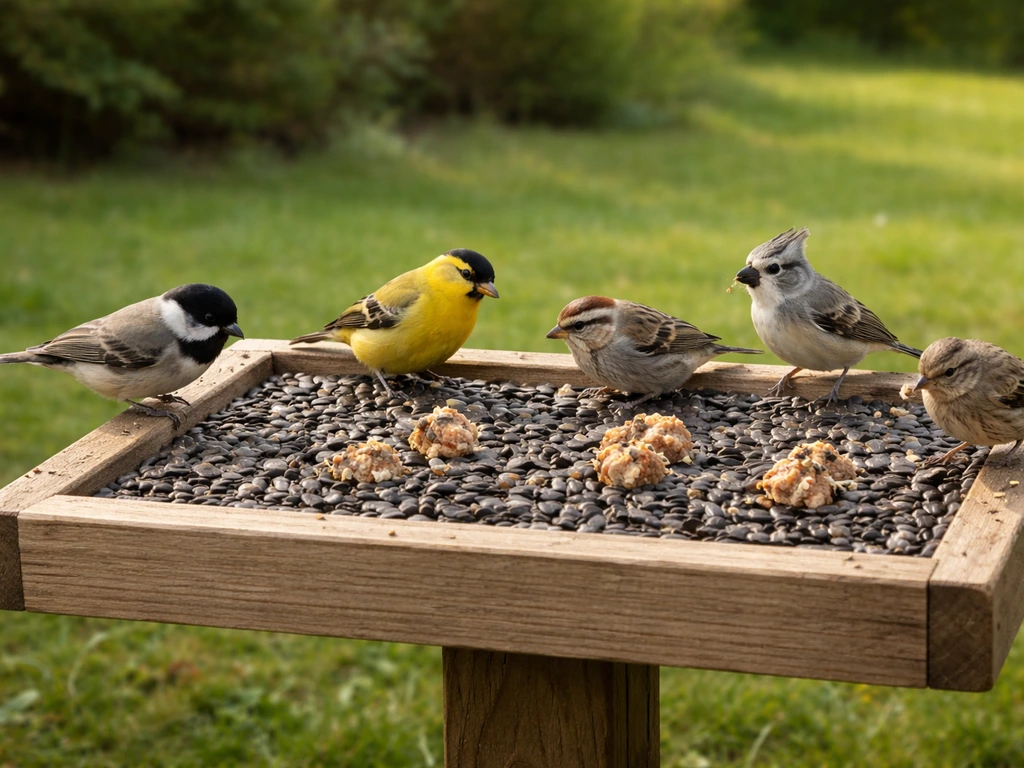
Before you cut anything, pick a design that matches what you want to feed and how many birds you're expecting. The two most practical options for a DIY metal feeder are a tray (platform) feeder and a hopper feeder. A tray feeder is basically a shallow metal pan raised off the ground or hung from a wire. It's the easiest to build and attracts the widest variety of birds, but seed is exposed to rain so drainage is non-negotiable.
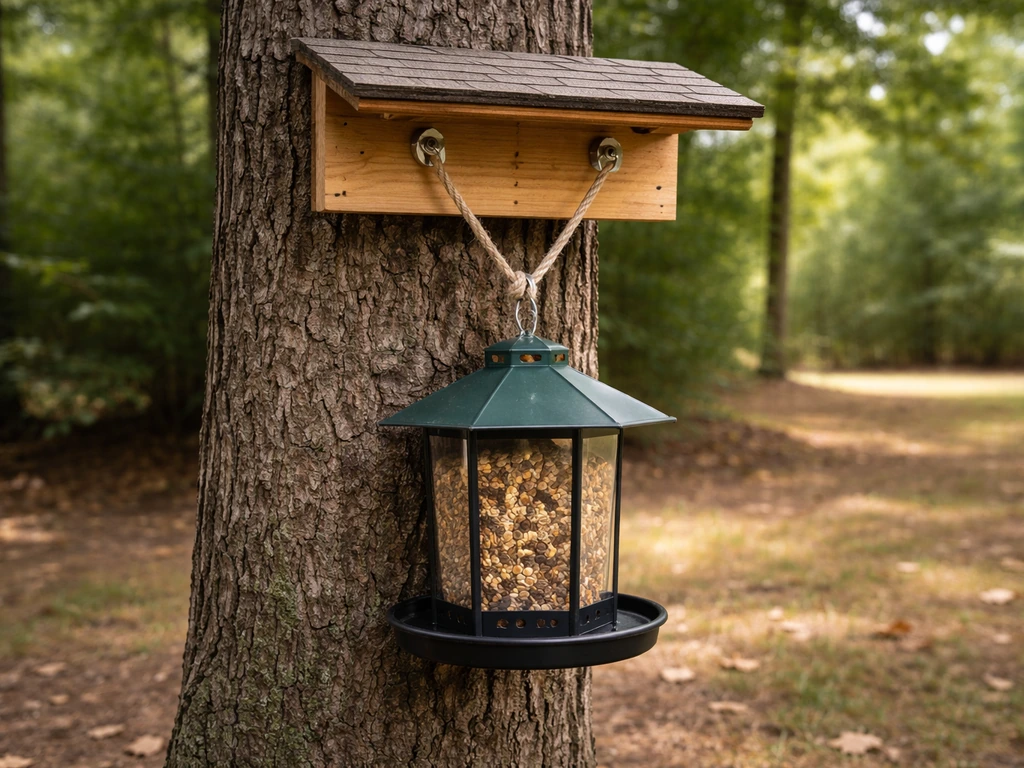
A hopper feeder adds side walls and a roof over a central seed chamber, which keeps seed drier and reduces waste significantly. Project FeederWatch defines a hopper feeder as a platform with walls and a roof that forms a hopper to protect seed against weather a hopper feeder adds side walls and a roof over a central seed chamber, which keeps seed drier and reduces waste significantly. If you're new to metalworking, start with a tray.
If you've handled tin snips before, a basic hopper is worth the extra effort.
For size, a tray of roughly 10 by 14 inches holds a good amount of seed without becoming unmanageable to clean. A hopper body of about 6 by 8 inches with a roof overhang of 2 to 3 inches on each side is a good target. Bigger feeders mean more seed capacity but also more weight when full, which matters for hanging hardware. Think about where you'll hang or mount it before you decide on final dimensions.
| Design | Difficulty | Weather protection | Best for | Drainage holes needed? |
|---|---|---|---|---|
| Tray/platform | Beginner | Low (exposed) | All seed types, maximum bird variety | Yes, several |
| Hopper | Intermediate | Good (roof + walls) | Sunflower, mixed seed, safflower | In base/tray section |
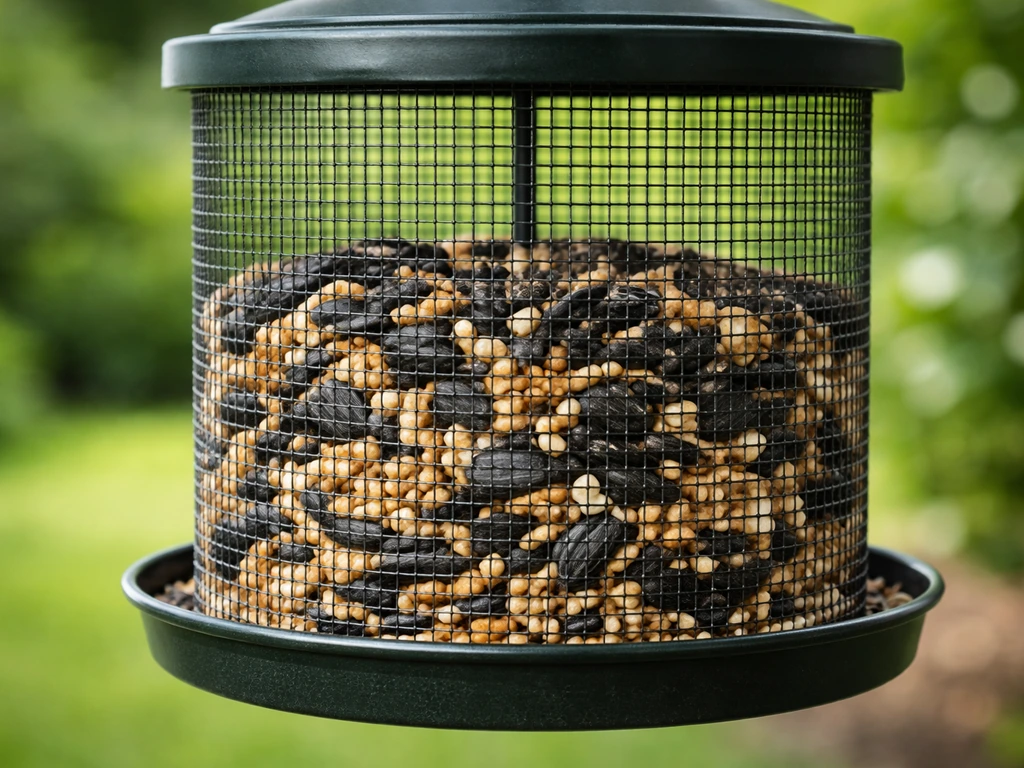
| Wire mesh tube | Beginner–intermediate | Moderate | Nyjer, peanuts, sunflower chips | N/A (open mesh) |
Wire mesh tube feeders are a close relative worth mentioning here. To decide what to put in a mesh bird feeder, match the seed type to the bird species and use only dry, fresh seed that fits the mesh size what to put in mesh bird feeder. They're excellent for nyjer and peanuts, and the build process overlaps with what's covered in guides specifically about wire mesh feeder construction. p5s1 wire mesh feeder construction. For a seed-holding tray or hopper with a solid metal body, the steps below are what you need.
Tools, materials, and safety for cutting and drilling metal
What you'll need
- Galvanized sheet metal (26–28 gauge for a tray; 24 gauge for a hopper) or aluminum flashing — available at any hardware store, often sold in rolls or pre-cut sheets
- Tin snips (straight-cut for straight lines; compound/aviation snips for curves and corners)
- Power drill with metal-cutting bits (1/4-inch and 1/2-inch at minimum)
- Pop rivet gun and aluminum pop rivets, or stainless steel screws and nuts
- Metal file or deburring tool
- Measuring tape, marker, and a straight-edge or metal ruler
- Food-safe silicone sealant (look for NSF/ANSI 51 certification on the label)
- Rust-inhibiting spray primer and outdoor metal spray paint (or a powder coat finish if you have access)
- Safety glasses, leather work gloves, and an N95 or P100 respirator
- Stainless steel screw eyes, a heavy-duty S-hook, and galvanized or coated wire cable for hanging
A word on safety before you start
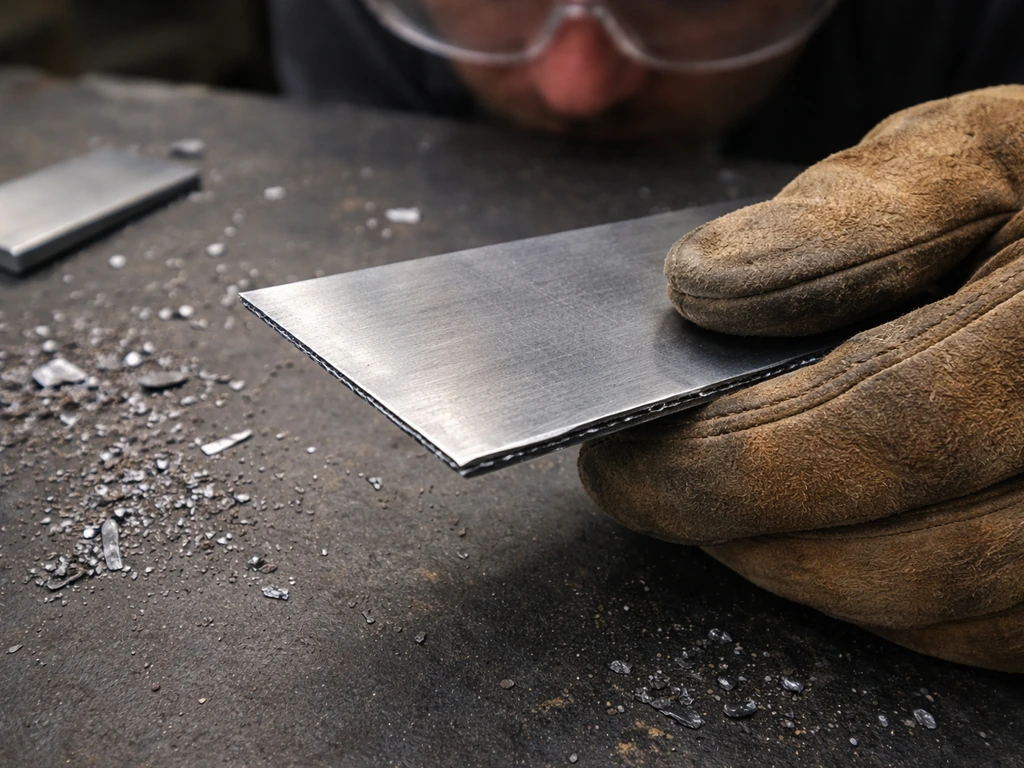
Cut sheet metal has edges that are genuinely razor sharp, and metal shavings from drilling go everywhere. Leather gloves and safety glasses are not optional here. If you're cutting or grinding galvanized (zinc-coated) steel, work outside or in a well-ventilated space. OSHA specifically flags zinc fumes from galvanized metal as a respiratory hazard, and local exhaust or fresh outdoor air is far more effective than just cracking a window.
For most home DIY work, taking it outside and wearing a respirator is the simplest solution. Don't cut thicker gauge metal than your snip manufacturer recommends, and always use a pilot hole (drill first, then insert snips) when making internal cuts.
For internal cuts, Bob Vila recommends drilling a pilot hole first with a power drill using a 1/2-inch or greater metal-cutting bit, then inserting the tin snips at the entry point drill a pilot hole first with a 1/2-inch or greater metal-cutting bit.
Build steps for assembling your metal feeder
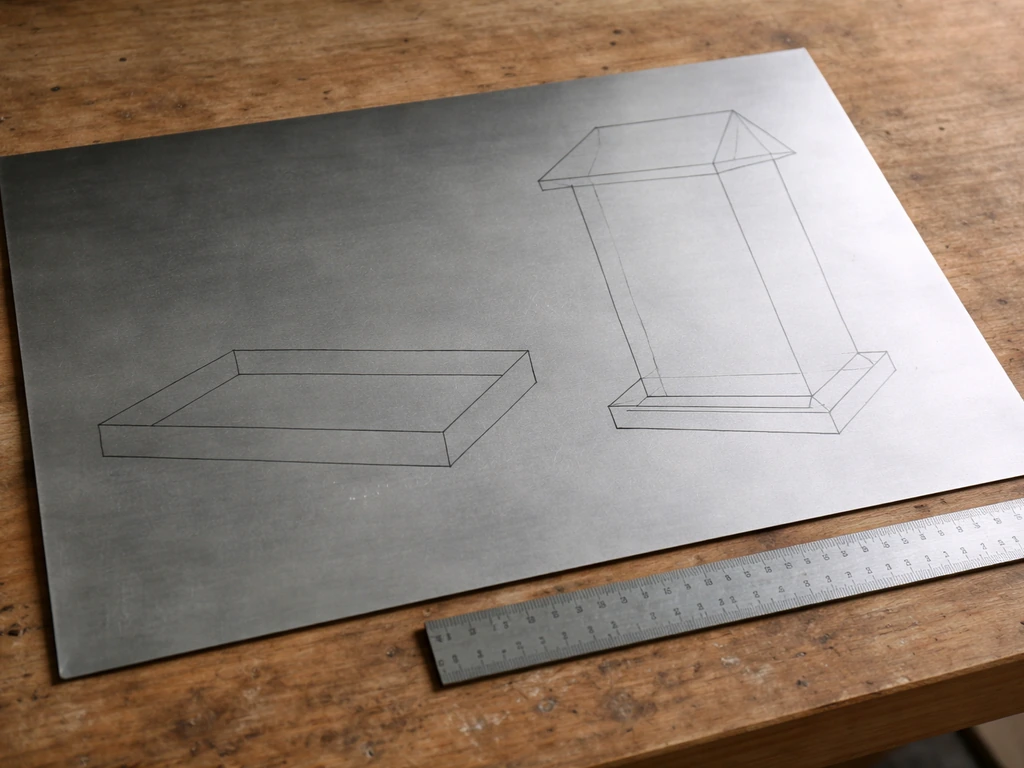
Step 1: Mark and cut your metal pieces

Lay your sheet metal flat on a stable work surface and mark all your cut lines with a permanent marker and straight-edge. For a basic tray feeder, you need one base piece and four side strips about 1.5 to 2 inches tall. For a hopper, add two triangular end pieces, two rectangular side panels, and two roof panels. Double-check measurements before cutting. Use straight-cut tin snips for long straight lines, and aviation snips for corners. Take your time on corners: rushing is how you end up with jagged edges that hurt later. File all cut edges immediately after cutting with a metal file or deburring tool. This step prevents injury and keeps sealant from pulling away from rough edges.
Step 2: Bend the sides and form the tray or hopper body
For the tray, bend each side strip up at a 90-degree angle along the edge of the base. A piece of scrap wood clamped along the bend line makes this much easier and keeps the bend clean. For a hopper, bend the side panels to form a rectangular tube that will hold seed. If you don't have a metal brake, clamping the sheet between two straight boards and bending by hand works well on 26–28 gauge material. Aim for clean 90-degree corners. Small gaps are fine since you'll seal everything with silicone.
Step 3: Fasten the pieces together
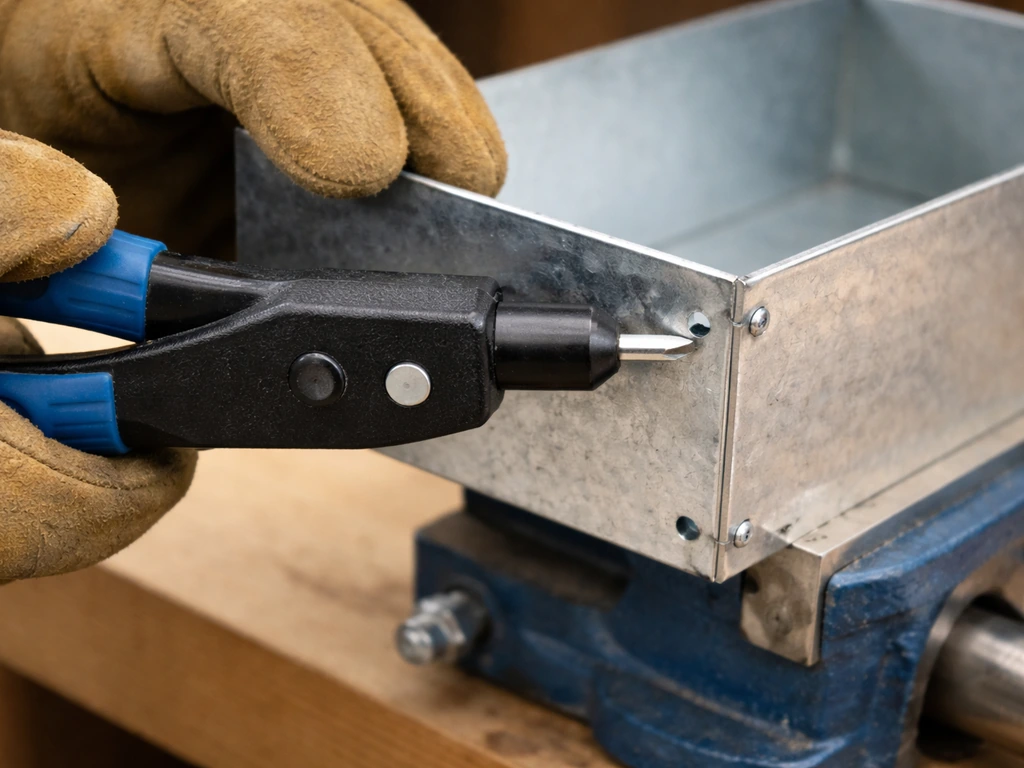
Pop rivets are the easiest fastening method and hold up well outdoors. Drill a 1/8-inch hole through both layers at each corner and joint, then insert and set a rivet with your pop rivet gun. Aim for rivets every 2 to 3 inches along seams for a solid hold. Alternatively, use stainless steel screws and nuts, which are easier to disassemble later for deep cleaning. Avoid standard steel hardware since it will rust quickly and stain the feeder. For the hopper roof, attach it at a pitch so rain sheds off to the sides rather than pooling in the center.
Step 4: Add a perch (optional but helpful)
A perch gives birds a place to land and access seed without crowding. A simple option is a 1/4-inch steel rod or a wooden dowel threaded through two small holes drilled in opposing sides of the feeder body, about 1 inch below the seed level. Secure it with a washer and small nut on the outside. You can also weld or rivet a short length of angle iron along the bottom edge of a tray if you want something sturdier, though for most backyards the rod or dowel works fine.
Add seed access, drainage, and weather and rust protection
Drainage holes
This is one of the most important steps and one of the most commonly skipped. Standing water in a feeder spoils seed fast and breeds bacteria that can make birds sick. Drill at least six to eight 1/4-inch holes evenly spaced across the bottom of your tray or hopper base. If you're building a hopper, also drill a few small holes in the lowest corners of the side walls where water could pool.
Project FeederWatch and the U. S. Fish and Wildlife Service both specifically call for drainage holes in platform and hopper designs for this reason. If you want even better drainage, you can cover the base holes with a small scrap of hardware cloth (wire mesh) riveted flat on the inside.
This lets water drain freely while keeping seed from falling through.
Sealing seams
Run a bead of food-safe silicone sealant along every interior seam where two metal pieces meet. Look for a product certified to NSF/ANSI 51 for direct food contact (Titebond 100% Silicone is one example; GE makes NSF-rated silicone sealants as well). Smooth the bead with a wet fingertip and let it cure fully before adding seed, typically 24 hours. Don't skip the interior seams because that's where water wicks in and rust starts.
Rust-proofing the exterior
Once the silicone is cured, apply a coat of rust-inhibiting metal primer to the outside of the feeder, then follow with two coats of outdoor metal spray paint in whatever color you like. Let each coat dry fully before adding the next. Avoid painting the interior seed surfaces, since you want to minimize any chance of birds contacting paint chips. Galvanized and aluminum sheet metal are already more rust-resistant than bare steel, but the primer and paint give you a much longer service life outdoors, especially in wet climates.
Mounting and hanging: placement, hardware, and stability
Where you put the feeder matters almost as much as how you built it. The West Virginia Division of Natural Resources recommends 5 to 8 feet off the ground as a safe height, keeping feeders out of easy reach of cats and low-jumping squirrels. A widely cited placement rule called the 5-7-9 rule is worth memorizing: at least 5 feet off the ground, at least 7 feet from any structure (fence, deck, shed), and at least 9 feet below any overhanging branch or eave. Squirrels are remarkably good jumpers, so each of these distances is meaningful.
For hanging, drill two stainless steel screw eyes into a wooden mounting board or directly into the feeder's top edge if the metal is thick enough. Run a length of galvanized or vinyl-coated steel cable through the screw eyes and over a shepherd's hook, tree branch, or bracket mounted to a post. Use S-hooks or locking carabiners to connect sections so you can lower the feeder easily for cleaning. For pole-mounted feeders, a threaded steel rod through the feeder base and secured with washers and locking nuts works well for a more permanent install.
Stability is worth thinking about in wind. A tray feeder hung on a single central cable will spin and spill seed in a stiff breeze. Running two cables from opposite corners of the tray (a bridle-style hang) keeps it level. For a heavier hopper, a rigid mounting bracket bolted to a post is more reliable than hanging hardware alone.
Pest-proofing and minimizing seed waste
Metal feeders already have a big advantage over plastic and wood when it comes to squirrels because there's nothing to chew through. But squirrels will still raid a feeder if they can reach it, and rats will clean up whatever falls below. Here's what actually works.
- Follow the 5-7-9 rule for placement (described above) as your first line of defense
- Add a metal squirrel baffle on the pole or cable above the feeder. A cone-shaped baffle at least 15 inches in diameter makes it very difficult for squirrels to get past it from below or above
- Avoid seed mixes with millet and milo if you're getting a lot of waste on the ground. Opt for straight sunflower seed or safflower, which most squirrels and pest birds find less appealing
- Use a seed catcher tray under the feeder if you want to reduce ground mess, but clean it every few days so it doesn't become a rat buffet
- Keep feeders away from dense brush and wood piles where rats and mice shelter — the closer the cover, the more rodent pressure you'll have
If you're also thinking about what to put in a wire mesh feeder or a platform feeder, seed selection makes a bigger difference to waste than almost any structural feature. For a wire bird feeder, focus on seed types that are easy to access and less likely to spill, like hulled seeds or whole peanuts in a protected configuration. Whole peanuts and sunflower seeds in the shell create the most mess; hulled seeds stay tidier and reduce the ground litter that draws rodents.
Cleaning, maintenance, and troubleshooting common problems
How often to clean and how to do it
Project FeederWatch recommends cleaning bird feeders about once every two weeks as a baseline, and more often during warm, humid weather or heavy bird traffic. Audubon echoes that every-other-week schedule but stresses that in summer or after rain, weekly cleaning is a better target. For a metal feeder, the actual cleaning process is straightforward: dump out old seed and debris, scrub surfaces with a stiff brush, then soak for 10 minutes in a diluted bleach solution (roughly one part bleach to nine parts water). Rinse thoroughly and, critically, let the feeder dry completely before refilling. Putting wet seed into a damp feeder is the fastest way to grow mold.
Dealing with rust
Surface rust on exterior painted areas is normal after a year or two outdoors. Sand the affected spot back to bare metal with 120-grit sandpaper, wipe clean, apply a touch of rust-inhibiting primer, and repaint. If you see rust at the seams on the interior (usually caused by damaged or degraded silicone), scrape out the old sealant, clean and dry the area fully, and reapply fresh food-safe silicone. A metal feeder that gets this kind of basic maintenance every season will last 10-plus years without structural problems.
Fixing leaks and seed clogs
If seed is getting wet inside a hopper feeder after rain, check the roof overlap first. The roof panels should extend at least 2 to 3 inches beyond the seed opening on each side. If the overhang is insufficient, you can rivet on extension strips of sheet metal or flashing. For clogged drainage holes, a cotton swab or a thin wire pushed through the hole clears most blockages. If seed is jamming in the hopper opening, check whether the opening is too narrow (less than 3/4 inch for sunflower seed) or whether wet, clumped seed is bridging the gap. Widening the slot or adding a small metal deflector inside to break up clumps usually fixes this.
What to do if birds aren't coming
New feeders sometimes take two to four weeks for birds to discover, especially in areas where feeders haven't been used before. Placing the feeder near natural cover like shrubs or a tree at a safe distance speeds this up because birds are more comfortable approaching when they have somewhere nearby to retreat. Check that you're using fresh, quality seed (old or heat-damaged seed loses its scent cues and birds ignore it).
Also make sure the feeder is visible from above and not positioned in deep shade, since many seed-eating birds locate feeders partly by sight. If you had birds at a previous feeder in the same yard and they've stopped coming, check for a nearby cat, check that the seed isn't spoiled or wet, and try moving the feeder a few feet in any direction.
Metal feeders reward a little upfront effort with years of low-hassle backyard feeding. Get the drainage holes right, seal the seams before you hang it, follow the placement rules, and keep to a two-week cleaning routine. If you want to add a heater or electrified perching feature, plan your power source and weatherproofing so it stays safe outdoors electrify a bird feeder. Do those four things and you'll have a feeder that works reliably through rain, heat, and squirrels for a long time.
FAQ
What metal should I choose if I want the feeder to last the longest outdoors?
For a DIY metal feeder, galvanized sheet and aluminum are typically the safest bets for rust resistance. If you use thinner galvanized steel, avoid over-bending, because stress points can thin and develop pinholes first, those are harder to repair than rust on flat areas.
Is there a better fastening method than rivets for long-term outdoor use?
Use pop rivets or stainless screws, but if you go with screws, plan on regular disassembly and re-tightening after heavy weather. Rubber washers under the screw heads can help keep silicone intact, but they must sit on clean, dry metal to seal correctly.
Can I drill drainage holes without losing small seed?
Yes, but size the drainage holes based on your seed. Larger holes help water drain faster, but can let smaller seeds drop out. If you want seed to stay in, cover the holes from the inside with a flat patch of hardware cloth riveted in place, then keep the cloth openings small enough for your seed type.
Why should I avoid painting the interior seed surfaces, and what happens if I do?
Skip interior painting, even if you think it is fully cured. Silicone seals the seams, but paint on surfaces can chip from handling and from wet seed contact. If you must paint near the interior, mask the interior completely and paint only the exterior.
My metal feeder spins or swings a lot in wind, how do I fix it?
If your feeder feels wobbly once hung, it is usually a level and hardware issue, not a metal strength issue. Use two suspension points at opposite corners for tray designs, and for hopper feeders use a rigid bracket to a post or secure cable pairs so the roof does not lever and loosen fasteners over time.
What can I do if seed keeps jamming in the hopper?
When seed bridges in a hopper, the fix depends on the seed moisture and the opening width. First confirm the seed is dry and not clumped, then check that the opening is at least about 3/4 inch for sunflower-type seeds. If it still bridges, add a small internal deflector plate angled slightly so seed breaks up before reaching the exit.
Can I use random scrap metal I have at home, like mild steel or copper?
Copper and untreated steel can be problem metals for bird feeders because they corrode faster and can stain or shed. If you already have scrap steel, treat it as bare steel, meaning you need thorough rust removal, a primer that is meant for outdoor metal, and a regular touch-up schedule.
What is the safest way to clean and dry the feeder between feedings?
For cleaning, the key is drying completely before refilling. If you do not have time to air-dry, wipe the feeder dry and then let it sit in sun or airflow until bone-dry, especially inside corners and around rivets. Wet seed in a still-damp feeder is where mold starts.
How do I reduce rats and seed litter under the feeder?
If rats are an issue, placement and feed choice matter more than the build. Avoid letting seed accumulate below, use hardware cloth as an internal drainage patch so loose seed does not fall out during rain, and keep the feeder high enough and far enough from cover that rats cannot approach unnoticed.
What should I troubleshoot if birds stop using my new feeder?
Birds often stop coming due to spoilage, moisture, or perceived danger, not just the feeder construction. Try fresh seed, check that drainage works by inspecting for wet seed after rain, and move the feeder a few feet while keeping it within the same safe height band and sight lines from nearby cover.
Can I add a heated or electrified feature to the feeder, and what is the biggest safety concern?
Yes, but plan for weatherproofing. If you add power for a heater or electrified perch, route wiring so it stays above splash zones, use outdoor-rated components, add strain relief so tension does not pull connections, and design the cable routing so it cannot be chewed or snagged by hanging hardware.
Next Articles
What to Put in a Platform Bird Feeder: Best Foods
Best foods for a platform bird feeder, what to avoid, plus refill, placement, and cleaning tips to reduce waste
What to Put in a Mesh Bird Feeder: Safe Fill Options
Safe, practical fills for mesh bird feeders: best seed mixes and seeds, what to avoid, plus quick setup and maintenance

How to Electrify a Bird Feeder Safely: Steps and Safety
Step-by-step, bird-safe guide to electrify a feeder using solar or low-voltage deterrents, with wiring, mounting, and ma