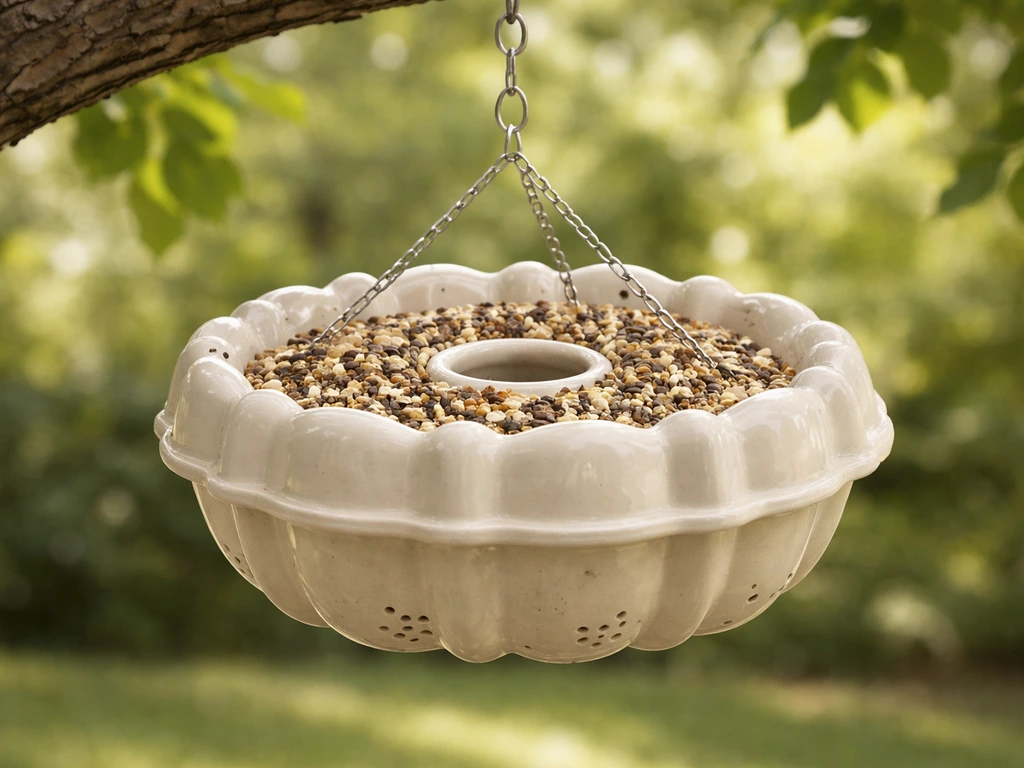
You can make a functional bundt pan bird feeder in under an hour using a metal bundt pan, a length of wire or rope, and a few basic tools. Drill a few drainage holes in the bottom, thread your hanging hardware through the center tube, fill it with seed or suet, and hang it from a sturdy branch or shepherd's hook. That's the core of it. The rest of this guide covers the details that make the difference between a feeder that works well for years and one that molds, leaks, or brings every squirrel in the neighborhood to your yard.
How to Make a Bundt Pan Bird Feeder Step by Step

Marcus Brennan
10 Jun 2026
Choosing the right bundt pan (and setup safety)
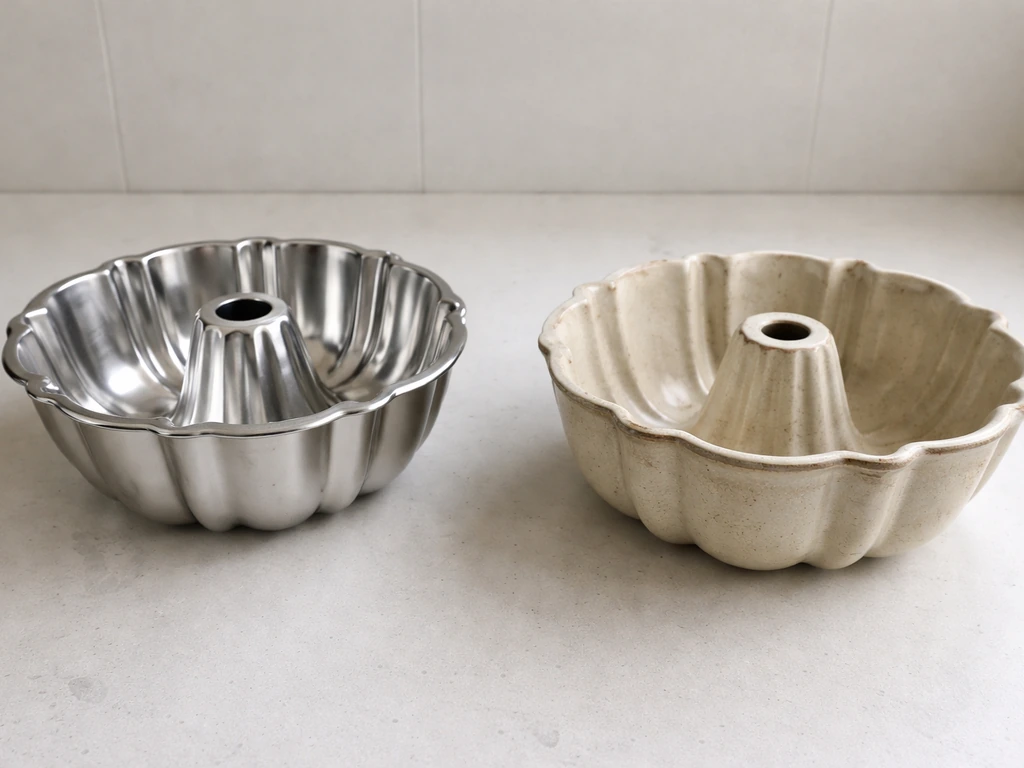
Not every bundt pan from your kitchen cabinet or thrift store is a safe choice for birds. The biggest concern is material. Stainless steel is the gold standard: it's highly corrosion resistant, requires no coatings or paint to resist rust, and won't leach anything harmful into the food you're putting out. Powder-coated aluminum is a reasonable second choice as long as the coating is intact and not chipping. Avoid pans with peeling non-stick coatings like Teflon, since those flakes can end up in the seed or suet.
Ceramic or glazed bundt pans are trickier. Lead can be present in some ceramic glazes and can migrate into food if the piece wasn't properly fired or if the glaze is damaged. Health authorities including the FDA and Health Canada have flagged this risk specifically for food-contact ceramics. A decorative ceramic bundt pan that you're not sure about is best left off your feeder list, or at minimum used only for dry seed where contact time and leaching risk are lower. When in doubt, go metal.
For size, a standard 10- to 12-cup bundt pan (roughly 10 inches in diameter) is ideal. It holds a generous amount of food, the wide ring shape lets multiple birds feed at once, and the center tube is perfectly sized for most hanging hardware. Fluted sides are actually a feature here: they give small birds like chickadees and finches natural perch points. Heavier cast iron pans work but add significant weight to your hanging setup, so factor that in before you commit.
Tools and materials you need
This is a genuinely low-tool project. Here's what you'll need to pull it together:
- Metal bundt pan (stainless steel preferred, 10 to 12 cup size)
- Power drill with metal drill bits (3/16 inch and 1/4 inch bits cover most needs)
- Wire, threaded rod, or heavy-duty rope for hanging (at least 18 inches)
- Two large washers and one nut (if using a threaded rod through the center tube)
- Metal file or sandpaper (80 to 120 grit) for smoothing drilled edges
- Zip ties or S-hooks for attaching to a branch or hook
- Bird-safe food: black-oil sunflower seed, mixed seed, or suet cake
- Optional: small mesh hardware cloth (1/4 inch opening) to line the pan if using suet or mealworms
Total cost if you're starting from scratch is usually under $15, and often much less if you already own a drill and can find a pan at a thrift store for a dollar or two. The only thing worth spending a little extra on is the hanging wire or rod: flimsy cord will rot or snap in a few months, and a feeder dropping from a branch is not ideal for the birds below it.
Preparing the pan: holes, drainage, and finishing
This is the most hands-on part of the build, but it only takes about 20 minutes. Start by deciding on your hanging method because that determines what you do to the center tube first.
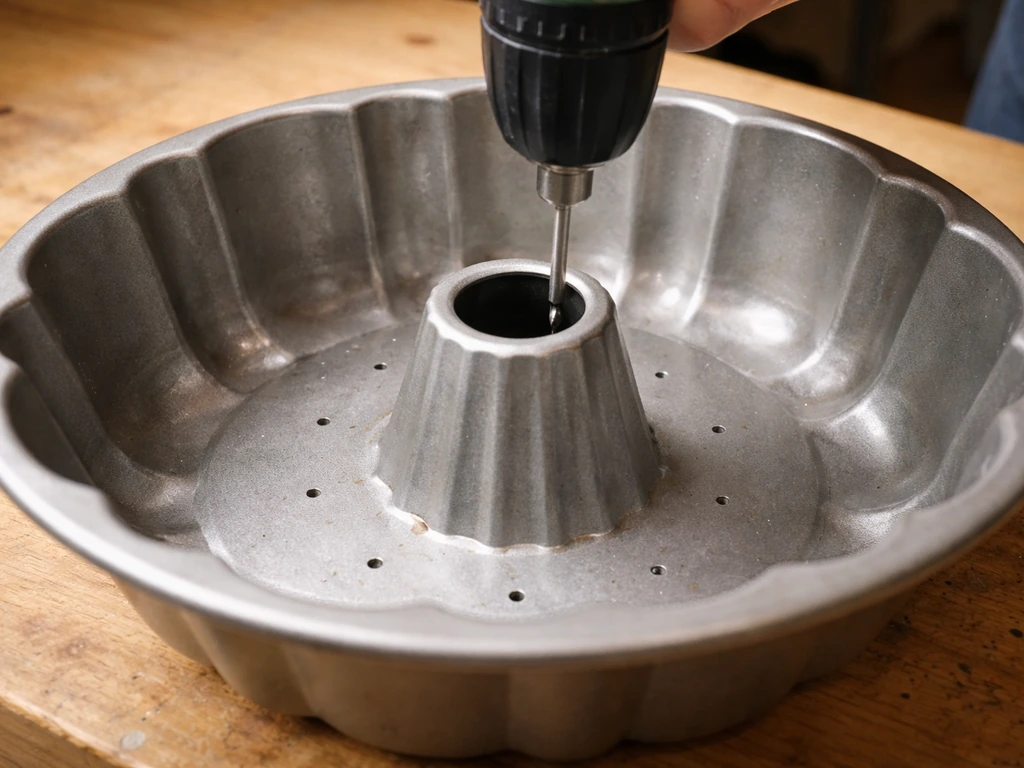
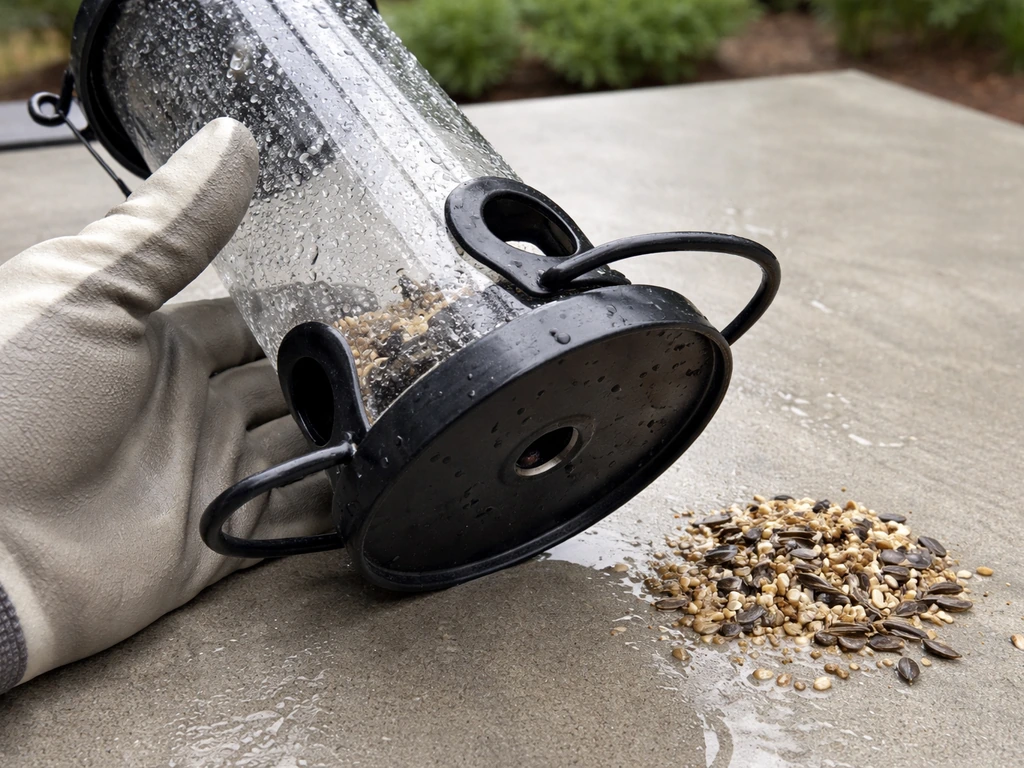
- Drill drainage holes in the base of the pan. Aim for 6 to 8 holes spaced evenly around the ring, each about 3/16 to 1/4 inch in diameter. These let rainwater drain instead of pooling and turning your seed into a soggy, moldy mess.
- Smooth every drilled edge with a metal file or a few passes of 80-grit sandpaper. Rough metal burrs can cut bird feet and beaks, so take a couple of minutes to knock them down flush.
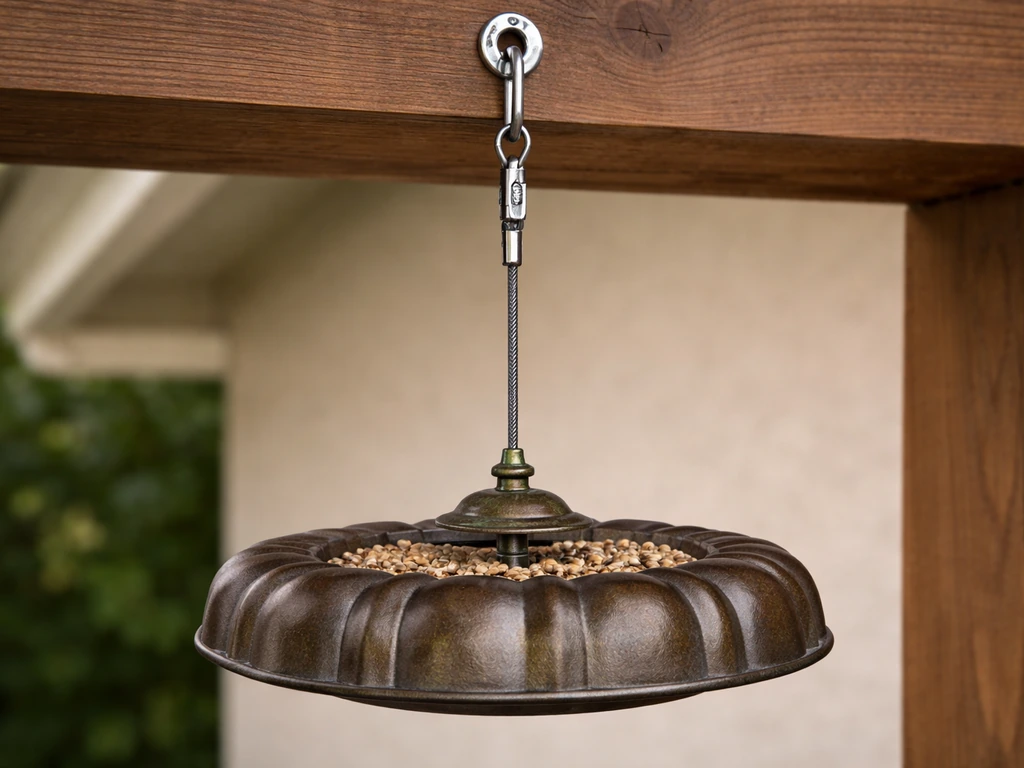
- Set up your hanging point. The simplest method is to thread a length of coated wire or a stainless steel threaded rod down through the center tube of the pan. Place a large washer on the underside of the tube opening, thread the wire or rod through, and secure it above the pan with another washer and a tightened nut or a knotted loop. The pan hangs level from this single center point.
- Check for any non-stick coating issues at this stage. If the interior shows peeling or flaking, either sand it back completely to bare metal or retire the pan and get a replacement. Bare stainless or bare aluminum is perfectly fine for birds.
- Give the whole pan a wash with warm soapy water before first use to remove any metal shavings, dust, or manufacturing residue.
If you want to get fancier, you can add a small roof above the feeder (a plain aluminum pie plate attached a few inches above via the same center wire works well) to cut down on rain filling the pan. It's not essential, but in rainy climates it extends the time between seed changes noticeably.
Filling options and how to load the feeder
The bundt pan's wide, shallow ring shape makes it naturally versatile. You can run it as a seed feeder, a suet feeder, or a combination, and switching between them is as easy as emptying and refilling. Here's how each approach works in practice:
| Filling type | Best for attracting | How to load it | Notes |
|---|---|---|---|
| Black-oil sunflower seed | Chickadees, nuthatches, cardinals, house finches | Pour directly into the ring, fill to about 1 inch from the rim | Most universally popular seed; hulls collect in the pan so clean more often |
| Mixed seed (sunflower + millet + safflower) | Wider variety including sparrows and doves | Pour and spread evenly around the ring | Avoid mixes heavy in milo or filler grains; birds tend to toss them out |
| Suet cake or homemade suet | Woodpeckers, nuthatches, starlings | Press a suet cake into the ring or pour melted suet and let it set in place | Line pan with 1/4-inch hardware cloth mesh to help birds grip; avoid suet in hot weather above 90°F as it goes rancid fast |
| Mealworms (dried or live) | Bluebirds, robins, wrens | Spread in the bottom of the ring, refresh daily | Best in summer; can mix with seed to stretch supply |
| Nyjer (thistle) seed | Goldfinches, pine siskins | Pour directly; works best in a feeder with small holes but open pan works too | Fine seed; drain holes help prevent clumping after rain |
For a seed-focused setup, filling the pan about halfway is better than packing it to the brim. Overfilling means seed at the bottom gets wet and starts to mold before birds reach it. If you're making a dedicated suet feeder, pressing a standard commercial suet cake directly into the ring is the easiest approach, and the fluted sides help hold it in place. If you enjoy making homemade lard-based suet, a bundt pan is actually a perfect mold to set it in before transferring to the feeder.
Hanging the bundt pan feeder safely and securely
A poorly hung feeder is a liability: it can drop on birds below, swing so violently in wind that birds can't land, or hang at an angle that spills seed constantly. Getting this right is worth a few extra minutes.
- Use coated steel wire (16 gauge or heavier) or a stainless steel threaded rod as your primary hanging hardware. Twine and thin cord rot or fray outdoors within a season.
- Run the wire or rod through the center tube of the pan. This keeps the pan level and prevents it from tipping. Secure both ends properly: a washer-and-nut below the tube, and a loop or hook above it for connecting to your branch or pole.
- Hang from a sturdy branch at least 1 inch in diameter, or from a shepherd's hook or dedicated feeder pole. The total weight of a loaded metal pan can reach 3 to 5 pounds, so don't hang it from a thin twig.
- Position the bottom of the feeder at least 5 to 6 feet off the ground to keep it out of easy reach of cats and most wildlife. If you're in bear country, the Minnesota DNR recommends hanging feeders so they're inaccessible from nearby trees, using a cable strung between two points rather than a single fixed branch.
- Use an S-hook or carabiner clip at the top connection point so you can lift the feeder off quickly for cleaning and refilling without unthreading anything.
- Add a wobble check before walking away: grip the bottom of the pan and give it a gentle shake. It should swing smoothly without rattling apart or tilting sharply.
Placement tips for attracting birds and reducing pests
Where you hang the feeder matters almost as much as what you put in it. Birds want a clear line of sight to spot predators, but they also want nearby cover to retreat to. The sweet spot is hanging the feeder roughly 10 feet from a shrub or tree edge: close enough that birds feel safe making the dash to eat, far enough that a cat or hawk can't ambush from the branches directly overhead.
Window collisions are a real risk. Research and guidance from organizations like All About Birds and ornithology educators consistently point to the same rule: place feeders either closer than 3 feet to a window or farther than 10 to 30 feet away. Feeders in the 3 to 10 foot zone are the danger zone because birds have enough speed to cause serious injury when they fly into glass. Under 3 feet, they don't build up enough velocity to get hurt. Over 10 to 30 feet, they're usually flying a different trajectory and miss the window entirely. If you're attaching window decals to break up reflections, that helps too.
For squirrel control, location is your first line of defense. A feeder on a smooth metal pole with a baffle below it is much harder to raid than one hanging from a tree branch. If you go the branch route, position the feeder at least 10 feet horizontally from any jumping-off point (fence, tree trunk, roof edge) and 5 to 6 feet above ground. A dome-style squirrel baffle placed above the feeder on the hanging wire works well for pan feeders. For ants, a thin layer of petroleum jelly on the hanging wire just above the pan creates an effective barrier, though it needs reapplication every week or two.
Maintenance and troubleshooting
Cleaning schedule and method
Bird feeders need real cleaning, not just a quick rinse. Old seed, hulls, and droppings accumulate fast, and they're the main reason for disease spread at feeding stations. North Beach’s safe bird feeding guidelines similarly recommend site sanitation steps like removing old food and droppings, along with cleaning, to reduce microbial and health problems around feeders rather than relying on the feeder alone Old seed, hulls, and droppings accumulate fast. Aim to clean your bundt pan feeder at least once a month, and more often in hot or humid weather when mold grows quickly. A good cleaning routine takes about 10 minutes:
- Empty any remaining seed or food completely and discard it, don't just push it to the side.
- Rinse the pan with warm water to loosen debris.
- Scrub with a stiff brush and mild dish soap, getting into the fluted channels where seed hulls collect.
- Disinfect with a dilute bleach solution: 1 part household bleach to 9 parts water (roughly 2 ounces of bleach per gallon of water works well). Soak or scrub with this solution for a few minutes.
- Rinse thoroughly with clean water until you can't detect any bleach smell.
- Let the pan air dry completely before refilling. This step is non-negotiable: filling a damp feeder is the fastest way to guarantee mold.
The area below the feeder needs attention too. Hulls, dropped seed, and droppings pile up under any active feeder and become a magnet for rodents and a source of disease. Rake or sweep the ground below every couple of weeks, and consider placing a catch tray or a layer of hardware cloth on the ground to make cleanup easier.
Troubleshooting common problems
Seed clumping or molding fast: This almost always means water is getting in faster than it drains. Check that your drainage holes aren't clogged with seed debris, and clear them with a toothpick or thin wire whenever you refill. Adding a roof (the pie plate trick mentioned earlier) helps a lot if you're in a rainy area. In very humid summer conditions, Audubon recommends increasing cleaning frequency rather than just hoping the feeder dries out on its own.
Pan tilting or spinning: If the feeder swings and tilts in wind rather than hanging level, your center-tube hanging point is probably uneven. Try adding a small counterweight to the lighter side with a zip tie, or re-thread the hanging wire so it sits centered in the tube. A longer hang (more wire between the branch and the feeder) actually increases swinging; shortening it to 12 to 18 inches keeps the feeder steadier.
Birds not coming: Give it a week or two after first setup. Birds need time to find a new food source. Filling with high-quality black-oil sunflower seed is the fastest way to attract attention because it appeals to the widest range of species. You can also scatter a small handful of seed on a nearby flat surface like a fence post to draw birds in and help them discover the feeder.
If you're targeting specific birds, adjusting your seed mix is the most effective lever: nyjer seed brings in finches, and suet draws woodpeckers. If you are wondering how to make a finch bird feeder, focus on seed choice like nyjer and choose feeder ports sized for small birds. If you're interested in attracting finches specifically, the seed selection and feeder port size matter more than the feeder shape itself.
Feeder corroding or coating flaking: Bare stainless steel won't corrode, but aluminum pans or any pan with a painted or powder-coated surface can degrade over time. If you see significant flaking, strip the affected area back to bare metal with sandpaper and leave it uncoated rather than repainting with an unknown product. Most hardware-store spray paints are not safe for food contact. A clean bare metal surface is safer than a compromised coated one.
Wildlife raiding the feeder at night: Raccoons and opossums are the usual suspects. A shepherd's hook pole with a baffle is harder to defeat than any tree-hung arrangement. If you're dealing with persistent wildlife, bringing the feeder inside overnight and hanging it back out in the morning is the most reliable solution, and it keeps the food fresher too. Squirrel-proofing tips noted above apply here as well.
Adapting the design over time
One thing I've found with the bundt pan feeder is that it's easy to iterate. If you're not getting the bird variety you want, try a different seed mix before modifying the hardware. If you want to add mealworms to attract bluebirds or robins, a shallow insert made from a section of hardware cloth dropped into the ring keeps them from spilling out while still letting birds reach them easily.
If you want a dedicated mealworm option, use your existing ring and tailor the insert and loading so the mealworms stay accessible to birds and harder for pests to reach add mealworms to attract bluebirds or robins. If you want a more enclosed suet setup that woodpeckers prefer, pressing suet into the fluted channels and adding a wire mesh face over the ring turns the same pan into a clinging-style suet feeder.
The basic platform stays the same; the food and small modifications do the heavy lifting.
FAQ
What’s the safest wire or rope to use for hanging the bundt pan bird feeder?
Use stainless steel wire, galvanized steel wire, or natural-fiber rope that can get wet and dry without degrading quickly. Avoid coated wire that flakes, and make sure whatever you use is rated for outdoor exposure so it does not stretch and tilt the feeder over time.
Do I need to drill drainage holes if I’m using a roof to protect the pan from rain?
Yes. Even with a roof, moisture can get in from humidity, bird droppings, and condensation. Drill multiple drainage holes and keep them clear, because blocked holes are the most common cause of fast molding.
Can I use the feeder with wet suet or homemade suet that’s softer than a store-bought cake?
Yes, but choose a method that supports the suet without letting it slump into the bottom. Pressing suet into the ring works best for firmer cakes, while softer batches may need a firmer insert or a brief freeze to help them set before hanging.
How do I stop ants without making a mess that birds will get into?
Apply a thin band of petroleum jelly only to the hanging hardware above the pan, not on the feeder surface. Reapply every 1 to 2 weeks (more often in heat or when it rains), and check so the jelly does not drip toward the food.
What food should I avoid in a bundt pan feeder?
Avoid using foods that turn into wet paste quickly or contain binders that can melt and run, for example, sugary syrups. Stick to dry seed or suet in forms that drain cleanly, since wet residue increases mold and attracts rodents.
How often should I refill versus doing a full clean?
Refill when the pan is down to about one quarter to prevent stale, damp seed at the bottom. Do a full clean at least monthly, and switch to every 1 to 2 weeks in hot, humid weather or after a rainy stretch.
Is it okay to use a bundt pan feeder for different bird types in the same season?
Yes, but swap the food before mold forms. For example, if you switch from seed to suet, empty and rinse first, because mixed residues can spoil and deter birds. You will typically get better results by matching seed type to target species rather than trying to mix everything together.
What should I do if the feeder is leaking seed or flipping over in wind?
First confirm the pan is centered on the hanging point inside the center tube, uneven threading causes the spinning problem. Then shorten the hanging length to about 12 to 18 inches, and re-check that the wire or rope is not twisted, which can create a tipping torque.
How can I reduce squirrel access if I must use a tree branch?
Place the feeder at least 10 feet from any jump-off point and ensure there is not a nearby vertical trunk or fence rail that lines up with the ring. If you can, add a dome baffle on the hanging wire, and consider bringing the entire setup closer to open space where squirrels have fewer routes.
My window is close to the feeder, but I still want birds to use it. What are my options?
Use the window placement rule: either closer than 3 feet or farther than 10 to 30 feet. If you cannot change distance, increase visibility to birds with multiple window decals, but do not rely on decals alone if you are still within the 3 to 10 foot danger zone.
Can I compost or dispose of the cleaned seed and hulls safely?
Treat discarded seed, moldy pieces, and droppings as contaminated. Bag it and dispose of it with your regular waste, rather than adding it to compost, especially if you had any signs of heavy mold or disease-like buildup.
What’s the quickest way to tell if my drainage holes are working?
After filling, observe how long it takes for water from a light mist or drizzle to drain fully. If water pools longer than expected, clear holes of seed debris and enlarge or add holes if needed, because even a few clogged holes can create a wet, mold-prone bottom layer.
Next Articles
How to Make a Sunflower Seed Bird Feeder Step by Step
Step-by-step DIY sunflower seed bird feeder, with materials, setup height, filling, cleaning, and squirrel-proofing tips
How to Make a Finch Bird Feeder: DIY Steps, Ports, and Setup
DIY finch feeder plans with proper seed ports, setup tips, drainage, pest-proofing, and easy cleaning for long-term succ
How to Make a Mealworm Bird Feeder Step by Step
Step-by-step mealworm bird feeder build with placement, clean dispensing, and tips to prevent mold, pests, and mess.