You can build a functional nectar bird feeder at home in under an hour using a clean glass or plastic bottle, a few rubber stoppers or cork, and some basic tubing. Fill it with a simple 4:1 water-to-sugar mix (4 cups water, 1 cup plain white sugar), hang it in a shaded spot 4 to 6 feet off the ground near flowers or shrubs, and you'll have hummingbirds or sunbirds visiting within days. The build is genuinely simple, but getting the nectar right, keeping it from souring, and stopping ants from taking over are where most people run into trouble. This guide walks you through all of it. To make a jelly bird feeder instead, choose a safe jelly recipe and use a setup that lets birds access it without drowning or spilling it.
How to Make a Nectar Bird Feeder Step by Step

Marcus Brennan
21 May 2026
Choose the right feeder design for nectar birds
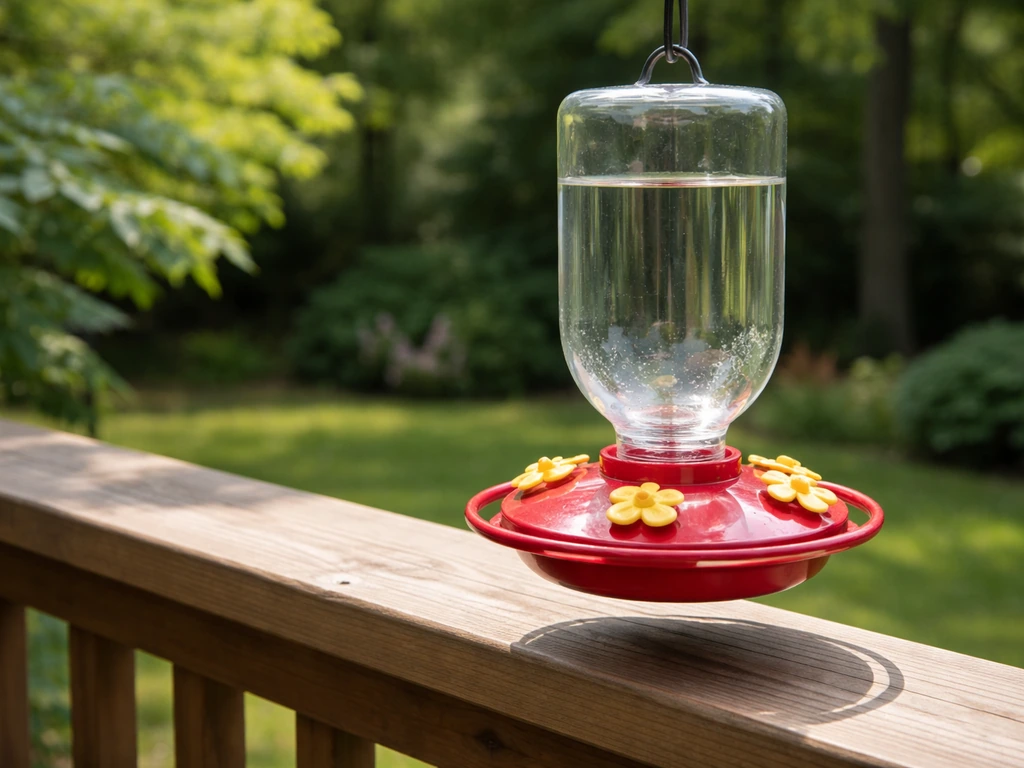
Nectar feeders are different from seed or suet feeders in one critical way: they have to hold liquid without leaking and dispense it in small amounts so birds can sip without spilling. For hummingbirds, the most practical DIY design is an inverted bottle feeder, where a sealed bottle flips upside down and feeds nectar by gravity into a shallow reservoir below. Sunbirds and other nectar feeders work well with the same basic setup.
There are two main DIY approaches worth knowing. The inverted bottle style is the easiest to build and gives you the best control over leaks. A dish-style feeder (basically a shallow tray with a cover and feeding ports) is simpler to clean but harder to seal properly. A hopper-style bird feeder is a great alternative for seed and other dry bird foods if you want feeding that refills slowly and reduces waste. For a first build, go with the inverted bottle design every time. It's forgiving, adjustable, and you probably already have the main component sitting in your recycling bin.
If you've already made other types of feeders for your yard, like a glass or ceramic feeder for seeds, the hanging and mounting skills transfer directly. If you want a ceramic bird feeder, the same hanging and mounting principles apply, but you will need to plan for moisture-tight connections and easy cleaning. The main difference is the liquid-tight assembly and the feeding port size, which needs to be small enough to create a slight vacuum that prevents the nectar from free-flowing out.
Materials and tools you can use today
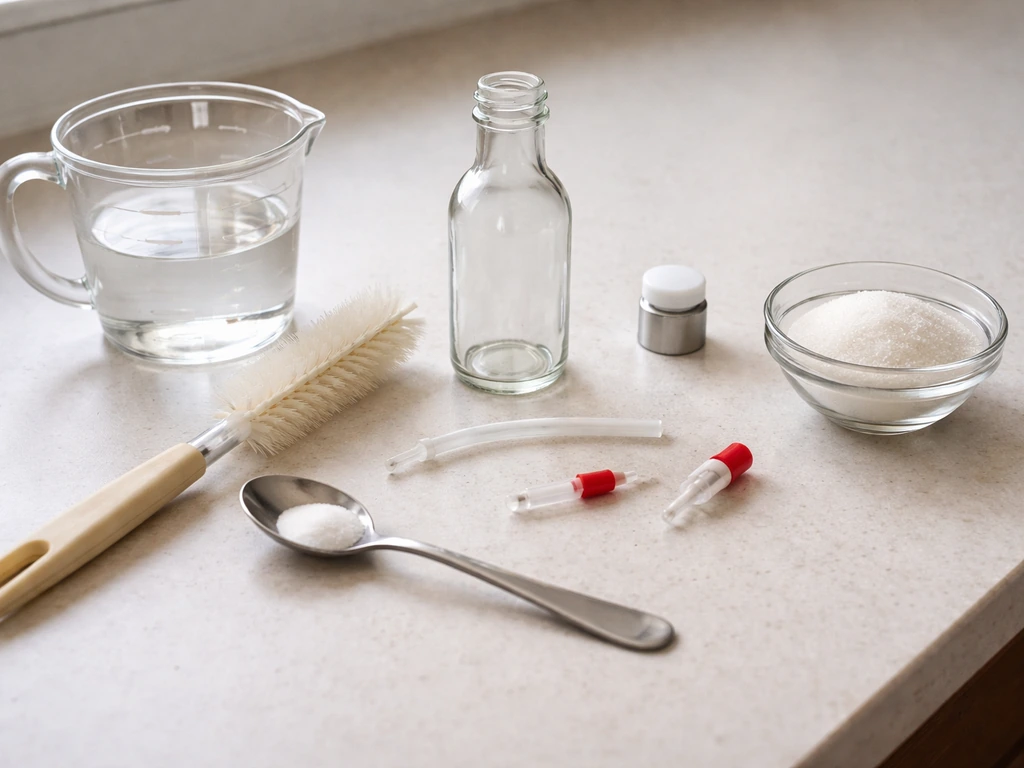
You don't need to buy a kit. Most of what you need is already at home or available at a hardware store for a few dollars. Here's what works well and why.
| Material | Best Option | Budget Alternative | Notes |
|---|---|---|---|
| Bottle | Glass wine or sauce bottle (8–16 oz) | Clean plastic soda or water bottle | Glass holds up better in the sun and doesn't leach chemicals |
| Stopper/Seal | Rubber stopper with pre-drilled hole (size #2 or #3) | Cork with a hole melted or drilled through | The hole should fit your tubing snugly — no gaps |
| Feeding tube/port | Aquarium tubing or copper tube (1/8" diameter) | Rigid plastic straw | Bend the tube downward at the tip so birds can hover and sip |
| Hanger | Galvanized wire or S-hook | Bent coat hanger | Make sure it can hold the full bottle weight (filled glass = 1–2 lbs) |
| Sealant | Food-safe silicone sealant | Plumber's tape (PTFE tape) | Use around stopper edges if you get any drip |
| Feeding dish (optional) | Small plastic bottle cap or jar lid | Cut bottom of a small plastic cup | Catches drips and gives birds a landing spot |
For tools, you just need a drill or a heated skewer to make holes, pliers to bend wire, and scissors. If you're using a glass bottle, a diamond-tip drill bit for glass is worth the few dollars it costs, but a rubber stopper that fits the bottle opening eliminates the need to drill glass entirely.
Make and manage bird nectar safely
The nectar recipe is not complicated, and you shouldn't overcomplicate it. The standard ratio confirmed by the Smithsonian's National Zoo, Project FeederWatch, and Penn State Extension is 1 part plain white sugar to 4 parts water. Project FeederWatch specifies making sugar water by adding 1 part sugar to 4 parts boiling water, then stirring and cooling before filling the feeder blank" rel="noopener noreferrer">Project FeederWatch specifies making sugar water with 1 part sugar to 4 parts boiling water, then stirring and cooling before filling the feeder. That's it. For a typical small feeder, mix 1/4 cup of sugar with 1 cup of water. For a larger bottle, scale up proportionally.
How to mix it correctly
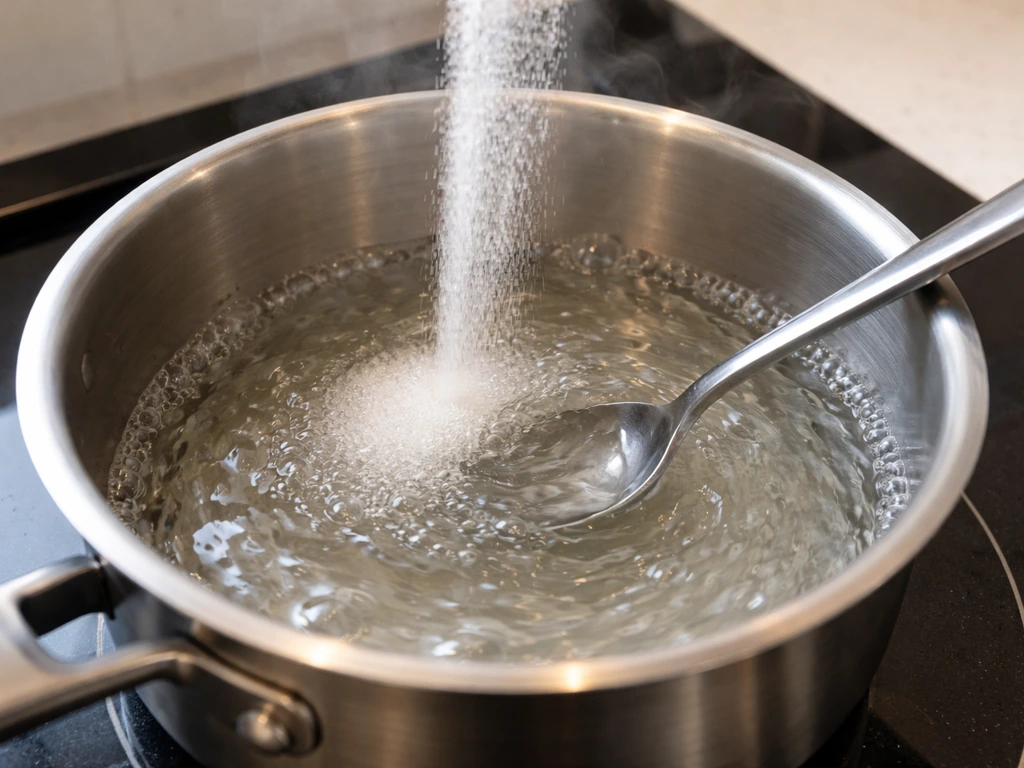
- Bring 4 parts water to a boil in a clean saucepan.
- Remove from heat and add 1 part plain white granulated sugar.
- Stir until the sugar is fully dissolved (takes about 30 seconds).
- Let the mixture cool completely to room temperature before pouring it into your feeder.
- Store any leftover nectar in a sealed container in the refrigerator for up to two weeks.
Use only plain white table sugar. Do not use honey (it ferments fast and can cause fungal growth in a bird's bill), brown sugar, powdered sugar, or artificial sweeteners. Do not add red food coloring. BirdCaribbean's nectar guide specifically flags red food coloring as a safety concern, and the red color isn't needed to attract birds anyway. If your feeder has red ports or a red rim, that's enough visual signal.
Don't make the nectar stronger than 1:4 thinking it will attract more birds. A higher sugar concentration is actually harder for hummingbirds to metabolize and can dehydrate them. Stick to the 4:1 water-to-sugar ratio every time.
Step-by-step build and assembly (including leak-proofing)
This build uses a standard inverted bottle design. This same step-by-step approach can be adapted to make a willow bird feeder with a leak-resistant reservoir and feeding ports how to make a willow bird feeder. If you want to mount a feeder on a window, you'll need a window-friendly setup and careful leak-proofing so nectar stays in the feeder where birds can reach it how to make window bird feeder. Plan for about 30 to 45 minutes on your first attempt, less once you've done it once. The leak-proofing steps are the most important part, so don't rush them. If you want an automatic setup that refills as levels drop, you can use a reservoir and float-style or gravity-based feed system and still keep it leak-proof automatic bird feeder.
- Clean your bottle thoroughly with hot water and a bottle brush. No soap residue should remain — rinse at least five times. Any leftover soap or contamination will ruin the nectar.
- Fit a rubber stopper into the bottle opening. It should be snug and require a little pressure to push in. If it drops in loosely, size up. Wrap the stopper with a single layer of PTFE plumber's tape to fill any minor gaps.
- Push your feeding tube through the hole in the stopper. The tube should extend about 1 inch inside the bottle and 1.5 to 2 inches below the stopper on the outside. Bend the exterior end of the tube downward at a 45-degree angle so hummingbirds can hover and reach it comfortably.
- Apply a thin bead of food-safe silicone sealant around the base of the tube where it meets the stopper, and around the stopper where it meets the bottle lip. Let it cure for at least 2 hours before filling.
- Fill the bottle three-quarters full with your cooled nectar. Cap it temporarily with your hand or a piece of plastic wrap while you flip it.
- Invert the bottle so the stopper is at the bottom. Place it in your hanger or mount before releasing your hand. A small amount of nectar may drip initially as the vacuum forms — this is normal and will stop within a few seconds.
- Check for leaks around the stopper and tube joint. If nectar is dripping steadily, remove the bottle, dry the stopper area, and add another layer of PTFE tape or sealant. Let it re-cure before refilling.
- If you want a small catch dish at the base (which helps birds land and catches any initial drip), attach a plastic bottle cap or small lid directly below the tube tip using a wire loop.
The key to a leak-proof feeder is the vacuum. When the bottle is inverted, gravity pulls nectar down, but atmospheric pressure pushes up through the tube and keeps it from free-flowing. If your tube is too wide (more than 3/16 inch inner diameter), the vacuum won't hold and you'll get constant dripping. If the tube is too narrow, it can clog with crystallized sugar. The 1/8-inch inner diameter is the sweet spot for most DIY builds.
Set up: where to hang it and how high
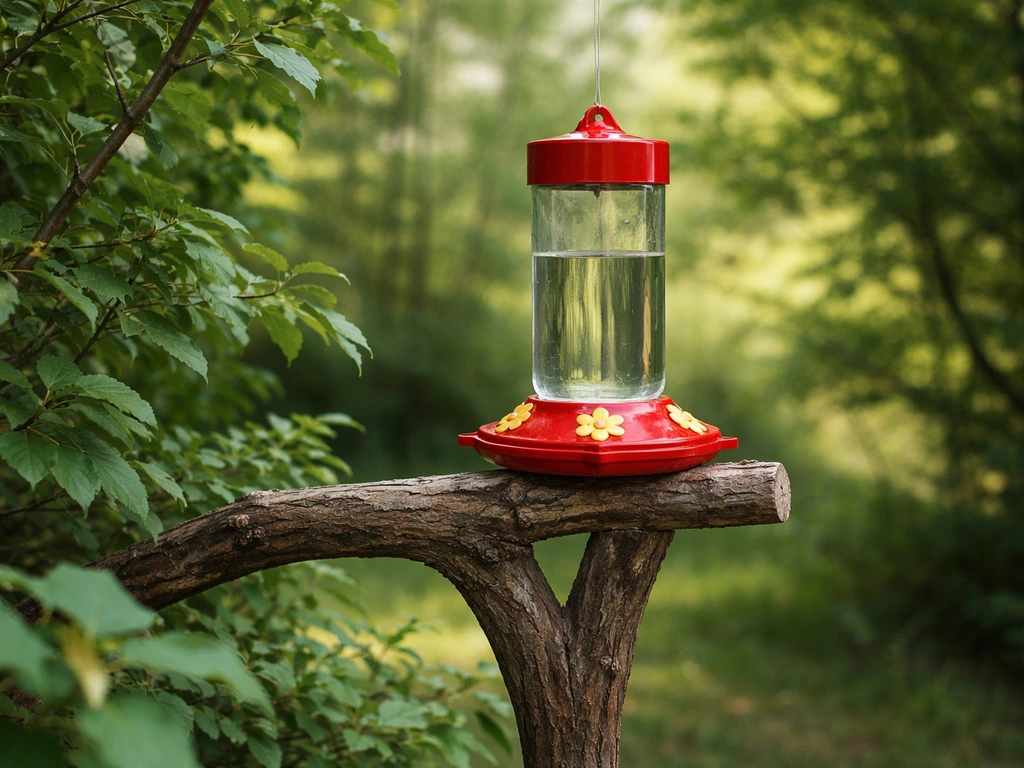
Location matters more than most people expect. Hummingbirds are territorial and skittish, so you need to balance visibility (so they can find the feeder) with enough shelter that they feel safe while feeding.
- Hang the feeder 4 to 6 feet off the ground. This height is comfortable for hovering hummingbirds and puts the feeder at eye level for you, making refills and cleaning easier.
- Choose a spot with morning sun and afternoon shade. Direct afternoon sun accelerates nectar fermentation dramatically, sometimes causing spoilage in under 24 hours in summer heat.
- Position the feeder near natural cover like shrubs, trees, or a flower bed within 10 to 15 feet. Hummingbirds like to perch and survey the area before approaching. Totally open placement works but can slow initial visits.
- Keep the feeder at least 3 feet away from any window to reduce bird strike risk, but close enough to your house that you can actually see and enjoy the activity.
- Avoid hanging directly over a deck or patio furniture if possible. Drips and ants trailing down from the feeder are a real nuisance in those spots.
- Use an S-hook and a sturdy shepherd's hook stake if you don't have a natural branch to hang from. Shepherd's hooks are cheap, adjustable, and keep the feeder away from fence lines where cats can reach.
If you have multiple hummingbirds visiting (or want to attract more), consider putting up two feeders out of sight of each other. Dominant hummingbirds will guard a single feeder aggressively and drive others away. Spreading feeders around the yard lets more birds eat in peace.
Maintenance: cleaning, refilling, and seasonal adjustments
This is the part most people underestimate. A nectar feeder that isn't cleaned regularly becomes a source of mold and bacteria that can genuinely harm birds. The cleaning schedule isn't optional.
How often to clean and refill
| Temperature / Season | Nectar Replacement Frequency | Full Cleaning Frequency |
|---|---|---|
| Below 60°F (cool weather, early spring or fall) | Every 5 to 7 days | Weekly |
| 60 to 75°F (mild weather) | Every 3 to 4 days | Every 3 to 4 days |
| 75 to 85°F (warm summer) | Every 2 days | Every 2 days |
| Above 85°F (hot summer) | Daily or every other day | Every 2 days |
To clean the feeder, disassemble it completely, rinse with hot water, and scrub with a bottle brush. A solution of 1 part white vinegar to 4 parts hot water works well for removing mold or buildup. Avoid dish soap if you can, because residue is very hard to rinse out of narrow tubes and it can make birds sick. If you do use a tiny drop of unscented dish soap, rinse the bottle at least eight times and smell the inside before reassembling, if you can detect any soap, keep rinsing.
At the end of the season (when temperatures drop consistently below 45°F and hummingbirds have migrated), bring the feeder in, clean it thoroughly, and store it dry. Don't leave nectar sitting in a feeder over winter. In warmer climates where hummingbirds overwinter, keep the feeder out year-round but adjust your cleaning schedule with the temperature.
Troubleshooting pests and nectar problems
Ants getting into the feeder
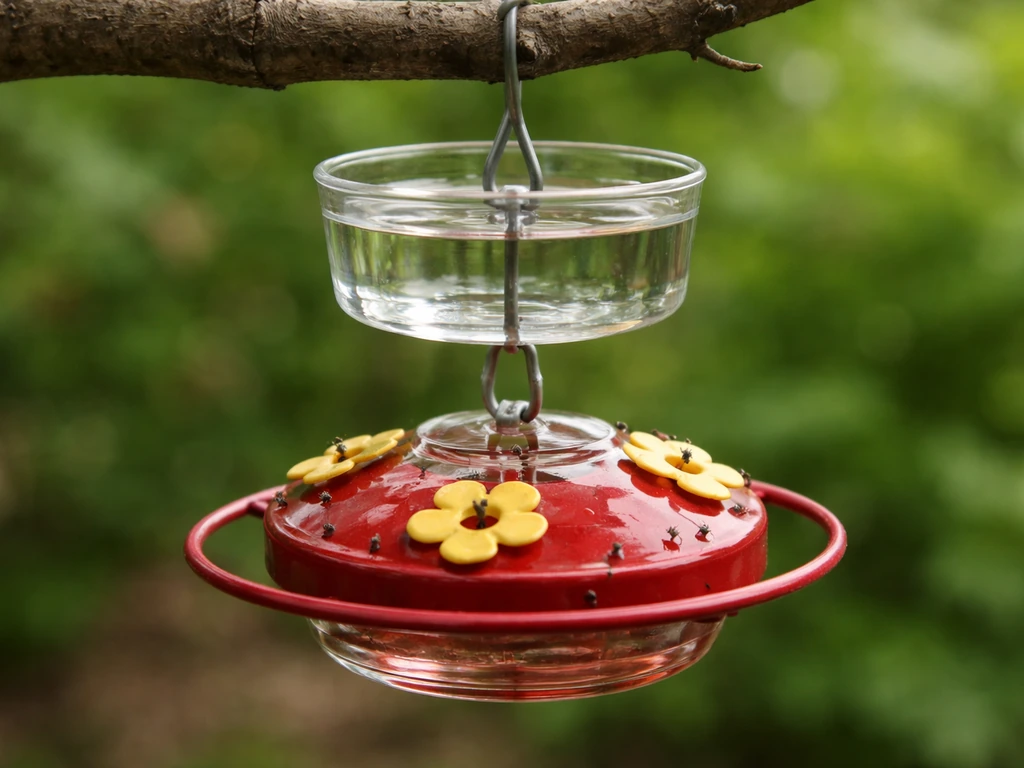
Ants are the most common problem with nectar feeders, and they'll contaminate the nectar fast. The single most effective solution is an ant moat, which is a small water-filled cup that sits between the hanger and the feeder. Ants can't cross standing water. You can buy ant moats cheaply, or make one by drilling a small hole through the center of a plastic bottle cap, threading your hanging wire through it, sealing the hole around the wire with silicone, and filling the cap with water. Check and refill the moat every few days. Don't use any kind of oil or petroleum product on the hanger wire to deter ants, since these can get onto birds' feathers and cause real harm.
Other insects (bees, wasps, fruit flies)
Bees and wasps are attracted to nectar that's dripping or pooling at the port. The best fix is to reduce the tube diameter so the feeder doesn't drip. If your tube is the right size and you're still getting bees, check that the vacuum is holding properly (re-seal the stopper) and move the feeder to a shadier spot. Fruit flies appear when nectar starts fermenting, which means you need to change it more frequently. If you see fruit flies, dump the nectar, clean the feeder the same day, and cut your replacement schedule in half.
Nectar fermenting or turning cloudy
Cloudy nectar means it's fermenting or has bacterial growth. Any time the nectar looks milky, smells sour or yeasty, or has visible particles floating in it, dump it immediately and clean the feeder before refilling. Fermented nectar can make birds sick. The root cause is almost always heat exposure, nectar left too long, or a feeder that wasn't cleaned thoroughly before refilling. Move to a shadier spot and tighten your replacement schedule.
Clogged feeding tube
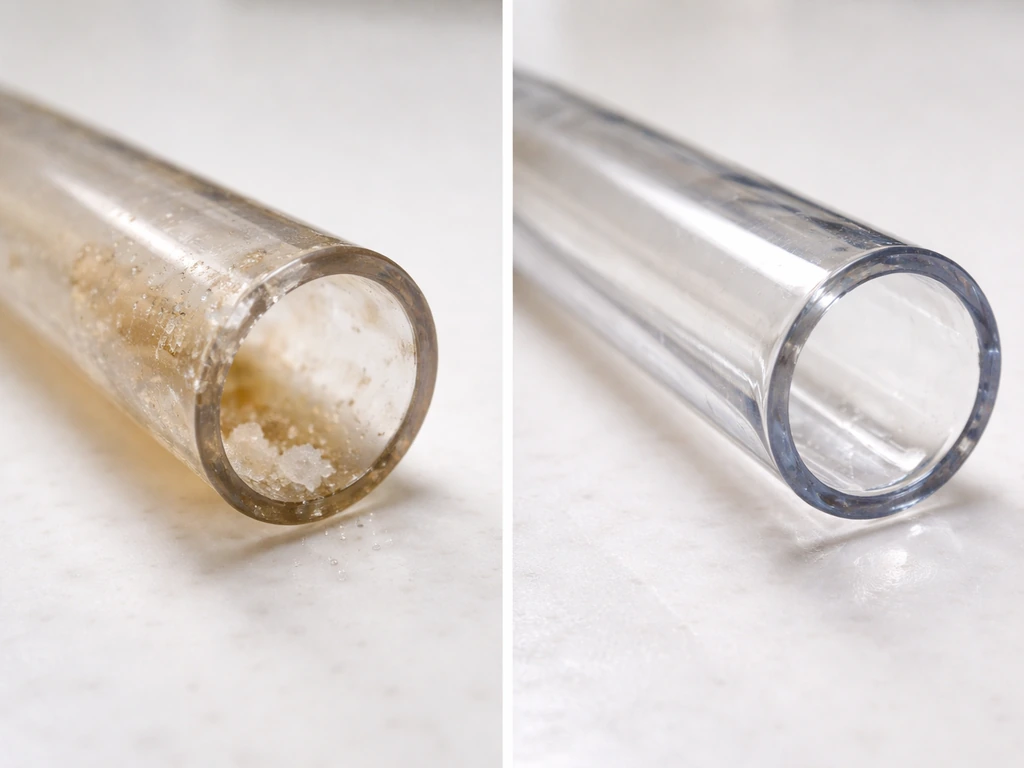
Tubes clog when sugar crystallizes inside them, especially if the feeder dried out or wasn't rinsed properly. Soak the tube in hot water for 10 to 15 minutes to dissolve the crystals, then run a pipe cleaner or thin brush through it. If the tube is beyond saving, replacement aquarium tubing costs almost nothing and takes two minutes to swap out. Keep a spare length on hand.
Feeder leaking after assembly
If the feeder drips constantly even after the initial vacuum forms, check these things in order: the stopper fit (too loose), the tube diameter (too wide), a crack in the bottle, or a gap where the tube meets the stopper. Re-wrap with PTFE tape, re-apply silicone to any joint that looks questionable, and do a quick leak test over a sink before re-hanging. Most leaks come from the stopper-tube junction, so that's always the first place to look.
Birds not visiting
If hummingbirds aren't finding your feeder within the first week, try moving it closer to flowering plants, adding a red ribbon or tag near the port (red is the color hummingbirds key in on), and making sure the feeder is visible from a perch or open area. Patience is genuinely part of this. Hummingbirds follow established routes, and it can take them a few days to a week to discover a new feeder. Once one finds it, others will follow quickly.
FAQ
Can I use a recycled bottle feeder and skip drilling holes by using only stoppers and tubing?
Yes. If the bottle opening fits your rubber stopper snugly, you can create the sealed feed path through the stopper without drilling glass. The critical check is that the tube sits centered and fully seated in the stopper opening, so there is no gap where nectar can leak or bypass the vacuum.
What is the safest way to handle the sugar mixture so it doesn’t grow mold or ferment fast?
Mix and use fresh nectar, and avoid leaving it in direct sun. If you want to pre-mix, store it covered in the refrigerator and only pour into the feeder when you can hang it immediately. Also, discard any nectar that looks cloudy, smells sour, or has floating particles, even if it hasn’t reached the usual replacement interval.
How often should I replace nectar if temperatures are mild versus hot?
In cooler weather, you can generally stretch replacement to longer intervals, but in heat you must shorten it to prevent fermentation. A practical rule is to check daily during warm spells, and replace immediately if you notice any cloudiness, odor change, or fruit flies. If you keep seeing fruit flies, cut your replacement schedule in half.
Is it okay to rinse with tap water only, or do I need vinegar every time?
Rinsing with hot water is fine for routine cleaning, but vinegar helps when you see buildup or mild residue on the tube walls. If the tube has been stained or has persistent crystallized sugar, use the vinegar solution, scrub with a bottle brush, then rinse very thoroughly to remove any remaining vinegar smell or residue.
My feeder is dripping even after sealing. How can I troubleshoot without rebuilding everything?
First confirm the stopper fit, then inspect the stopper-tube junction for any microscopic gap. Next, check the tubing inner diameter, if it is wider than about 3/16 inch it may not hold the vacuum. Finally, perform a 5 to 10 minute leak test over a sink before rehanging, since small leaks often show up faster than you expect.
What should I do if hummingbirds keep coming but aren’t actually drinking much?
Look for tube clogs or partial vacuum failure, which can reduce flow without completely stopping it. Also confirm the feeding ports are positioned so birds can access the liquid without having to reach over plastic parts. If you recently tightened seals, recheck that the tube is not pinched inside the stopper.
Can I sweeten the nectar slightly less than 4:1 to make it safer?
Using less sugar than 4:1 is not always “safer.” Too weak can reduce energy availability, and birds may still be affected by contaminated nectar. Stick to the standard 1 part plain white sugar to 4 parts water ratio, and focus on freshness and cleanliness, since those have the biggest impact on bird health.
What’s the best way to stop ants if I can’t fit an ant moat under my feeder?
You can sometimes relocate the ant barrier higher on the hanger so ants cannot find a climbing route around it. If you cannot use a water-filled moat, make sure no nearby vegetation, surfaces, or wires give ants an alternate path to the feeder. Avoid oil or petroleum deterrents, since residue can reach birds’ feathers.
How do I prevent wasps and bees if the feeder doesn’t drip but insects still hover near it?
Even if there is no visible drip, make sure the feeding ports are not pooling nectar underneath. Recheck tube sizing and vacuum hold so nectar dispenses in controlled amounts. If activity remains high, move the feeder to a shadier spot and ensure there is no spilled nectar on surrounding surfaces.
Can I leave the feeder up year-round if hummingbirds remain in my area?
Yes, but adjust based on weather. In mild climates, keep the feeder out, but shorten cleaning and nectar replacement during warmer periods. In colder regions where temperatures consistently drop and birds migrate, bring it in and store it dry after a final thorough cleaning to avoid freezing damage and lingering residue.
How do I store the feeder between cleaning days so it stays safe?
For short gaps, keep the feeder dry between cleanings when possible and always refrigerate any leftover nectar. Before reassembling, make sure the inside surfaces are fully rinsed and not sticky. If you notice any crystallized sugar, soak the tube again before reuse, since clogs can create poor flow.