Sugar water feeders are nectar feeders, and they're almost exclusively used for hummingbirds (and occasionally orioles). The recipe is simple: 1 part plain white sugar dissolved in 4 parts water. That's it. No red dye, no honey, no additives. Mix it up, let it cool, pour it into a feeder with feeding ports, hang it in a shaded spot, and clean it every one to two days in summer. The rest of this guide walks you through every step so you can have a working setup today.
How to Make a Sugar Bird Feeder Sugar Water Recipe

Marcus Brennan
7 Jun 2026

What sugar water feeders are actually for (and when to use one)
Sugar water feeders mimic flower nectar, which is the primary food source for hummingbirds. They're liquid energy feeders, not seed feeders, so if you're hoping to attract sparrows, finches, or cardinals, this isn't the setup you need. But if you want hummingbirds visiting your yard, a sugar water feeder is one of the most effective things you can put out. Orioles also respond to sugar water, though they prefer a more diluted mix (more on that below).
The best time to put one out depends on where you live. In most of the continental US, hummingbirds arrive as early as late March in the South and by May in northern states. Keeping a feeder up through summer and into September (or later in warmer regions) gives migrating birds a reliable fuel stop. If you're in a year-round warm climate, you can run a feeder all twelve months. During migration peaks, expect higher traffic and plan to clean and refill more often.
The nectar recipe: exact ratio and steps
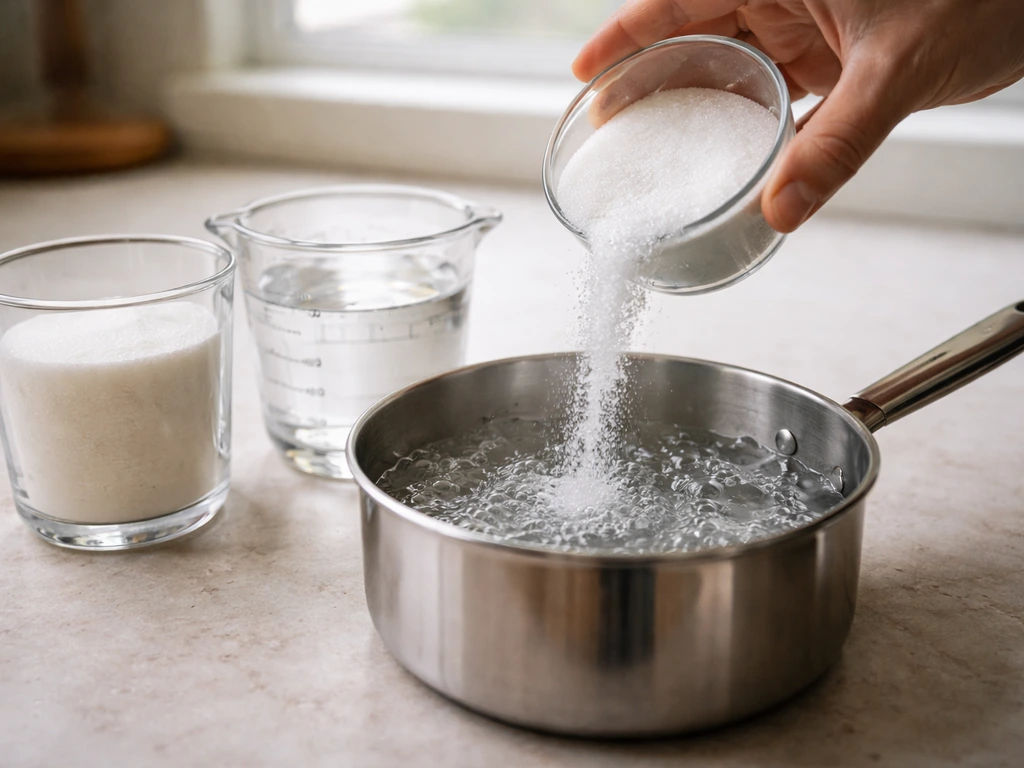
The standard hummingbird nectar ratio is 1 part white granulated sugar to 4 parts water. That means 1 cup of sugar to 4 cups of water, or half a cup of sugar to 2 cups of water if you're making a smaller batch. For orioles, use a more diluted mix: 1 part sugar to 6 parts water. Don't use honey (it ferments fast and can cause a fatal fungal infection in birds), brown sugar, powdered sugar, or artificial sweeteners. Plain white refined sugar is the only safe choice.
- Measure your water and bring it to a boil in a saucepan. Boiling helps dissolve the sugar fully and kills off any bacteria or contaminants already in the water.
- Remove the pan from heat and stir in the sugar. Use 1 cup of sugar for every 4 cups of water. Stir until completely dissolved, which only takes about a minute off the boil.
- Let the solution cool completely to room temperature before filling your feeder. Pouring hot nectar into a plastic feeder can warp it and may harm birds. This usually takes 30 to 60 minutes on the counter.
- Fill your feeder and refrigerate any leftover nectar in a sealed glass jar or container. Stored nectar keeps in the fridge for up to one to two weeks, but toss it immediately if it looks cloudy or smells off.
Some sources say boiling isn't strictly required since the sugar dissolves fine in very hot tap water. That's true, but boiling gives you a cleaner starting point, especially in summer when bacteria multiply fast. I've found it's worth the extra five minutes.
Safe preparation and storage: what to know before you fill the feeder
Once your nectar is made, let it cool fully before it goes into the feeder or the fridge. Rushing this step is the most common beginner mistake. Hot nectar sitting in a sealed feeder creates a warm, moist environment that speeds up bacterial growth, which is exactly what you're trying to avoid.
Refrigerated nectar is convenient if you want to make a larger batch and refill quickly every day or two. Use a clean jar with a tight lid and label it with the date so you don't lose track. Here are the storage rules worth knowing:
- Refrigerated nectar: good for up to one to two weeks in a sealed container
- Nectar in the feeder outdoors: replace every one to two days in hot weather (above 80°F), every two to three days in cooler conditions
- Cloudy nectar: discard immediately and clean the feeder before refilling, regardless of schedule
- Any sign of mold in your stored fridge batch: throw the whole batch out and start fresh
- Never top off old nectar with new nectar without cleaning the feeder first
Building or choosing your feeder container
You don't need to build a feeder from scratch to get started. A basic bottle-style or saucer-style hummingbird feeder from a hardware or garden store costs between $8 and $20 and works perfectly well. That said, if you want to DIY one, a clean plastic bottle with a feeding port attachment (sold separately or repurposed from an old feeder) is a solid beginner option.
If you want a hands-on project instead of buying a feeder, see how to make a bird feeder for hummingbirds for a related DIY option. If you want to take it a step further, you can also learn how to make an apple bird feeder that works as a simple, attractive feeder option DIY one.
The key requirements for any nectar feeder are: it must seal tightly to prevent leaks, it must be easy to take apart for cleaning, and the ports need to be sized for hummingbird bills.
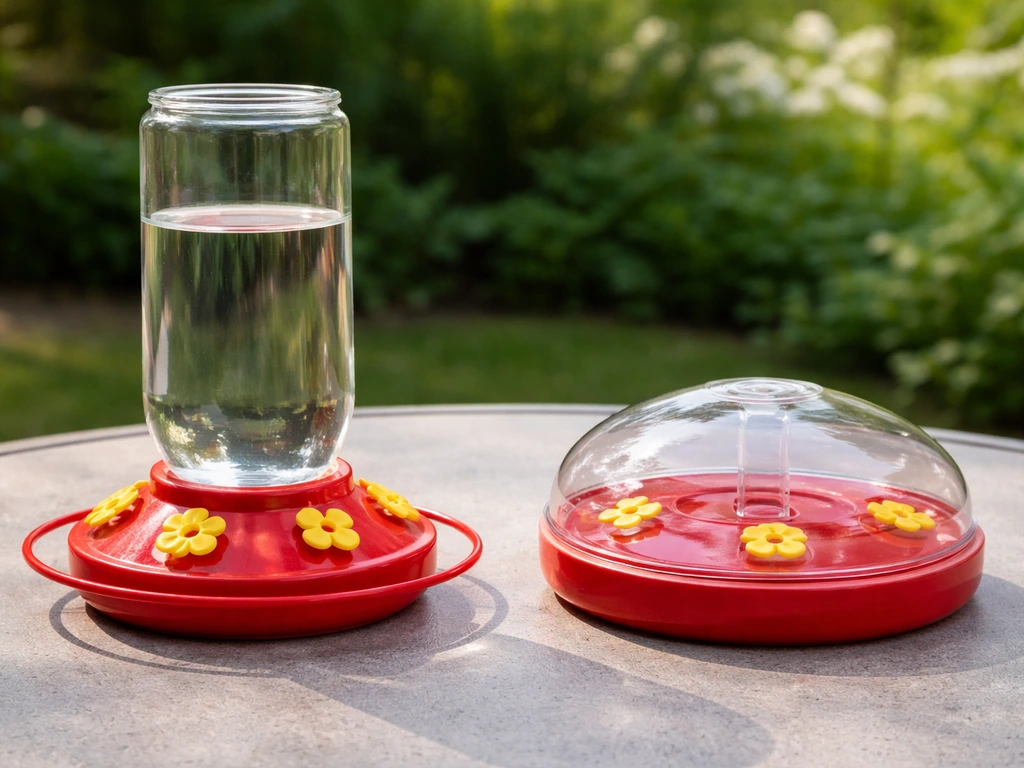
Saucer-style feeders (shallow dish with a dome) tend to be easier to clean and less prone to leaking than the traditional inverted-bottle style. If you go with a bottle-style feeder and it drips constantly, the issue is almost always temperature: as the feeder warms in sunlight, the air inside expands and pushes nectar out. Moving it to a shadier spot usually solves this. Gaskets and O-rings wear out over time, so check them during each cleaning and replace them when they look cracked or flattened.
Skip red-dyed nectar even if your feeder comes with it. The red color on the feeder itself is enough to attract hummingbirds. Dyes have no nutritional benefit and there's enough uncertainty about their safety that it's not worth the risk. Plain 1:4 sugar water is what hummingbirds need.
Where to hang the feeder
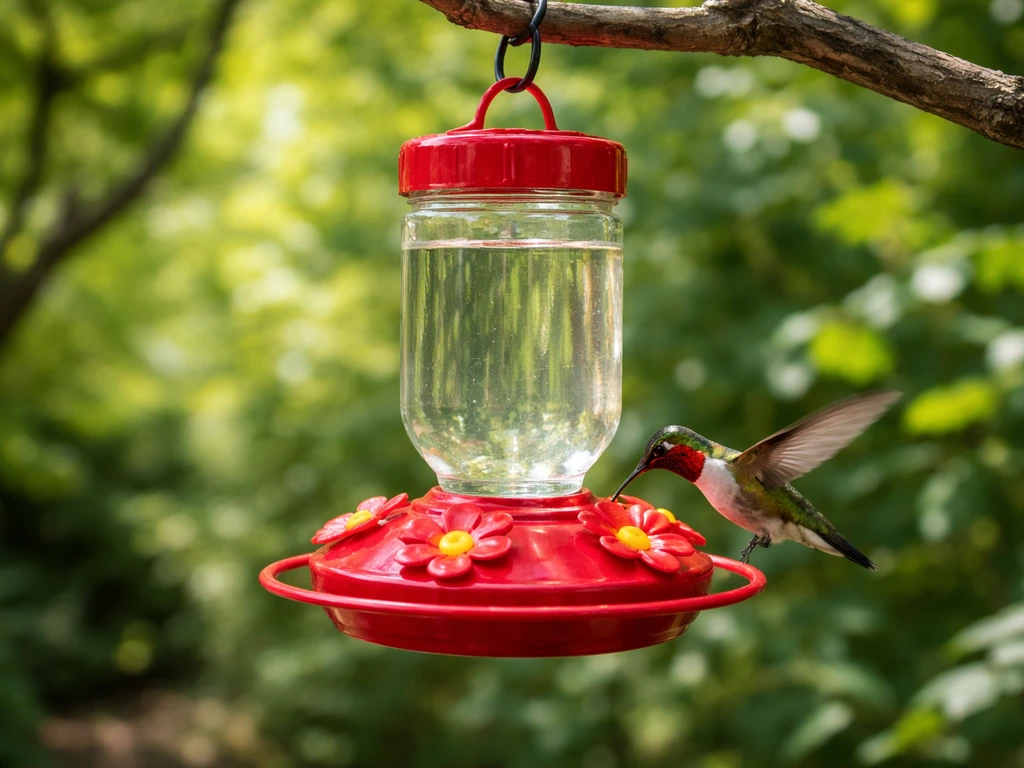
Shade is the single most important placement factor for a nectar feeder. Direct sun heats the nectar quickly, which accelerates fermentation and mold growth and means you'll be cleaning and refilling more often. Find a spot that gets morning light and afternoon shade, such as under a tree canopy, on a north or east-facing eave, or near a shrub that provides cover. The birds don't mind, and your maintenance load drops noticeably.
Height matters less than you might think. Hummingbirds will visit feeders from about 3 feet off the ground up to 15 feet or higher. A hook at eye level (around 5 to 6 feet) makes refilling and cleaning easy for you without discouraging the birds. Keep the feeder at least 10 to 15 feet away from windows to reduce the risk of bird strikes, and if you're dealing with bears in your region, follow local guidance about bringing feeders in at night or avoiding nectar feeders altogether during active bear seasons.
If you're also putting out other feeders, like one for grape jelly to attract orioles or a standard seed feeder for other backyard species, space them out by at least a few feet. Hummingbirds are territorial and may get spooked by too much activity immediately around their feeder.
Cleaning schedule and how to actually do it
This is where most people underestimate the commitment of a nectar feeder. In summer heat, you need to clean the feeder every one to two days. Not rinse, but actually clean it. In cooler weather (spring and fall), every two to three days is acceptable. A dirty feeder can grow black mold and bacteria that are genuinely harmful to hummingbirds, so this isn't optional.
- Empty any remaining nectar from the feeder completely.
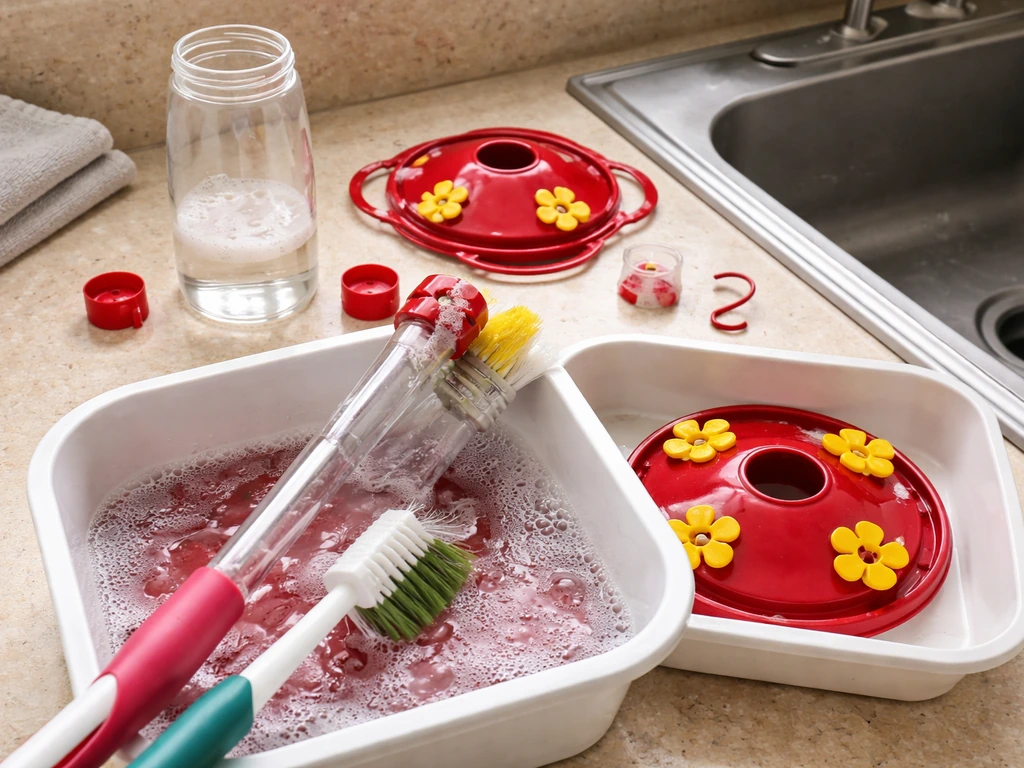
- Disassemble the feeder into all its parts: bottle or reservoir, base, feeding ports, and any O-rings or gaskets.
- Rinse all parts with hot water first to flush out loose residue.
- For routine cleaning, scrub with a bottle brush and hot water with a splash of white vinegar. A small pipe cleaner or cotton swab works well for the feeding ports.
- For a deeper disinfection (weekly or if you see mold), use a 10% bleach solution: 1 part household bleach to 9 parts water. Soak for a few minutes, then rinse extremely thoroughly.
- Let all parts air dry completely before reassembling. This prevents trapping moisture that encourages mold.
- Refill with fresh, cooled nectar and rehang.
Some Audubon-affiliated guidance recommends sticking to a vinegar-and-water solution for hummingbird feeders rather than bleach for routine cleans, since bleach residue can be harmful if the feeder isn't rinsed extremely well. If you use bleach, rinse until you can't detect any smell at all. When in doubt, vinegar and a good scrub brush get the job done safely.
Troubleshooting: cloudy nectar, mold, ants, bees, and wasps
Cloudy or discolored nectar
Nectar should be clear. If it looks milky, cloudy, or has visible particles floating in it, it's fermenting or growing bacteria. Don't wait for your scheduled cleaning day. Empty it, clean the feeder immediately, and refill with a fresh batch. The same goes for nectar stored in your fridge: if it's turned cloudy in the jar, toss it and make a new batch. There's no safe way to "refresh" contaminated nectar.
Mold inside the feeder
Black mold inside the reservoir or ports is a sign the feeder went too long between cleanings. It happens to everyone at some point. The fix is a thorough bleach soak (1:9 bleach to water), a good scrub with a bottle brush, then an extremely thorough rinse and full air dry. If the mold is embedded in cracks or scratches in the plastic that you can't get clean, it's time to replace the feeder. Scratched plastic harbors bacteria in ways no amount of cleaning can fully fix.
Ants
Ants find nectar quickly. The most reliable fix is an ant moat, which is a small water-filled cup that sits between your hanging hook and the feeder. Ants can't cross the water barrier. Many feeders include one or you can buy one separately for a few dollars. Keep the moat filled with plain water and replace it after rain. Don't use oil or petroleum-based products in the moat as they can harm birds.
Bees and wasps
Bees and wasps are attracted to nectar, especially when flowers are scarce. Bee guards (mesh or plastic covers over the feeding ports) help by keeping insects from reaching the nectar directly, but they're not a complete solution if nectar is dripping or the feeder surface is sticky from spills. Clean the outside of the feeder thoroughly every time you refill it.
If bees are swarming heavily, try moving the feeder to a completely different location, even just 10 to 15 feet away. Tom’s Guide recommends that if bees start swarming around your hummingbird feeder, you can solve the problem by moving the feeder to a new location, since hummingbirds will follow more quickly than bees move the feeder to a completely different location, even just 10 to 15 feet away.
Hummingbirds will find the new spot quickly, but bees often don't follow immediately. This gives the birds a break from the competition.
| Problem | Likely cause | Fix |
|---|---|---|
| Cloudy nectar | Fermentation or bacteria growth | Discard nectar, clean feeder immediately, refill fresh |
| Black mold | Infrequent cleaning | Bleach soak (1:9), scrub, rinse thoroughly, air dry |
| Leaking feeder | Heat expansion or worn gaskets | Move to shade; inspect and replace gaskets/O-rings |
| Ants in feeder | No physical barrier | Add ant moat above feeder, keep filled with water |
| Bees/wasps swarming | Nectar spillage or low flower availability | Add bee guards, clean exterior, relocate feeder 10-15 ft |
You're ready to set it up today
The whole process from mixing nectar to hanging the feeder takes under an hour, and once it's up, the main job is staying on top of the cleaning schedule. Make a slightly bigger batch than you need, store the rest in the fridge, and you can refill quickly every day or two without having to cook a new batch every time.
If you want to expand your backyard bird setup beyond hummingbirds, pairing this with a grape jelly feeder for orioles or exploring other feeder types for different species is a natural next step. If you're feeling crafty and want a more decorative option, you could also use this as inspiration for how to make a macrame bird feeder. A grape jelly bird feeder is a great option for attracting orioles grape jelly feeder.
But start here, keep the nectar fresh, and the hummingbirds will show up. If you want to keep the birds coming while adding a decorative touch, a magic halo for bird feeders is another fun DIY idea to try hummingbirds will show up.
FAQ
Can I use brown sugar, powdered sugar, or a natural sweetener to make the sugar bird feeder nectar?
Yes, but keep it strictly plain. If you have softened sugar or “brown sugar” in the kitchen, skip it, use only white granulated (refined) sugar and clean water to match the 1:4 ratio (or 1:6 for orioles).
What should I do if my nectar changes color or looks cloudy before the next cleaning?
No. If the nectar looks cloudy, milky, or has floating specks, treat it as contaminated and replace it. “Refreshing” by adding new nectar to old nectar can leave bacteria behind.
Do I have to boil the sugar water, and for how long?
Boiling can be helpful, especially in hot weather, but you do not have to keep it at a rolling boil for a long time. The key is mixing until fully dissolved, then letting it cool completely before filling the feeder.
How does weather (heat vs. cool days) change how often I should clean and refill?
Plan on shorter cleaning intervals if temperatures are high or the feeder is in brighter sun. Even in cool weather, if you notice any cloudiness, odor, or residue, clean immediately instead of waiting for the usual schedule.
My bottle-style feeder keeps leaking, what are the most likely causes besides a loose lid?
If a bottle-style feeder drips nonstop, don’t just tighten it. Check for a compromised gasket or O-ring, confirm the nectar is fully cooled, and move the feeder to more shade because warm air expansion is a common cause.
Can I use vinegar or bleach to clean the feeder, and what if I see black mold?
Vinegar-and-water is a good routine cleaner, but for heavy black mold use a bleach soak and then rinse thoroughly until there is no lingering bleach smell. After cleaning, let the feeder fully air-dry before refilling.
Is it safe to make a large batch ahead of time and refrigerate it?
Yes, but it can backfire if you store it too warm or too long. Refrigerate in a clean, tightly sealed container, label with the date, and discard if it turns cloudy when you open it.
Should I build a DIY feeder or buy a commercial one, and which design is easiest to maintain?
Use the feeder type and port design that matches hummingbird bills. Saucer-style feeders are often easier for you to scrub, while any feeder you choose should seal tightly and be simple to take apart daily or every other day in summer.
How far should I place the feeder from windows and from other bird feeders?
Do not place the feeder close to windows, and keep it separated from other feeders if hummingbirds are getting chased. A distance of about 10 to 15 feet from windows and a few feet from other feeders helps reduce collisions and territorial stress.
Is red dye nectar actually better for attracting hummingbirds?
Using a red-dyed solution is unnecessary because hummingbirds respond to the feeder and location cues. If your goal is hummingbirds, focus on fresh 1:4 sugar water and clean ports, not added colorants.
What’s the best way to decide how much nectar to mix so it stays fresh?
Bigger is not always better. If you can’t reliably clean every one to two days in warm weather, make smaller batches so nectar never sits long enough to ferment.
If I’m attracting insects instead of hummingbirds, what quick fixes should I try first?
If you’re only getting visits from bees, wasps, or ants, the nectar may be spilling or the feeder may be positioned too sunny. Clean the outside every refill, check for drips, and consider a bee guard plus an ant moat.
How do I adjust the sugar-water recipe if I also want orioles to use the feeder?
For orioles, switch the nectar ratio to 1 part sugar to 6 parts water and keep it fresh on a similar schedule. They may also use jelly feeders, but dilution matters if you are using nectar-only setups.
Next Articles
How to Make a Bird Feeder for Hummingbirds at Home
DIY hummingbird feeder guide: build options, safe nectar recipe, setup tips, and clean maintenance to prevent mold and l
How to Make an Apple Bird Feeder at Home Step by Step
Step by step guide to build an outdoor apple bird feeder, with materials, mounting tips, safe placement, and maintenance
How to Make a Macrame Bird Feeder Step by Step Today
Step-by-step macrame bird feeder guide: materials, knot tying, secure hanging, placement tips, and troubleshooting for r