You can make a sturdy macrame bird feeder in an afternoon using about 30–40 feet of synthetic cord, a small container (a jar, a dish, or a mesh cup), a few basic knots, and a couple of S-hooks or carabiners. The whole project costs under $15 if you already have scissors and a tape measure. The knots involved are simple enough for a first-timer: square knots and gathering knots do most of the structural work, and once you nail those two, the rest is just repetition and finishing.
How to Make a Macrame Bird Feeder Step by Step Today

Marcus Brennan
4 Jun 2026
What you need before you start
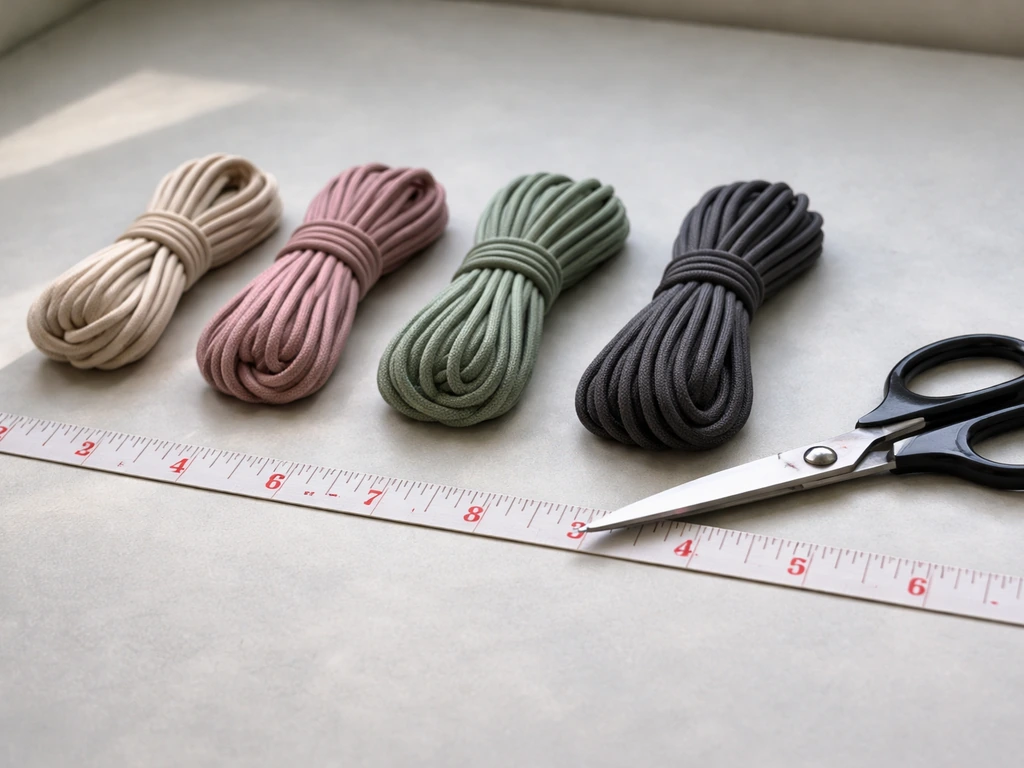
The most important material decision you'll make is the cord. Go with outdoor-rated synthetic cord, specifically spun polyester or nylon. Go with [spun polyester](https://www. rope.
com/products/spun-polyester-macrame-cord) macrame cord because polyester is commonly described as rot and mildew resistant, which helps it perform better outdoors than natural fibers like cotton. Both are rot and mildew resistant, handle UV exposure well, and don't absorb moisture the way natural fibers do. [Jute and cotton look great in photos but go moldy and weak within a season outdoors, especially if rain gets into the feeder regularly. ](https://homeinnovationideas.
com/can-jute-rugs-be-used-outdoors-the-definitive-guide-to-durability-care-and-alternatives/) I've learned this the hard way. Stick with 3mm or 4mm thickness for the structural knot work and a thicker 5mm or 6mm piece for the main hanging loop if you want extra reassurance.
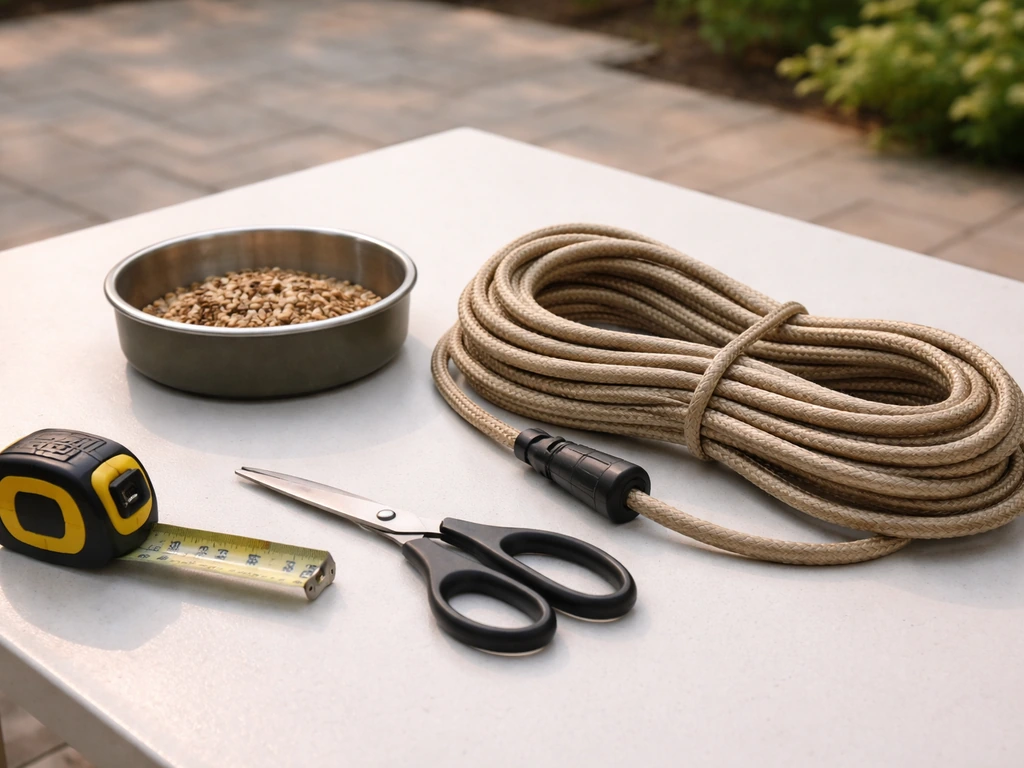
Materials and tools
| Item | What to look for | Budget option |
|---|---|---|
| Cord | 3–4mm spun polyester or nylon, outdoor rated | Repurpose paracord or braided twine from hardware store |
| Container/feeder dish | Ceramic dish, glass jar lid, metal mesh cup, or coconut shell half | Recycle a tuna can lid or small terra cotta saucer |
| Hanging hardware | S-hook, carabiner, or swivel hook rated for outdoor use | Thick zip tie through a branch or screw eye in a wooden beam |
| Scissors | Sharp enough to cut synthetic cord cleanly | Any sturdy scissors or a craft knife |
| Tape measure or ruler | For cutting consistent cord lengths | Mark lengths on your work surface with tape |
| Lighter or fray-check | To seal cut ends of synthetic cord | Touch the tip briefly to a flame to melt and seal |
You'll also want a mounting point to hang the work-in-progress while you tie knots. A coat hook on a wall, a door knob, or a ceiling hook all work. Tying macrame while the piece is suspended keeps the tension consistent and makes it much easier to see what you're doing.
Picking a design that actually works for the birds you want
The design you choose should follow the seed type and the birds you're targeting. If you want a nectar-style setup for NZ, use a feeder designed for hummingbirds or honeyeaters and keep ports small so birds can feed without spilling nectar bird feeder. A flat or shallow dish feeder (a saucer or jar lid held in a knotted platform) works well for sunflower seeds, mixed seed, and safflower, and it attracts cardinals, chickadees, finches, and sparrows.
If you are making a sugar feeder, choose a design that can handle liquid or syrup safely, such as a covered, well-drained setup that prevents dripping sugar bird feeder. To make the feeder work for hummingbirds specifically, you’ll want to choose a nectar-friendly setup rather than a seed-based design hummingbird feeder.
If you want an apple bird feeder, choose an apple container or craft a small saucer-style holder so you can fill it and secure it safely in the macrame cradle. A deeper cup or small mesh container holds nyjer (thistle) seed better and is preferred by goldfinches. If you want to offer suet or a fat cake, you'll want a cage or basket-style container held in the macrame cradle rather than an open dish.
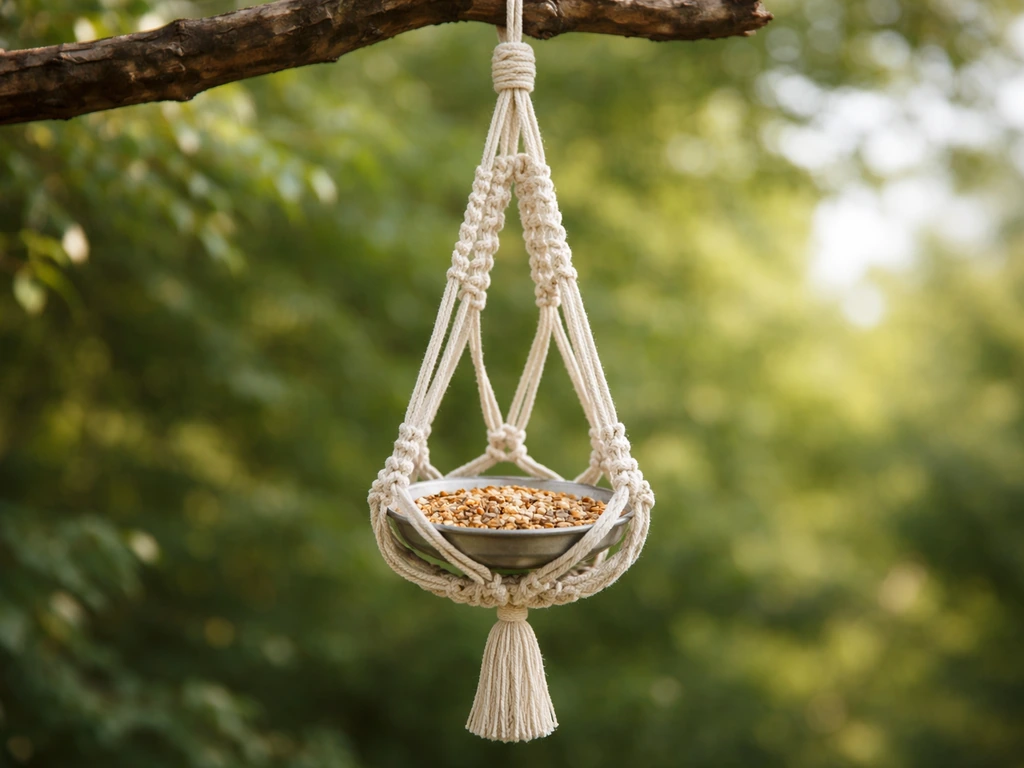
For hanging style, you have two main options: a single-strand drop (one loop at the top, the macrame hangs straight down and cups the feeder at the bottom) or a multi-strand suspended cradle (cords hang from a ring or dowel and fan out to hold the feeder from multiple sides). The single-strand drop is easier for beginners and fine for calm or sheltered spots. The multi-strand cradle is more stable in wind. If your yard is exposed, go with the cradle and use at least 4 anchor strands.
Step-by-step: tying your macrame bird feeder
This guide builds a four-strand suspended cradle that holds a small saucer or dish. The finished feeder hangs about 12–14 inches below the hanging point. Estimated time: 45–90 minutes depending on your comfort with knots.
Step 1: Cut your cords
Cut four cords, each 8 feet long. You'll also cut one shorter piece, about 18 inches, to use as a gathering knot later. Fold each of the four long cords in half so you have eight working strands. Seal all cut ends with a lighter: hold the tip of each cord near a flame for one second until the fibers melt together. Don't hold it in the flame or you'll burn through it.
Step 2: Create the hanging loop
Gather all four folded cords together at their midpoints. Tie them together using the 18-inch piece of cord: wrap it tightly around all eight strands about 2 inches below the fold, make five or six tight wraps, then thread the end back through the wraps and pull firm. This is a gathering knot and it forms the base of your hanging loop. The loop at the top (the folded midpoints sticking up) is what you'll slip over your S-hook. Trim that loop to a consistent length if needed, but leave at least 3–4 inches so it doesn't slip off the hook.
Step 3: Divide and tie the upper knots
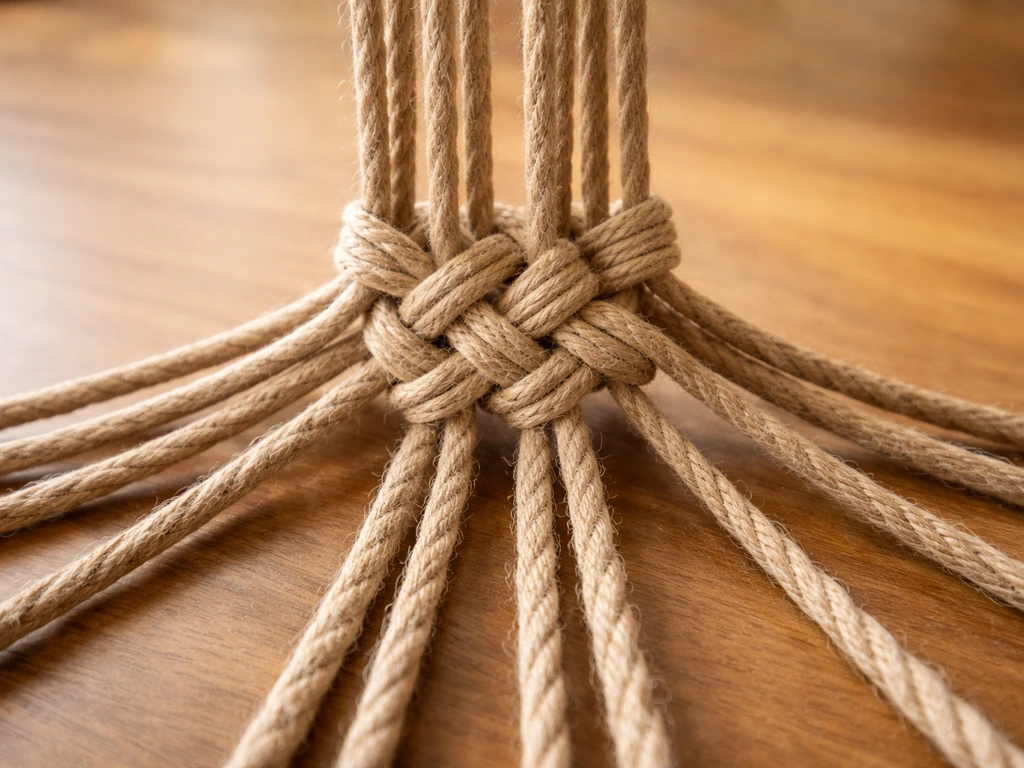
Below the gathering knot, divide your eight strands into four pairs. On each pair, tie a square knot about 3–4 inches below the gathering knot. To tie a square knot: take the left strand over the center pair and under the right strand, then take the right strand under the center pair and up through the loop on the left. Pull both ends snug. Repeat going the opposite direction (right over center, left through loop) and pull snug again. That's one full square knot. Tie one on each of your four pairs.
Step 4: Create the basket weave
Now you'll alternate the strands to build the cradle that holds the feeder. Take the right strand from one pair and the left strand from the adjacent pair, and tie a square knot about 3–4 inches below the previous row of knots. Work your way around all four pairs doing the same thing: always pair up one strand from neighboring groups, then knot. This alternating pattern creates a net that widens as you go, which is what cradles the dish. Do one or two rounds of alternating knots depending on the depth of your container.
Step 5: Final gathering knot at the base
Once the cradle is deep enough to hold your container securely (test it by placing the dish in and checking that it sits level), bring all eight strands together below the dish and tie one final gathering knot, just like the one at the top. Trim the excess strands below this knot to about 4–5 inches and seal each end with the lighter. These form a tassel-like tail at the bottom, which is both decorative and keeps the final knot from slipping.
Attaching the container and finishing the feeder
Place your container into the cradle now and check the fit. It should sit level and feel secure when you pick the whole feeder up by the hanging loop. If the dish tilts or slips, adjust the alternating knots in Step 4 by retying them tighter or closer together. A dish that's even slightly too small for the cradle will tip and spill seed constantly.
If you're using a container with holes or a rimmed edge, you can run a short piece of cord through the rim and tie it to one of the cradle strands for extra security. This is worth doing for any container that might fly out in a strong wind. For mesh cups or suet cages, weave a few of the cradle strands directly through the mesh so the container becomes integrated with the knot work rather than just resting inside it.
Finish by adding an S-hook or carabiner through the top loop. If you want to be able to lower the feeder easily for refilling without untying anything, a swivel hook or a quick-link connector makes that much more convenient. These cost about $1–2 at a hardware store and are worth it.
Where and how to hang it
Height matters more than most people think. Hang the feeder at least 5 feet off the ground to reduce ground predator access, and ideally no more than 10 feet high so you can reach it comfortably for refilling. Position it within about 10–15 feet of shrubs or trees so birds have nearby perching and escape cover, but keep at least 8–10 feet of clear space immediately around the feeder so cats and squirrels can't easily launch themselves onto it from a branch or fence.
Hang it in a spot that gets morning sun and afternoon shade. This keeps the seed cooler and drier in the afternoon heat and reduces how quickly it goes stale or damp. Avoid placing it directly under a tree where heavy sap drip, bird droppings from above, or falling debris will foul the seed constantly.
Use a shepherd's hook pole if you don't have a suitable branch or overhang: these are inexpensive (around $10–20), adjustable, and let you position the feeder exactly where you want it. Add a baffle (a dome or cone barrier) on the pole below the feeder to block squirrels if they become a problem.
Keeping it clean and weather-ready
Plan on cleaning the feeder every 1–2 weeks in warm weather, and every 2–4 weeks in cold weather. Remove the container, dump any old or wet seed, and scrub the dish with a 1:9 bleach-to-water solution (about 1 tablespoon of bleach per 9 tablespoons of water). Rinse thoroughly and let it dry completely before refilling. Wet, spoiled seed is one of the main causes of sick birds at feeders and also accelerates cord degradation.
Inspect the macrame cord each time you clean. Look for fraying, discoloration, or any strands that feel stiff or brittle. Spun polyester and nylon hold up well, but UV exposure and friction against a hook will eventually wear the top loop. If that loop looks thin or abraded, retie it or add a reinforcing wrap of fresh cord before it snaps.
In heavy rain or snow, bring the feeder inside or cover it with a dome weather guard. If you leave it out through winter, shake accumulated snow off promptly so the extra weight doesn't strain the knots. Consider switching to a suet cake or high-fat seed mix in winter since these are less prone to freezing into a clump inside a shallow dish.
Fixing common problems
Sagging or uneven knots
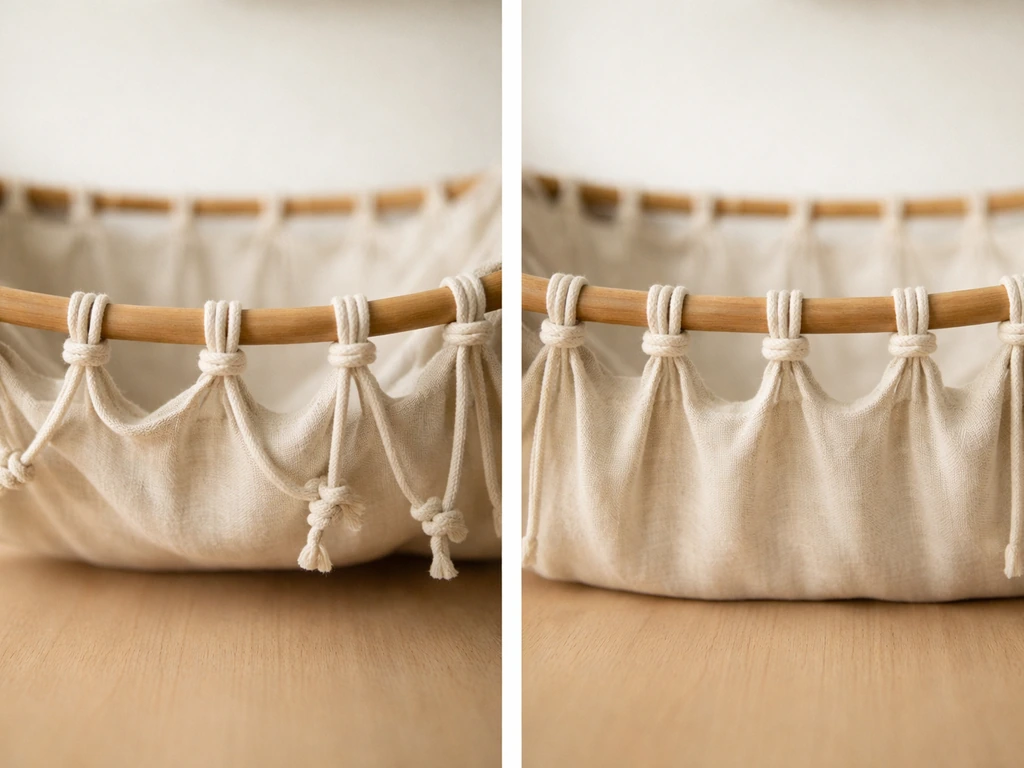
If the cradle sags to one side, the most common cause is inconsistent tension when tying the alternating knots in Step 4. Pull each knot snug immediately after tying, with the feeder hanging vertically so gravity shows you where the tension is uneven. If it's already sagging after setup, untie the affected knots and redo them one at a time, pulling firmly and checking level after each one. It's tedious but takes about 10 minutes and fixes the problem properly.
Seed spillage
Spillage usually comes from one of three sources: a dish that's too shallow, a feeder that swings in wind, or birds that are too large and tip the container while feeding. For a shallow dish, switch to a container with at least a 1-inch rim depth. For wind movement, add a second anchor point by tying a light guide cord from the bottom of the feeder to a nearby stake or post to dampen swinging. For large birds, check whether you're putting out seed that attracts species too big for the feeder size and either switch to a smaller seed like nyjer to attract smaller birds, or upgrade to a larger, heavier dish.
Squirrels and other pests
Squirrels will chew through cord if they're determined, and synthetic cord slows them down but doesn't stop them entirely. A pole-mounted baffle is the most reliable deterrent. If you're hanging from a tree branch, wrap the branch with a smooth metal sleeve or use a cone baffle above the feeder. Avoid placing the feeder near a fence top, deck railing, or any launch point within about 8–10 feet horizontally. For seed-raiding birds like starlings or house sparrows, switching to safflower seed helps because most pest species strongly dislike it while cardinals and chickadees eat it readily.
Mold or slimy seed
This nearly always means moisture is getting in. Either the dish isn't draining, rain is hitting the seed directly, or you're filling it faster than birds are eating it. Try a weather dome (a hanging umbrella-style guard above the feeder), reduce fill quantity so seed turns over in 2–3 days, or switch to a container with small drainage holes drilled in the base so rainwater doesn't pool. If the cord itself smells musty, that's a sign moisture has been sitting in the knots: let the whole feeder dry for 48 hours in the sun before rehanging.
Macrame feeders are genuinely one of the more forgiving DIY feeder builds once you get the knots right: they're easy to adjust, cheap to repair, and look great in a garden. If you enjoy the project and want to expand, the same knotting skills transfer to making a hummingbird feeder cradle to hold a nectar bottle, or a jelly feeder holder for orioles. Start with this one, get comfortable with the square knot pattern, and the variations come naturally.
FAQ
Can I use natural fiber cord like cotton, jute, or hemp for a macrame bird feeder?
You can, but it will usually fail faster outdoors. Natural fibers absorb moisture, swell, and then rot or weaken (especially around knot areas). If you try them anyway, plan on bringing the feeder in often or using it only in a sheltered, low-rain spot, and expect more frequent cord replacement.
How do I choose the right container size so the cradle doesn’t tip or spill?
Aim for a snug fit where the dish sits level even when you lift the feeder by the top loop. Before tying the lower gathering knot, do a dry test with the empty dish and check for rocking. If it rocks, add one more round of alternating knots or choose a dish with a slightly deeper rim so it can’t slide.
What’s the best way to prevent rainwater from pooling in the dish?
Use a container that drains, or modify the dish with drainage holes if the design allows. If you can’t drill holes, reduce how full you fill it and consider a small weather dome so direct rainfall doesn’t hit the seed. Also, empty and dry the dish promptly after storms.
My cord frays near the top loop. Do I have to remake the whole feeder?
Not necessarily. If only the top loop is abraded, you can cut away the worn portion and retie a reinforced gathering loop using fresh cord. Inspect the hook contact point too, if the S-hook edge is sharp it can chew the loop faster.
How much should I trim the loops and tassel ends before sealing?
Keep enough length to stop slipping, usually 3 to 4 inches on the hanging loop and about 4 to 5 inches on the tail ends. Seal cut ends fully, then tug firmly to confirm nothing loosens. Over-trimming can reduce friction on the knot and lead to loosening.
Can I hang this feeder from a branch instead of a hook or shepherd’s hook?
Yes, but branches sway and wind can increase swinging and spillage. To reduce movement, add a second anchor point (a short guide cord from the feeder bottom to the support) and avoid locations where cats or squirrels can launch from nearby rails or fence tops.
Will this feeder work in winter if it freezes?
It can, but shallow dishes can freeze seed into a solid clump and slow feeding. In cold weather, consider switching to higher-fat foods or suet, and shake off snow quickly so extra weight doesn’t stress knots. If temperatures are extreme where you live, bring it in during storms.
How do I clean a seed macrame feeder without soaking the knots?
Remove the container and clean only the dish. Use a bleach-water solution to scrub the dish, rinse thoroughly, and fully dry it before refilling. Avoid pouring liquid over the cradle, if knots get wet, dry the entire feeder for at least a day before rehanging.
How do I stop squirrels from chewing the cord or reaching the container?
A baffle on the hanging pole is the most reliable option, a dome or cone placed below or around the feeder creates a barrier they cannot climb. Also, keep the feeder away from strong launch points within about 8 to 10 feet, and use a food that discourages raiders like safflower.
Why does the feeder swing even though the cradle looks tight?
Swing usually comes from slight differences in knot tension or a top loop that is not centered. Hang it vertically and re-check that the cradle distributes weight evenly. If needed, untie and redo only the knots that are causing asymmetry rather than redoing the entire piece.
Can I lower or remove the feeder for refilling without taking it apart?
Yes, use a swivel hook or quick-link connector at the top loop. That lets you drop or detach the feeder while keeping the macrame knots intact. The connector also reduces twisting, which can reduce wear where the loop rubs the hook.
What should I do if birds aren’t using the feeder after I install it?
First, confirm it is positioned near cover (shrubs or trees) and at a comfortable reach height. Try a seed that matches your target species, for example nyjer for goldfinches or safflower to discourage starlings. Also, give it a few days, birds often need time to investigate a new feeder location.
Next Article
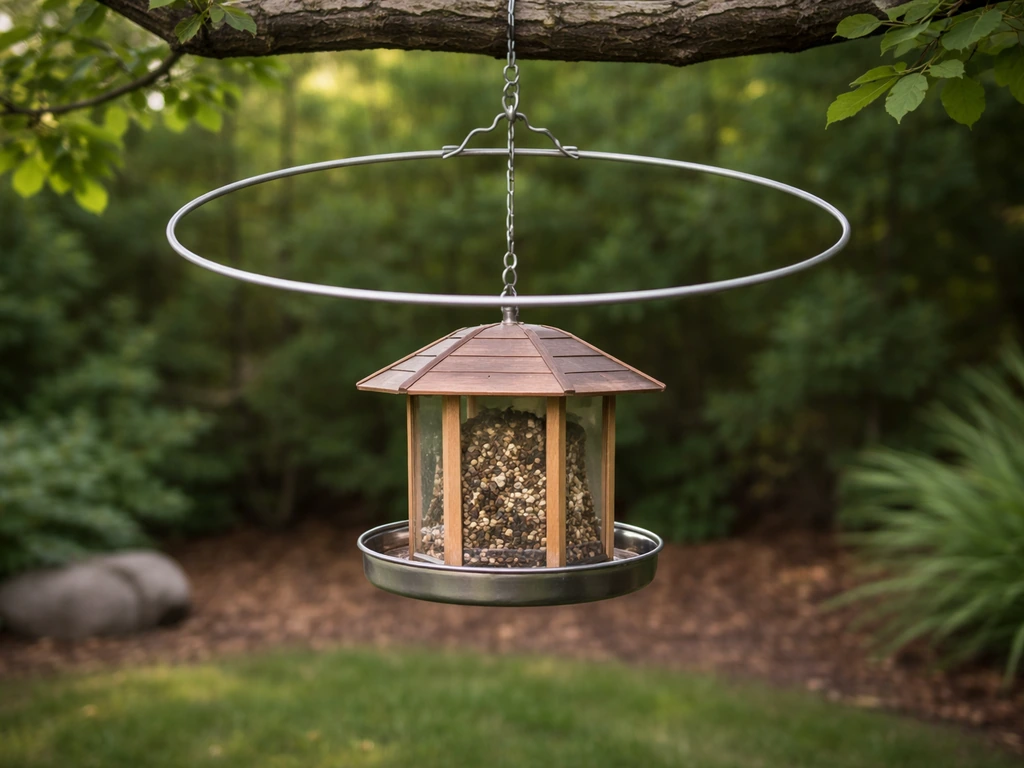
How to Make a Magic Halo for Bird Feeders
Build a DIY magic halo ring for bird feeders with secure mounting, safe hanging, placement tips, and maintenance for few