Pick up a bag of black-oil sunflower seed, hang a simple tube or hopper feeder about 10 feet from your nearest window and at least 10 feet from any tree or shrub, and you can realistically have birds visiting within three to seven days. That is genuinely all it takes to start. Everything else, including pest-proofing, cleaning routines, and scaling up to multiple feeders, comes after you get that first setup in the ground.
How to Start a Bird Feeder: Beginner Setup Guide
Marcus Brennan
29 May 2026
Decide what birds you want to attract (and match your feeder and food)
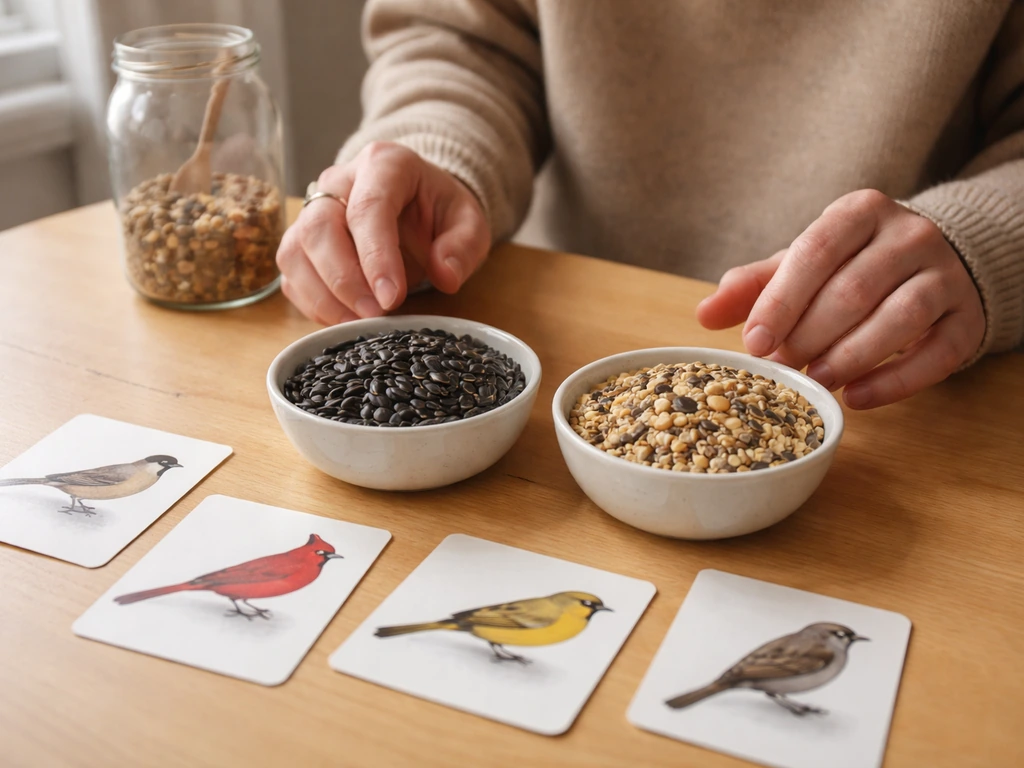
Before you buy anything, spend five minutes thinking about which birds you actually want in your yard. This matters because different birds eat differently, and buying the wrong seed for the wrong feeder is the number one reason beginners get discouraged early on.
For most beginners, black-oil sunflower seed is the place to start. It attracts the widest variety of popular backyard birds including cardinals, chickadees, finches, nuthatches, woodpeckers, and jays. It works in almost every feeder type and is easy to find at hardware stores, garden centers, and even grocery stores. If you want to branch out from there, nyjer (thistle) seed draws goldfinches and pine siskins specifically, peanuts appeal to jays and woodpeckers, and suet cakes are excellent for woodpeckers, nuthatches, and chickadees during cooler months. One important note on suet: only offer it in cool weather. In summer heat it goes rancid quickly and can actually harm birds.
If you are hoping to attract fruit-eating birds like robins, bluebirds, waxwings, or mockingbirds, know that those species rarely visit seed feeders at all. They are drawn to native plantings and moving water, not a tube feeder full of sunflower. Keep your expectations realistic and match your goals to what feeders can actually deliver.
| Target Bird | Best Food | Best Feeder Type |
|---|---|---|
| Cardinals, chickadees, nuthatches | Black-oil sunflower seed | Hopper or platform feeder |
| Goldfinches, siskins | Nyjer (thistle) seed | Tube feeder with small ports |
| Woodpeckers, jays | Peanuts, suet (cool weather) | Suet cage or hopper feeder |
| Ground-feeding sparrows, juncos | Millet, sunflower chips | Low platform or ground tray |
| Hummingbirds | Nectar (4:1 water to white sugar) | Dedicated hummingbird feeder |
Choose the right feeder type and starter setup
You do not need an expensive feeder to start. If you are still figuring out how to buy a bird feeder, start with the feeder type that matches the birds you want to attract. What you need is one that matches the birds you want and that you can actually clean and maintain without it becoming a chore.
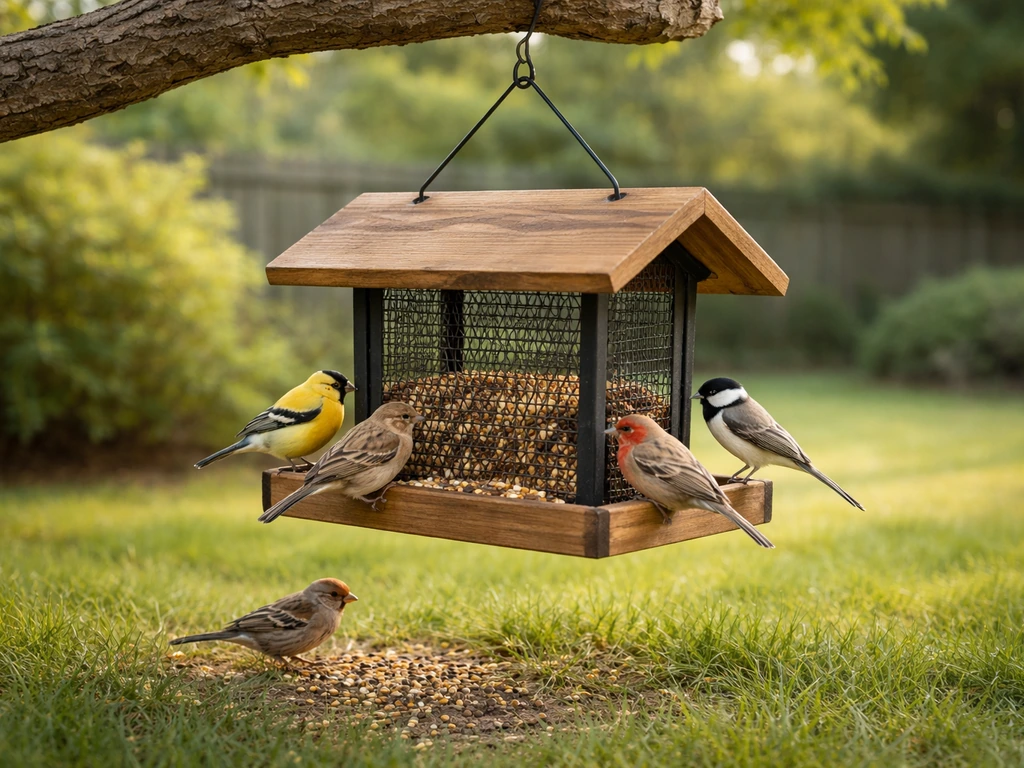
Hopper feeders are the most beginner-friendly option for most yards. They hold a good volume of seed, have walls and a roof that keep the seed dry, and attract a wide range of species. Project FeederWatch defines feeder types such as hopper feeders, tube feeders, platform feeders, and suet feeders, with specific features for each. Tube feeders are slightly more restrictive in a good way: because seed only sits at the small port openings, larger animals have a harder time getting a beak in. Platform feeders are basically flat raised trays and work well for ground-feeding birds like sparrows and juncos that feel uncomfortable perching on a narrow tube. Suet feeders are usually just a simple wire cage that holds a suet block, and they are best mounted several feet off the ground on a tree trunk or post so woodpeckers and nuthatches can cling while feeding.
For a first-time setup, I recommend starting with a single hopper feeder filled with black-oil sunflower seed. It is the closest thing to a universal beginner setup that exists. Once you see what birds show up, you can add a tube feeder with nyjer or a suet cage to target specific species. Trying to run three feeder types at once in week one just creates more maintenance and more chances for things to go wrong.
Step-by-step: assemble or build a simple feeder at home
You have two real options here: buy a feeder and put it together, or build one from stuff you probably already have. Both work. The DIY route costs almost nothing and gets kids involved easily. The store-bought route is faster if you want birds this week and do not want a project.
Option A: Quick pinecone feeder (zero tools, under 10 minutes)
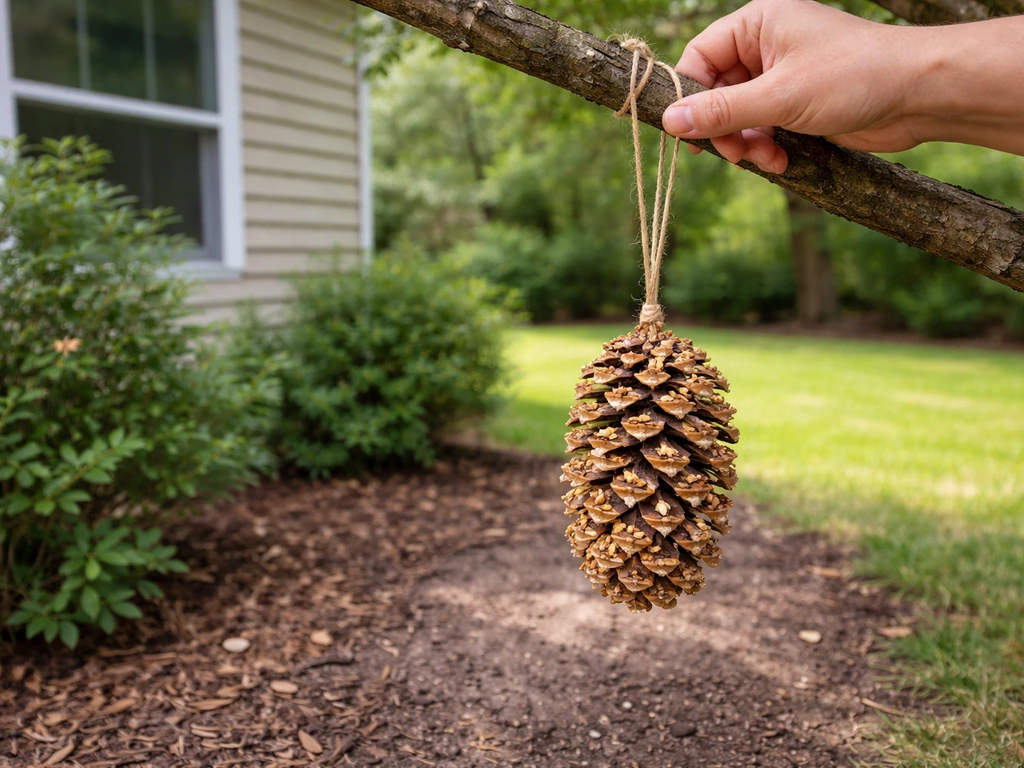
This is genuinely the fastest feeder you can make, and it works. Go outside, find a large pinecone (or pick one up at a craft store for about $1), and you are most of the way there.
- Tie a 12-inch length of twine or string tightly around the top of the pinecone, leaving enough length to hang it.
- Spread peanut butter, almond butter, or sunflower butter generously over the scales of the pinecone. Use a butter knife or your fingers. Get it into the gaps.
- Pour black-oil sunflower seed or a mixed seed blend onto a plate or tray.
- Roll the peanut butter-coated pinecone through the seeds, pressing lightly so the seeds stick into the gaps. Rotate it until the whole surface is coated.
- Hang it from a tree branch or shepherd's hook at least 5 feet off the ground.
The downside of pinecone feeders is that they do not last long, especially in rain or heat, and squirrels will find them fast. Think of this as a starter feeder to see if birds are in your area while you set up something more durable.
Option B: Plastic bottle or milk jug feeder (about 20 minutes)
A clean 2-liter plastic bottle or a rinsed milk jug makes a surprisingly functional tube-style or hopper-style feeder. Here is what you need and how to put it together:
- 1 clean 2-liter bottle or half-gallon milk jug
- 2 wooden dowels or sturdy sticks (about 10 inches long each) for perches
- Scissors or a utility knife
- Twine or wire for hanging
- Black-oil sunflower seed
- Rinse and dry the bottle or jug completely. Any moisture left inside will mold your seed.
- Poke two small holes opposite each other near the bottom of the bottle, just large enough to push a wooden dowel through. Push the dowel through so it sticks out about 3 inches on each side. These are your perches.
- About an inch above each perch, cut a small seed port opening, roughly the size of a nickel. This is where seed will spill out as birds eat. Do not cut it too large or seed will pour out in the rain.
- Repeat steps 2 and 3 on the other side of the bottle at a slightly higher point so you have two feeding stations.
- Fill the bottle with seed through the top opening, then cap or cover it to keep rain out.
- Tie twine around the neck of the bottle or through a hole poked in the cap, and hang it up.
Option C: Assembling a store-bought feeder
Most hopper and tube feeders from hardware or garden stores come mostly assembled and just need a hanging wire or hook attached. Read the included instructions for your specific model. If you pick up a feeder from a brand like Roamwild, those are designed with easy assembly and disassembly in mind specifically to make cleaning simpler. If you are using a Roamwild feeder, follow the steps for assembling and disassembling it so the seed ports and lid fit correctly. Check that any locking tabs are fully clicked into place, that the seed ports open and close properly, and that the roof or lid fits securely before you hang it.
Where to hang it: location, height, and visibility
Placement is where most beginners make mistakes, and it directly affects both whether birds find the feeder and whether you end up with a squirrel problem from day one.
Window distance is the first thing to figure out. The danger zone for window strikes is roughly three to thirty feet from a window: birds can build up enough speed in that range to fatally hit the glass. The safest options are to place your feeder either very close to a window (within three feet, where birds cannot build momentum) or at least ten feet away. About ten feet from the nearest window is a practical starting point for most backyards.
Distance from trees and shrubs matters just as much for pest control as for bird safety. A pole-mounted feeder should be at least 10 feet from the nearest tree, shrub, fence, or structure. Squirrels can jump surprisingly far, and anything closer than that essentially gives them a launching pad. If you are hanging from a tree branch, you will need a baffle (more on that in the pest section) to have any real defense.
Height depends on feeder type. For a standard hopper or tube feeder on a pole, aim to have the feeder sitting at least 5 to 6 feet off the ground, with the base of the pole baffle at least 4 feet up. Suet feeders for woodpeckers work better mounted on or near a tree trunk several feet up. Ground-level platform feeders can sit low, but keep them in an open spot so cats and other predators cannot sneak up on feeding birds.
Visibility to you matters too. Put the feeder somewhere you can actually see it from a window you look through regularly. If you place it at the back corner of the yard and forget about it, you will not notice when it runs empty, and you will miss a lot of the enjoyment. Pick a spot that lets you watch from the kitchen or a sitting area.
How to fill, maintain, and monitor feeding safely
Getting the feeder up is the easy part. Keeping it clean and full is what actually makes birds stick around.
Filling the feeder
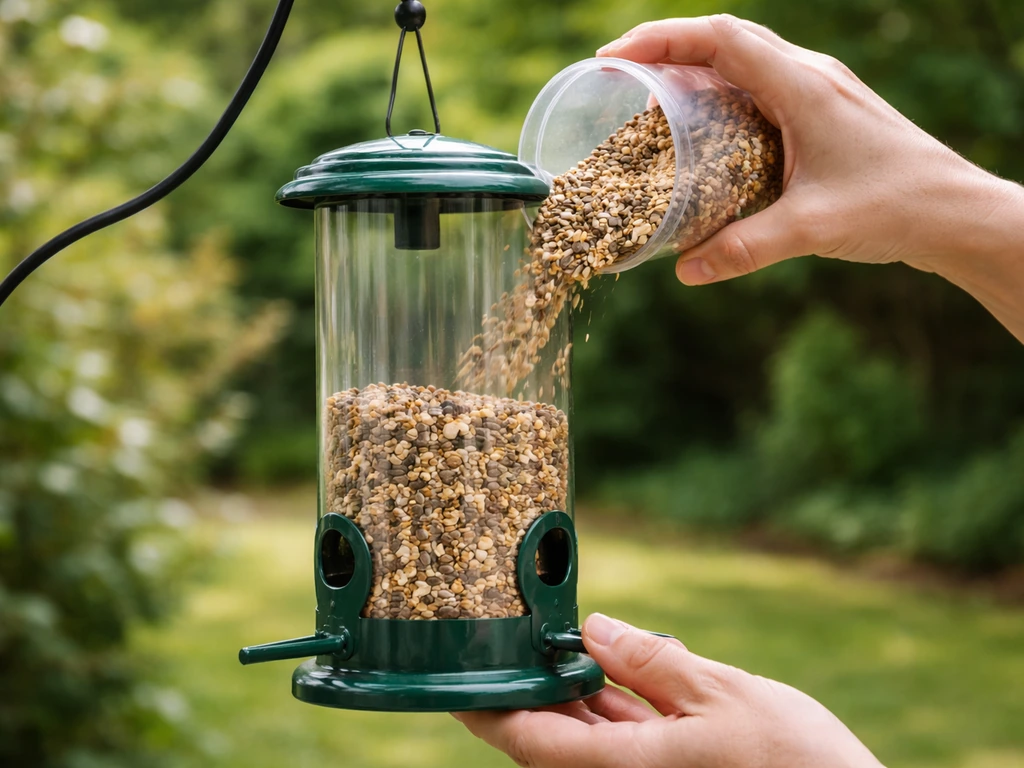
Only fill the feeder about two-thirds full to start, especially in humid weather. Overfilling means seed at the bottom sits for longer and gets damp, which leads to mold and clumping. Check the feeder every two to three days in the first week, not just to refill but to see how quickly birds are going through the seed. If the seed barely moves after five days, the feeder location or type may need adjusting.
Cleaning routine
This is non-negotiable. A dirty feeder spreads disease among birds and is one of the main reasons feeders get abandoned by the local flock. Every other week is a solid baseline for seed and suet feeders. In hot or humid weather, clean more often, roughly every week. Hummingbird nectar feeders need to be emptied and cleaned every day or every other day in hot weather since nectar ferments and grows mold quickly.
To clean a seed feeder, take it apart, dump out any old seed and debris, and scrub all surfaces with warm soapy water. Then soak or wipe down with either a diluted bleach solution (1 part bleach to 9 parts water) or a vinegar-and-water solution to sanitize. Rinse thoroughly and, critically, let the feeder dry completely before refilling. Putting seed into a damp feeder just restarts the mold problem.
Monitoring whether birds are finding it
Give your feeder at least a week before concluding birds are not interested. Birds often take three to seven days to discover a new feeding station, especially if you are putting one out for the first time or if the location changes. Check for signs of activity like seed shells on the ground below the feeder, footprints in soft soil nearby, or brief glimpses of birds perching then flying off. If nothing happens after ten days, that is when it is worth troubleshooting location or seed type.
Pest-proofing and troubleshooting common problems
Here is the honest truth: something will go wrong in the first few weeks. The most common issues are squirrels raiding the feeder, seed spilling and rotting on the ground, rain clogging ports, and birds simply not showing up. All of these are fixable. If you run into issues with your feeder or birds are not using it, this guide on how to fix bird feeder problems will help you troubleshoot quickly All of these are fixable..
Squirrels
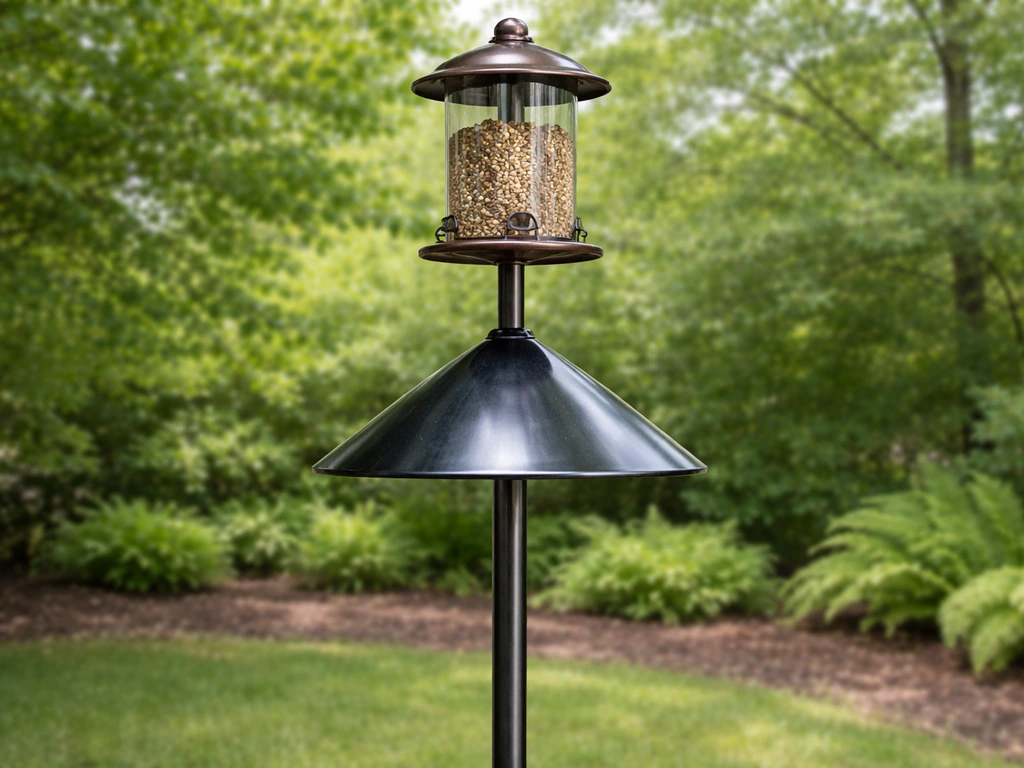
Squirrels are persistent and smart. The only reliable approach combines distance and physical barriers. Mount your feeder on a smooth metal pole (squirrels cannot grip it as easily as wood), and attach a pole baffle at least 4 feet off the ground. The baffle needs to extend out at least 2 feet in diameter so squirrels cannot reach around it. The feeder also needs to be at least 8 to 10 feet horizontally from anything they can jump from, including fences, tree trunks, and eaves. Get all three elements right and you actually have a squirrel-resistant setup. If you are dealing with persistent pests, follow a bear-proof feeder approach too by using hardware that is designed to prevent bears from accessing the food. Get only one or two right and the squirrels will find the gap.
If squirrels are a persistent problem and you want to avoid the baffle-and-pole setup, weight-activated squirrel-proof feeders are a legitimate solution. These close off the seed ports when anything heavier than a typical songbird lands on them. They cost more upfront but require less engineering on your part.
Rats and rodents
Seed spilled on the ground is the main attractant for rats. Use a feeder with a catch tray to reduce spillage, and clean up fallen seed regularly. A squirrel-proof style feeder that minimizes seed loss goes a long way here. If you see signs of rodent activity, remove the feeder for a few days and clean the ground beneath it before rehanging.
No birds showing up
If you have waited a full week and nothing is visiting, run through this checklist before giving up:
- Is the feeder in a spot with some nearby cover, like a shrub or tree within 10 to 15 feet, that birds can use as a staging area before flying to the feeder?
- Is the seed fresh? Old or stale seed loses smell and appeal. If the bag has been open for months, start with a fresh one.
- Is the feeder in a highly trafficked, noisy area? Feeders near frequently used doors, AC units, or road traffic take longer to get discovered.
- Are cats or dogs visible near the feeder regularly? Birds will avoid the area if they sense a predator threat.
- Have you tried moving the feeder 10 to 15 feet in a different direction? Sometimes a small change makes a big difference.
Clogged ports and wet seed
Tube feeders can clog when seed hulls accumulate at ports or when moisture gets in and clumps the seed. Shake the feeder gently before each refill to break up clumps. If ports are blocked, use a small brush or a straightened paper clip to clear them. Going forward, only fill to two-thirds capacity so seed turns over more quickly before it can get damp.
Next steps: seasonal adjustments and scaling up
Once you have a working setup and birds are visiting reliably, the natural next step is adjusting for the seasons. Bird feeding is not a set-it-and-forget-it hobby. What works in fall and winter needs to change as spring arrives.
In spring and summer, birds rely heavily on insects to feed themselves and their chicks, so they visit seed feeders less often. This is normal. Keep your seed fresh and do not overfill during these months since seed will sit longer. Spring is also when hummingbirds return in most of the US, so a nectar feeder becomes worthwhile if you want to attract them. Adding mealworms in a platform feeder in spring and summer draws bluebirds and robins that would otherwise never visit a seed station.
In fall and winter, ramp back up. This is when birds depend more heavily on feeders, natural food sources get scarce, and activity at your setup will peak. Switch to higher-fat foods like suet cakes for woodpeckers and chickadees. Keep the feeder stocked consistently because birds in cold weather learn to depend on reliable food sources and will factor yours into their daily routes.
When you are ready to scale up, add one feeder type at a time rather than overhauling everything at once. A nyjer tube feeder for goldfinches is a satisfying addition after you have the main sunflower setup humming along. If you want to go further, a dedicated suet cage on a nearby tree and a low platform feeder for ground-feeding sparrows can turn your yard into a genuinely diverse feeding station without much extra effort.
If you are planning to expand your setup or want to troubleshoot a specific feeder model, it is also worth knowing how to take apart and reassemble your feeders properly so cleaning stays manageable as you add more stations. Once you know how to take apart a bird feeder, you can clean ports, remove old seed, and reassemble everything correctly so it stays safe and effective. Keeping each feeder type clean and pest-resistant is the real long-term work of backyard bird feeding, and getting those habits right early makes everything easier as your setup grows.
FAQ
How long should I leave a new bird feeder up before deciding it is not working?
Give it at least 10 days, since birds often need repeated sightings to trust a new station. During that window, check for small activity signs like seed husks, short bird visits, or footprints under the feeder, then troubleshoot only after you have observed nothing for about a week.
What is the best seed to start if I am not sure which birds are around?
Black-oil sunflower is usually the safest first choice for variety, but verify you are using seed intended for feeders (not bird mix that is mostly fillers). If you see mostly sparrows, try switching to a seed that offers higher energy or adjust to a platform feeder for ground-feeding species.
Is it okay to use multiple seed types in the same feeder right away?
Usually no for beginners, because mixed seeds can behave differently (some bridge, others clog ports, and some mold faster). Start with one seed and one feeder type for 1 to 2 weeks, then add targeted feeders after you confirm which birds are actually arriving.
How full should I keep the feeder to prevent mold?
Start around two-thirds full and do not refill to the brim. In humid conditions, leaving extra seed sitting longer increases clumping and mold risk, so top off only what birds will likely consume before the next check.
What should I do if birds start visiting but the seed is still damp or clumping?
Stop overfilling and reduce the time seed sits. Shake the feeder to loosen hull buildup and clumps, clean and dry the unit promptly, and consider switching to a feeder style with better roof coverage or port design if moisture is getting in.
Can I put a feeder close to a window if I want more bird activity to watch?
Yes, but the placement matters. Keep it either very close (within about three feet) so birds cannot build speed, or use the more conservative option of at least 10 feet from the window. If you prefer mid-range distances, use bird-safe window decals or screens to reduce strike risk.
How high should a hopper or tube feeder be for best results and safety?
For pole-mounted hopper or tube feeders, aim for roughly 5 to 6 feet off the ground. Also ensure the baffle base is at least about 4 feet high, since squirrels use height to launch and reach around barriers.
Do I need a baffle if squirrels are not showing up yet?
If you are within jumping distance of trees, shrubs, fences, or eaves, plan for it now. It is easier to prevent problems than to fix them after squirrels learn the route, and the same distance rule that protects from squirrels also supports safer placement for birds.
How often should I clean a bird feeder in different weather?
For seed and suet feeders, a typical baseline is every two weeks, and about weekly in hot or humid weather. For nectar feeders, clean daily or every other day in heat due to faster fermentation and mold growth.
Can I clean a feeder without taking it completely apart?
Not reliably. To remove old seed and debris and to sanitize ports and interior surfaces, you need to disassemble the feeder. If your model is hard to break down, choose a design that is intended for easy tool-free cleaning before expanding.
What is the safest way to clear clogged feeder ports?
After letting the feeder empty, gently clear ports with a small brush or a straightened paper clip, then rinse and dry fully. Avoid forcing hulls so hard that you damage the port openings, and return to two-thirds fill so clogs are less likely.
My feeder is attracting birds, but I also see more rodents. What should I change?
Reduce fallen seed by using a feeder with a catch tray if you are dealing with spillage. Clean up seed beneath the feeder promptly, and if rodent signs persist, remove the feeder for a few days, thoroughly clean the area, and then rehang with tighter spill control.
Should I stop feeding in spring and summer?
Not necessarily, but visits often drop because insects become abundant. Keep seed fresh, avoid overfilling, and consider adding spring and summer options like mealworms in a platform feeder if you want to attract insect-feeding songbirds.
Do suet feeders work year-round?
Suet is best offered only during cooler months. In summer heat, blocks can go rancid quickly, and that can harm birds. Use the correct seasonal timing rather than keeping suet available all year.
How do I scale up without making maintenance overwhelming?
Add one feeder type at a time after your original setup is stable. Confirm which birds are using the first feeder before adding a second, then keep cleaning routines manageable by using feeder designs that disassemble easily and by not running three new setups simultaneously.