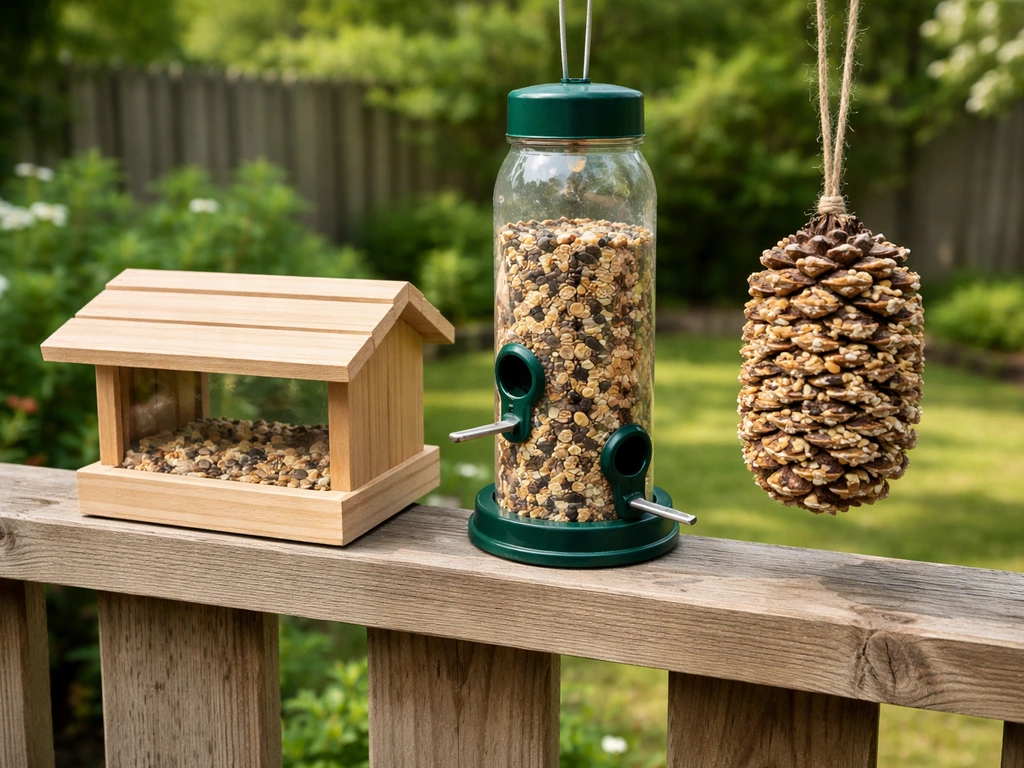
You can build a functional bird feeder in an afternoon using wood scraps, a plastic bottle, or even a pinecone from the backyard. The build itself is not complicated. The part most people get wrong is the placement, the seed choice, or the maintenance routine afterward. This guide covers all three: how to build several styles of feeders from scratch or common household items, how to design them for small birds, and how to keep the whole setup working once it is out there.
How to Build a Bird Feeder: Simple DIY Steps for 3 Types

Marcus Brennan
17 Apr 2026
Picking the right feeder type before you build
The feeder type you build should match the birds you want to attract and the space you have. There are a few main categories worth knowing before you grab a saw or a plastic bottle.
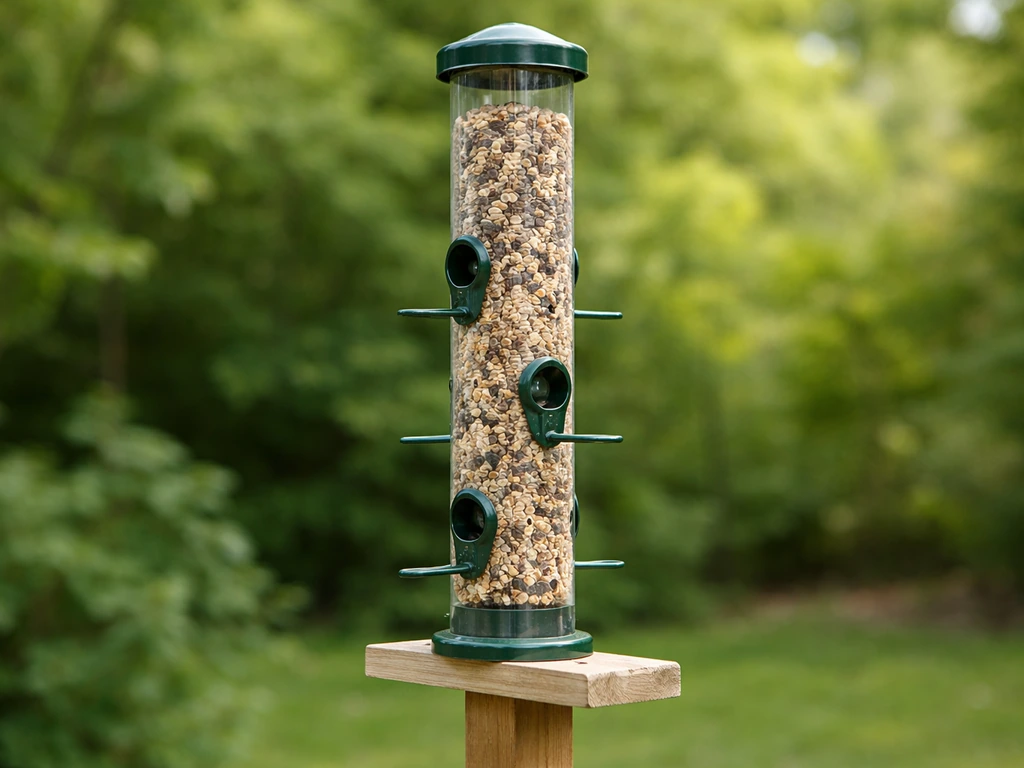
- Tube feeders: cylindrical containers with small ports and perches, ideal for finches, chickadees, and other small birds. Great for nyjer or black-oil sunflower seed.
- Hopper feeders: enclosed box-style feeders with a roof and side openings. They hold more seed and protect it from rain reasonably well.
- Platform (tray) feeders: open flat surfaces. Easy to build and used by a wide range of species, but seed gets wet and can blow off more easily than with enclosed designs.
- Ground feeders: low trays or flat boards placed directly on or near the ground, attracting doves, sparrows, juncos, and towhees.
- Suet cage feeders: simple wire cages that hold suet blocks, loved by woodpeckers and nuthatches.
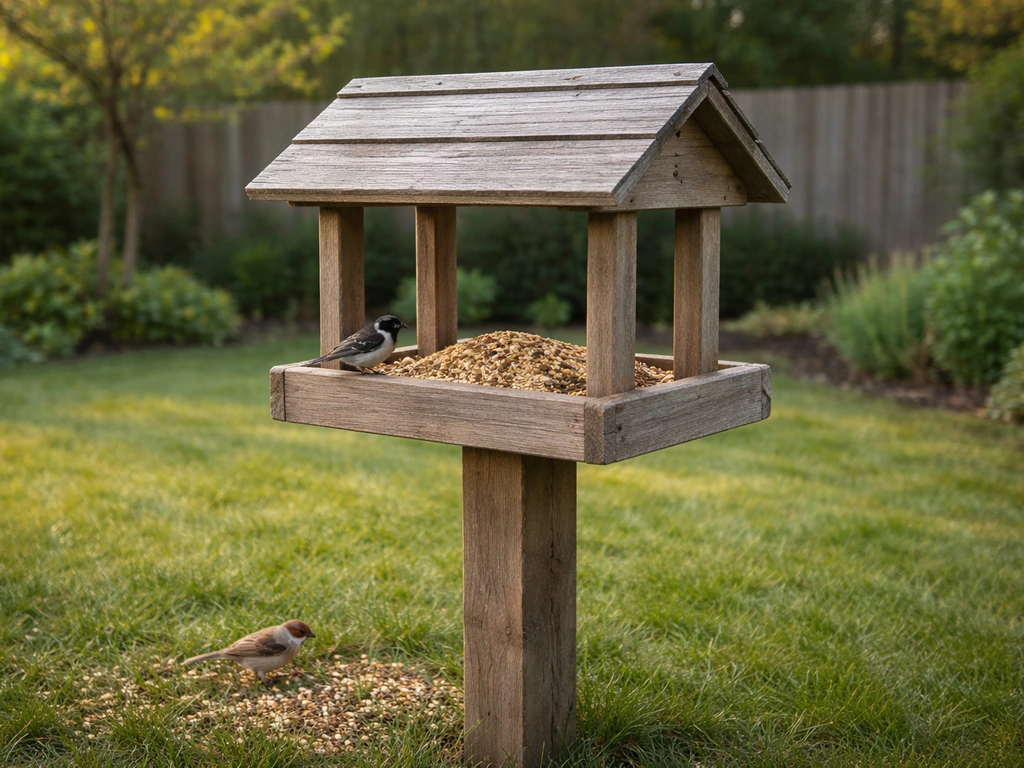
- Birdhouse feeder combos (gazebo style): a feeder with a fully enclosed house-style roof and walls, sometimes with a center hopper. Great for weather protection and a handsome yard feature.
For small birds specifically, tube feeders with short perches and small port openings are your best bet because larger, more aggressive species have trouble gripping and dominating them. If you want to attract the widest variety of visitors, a platform bird feeder is one of the simplest builds you can do and welcomes almost every common backyard species. For a more organized multi-feeder yard, you might eventually want to look at how to build a bird feeding station that supports several feeder styles at once.
Materials and tools you will actually need
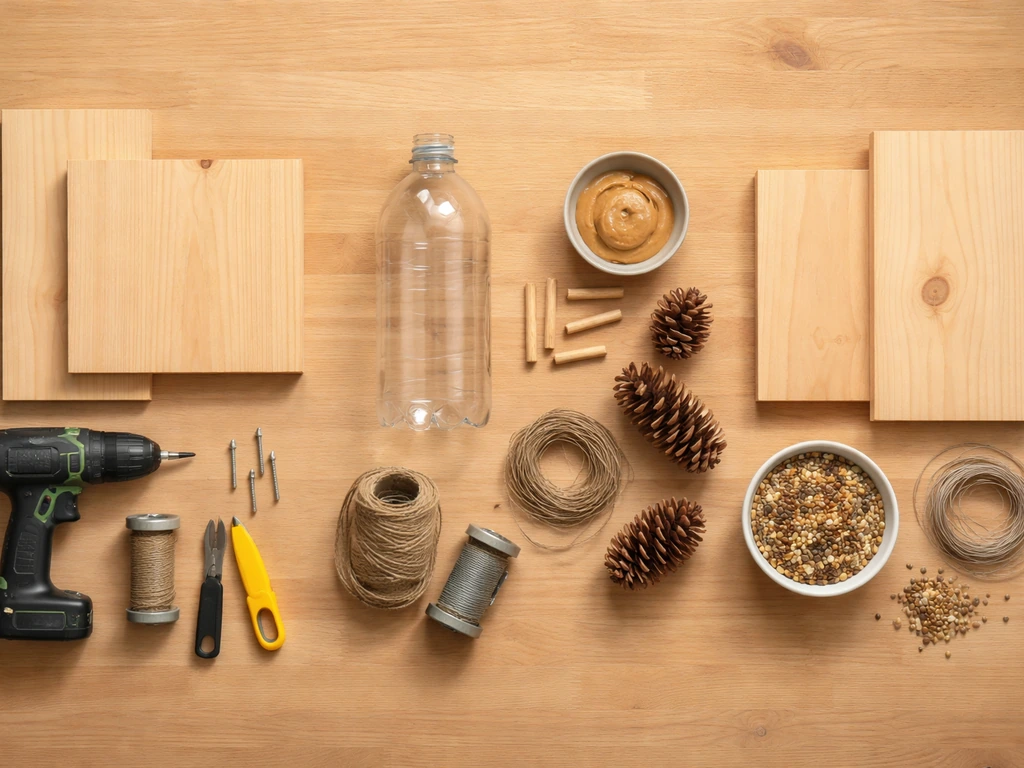
What you need depends on what you are building. Here is an honest breakdown by project type, from simplest to most involved.
For a simple wood platform or hopper feeder
- Cedar or pine board, 1x6 or 1x8 (cedar resists rot and is worth the small extra cost)
- Wood screws or galvanized nails (1.5 to 2 inch)
- Sandpaper (medium grit)
- Drill with bits, or a hammer
- Saw (handsaw works fine for small cuts)
- Exterior wood glue (optional but helps joints)
- Eyebolt or screw hook for hanging, plus paracord or chain
- Non-toxic, water-based exterior paint or linseed oil finish (optional)
For a plastic bottle or milk jug feeder
- Clean 1- or 2-liter plastic bottle, or a clean plastic milk jug
- Two wooden dowels or sticks (about 10 inches long, 1/4 inch diameter)
- Scissors or a sharp craft knife
- Twine, wire, or zip ties for hanging
- A permanent marker for marking cut lines
- Optional: paint or stickers to decorate (use non-toxic paint only)
For a pinecone feeder
- One large, open pinecone
- Peanut butter or suet (room temperature for easier spreading)
- Birdseed mix or nyjer seed
- A plate or shallow tray for rolling
- Twine or string for hanging (about 18 inches)
- Optional: a butter knife or spoon for spreading
You do not need expensive tools for any of these builds. The wood feeder is the most involved and takes about one to two hours for a first-timer. The bottle and pinecone builds take fifteen to thirty minutes each, making them perfect rainy-afternoon projects or something to do with kids.
Step-by-step build instructions
Build 1: Simple wood platform feeder (from scratch)
- Cut your base: Cut a piece of cedar or pine to roughly 12 x 12 inches. This is your tray floor. Sand the edges smooth.
- Add a lip: Cut four strips about 1 inch wide and nail or screw them around the perimeter of the base, leaving small gaps at the corners for drainage. Water pooling in the tray spoils seed fast.
- Drill drainage holes: Even with corner gaps, drill four or five small holes (about 1/4 inch) across the base floor just in case.
- Add a hanger or post mount: Drill a hole near each corner and thread paracord through to tie the feeder to a branch or hook. Or attach a center eyebolt on the underside if mounting to a pole.
- Sand everything smooth so birds do not snag feathers on rough edges.
- Optional finish: A coat of linseed oil protects the wood without introducing toxins. Let it dry fully before adding seed (at least 24 hours).
- Fill and hang: Add about a cup of black-oil sunflower seed to start.
Build 2: Plastic bottle tube feeder
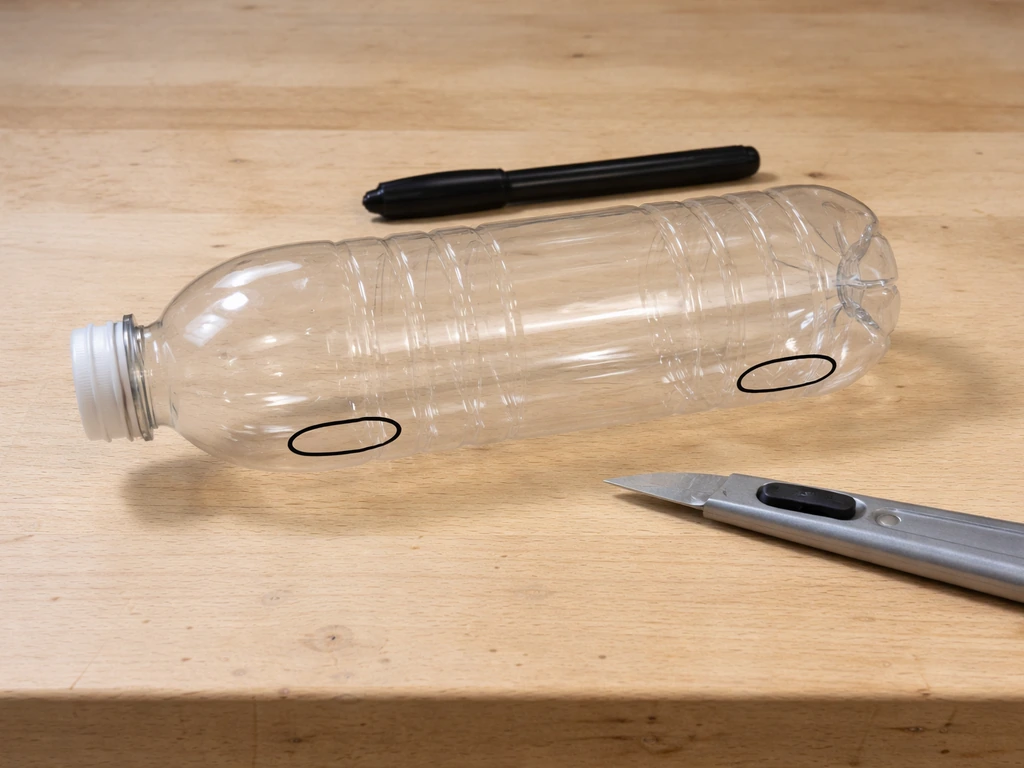
- Clean the bottle thoroughly and let it dry completely.
- Mark two small oval or circular openings on opposite sides of the bottle, about 2 inches from the bottom. Make them roughly 1 inch wide and 1.5 inches tall.
- Cut out the openings carefully with a craft knife. Smooth any sharp plastic edges with sandpaper or a lighter flame (briefly).
- Poke a small hole just below each opening, wide enough for your dowel. Push the dowel straight through both holes so it sticks out about 2 inches on each side to form a perch.
- For a second set of ports, repeat 90 degrees around the bottle, offset a few inches higher.
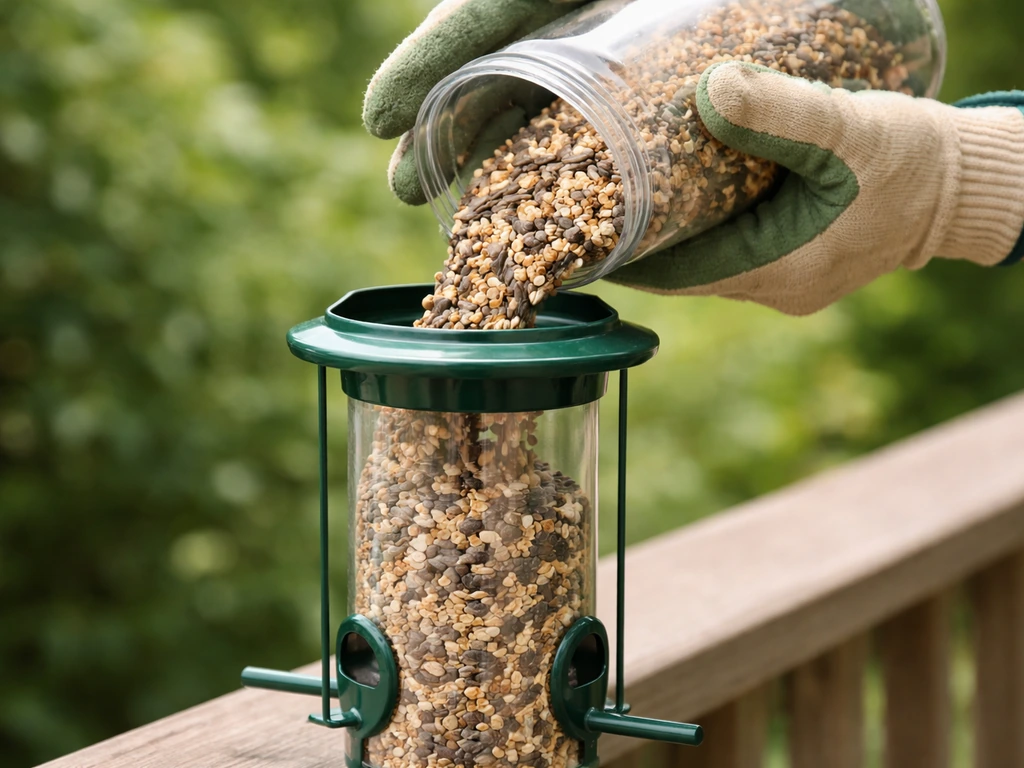
- Fill the bottle with nyjer or black-oil sunflower seed before sealing the cap.
- Tie twine around the bottle neck tightly and hang from a branch or hook.
Build 3: Milk jug feeder
- Rinse the jug and let it dry fully.
- Cut a large rectangular opening on one or two sides, starting about 3 inches up from the bottom (leave the bottom intact as a seed reservoir).
- Smooth the cut edges. A small dowel pushed through the jug just below each opening creates a perch.
- Punch a hole through the handle or the cap area and thread twine for hanging.
- Fill with seed and hang. Milk jugs are not as durable as wood or bottles, so expect to replace them every season.
Build 4: Pinecone feeder

- Tie your string securely around the top of the pinecone before you get your hands messy.
- Using a butter knife or spoon, press peanut butter or softened suet into the gaps between the scales of the pinecone. Cover as much surface area as you can.
- Pour birdseed onto a plate or tray, then roll the peanut butter-coated pinecone in the seed, pressing gently so the seeds stick.
- Hang immediately from a branch. The pinecone feeder works best in cooler weather because peanut butter can go rancid quickly in heat.
This pinecone method comes from activity guides used by wildlife educators, and it works remarkably well for chickadees, nuthatches, and titmice. It is not a long-term feeder, but it is a great way to get birds comfortable with a new feeding spot while you build something more permanent.
Building a birdhouse feeder combo (gazebo style)
A gazebo or birdhouse-style feeder is essentially a hopper feeder dressed up with a peaked roof, decorative posts, and sometimes side panels with arched openings. It looks great and it genuinely protects seed better than an open tray. This is not a beginner project, but it is very doable in a weekend.
- Base and tray: Start with a 14 x 14 inch base, same as the platform build but slightly larger. Add a 1-inch lip all around with corner drainage gaps.
- Center hopper box: Build a small rectangular box (about 6 x 6 x 8 inches tall) from 1/2-inch cedar. Cut seed ports (about 1.5 x 2 inches) on each side near the bottom. This box will sit centered on the tray and gravity-feed seed as it is consumed.
- Roof: Cut two triangular gable ends and two rectangular roof panels. For a gazebo look, cut six equal roof panels and arrange them in a hex pattern. Secure at the peak with a central dowel or decorative finial.
- Posts: Four corner posts (about 8 inches tall, 3/4-inch square stock) give the feeder its gazebo silhouette and support the roof overhang.
- Hanging or mounting: Attach a sturdy eyebolt through the roof peak for hanging, or add a 1/2-inch hole in the base center to mount on a pole.
- Finish: Sand everything smooth, seal with linseed oil or exterior non-toxic paint, and let cure before use.
If you want to take this concept further and combine a nesting box with a feeding station, the design considerations change significantly. Entrance hole size becomes critical: a bluebird house needs a 1.5-inch hole, chickadees need about 1.125 inches, and wrens work with a 1.0-inch opening. Getting this wrong means the wrong species move in or nothing uses it at all. For a detailed walkthrough of that combined build, check out how to make a platform bird feeder with roof, which covers the roofed style in more depth.
Designing for small birds: ports, perches, and seed
If your goal is specifically attracting small birds like finches, chickadees, nuthatches, and wrens, a few design choices make a real difference. Small port openings (3/8 to 1/2 inch for seed feeders) let small birds reach the seed while making it awkward for larger, more aggressive species like starlings and grackles. Short perches (under 2 inches) have the same effect: small birds can grip them easily, while larger birds cannot land comfortably.
Seed choice matters just as much as hardware. Black-oil sunflower seed is the single broadest attractor, bringing in the widest variety of common backyard birds. For finches specifically, nyjer (thistle) seed in a tube feeder with tiny ports is the go-to. Avoid millet if you are seeing a lot of house sparrows or cowbirds, as those species are strongly drawn to it. Peanuts are popular with jays, woodpeckers, and larger birds but will also pull in squirrels in a hurry.
| Seed Type | Best For | Feeder Style | Watch Out For |
|---|---|---|---|
| Black-oil sunflower | Widest variety of small and medium birds | Tube, hopper, platform | Squirrels also love it |
| Nyjer (thistle) | Finches (goldfinch, siskin, redpoll) | Tube with small ports | Must stay dry or molds quickly |
| Safflower | Cardinals, chickadees | Hopper or tube | Squirrels tend to ignore it (a plus) |
| Peanuts (shelled or whole) | Jays, woodpeckers, nuthatches | Mesh tube or platform | Strong squirrel magnet |
| White millet | Sparrows, doves, juncos | Ground or platform tray | Also attracts house sparrows, cowbirds |
For the feeder openings themselves, tube-style feeders designed for nyjer often have ports as small as 1/16 inch. For a general small-bird seed feeder, aim for ports around 3/8 to 1/2 inch and perches no longer than 1.5 to 2 inches. These small adjustments do more to control which birds show up than almost anything else in the design.
Where to hang or place your feeder
Placement is where a lot of first-time feeders fail. You can build the best feeder in the neighborhood and still have birds ignore it because of where you put it. Here is what actually works.
Height and distance from the house
For hanging feeders, 5 to 6 feet off the ground is a good working height. It keeps the feeder above most cat-jumping range, makes refilling easy without a ladder, and puts the birds at a comfortable viewing level. For squirrel-proofing purposes, the feeder bottom should be at least 4 to 5 feet off the ground when using a baffle, and the pole or hanging point needs to be far enough from branches, fences, or rooflines that a squirrel cannot simply leap onto the feeder from a nearby surface.
Window proximity is a real concern. Birds can collide with glass when a feeder is close enough to reflect sky or foliage. Placing a feeder within about 3 feet of a window (close enough that a bird cannot build speed before hitting glass) or much farther away reduces collision risk. The evidence on exactly how far is "safe" gets complicated beyond 10 meters (about 33 feet), so the safest practical approach is to keep feeders either very close to the window (under 3 feet) or well away from it, and use window decals or screens to break up reflections.
Choosing the right spot in the yard
- Near cover: Place feeders within 10 to 15 feet of shrubs, trees, or dense plantings so birds can retreat quickly if startled. Too far from cover and birds feel exposed.
- Away from foot traffic: High-traffic areas of the yard stress birds. A quieter corner or side yard works better than a spot near the back door.
- Visible from indoors: Obvious, but easy to overlook. Position the feeder where you can actually watch it from a window you use regularly.
- Stable ground: If mounting a pole, make sure the ground is firm enough to hold it upright. Wobbly poles discourage use and make squirrel-proofing baffles less effective.
Setting up a ground feeder
Ground feeders are exactly what they sound like: a low tray or flat platform placed at or near ground level for birds that naturally forage on the ground, like mourning doves, dark-eyed juncos, and white-throated sparrows. A simple build is a wooden tray (12 x 18 inches, with 1-inch lip and drainage holes) placed on a low post or flat stone. Keep it away from tall grass or dense shrubs immediately adjacent, which is where cats like to hide. Clean and refill ground feeders more often than elevated ones because seed and droppings accumulate faster.
Maintenance, pest-proofing, and when things go wrong
Cleaning schedule
Clean your feeders about every two weeks under normal conditions. During wet weather, heavy use, or if you notice sick-looking birds in your yard, clean more frequently, potentially every few days. To clean: disassemble the feeder, dump old seed, scrub all surfaces with a dilute bleach solution (no more than 1 part bleach to 9 parts water), rinse thoroughly with clean water, and let the feeder dry completely before refilling. Fully drying before refilling is not optional. Moisture left inside creates exactly the conditions where mold and bacteria thrive, which can sicken birds. If your feeder is dishwasher-safe, a hot-cycle run works well too.
Squirrel-proofing
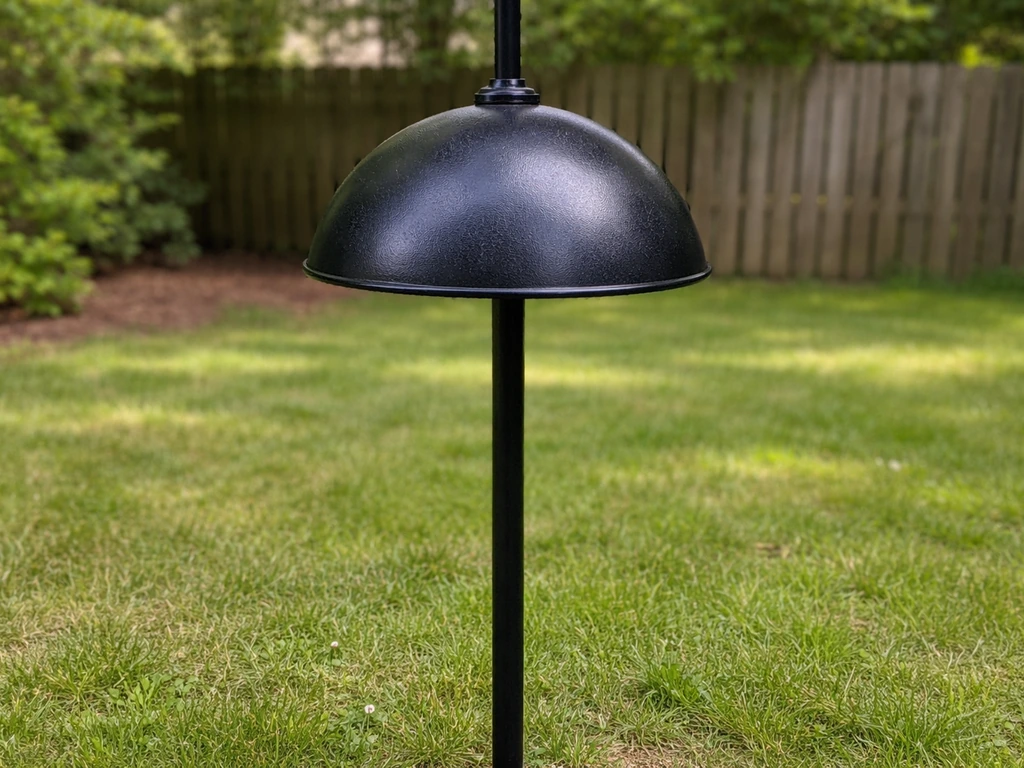
Squirrels are persistent and creative. The most reliable approach is a combination of baffle placement and pole positioning. A dome or cylinder baffle mounted on the feeder pole, with the baffle positioned so the feeder bottom sits at least 4 to 5 feet off the ground, stops most ground-to-pole climbers. But squirrels will also jump from nearby surfaces, so keep the feeder pole at least 10 feet from any branch, fence, or structure edge.
Using safflower seed instead of sunflower or peanuts also helps, since squirrels tend to ignore safflower while most birds accept it readily. Project FeederWatch also notes that black-oil sunflower seed is the most common seed offered at feeders in North America, and its thin shells can be cracked easily by many birds squirrels tend to ignore safflower.
If squirrels remain a stubborn problem, building a cage around a bird feeder is an effective physical barrier that lets small birds through while blocking larger pests.
Common problems and fixes
| Problem | Likely Cause | Fix |
|---|---|---|
| Birds not using the feeder | New location, wrong seed, or no nearby cover | Move closer to shrubs, switch to black-oil sunflower, give it 1–2 weeks |
| Seed molding or clumping | Moisture getting in, overfilling | Drill more drainage holes, fill less at a time, clean more often |
| Squirrels emptying the feeder | No baffle, feeder too close to jump surfaces | Add a pole baffle, reposition pole, switch to safflower seed |
| Feeder swinging too much in wind | Loose hang point or light feeder | Use a heavier feeder, add a stabilizing hook or bracket |
| Feeder attracting unwanted birds | Millet or mixed seed with fillers | Switch to straight black-oil sunflower or safflower |
| Birds colliding with nearby window | Feeder placed at mid-distance from glass | Move feeder within 3 ft of glass or much farther away, add window decals |
Keeping the setup going long-term
The hardest part of backyard feeding is not the build, it is staying consistent. Birds learn to rely on a food source and will adjust their foraging routes to include your yard. Empty feeders for extended periods disrupt that habit. A simple rhythm works well: refill every three to four days during active seasons, check for moisture or mold once a week, and do a full clean every two weeks. Inspect the feeder hardware (hooks, cords, screws) every month. Weather breaks down wood and corrodes metal faster than you expect. A feeder that worked fine last spring may have a cracked base or a rusted hook by fall.
Once you have one feeder working well, it is natural to want to expand. Adding a second or third feeder of a different style lets you serve a wider range of species and reduces crowding and competition at a single feeding spot. At that point, thinking about the overall layout of your yard setup becomes worthwhile, and planning it as a proper feeding station with coordinated pole placement and feeder spacing pays off. Start with one solid build, get your placement and maintenance dialed in, and go from there.
FAQ
How can I make sure the perch and ports actually work for small birds like finches and chickadees?
For birds that use hanging feeders, a simple way to improve grip is to add a narrow, rough-textured perch section (like small grooves in wood or a strip of untreated rope wrapped around the perch area). Avoid smooth plastic perches, they can be harder for small feet to hold, and birds may choose not to land even if the ports and seed are correct.
What should I change first if my feeder attracts the “wrong” birds?
If you are seeing lots of aggressive species at a feeder you built for small birds, the fastest fix is usually reducing access: smaller port size and shorter perches help, but also switch to a seed that matches your target birds. For example, move from sunflower or peanuts to nyjer in a tube feeder with tiny ports to discourage birds that do not handle it well.
My feeder got wet, can I just refill it or do I need to clean?
You should not assume a feeder will be safe to refill immediately after rain. Moisture trapped in the feeder and on the seed can spoil quickly, so use the “touch test” (seed should not clump) and visually check for mold. If seed looks swollen, smells off, or you see any fuzzy growth, discard it and clean the feeder before refilling.
How do I know the feeder is dry enough after cleaning?
Food safety is closely tied to drying time. If you refill before the feeder is fully dry, mold can grow inside seams, corners, and bottle caps. A practical approach is to dry it outdoors in shade for several hours and confirm it feels dry to the touch throughout, not just on the main surfaces.
How long should I wait for birds to start using a newly built feeder, and what helps most in week one?
If birds are not using a new feeder, try two things in the first week: keep it where they already travel (near cover like shrubs, but not immediately next to dense hiding spots for cats) and start with the seed they are already showing interest in nearby. Then, once they visit reliably, you can fine-tune port size or switch seed to better target species.
Why do my squirrels still reach the feeder even though I added a baffle?
For squirrel control, adding only a baffle without adjusting the pole height and clearance can still fail. Re-check that the feeder bottom is at least 4 to 5 feet off the ground and that the pole is far enough from branches, fences, or roof edges so squirrels cannot launch from a nearby surface.
How can I cut down on wasted seed and mold on platform or ground feeders?
If you want to reduce waste, use smaller portions and more frequent refills instead of filling deeply. Deep seed piles compact and spoil faster, and on platform feeders they also increase mold risk. For ground feeders especially, plan on cleaning more often because droppings mix with spilled seed quickly.
What is the best way to prevent bird-window collisions when I do not have ideal placement options?
If you are installing near windows, the safest practical placement strategy is either very close (under about 3 feet) so birds do not build speed, or well away (more than about 10 meters/33 feet). If you must place it in between, use window decals or screens to break reflections rather than relying only on location.
When should I add another feeder instead of redesigning the one I already built?
If you plan to attract multiple species, the simplest approach is to add a second feeder rather than changing one feeder’s design. Keep the existing feeder dedicated to small birds, then add a separate platform or different seed type for other visitors. This reduces crowding and makes it easier to clean and maintain each feeder for its specific seed.
Next Articles
How to Build a Bird Feeding Station Step by Step
Step-by-step guide to build and set up a backyard bird feeding station, including a simple wooden build and placement ti
How to Make a Tube Bird Feeder Step by Step
Step-by-step how to make a tube bird feeder with materials, safe mounting, maintenance, and fixes for leaks and clogs.
How to Put Bird Seed in a Bird Feeder Step by Step
Step-by-step guide to add bird seed to hopper, tube, platform, and suet feeders, avoiding spills and jams.