You can make a working jelly bird feeder in about 20 minutes using a small jar, a piece of scrap wood, and a few basic tools. Fill it with plain grape jelly, hang it at eye level near a tree or shrub, and you've got a solid shot at luring Baltimore orioles, catbirds, and other fruit-eating birds that almost never touch a seed feeder. The build is genuinely easy, the materials cost next to nothing if you repurpose what you already have, and once you get the placement and hygiene routine right, birds will find it reliably.
How to Make a Jelly Bird Feeder: Step-by-Step Guide

Marcus Brennan
23 May 2026

What a jelly bird feeder actually is (and why birds want it)
A jelly bird feeder is simply a feeder designed to hold fruit preserves, most commonly grape jelly, in a controlled way so birds can access it without making a mess or exposing large amounts of food to spoilage. Unlike a flat tray loaded with jelly, a proper jelly feeder uses a small shallow dish, a ported container, or an inverted jar to limit how much jelly is exposed at one time. That matters for hygiene, pest control, and making the food last.
Jelly feeders expand the variety of birds you'll see in your yard. Birds that live primarily on fruit and insects rather than seeds, such as Baltimore orioles, gray catbirds, and American robins, normally have no reason to visit a standard seed feeder. Offer jelly and you're speaking their language. Orioles in particular are strongly associated with grape jelly during spring migration and the breeding season, when adult birds need quick energy. The catch is that orioles are cautious. They'll often sit in a nearby tree and watch a new food source for a day or two before committing, so don't pull the feeder if nothing shows up immediately.
One seasonal note worth keeping in mind: once oriole chicks fledge, the parents sometimes bring them to the jelly feeder repeatedly throughout the day. At that point it's worth scaling back the offering or temporarily closing the feeder, since fledglings need a varied diet, not jelly several times daily.
Choose the right jelly (and what to avoid)
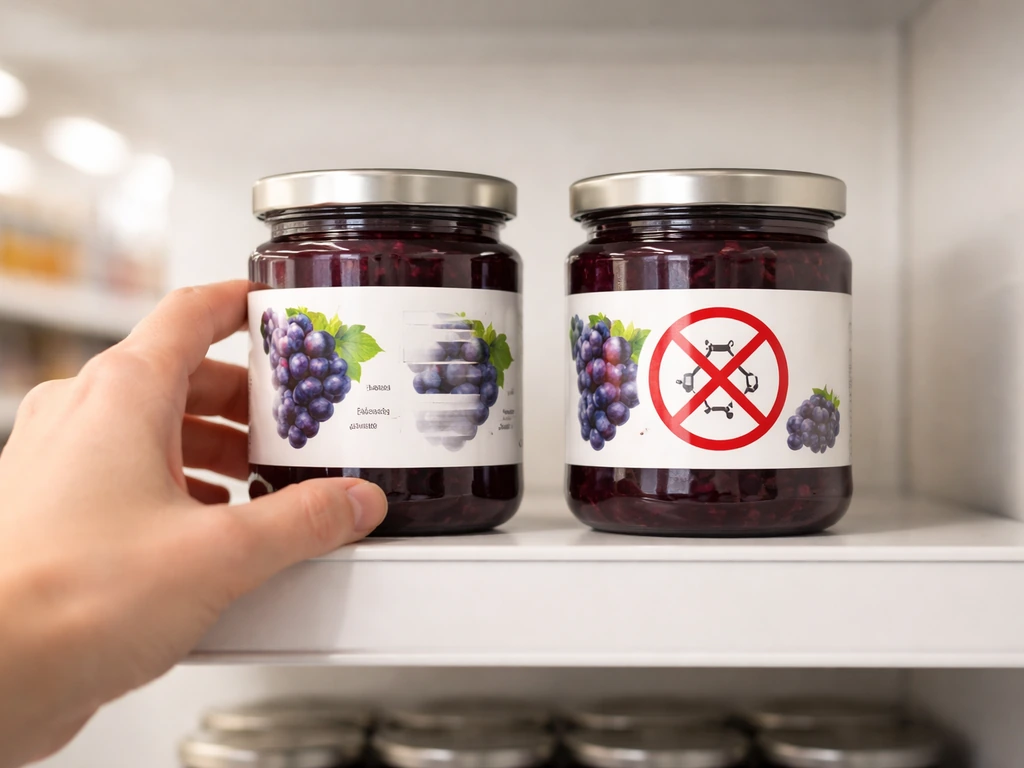
Standard grape jelly from the grocery store works well, but check the label before you buy. You want a product made with real fruit juice and sugar, nothing more complicated than that. Here's what to watch for:
- Avoid anything containing xylitol. This artificial sweetener is life-threatening to birds and shows up in some reduced-sugar spreads.
- Skip products with high-fructose corn syrup. Plain sugar is what you want.
- Avoid artificially flavored or heavily preserved products. The fewer the additives, the better.
- Organic grape jelly with simple ingredients (fruit, sugar, pectin) is a solid choice if it's in your budget.
- Other fruit preserves work too: strawberry, apricot, and mixed berry jellies attract similar species. Grape tends to get the best response from orioles specifically.
Portion size matters as much as the type of jelly. Put out a small amount, roughly one to two tablespoons at a time, rather than filling the container to the brim. Birds will eat it fresh, you'll waste less, and there's far less chance of the jelly sitting out long enough to ferment or grow mold in warm weather.
What you need to build one
There are a few different approaches to a DIY jelly feeder depending on what you have on hand. Once you’ve chosen your jelly feeder style, follow the simple step-by-step for how to make a nectar bird feeder in the same easy way. I'll cover three builds: a simple jar-on-a-board feeder (the easiest starting point), a repurposed bottle or container feeder with feeding ports, and a milk jug version. To get the best results, pair your build with safe setup tips like correct placement and a simple cleaning routine build one. Here’s how to make an automatic bird feeder with a jelly setup and a simple, repeatable refill routine so you can keep birds fed with less day-to-day work. To make a window bird feeder, you can use a similar jelly setup but with a secure suction or clamp mount so it stays stable on the glass. Here's a combined materials list covering all three options.
Materials
- Small shallow jar or lidded container (a half-pint mason jar works perfectly)
- A scrap piece of untreated wood, roughly 6 to 8 inches square, for the platform (for the jar feeder)
- A clean plastic bottle or food container with a secure lid (for the ported bottle feeder)
- A clean one-gallon milk jug (for the milk jug version)
- Stainless steel or galvanized wood screws (1.5 inch)
- Screw eye or sturdy hook for hanging
- Thick wire, paracord, or zip ties for hanging
- A waterproof sealant or exterior wood glue (optional but helpful for wood builds)
- Sandpaper (medium grit) if using wood
Tools
- Drill with a small drill bit (3/16 inch works for hanging holes and drainage holes)
- A sharp utility knife or scissors (for cutting bottle or milk jug openings)
- Marker or pencil for marking cut lines
- Screwdriver or drill driver
- Pliers (useful for bending wire)
Step-by-step: building your jelly feeder
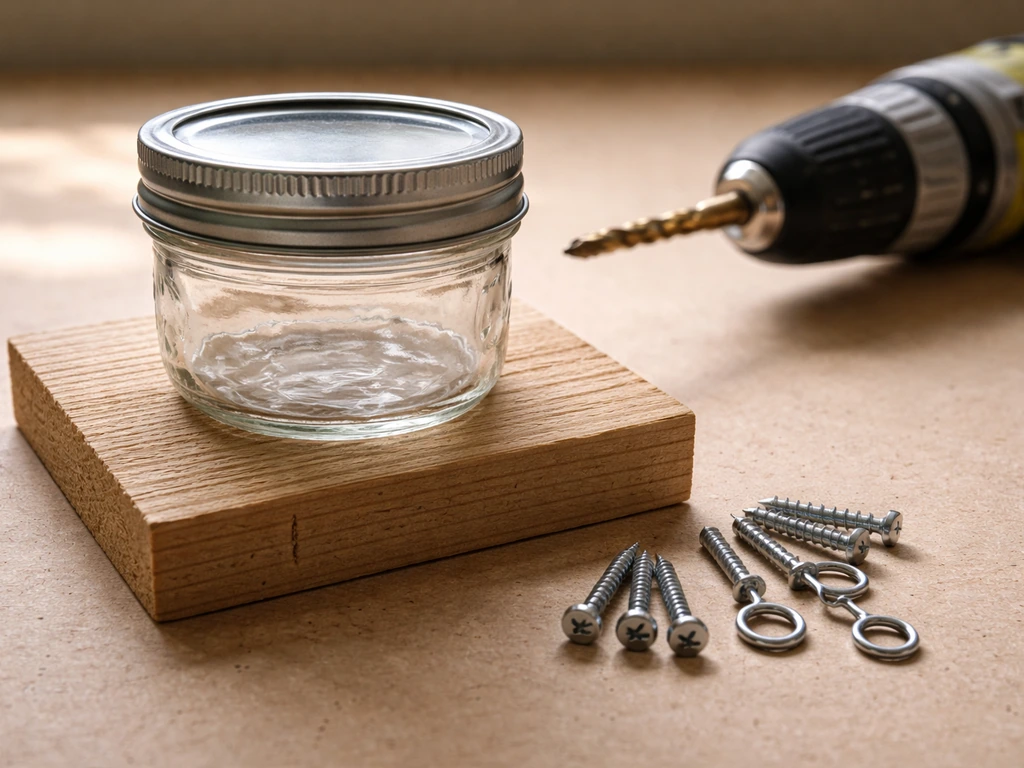
Build 1: Jar-on-a-board feeder (easiest, best for beginners)

- Sand the edges of your wood platform so there are no splinters. This takes about two minutes and is worth doing.
- Drill a small drainage hole (3/16 inch) near each corner of the platform so rain doesn't pool.
- Drill a hole in the center top edge of the platform for your screw eye. Twist the screw eye in by hand until snug.
- Set your jar in the center of the platform. If you want it fixed in place, drill two small holes on either side of the jar's base and thread a zip tie through to hold it. Alternatively, just set it in place and let gravity do the work.
- Thread wire or paracord through the screw eye, tie a secure loop, and your feeder is ready to hang.
- Add one to two tablespoons of jelly to the jar before hanging. Don't fill it more than halfway.
Build 2: Ported bottle or container feeder
- Use a clean wide-mouthed plastic food container (a small peanut butter jar or yogurt container works) with its lid.
- Mark two or three feeding holes on the side of the container, each about 1 inch in diameter. Space them evenly around the circumference, positioned about an inch above the base.
- Cut the holes carefully with a utility knife. Smooth any sharp plastic edges with sandpaper.
- Drill a small hole through the base of the container for drainage.
- Drill a hole through the lid and thread wire through it to create a hanging loop. Reinforce with a knot on the inside.
- Fill the container partway with jelly (not to the level of the feeding holes, just below), replace the lid, and hang it upright. Birds feed through the side holes.
Build 3: Repurposed milk jug feeder
- Rinse a clean one-gallon milk jug thoroughly and let it dry completely.
- Mark a large rectangular opening on one flat side using a marker, leaving at least one inch of plastic around all edges for structural support.
- Cut the opening with scissors or a utility knife. This is where birds will access the jelly.
- Drill a few small drainage holes in the base of the jug.
- Use the existing handle of the jug as your hang point. Thread wire or cord through the handle for extra security.
- Place a small shallow dish or jar lid inside the jug at the base, fill it with jelly, and you're ready. The jug walls give some protection from rain and help deter larger pests.
How to hang or mount it for different backyards
Placement makes a bigger difference than most people expect. Orioles and catbirds like to approach from a nearby perch, so hanging the feeder within 10 to 15 feet of a tree, tall shrub, or fence line gives birds a landing spot to survey from before they commit. The U.S. Fish & Wildlife Service recommends placing bird feeders so birds have nearby perches and can feed safely and comfortably gives birds a landing spot to survey from before they commit. Fully open, exposed positions in the middle of a lawn tend to get fewer visits, at least early on.
Height-wise, aim for 5 to 6 feet off the ground. This puts the feeder roughly at human eye level, which is easy for you to check and refill, and comfortable for the birds. Much lower and ground predators become a bigger concern. Much higher and you'll have trouble with maintenance.
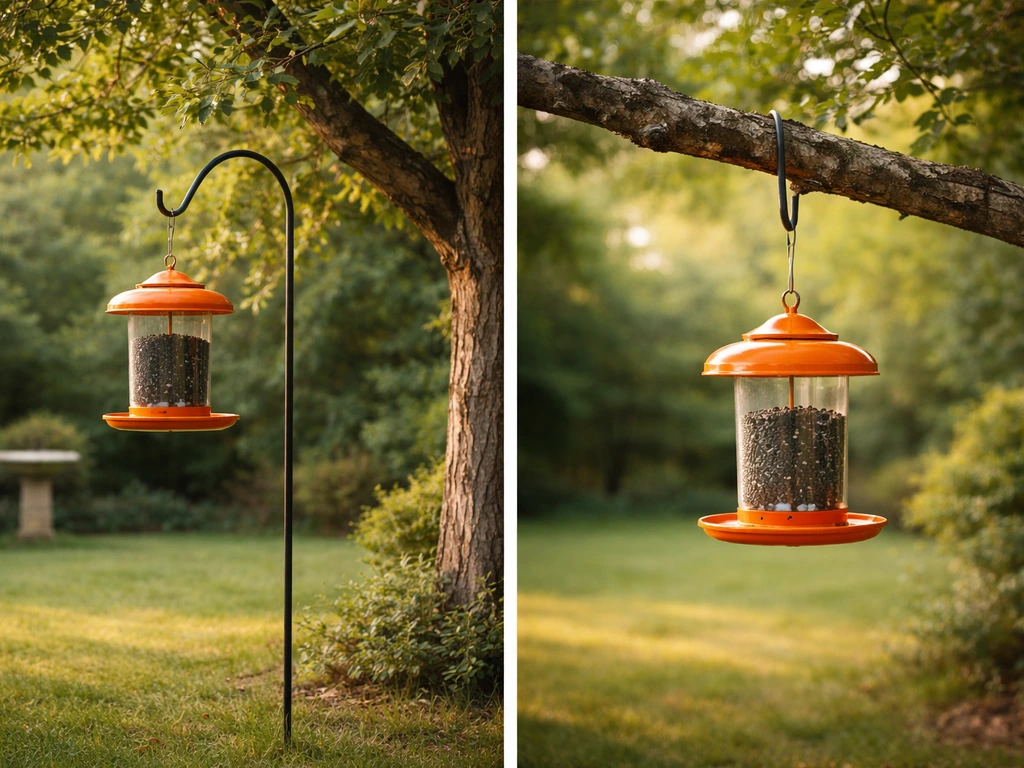
For hanging, a shepherd's hook pole is the most flexible option since you can move it easily. A tree branch works if it's stable and doesn't swing wildly in the wind, which can spill jelly fast. If you're mounting to a fence or deck railing, a screw-in hook with a short arm works well. Whatever you use, make sure the feeder hangs level. A tilted jar feeder will dump jelly at the first breeze.
If you're interested in other mounting approaches for different feeder styles, window-mounted and hopper-style setups each have their own placement logic worth considering if you decide to expand your feeder setup later. You can also build a hopper-style feeder for jelly birds, which releases small amounts at a time and keeps the food cleaner between visits.
Keeping ants, wasps, and mold away
Ants
Ants will find jelly within hours if you don't block them. The single most effective solution is an ant moat: a small cup-shaped barrier filled with water that hangs above the feeder on the same line. Ants can't cross the water, so they never reach the jelly. You can buy moats cheaply or make one from a plastic bottle cap or small container. The key is keeping it topped up with water, especially in dry or hot weather when it evaporates quickly. Check it every time you refill the jelly.
Do not use petroleum jelly or other sticky substances on the hanging wire or pole to deter ants. It sounds clever but it can get on birds' feathers and cause real problems. The water moat is the right tool for this job.
Wasps
Wasps are drawn to sweet smells, so the less exposed jelly surface you have, the better. That's another reason to use ported or partially enclosed feeder designs rather than a wide open dish. If wasps are a persistent problem, try moving the feeder to a shadier spot. Wasps tend to prefer sunny, warm areas and are less active in cooler, shaded locations. Avoid the temptation to use any chemical deterrents near the feeder.
Mold and spoilage
In warm weather, jelly can start fermenting and growing mold within a day or two. The practical fix is small portions: put out only what birds are likely to eat in one to two days, then replace it completely. Don't just top up jelly on top of older jelly. In hot weather (above 80°F), check it daily. A good rule of thumb borrowed from sugar-water feeders is to refresh and clean every two to five days depending on temperature, more frequently as it gets hotter.
Maintenance schedule and what to do when birds don't show up
Cleaning routine
At minimum, clean the feeder thoroughly at least once every two weeks. In summer, aim for once a week. The cleaning process is simple: discard any remaining jelly, rinse the feeder with hot water, then scrub it with a diluted bleach solution (about 2 ounces of bleach per gallon of water, or a 10% bleach solution) to kill mold and bacteria. After scrubbing, rinse every surface thoroughly under clean running water for at least 10 seconds to remove all bleach residue. Let it air dry completely before refilling. Dispose of any jelly that looks discolored, smells fermented, or has visible mold growth.
Refill schedule at a glance
| Temperature / Condition | Recommended Jelly Refresh Interval | Notes |
|---|---|---|
| Below 60°F (cool weather) | Every 4 to 5 days | Spoilage is slower, but still check for mold |
| 60 to 79°F (mild weather) | Every 2 to 3 days | Standard active season interval |
| 80°F and above (hot weather) | Daily or every other day | Fermentation and mold risk is high |
| After rain | Check immediately | Diluted jelly spoils faster |
Troubleshooting low bird activity
If birds aren't visiting after a week or more, work through these common causes before giving up:
- Wrong timing: Orioles are most active at feeders during spring migration (April to May in most of North America) and early breeding season. If you set up a jelly feeder in midsummer or fall, visits will be less frequent.
- Poor placement: Move the feeder closer to trees or shrubs. A feeder stranded in an open lawn is intimidating to cautious species like orioles.
- The jelly has spoiled: Even if it looks okay, old jelly that's slightly fermented will be avoided. Dump it, clean the feeder, and start fresh.
- Competing food: If you have many seed feeders nearby, fruit-eating birds may not realize the jelly feeder is there. Try temporarily placing it in a more visible spot.
- No orange nearby: Orioles are strongly attracted to the color orange. Tying a small piece of orange ribbon near the feeder or using an orange-colored container can help draw their attention initially.
- Predator pressure: If a neighborhood cat or hawk has been around, birds may be avoiding that area entirely. Give it a few days and see if traffic resumes.
If you've gone through all of that and still have nothing after two to three weeks in peak season, try switching jelly brands or adding a fresh orange half cut-side up near the feeder. Sometimes that small change is enough to tip cautious birds into trying something new. Once one bird visits, others tend to follow quickly. The first visit is almost always the hardest to get. If you do want to go beyond jelly, check out this guide on making a willow bird feeder too how to make a willow bird feeder.
FAQ
Can I make a jelly bird feeder without a jar, board, or milk jug, using something I already have?
Yes. Any setup that limits exposed jelly at one time works, for example a shallow plastic food container with a lid flipped to create a small opening, or a cored citrus half holder turned into a cup. The key is to create a “small access window” so birds grab jelly quickly while keeping the rest covered.
What’s the safest jelly type if I can’t find plain grape jelly?
Choose a jelly labeled with real fruit juice and sugar only, avoid anything with added spices, artificial flavorings, or sweeteners. If the label lists corn syrup or additional flavor compounds, test by running a very small portion for 24 to 48 hours rather than filling the feeder right away.
How much jelly should I put out at first so I don’t waste it or attract pests?
Start with about one tablespoon per refill and only top up after you see birds feeding. If no birds come, remove the jelly after a day in warm weather so it does not ferment or go moldy, then try again with a fresh portion.
How often should I refill a jelly bird feeder in cooler weather (under 80°F)?
In moderate temperatures, aim to refresh and fully replace the jelly every two to five days. If you notice the feeder looks cloudy, smells sour, or develops any film, switch to shorter cycles and do a thorough clean.
Can I leave jelly out overnight during hot summers?
It’s risky. Warm temperatures accelerate fermentation, so it’s usually better to remove and replace jelly daily when nights stay hot. If you must leave it, use very small portions and check the feeder in the morning, discard anything that looks changed.
Do I need to worry about birds getting sick from jelly or mold?
Yes. Mold can form quickly in warm conditions, and fermented jelly can discourage feeding while increasing risks. Only refill with fresh jelly, discard any batch that is discolored, smells fermented, or shows any visible growth, and sanitize at least on your weekly schedule in summer.
What’s the best way to prevent ants besides using an ant moat?
The most reliable method is still a water moat, but also keep the feeder line clean and avoid any sticky deterrents on hardware. If ants bypass the moat by climbing along a nearby surface, reposition the feeder so the closest climbing path does not touch the same support line.
Will the feeder attract wasps or bees, and how can I reduce that?
Wasps are drawn to exposed sweet surfaces, so designs that keep jelly partially enclosed help most. If you see frequent wasp activity, move the feeder to a shadier spot and reduce portion size, do not use chemical sprays near the feeder.
How should I hang the feeder so birds don’t make a mess or dump jelly?
Hang it level and stable. If the setup swings in wind, jelly can spill and also create sticky residue that attracts pests. Use a hook location that minimizes movement, and re-check tightness after storms.
Why might orioles not visit even if I placed the feeder correctly?
Birds can be cautious and may ignore a new feeder for a day or two. Also confirm the environment is right, the feeder is near cover like a shrub or tree line within the usual approach distance, and the portion is fresh, because stale jelly often prevents the first trial.
What should I do if birds start visiting but I still don’t see chicks being fed elsewhere?
If adult birds are repeatedly bringing fledglings to the jelly feeder, consider scaling back by offering smaller amounts or temporarily pausing for a short period. Fledglings need a varied diet, so the goal is to support feeding without making jelly the only food source.
Can I place the feeder closer to my house or on a balcony?
Yes, but prioritize safe viewing and flight access. Keep it near a landing perch and avoid locations where it feels exposed to predators. On balconies, make sure the feeder cannot tip onto walkways, and keep cleaning easier by choosing a stable mount.
What’s the right cleaning method between refills if I don’t have time for a full scrub?
For quick turnarounds, discard remaining jelly, rinse with hot water to remove residue, then do a full diluted-bleach scrubbing on your normal schedule. If there is any mold film, always scrub and rinse thoroughly, because a simple rinse may not remove microscopic buildup.
How do I know when it’s time to discard the whole feeder setup and rebuild?
Replace parts if plastic shows deep scratches or cracks (scratches can hold residues that are hard to sanitize), if the container won’t stay level, or if mounting hardware rusts or loosens. A feeder that tips or leaks will both waste jelly and increase pest pressure.
Next Article
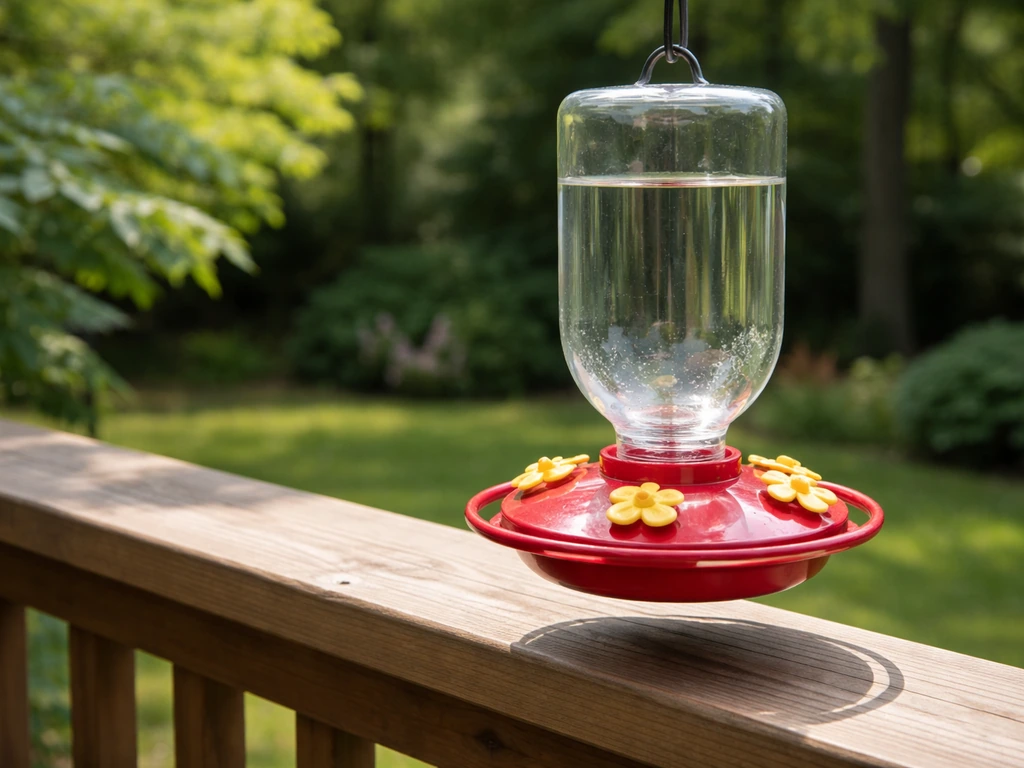
How to Make a Nectar Bird Feeder Step by Step
Step-by-step guide to build a nectar bird feeder, mix safe nectar, mount it, and troubleshoot leaks, clogs, and fermenta