To make a bear-proof bird feeder, you need two things working together: a sturdy feeder that can't be torn apart, and a hanging setup that puts it completely out of a bear's reach. If you are specifically aiming for a bird feeder that stays safe from dogs, adapt the same build and placement approach to include sturdy dog-proofing.
How to Make a Bear-Proof Bird Feeder That Works

Marcus Brennan
31 May 2026
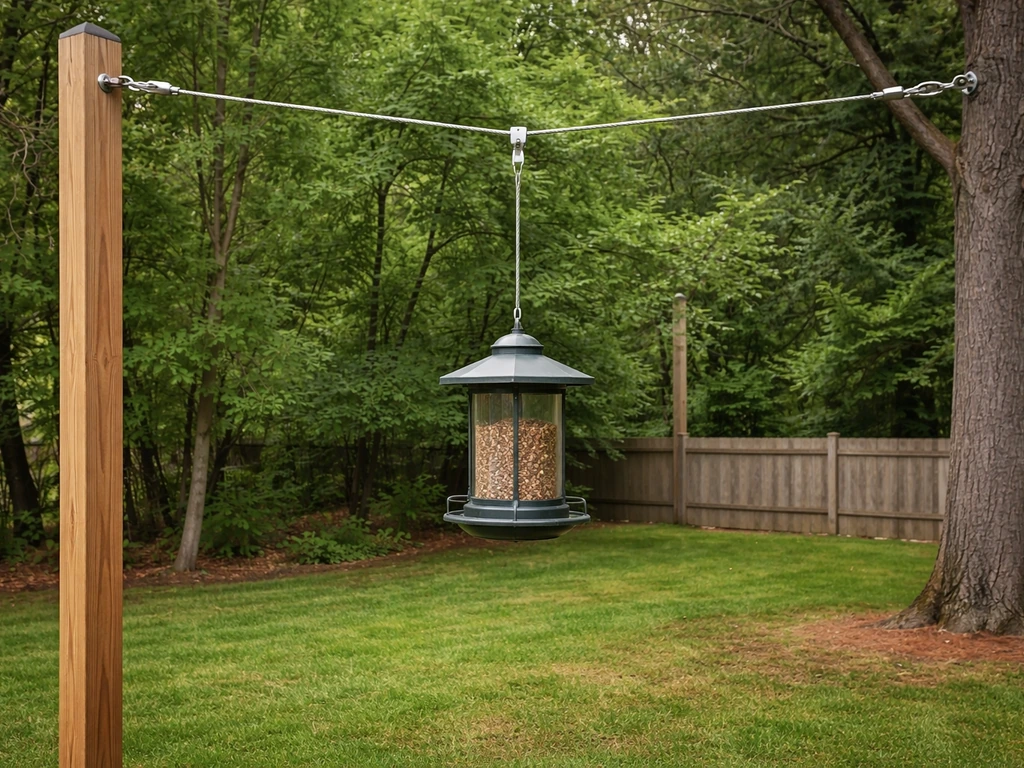
That means suspending the feeder from a free-hanging wire at least 10 feet off the ground and at least 10 feet away from any tree trunk or structure, with no way for a bear to grab it, swing it, or pull it down. The feeder itself should be metal or heavy-duty construction with no loose parts, and you should bring it inside at night.
Get those basics right and you've solved 90% of the problem before you ever pick up a drill.
Why bears go after feeders in the first place
Bears aren't being clever when they raid your bird feeder. They're just following their nose to a calorie-dense food source, and once they find one, they remember it. That's the core problem: a single successful raid turns your yard into a regular stop on a bear's circuit. Western Wildlife researchers have documented exactly this pattern, describing bird feeders as a recurring attractant once bears discover them. Every subsequent visit reinforces the behavior, making the bear harder to deter over time.
Black bears can weigh 200 to 600 pounds and stand over 6 feet tall on their hind legs. They can swipe, pull, climb, and apply enormous downward force. A standard hanging feeder fails in predictable ways: the hook bends or snaps, the wire gets pulled down, the feeder body gets crushed or torn open, or the pole gets knocked over entirely. WMI’s Black Bear-Resistant Product Testing Program includes example failure modes such as a mesh food storage bag torn open by a bear a feeder body gets crushed or torn open. Even a 'heavy' plastic feeder is no match for a determined bear. Understanding these failure modes is the first step to designing around them.
Picking the right bear-proof feeder approach
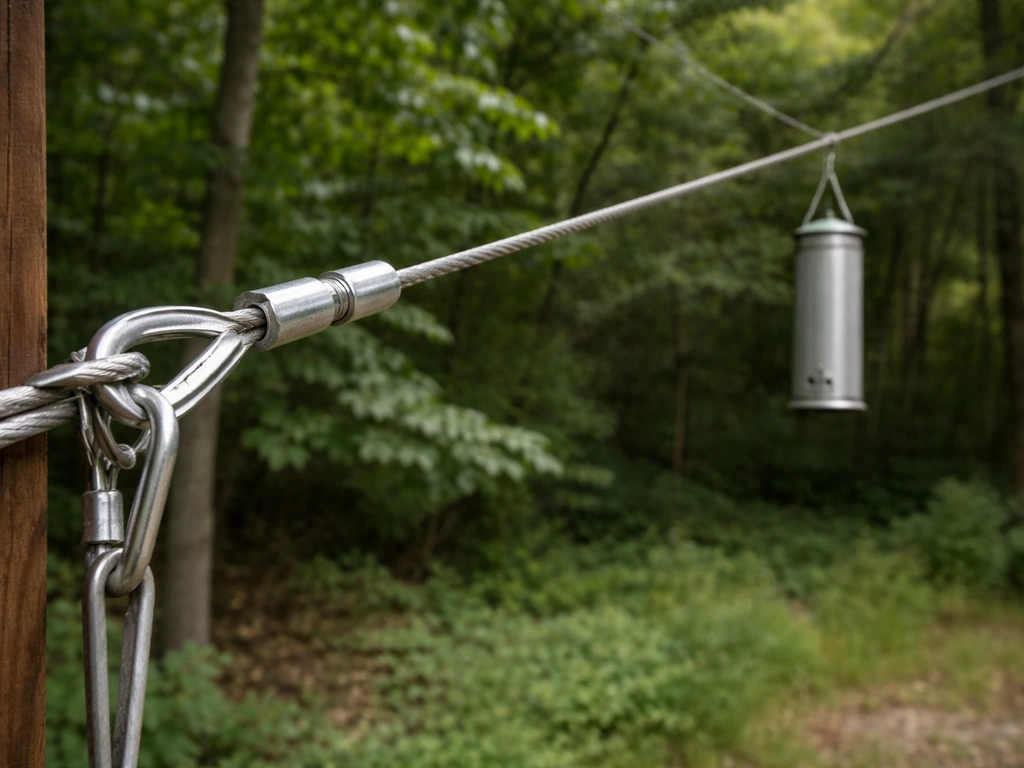
You have three main options: a hanging wire setup, a dedicated bear-resistant pole system, or abandoning a standing feeder entirely in favor of a window-mounted or enclosed feeder. You can apply the same high-placement, protected-access ideas to make a dove-proof bird feeder that reduces feeding conflicts hanging wire setup. Each has trade-offs depending on your yard layout, tree availability, and how much hardware you want to install.
Hanging wire setup
This is the most effective DIY option and the one recommended by wildlife agencies across the country. You run a steel cable between two anchor points, high enough that a bear can't reach it standing, and hang the feeder from the middle of that cable. The key is that the feeder must be free-hanging in space, with no nearby surface a bear can grab or stand on to reach it. NC Wildlife specifically says not to hang feeders from your house or deck, because a bear will simply approach along the structure.
Pole-mounted setup
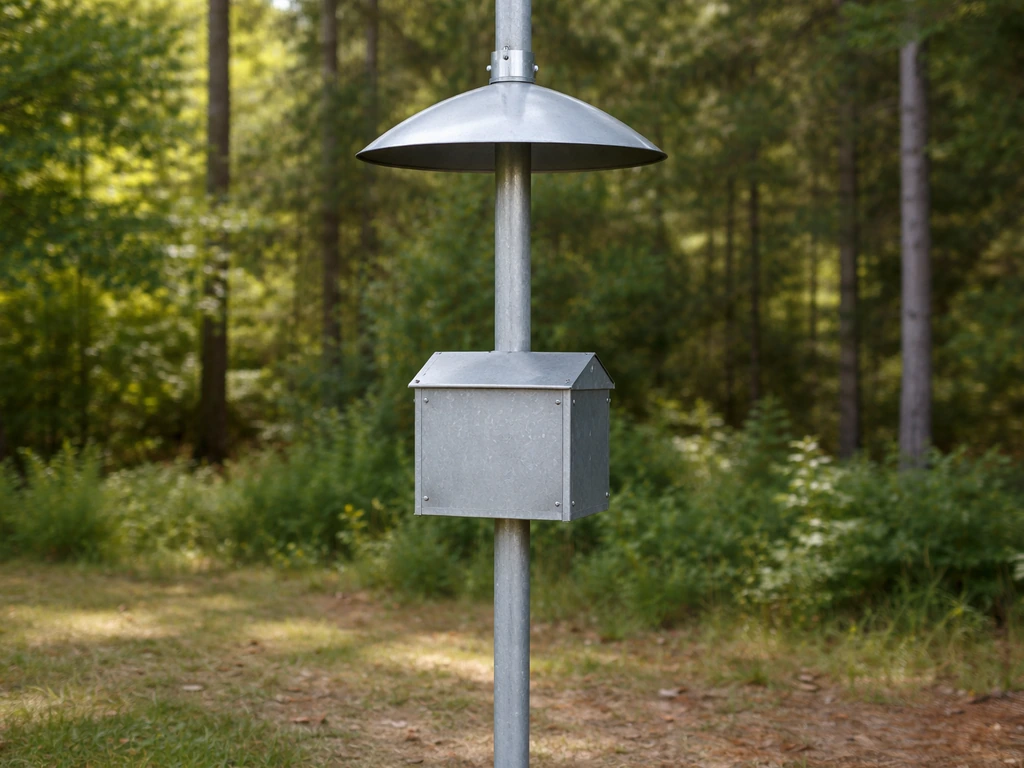
A pole system can work, but it demands a properly installed baffle and a pole set deep enough that it won't tip. Bears will push, shake, and climb. A smooth metal pole with a wide cone baffle mounted about 4 to 5 feet up can stop a bear from climbing, but if the pole isn't anchored solidly in concrete, the bear will just knock it over.
For a full breakdown of building a bear-proof pole, that's a project worth tackling on its own. If you prefer a stand-alone setup, the same bear-proofing principles apply when you build a bear-proof bird feeder pole with a properly installed baffle and secure anchoring. The hanging wire method is generally easier to implement correctly as a DIY project.
Platform and enclosed feeders
Open platform feeders are the worst option in bear country. They're easy to reach and easy to clean out. Enclosed tube or hopper feeders with metal construction are much better because there are fewer exposed parts to grab. If you're building from scratch, aim for an enclosed design made from materials that can't be crushed or torn. Mesh bags and thin plastic containers, like the kind used in some DIY feeder projects, will not survive a bear encounter. blank" rel="noopener noreferrer">The WMI bear-resistant product testing program explicitly lists 'mesh food storage bag torn open by a bear' as a documented failure mode.
| Setup type | Bear resistance | DIY difficulty | Best for |
|---|---|---|---|
| Free-hanging wire | High (if placement is correct) | Moderate | Yards with two trees or posts 15+ feet apart |
| Baffled pole | Medium to high (if anchored) | Moderate to hard | Open yards without anchor trees |
| Platform feeder | Low | Easy | Not recommended in bear territory |
| Enclosed metal tube/hopper | Medium (body only, needs proper hanging) | Easy to moderate | Combined with wire hanging for best results |
Materials you'll need
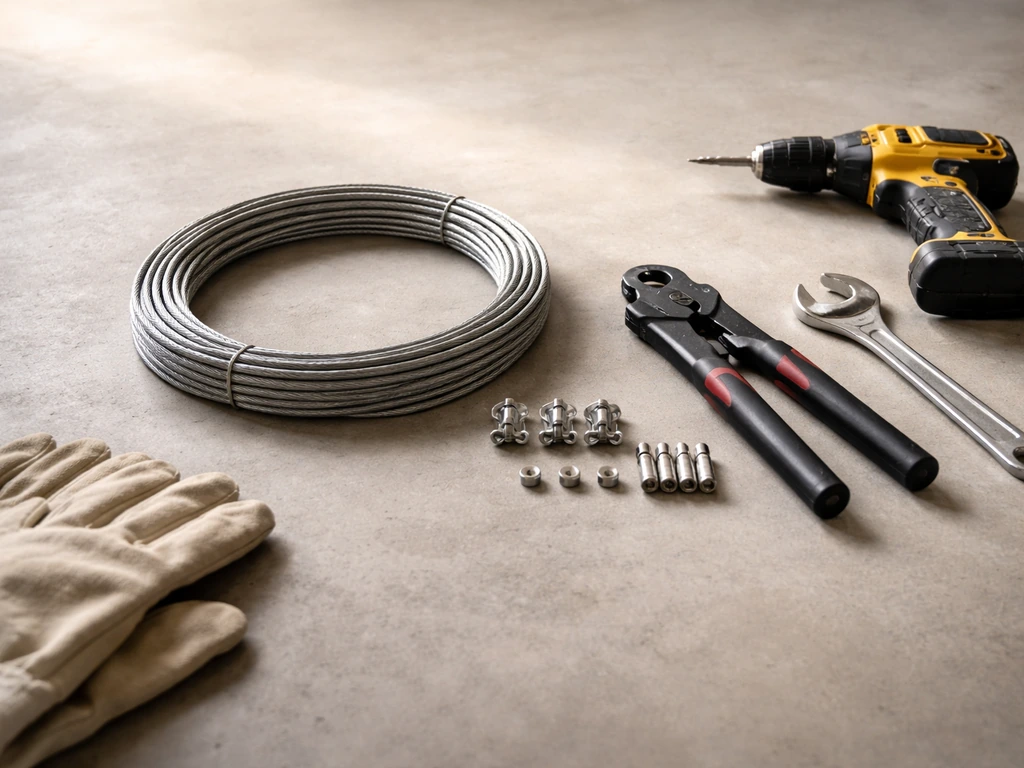
For a free-hanging setup, you don't need exotic materials, but you do need the right ones. Avoid anything a bear can bite through, bend easily, or rip apart. Here's what actually works:
- 3/16-inch or 1/4-inch galvanized steel aircraft cable (not rope, not twine, not bungee cord)
- Two heavy-duty eye bolts or lag screws rated for at least 200 lbs, to anchor the cable ends
- Aluminum or steel crimping sleeves and a hand crimper to secure cable ends
- A steel S-hook or locking carabiner rated for at least 50 lbs to hang the feeder from the cable
- A metal pulley or trolley so you can slide the feeder to the center of the span
- A steel or cast-aluminum feeder body with a metal lid and no exposed plastic parts that can be snapped off
- Optional: a metal cone or dome baffle above the feeder to prevent upward access if the setup is near a surface
- Optional: a cable lock or locking snap hook so the feeder can't be easily unclipped
If you want to build your own feeder body instead of buying one, use exterior-grade wood (cedar or pressure-treated pine) with metal hardware cloth (1/2-inch mesh, 19-gauge or heavier) for any open sections. Weatherproofing a wooden bird feeder also means sealing all surfaces and edges before you hang or mount it so water does not warp the wood. Avoid plastic bottles, milk jugs, or pinecone-style builds in bear territory. Those are fun beginner projects for areas without bear pressure, but they won't survive a single visit. Metal is the minimum standard here.
Step-by-step: building and rigging a bear-proof feeder
This build takes about 2 to 3 hours if you have the materials on hand. You'll need a drill, a wrench, wire cutters, and a crimping tool. The most time-consuming part is getting your anchor points right.
- Choose your anchor trees or posts. You need two anchor points at least 15 feet apart (20 feet is better) so the feeder hangs freely in the middle with clearance on all sides. The anchor points should be at least 12 to 13 feet off the ground so your cable hangs at or above 10 feet at its lowest sag point.
- Install the lag screws or eye bolts. Drill a pilot hole slightly smaller than your lag screw diameter to avoid splitting the wood. Thread the eye bolt through a steel washer and drive it in with a wrench until it's flush and tight. Both anchors need to be solid enough that you can't wiggle them by hand.
- Cut your steel cable to span the distance between anchors, plus about 3 feet of extra length on each end for looping and crimping. Run the cable through the eye bolts on each end, loop it back on itself, thread it through two crimping sleeves, and compress the sleeves firmly with your crimping tool. Pull-test each end hard before you trust it.
- Build or prepare your feeder body. If building from wood, construct a simple hopper or tube design with a hinged roof (secure the roof with a small barrel bolt latch so a bear can't flip it open). Line any openings with hardware cloth stapled and folded over metal staples to prevent pulling. If using a purchased feeder, remove any plastic perches or decorative parts that could be snapped off and used as grip points.
- Attach the metal pulley or trolley to the cable. Slide it on before you crimp the second end. The pulley lets you slide the feeder to the center of the span from the ground using a thin retrieval cord. Thread the retrieval cord through the pulley and tie both ends off at ground level around a cleat or stake, so you can lower the feeder to refill it without climbing a ladder.
- Hang the feeder from the pulley using a locking carabiner or locking S-hook. Make sure the feeder hangs at least 10 feet from the ground at its lowest point. Slide it to the center of the cable span so it's at least 10 feet horizontally from either anchor tree.
- Add a baffle if needed. If the cable passes near a branch or surface within 4 feet of the feeder, add a cone-shaped metal baffle above the feeder body on the hanging line. This closes off any upward approach route.
Getting the height and placement exactly right
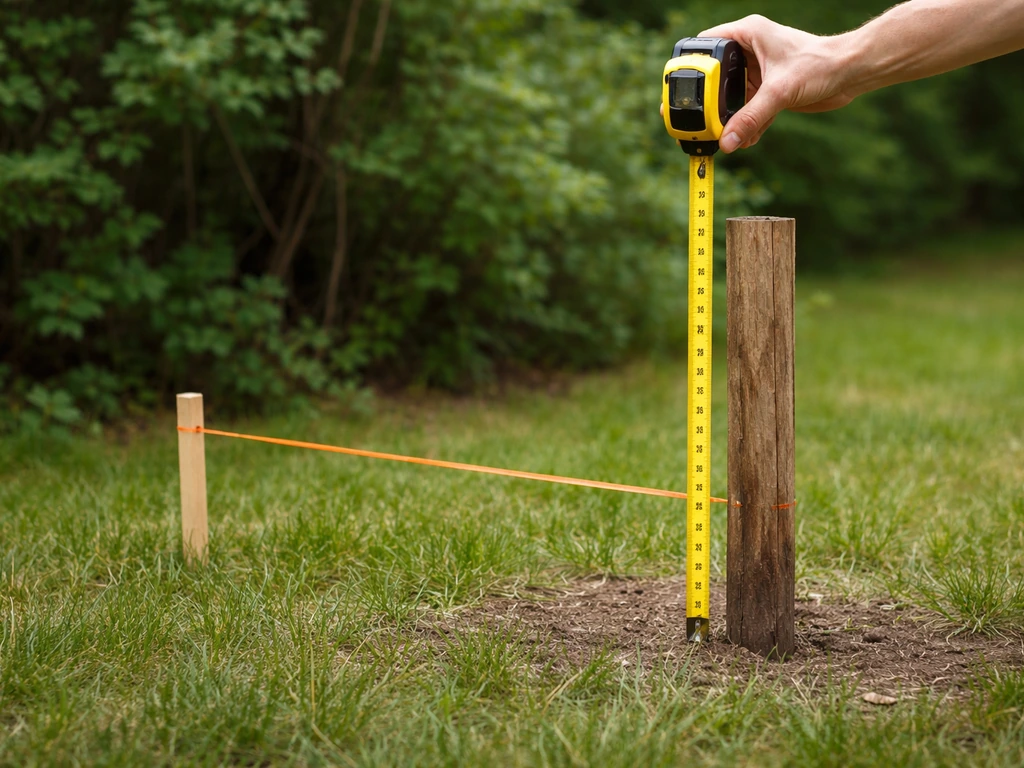
Placement is the most critical factor in bear-proofing a feeder, full stop. The FWC puts it plainly: placement is the most important variable, more than the feeder design itself. You can have the toughest metal feeder on the market and still lose it if it's hung at the wrong height or too close to a tree trunk.
- Minimum height: 10 feet from the ground to the bottom of the feeder
- Minimum horizontal distance from any tree trunk, branch, or structure: 10 feet on all sides (NC Wildlife and NJ DEP both specify this)
- Do not hang from your house, deck railing, or porch overhang. Bears will approach along the structure.
- Do not hang over a surface a bear could stand on to gain height, like a fence, woodpile, or raised bed
- Keep the feeder away from dense brush or tree cover where bears feel safe approaching in daylight
- Bring the feeder inside at night. Bears are most active at dusk and dawn, and an empty feeder pulled down at 2 a.m. still teaches the bear that your yard is worth visiting
A practical way to visualize the placement: imagine a bear standing on its hind legs directly under the feeder, and then imagine it reaching sideways toward the nearest tree trunk or structure. If anything is within its reach, you need to move the feeder or raise the cable. Use a tape measure, not your eye. Most people underestimate 10 feet when eyeballing it.
Maintenance, testing, and what to do when bears still show up
Even a well-built setup needs regular inspection. Steel cable can fray at crimp points over time, especially after ice or wind storms. Lag screws can loosen as wood expands and contracts through seasons. Every month or so, give the whole system a firm pull-test: tug the cable ends, check the eye bolts, and inspect the feeder body for bent hardware or damage.
After a bear visit
If a bear has been at your feeder, even unsuccessfully, take it down immediately. NC Wildlife is direct about this: remove the feeder as soon as a bear has visited to avoid continued attraction and repeat visits. Even if the feeder survived the encounter, the bear now knows your yard has food. Give it at least two weeks, sometimes a full season, before putting the feeder back up. When you do, check your setup against all the placement rules above before rehanging.
Common troubleshooting scenarios
- The cable is sagging too low: Add a third anchor point midspan, or use a heavier gauge cable that resists sag under the feeder's weight
- The feeder is spinning or swinging too much: Add a second retrieval line attached to the bottom of the feeder, tied off loosely to stabilize it without making it climbable
- Bears are reaching the cable from a branch you didn't notice: Walk the full span at dusk and look for branches that weren't obvious at ground level, then prune or relocate
- The feeder body is getting damaged: Upgrade to a WMI- or IGBC-tested bear-resistant feeder; look for products on the IGBC Certified Products List, which tracks commercially approved bear-resistant designs
- Seed is spilling and attracting bears at ground level: Switch to a no-mess seed blend like hulled sunflower chips, and add a seed-catching tray with a tight-fitting lid
Alternatives when a feeder just isn't worth the risk
Sometimes the honest answer is that a traditional feeder isn't the right choice for your yard. If you're in an area with frequent bear activity, especially during spring and fall when bears are bulking up, even a well-placed feeder can create ongoing conflict. The USFWS recommends considering alternatives that attract birds without presenting a food attractant to bears.
- Birdbaths and water features: Birds need water year-round, and a birdbath draws a wide variety of species without any scent attractant for bears
- Birdhouses and nesting boxes: Cavity-nesting species like bluebirds, wrens, and chickadees will use nest boxes, and a well-placed birdhouse gives you bird activity without seed
- Native plantings: Berry-producing shrubs (serviceberry, elderberry, native viburnums) and seed-head flowers (coneflowers, black-eyed Susans) feed birds naturally and reduce your maintenance footprint
- Window feeders with enclosed chambers: Small, enclosed window-mounted feeders hold very little seed and are pressed against glass, making them essentially inaccessible to bears while still giving you close-up bird watching
- Seasonal feeding only: In many states, the safest approach is to feed birds only in winter, when bears are denning or inactive, and take feeders down from April through November
If you're thinking about a rain-proof or weatherproof feeder design as a companion project, those builds pair naturally with the enclosed hopper style recommended here. A rain-proof bird feeder works even better when you also use a sturdy, bear-resistant design so it stays secure in any weather. The same covered, enclosed construction that keeps rain out also limits a bear's ability to access seed from the sides. Weatherproofing your feeder body is worth doing at the same time as bear-proofing it.
Your next steps to get this done today
If bears are already visiting your yard, take your feeder down right now and leave it down for at least two weeks. Then gather your materials, pick two anchor points that meet the 10-foot height and 10-foot clearance requirements, and run your cable. A hardware store trip for aircraft cable, crimping sleeves, eye bolts, and a locking carabiner will run you roughly $30 to $50 and you can have the rigging done in an afternoon.
Pair that with a metal hopper feeder (purchased or built from cedar with hardware cloth) and you have a setup that wildlife agencies across the country have endorsed. If you want to use the same ideas for a chicken setup, learn how to make a bird proof chicken feeder so wild birds cannot eat the feed. Bring it in every night, inspect it monthly, and you'll keep the birds coming without training a bear to visit your yard.
FAQ
What’s the minimum height and clearance I should use, and how do I measure it correctly?
Use at least 10 feet off the ground and keep the feeder at least 10 feet away from any tree trunk, fence post, or building edge. Measure from the ground to the feeder’s hanging point, then check sideways reach by placing a tape measure at bear shoulder height (standing height on hind legs) and estimating the lateral gap to the nearest surface.
Can I hang a bear-proof feeder from my porch, deck, or garage beam if I use a strong cable?
Generally no. If the feeder is connected to or near a structure, a bear can approach along that surface and reach the feeder. If you must use nearby structures for anchor points, keep the feeder itself in free space and ensure there are no climbable paths between the bear and the feeder.
What cable and hardware should I buy so it won’t fail at the crimp points?
Choose steel cable and matching crimping sleeves sized for the cable diameter, then use the correct crimp tool for clean, tight crimps. After storms, re-check the crimps and eye bolts, because the first failures often start with frayed cable strands or slightly loosened fittings.
Do I need a swivel, carabiner, or specific connectors to prevent twisting and wear?
A locking connector like a carabiner or properly sized swivel can reduce twisting, which helps the cable wear slower. Still, don’t assume hardware is automatically stronger than the system, test pull tension after assembly, and inspect connectors monthly.
How can I tell if my feeder is actually free-hanging, not reachable from the side?
Do a “no-surface” test. With the feeder installed, stand at ground level and look for any point a bear could brace on (nearby branches, fence tops, rocks, or even tall grass). Then get low and check the side clearance around the cable and feeder body, because bears often reach from an angle rather than directly below.
Is an enclosed hopper enough, or do I still need a completely bear-resistant exterior design?
Enclosed designs help because fewer parts are exposed to bite or pry, but the body still must be metal or heavy-duty and tightly assembled. Avoid thin mesh, thin plastic, and any seams or access points a bear can pull open.
Can I use bird seed that’s “bear resistant” to make the feeder safer?
Bear-resistant seed mixes may reduce temptation slightly, but they do not replace the need for bear-proof hardware and placement. Bears are persistent and can still learn the location, especially after a single successful visit.
How often should I inspect the feeder and what exactly should I check?
Inspect about monthly and always after ice, high winds, or heavy storms. Focus on cable fraying at crimp points, tightness of lag screws and eye bolts, and any bent or cracked hardware on the feeder body. A quick “firm pull test” should show no shifting or slackening.
If a bear already visited, can I just put the feeder back right away if it looks undamaged?
Don’t. Take it down immediately and leave it off for at least two weeks, sometimes longer. The bear has learned the food source, so returning too soon can turn a one-time incident into repeat visits.
My yard has limited places to anchor the cable. What are safer alternatives if I can’t meet the 10-foot clearance?
If you cannot meet the clearance to trees and structures, consider switching to a different approach like an enclosed/window-mounted feeder or a properly installed pole system with a baffle that prevents access. The key decision aid is that placement is the limiting factor, so if clearance fails, the risk remains even with a strong feeder.
How do I reduce accidents from rain or warped wood in a DIY wooden feeder body?
Seal all edges and surfaces before installation, and avoid leaving open sections that can swell and create gaps. Warping can loosen hardware cloth or expose seed access points, so re-check fasteners after the first wet season.
Will bringing the feeder in every night fully solve bear risk?
It helps, but it does not remove all risk. If bears are already visiting, the daytime handling and outdoor staging still matters, and a bear can investigate when the feeder is absent. Use bring-in practices plus secure build and placement to avoid training repeat behavior.
How long will a bear-proof setup last, and when should I replace parts?
Cable and connectors are the most wear-prone parts. Replace steel cable if strands are frayed, crimps show signs of loosening, or the system develops slack. Replace any bent hardware and any feeder body components with cracks, corrosion in load-bearing areas, or pry marks indicating forced entry.
Can I apply these same ideas to make the feeder more dog-resistant too?
Yes, but treat it as a separate constraint. Use hang height and cable clearance for bears, then add dog-proofing by preventing dogs from reaching the feeder or knocking it sideways, for example by choosing higher placement and an arrangement with no accessible footholds. Test with your dog’s typical jumping and reach, not with human assumptions.
Next Article
How to Make a Bird-Proof Dog Feeder: DIY Steps
Build a bird-proof dog feeder with hoods, baffles, single-entry guards, safe mounting, and easy maintenance tips.