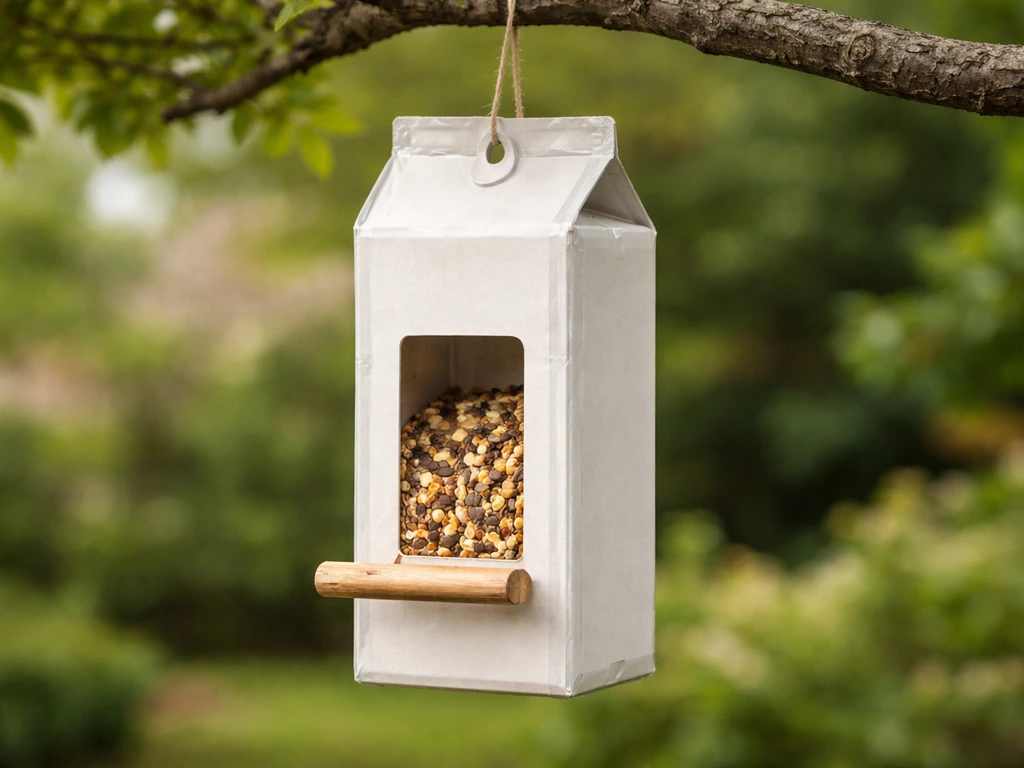
You can make a functional, bird-safe feeder from a Tetra Pak carton in about 20 minutes using a craft knife, some wire or sturdy string, a wooden dowel or chopstick for a perch, and a handful of seeds. You can also use this same approach to make a LEGO bird feeder with parts you already have. Cut a feeding window in the side, poke a perch hole below it, thread wire through the top for hanging, and you're done. The tricky part isn't the build, it's making it last more than a week outdoors, keeping pests out, and getting birds to actually show up. This guide covers all of that.
How to Make a Bird Feeder with a Tetra Pak Carton

Marcus Brennan
6 Jun 2026
When a Tetra Pak bird feeder makes sense
A Tetra Pak feeder is a great choice when you want something up quickly, you're working with kids, or you just don't have access to wood and power tools. Tetra Pak cartons (the kind that hold milk, juice, oat milk, or soup) are made from layered paperboard and a thin polyethylene coating, which makes them more water-resistant than plain cardboard. They're not waterproof, but with a few tweaks they'll hold up through a few weeks of light weather.
This is also one of the more eco-friendly feeder builds you can do, because you're giving the carton a second life before it hits the recycling bin. If you've already looked at tin can or yoghurt pot feeders and found the openings too small or the structure too flimsy, the Tetra Pak hits a useful middle ground: it's rigid enough to hold shape, large enough to attract small-to-medium birds, and easy enough to replace when it eventually degrades.
That said, be honest with yourself about its limits. A Tetra Pak feeder won't survive a full winter in a wet, exposed garden without reinforcement. If you're in a high-rainfall area or need something that lasts months without replacement, a wood or plastic-bottle feeder is more durable. For a summer project, a short-term setup, or a trial run to figure out where birds actually feed in your yard before investing in something fancier, this build is hard to beat.
Materials and tools for a tetra pack feeder
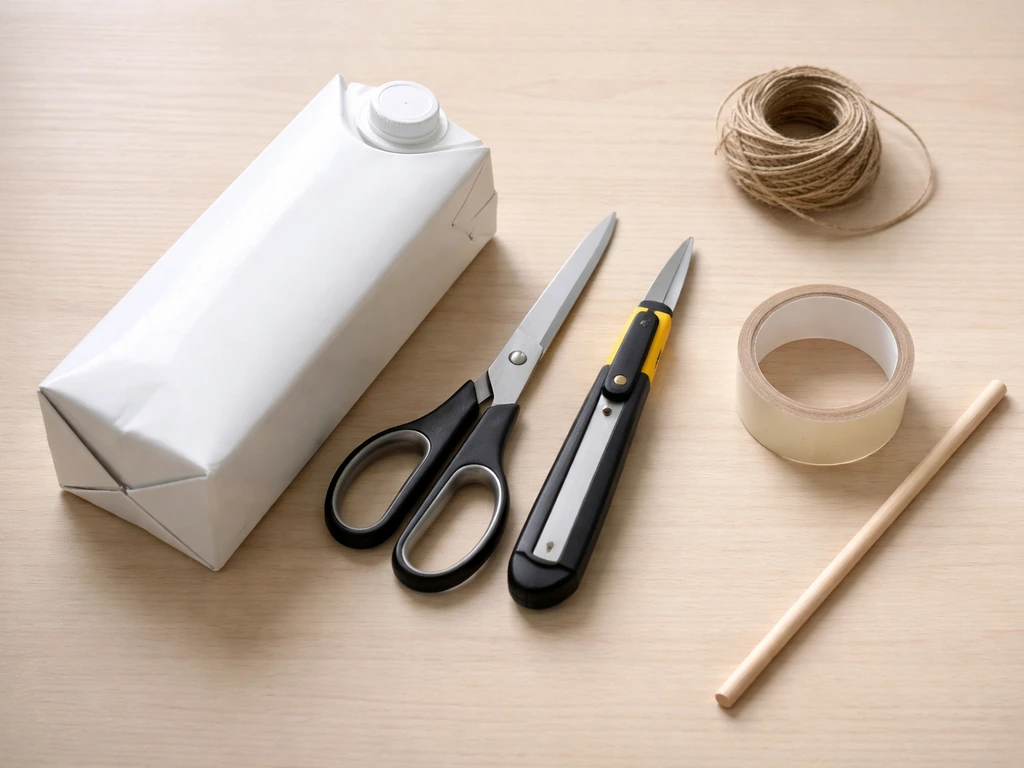
You don't need to buy anything special. Most of this is already at home.
- One clean Tetra Pak carton (1 litre or larger works best; a 1-litre milk or juice carton is ideal)
- A craft knife or sharp scissors
- A wooden dowel, chopstick, pencil, or thin bamboo skewer for the perch (around 6mm diameter)
- Galvanised wire, jute twine, or strong nylon cord for hanging (at least 40cm length)
- A hole punch or awl for making clean holes
- Waterproof tape or clear packing tape (for reinforcing edges and seams)
- Optional: acrylic paint or non-toxic craft paint if you want to decorate it
- Optional: a small piece of window screen mesh or fine mesh to line the base for drainage
Avoid using anything with a strong solvent smell inside the feeder, including spray paint applied directly to interior surfaces. Birds are sensitive to fumes. If you paint the outside, let it cure for 24 hours before hanging. For adhesives, if you need to seal any cut edges, use PVA glue (non-toxic when dry) or clear waterproof tape. Skip super glue and hot glue on surfaces that touch seed.
Step-by-step build instructions
Set aside about 20 to 30 minutes for this. Have your tools laid out before you start because once you're cutting, you want to keep moving. If you are ready to build your own, follow the step-by-step Tetra Pak instructions and apply the same placement tips for a reliable tire bird feeder setup tire bird feeder how to make.
- Wash and dry the carton thoroughly. Rinse out any milk or juice residue and let it air dry completely, at least a few hours. Any leftover smell will deter birds and cause mold faster.
- Mark your feeding window. On one flat side of the carton, draw a rectangle roughly 8cm wide by 6cm tall, positioned so the bottom of the opening is about 3 to 4cm from the base of the carton. This leaves a lip at the bottom to hold seed inside. If you want feeding on two sides, repeat on the opposite face.
- Cut the feeding window carefully. Use a craft knife against a cutting mat, or sharp scissors. Cut three sides and fold the top flap inward to create a small rain guard, or remove the piece entirely for a cleaner look. Folding inward and taping it flat gives extra weather protection.
- Reinforce the cut edges with a layer of clear packing tape. Fold the tape over the raw edge so it covers both the inside and outside lip of the window. This stops the cardboard layers from absorbing moisture at the cut point, which is where sogginess starts.
- Add drainage holes. Use an awl or the tip of a pencil to poke 4 to 6 small holes through the base of the carton. This lets any rain or condensation drain out instead of pooling and rotting the seed.
- Make the perch holes. About 2cm below the centre of your feeding window, poke a hole straight through both sides of the carton using your awl. Thread your dowel or chopstick all the way through so it sticks out about 3cm on each side. This gives birds a place to grip while feeding.
- Secure the hanging point. At the very top of the carton (through the sealed peak or just below it), push your wire or cord through from one side to the other and tie or twist a loop above the carton. For wire, use pliers to twist a secure loop. For cord, double it and tie a strong knot. Pull it firmly to confirm it'll hold the weight of a full feeder.
- Seal any gaps at the top seam if yours has come loose. A few strips of waterproof tape over the original factory seal will do. This prevents rain from entering from the top.
- Optional: apply two coats of acrylic paint to the exterior for weather resistance and to help the carton repel moisture a little longer. Allow to dry fully before filling.
- Fill through the top or through the feeding window, add your seed mix, and hang it up.
Choosing the best placement and hanging method
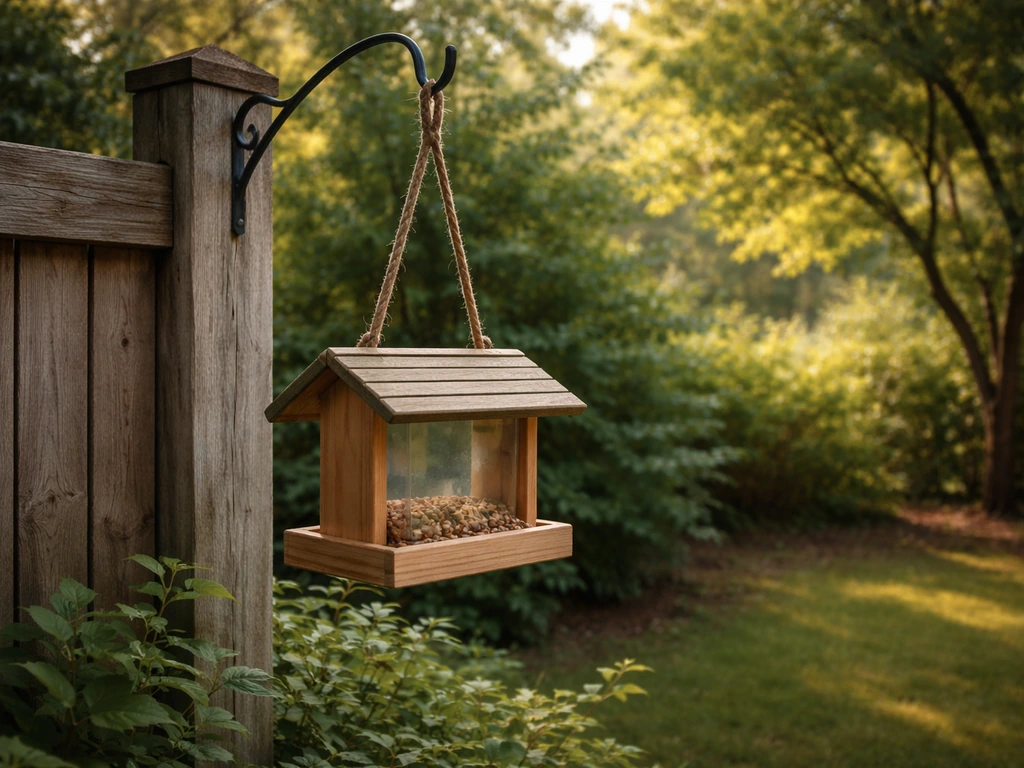
Where you hang the feeder matters at least as much as how you build it. Birds won't use a feeder they can't feel safe approaching, and a feeder in the wrong spot will get ignored for weeks.
Height is the first thing to nail. Aim for around 1.5 to 2 metres off the ground, which puts it in the range that small garden birds like sparrows, finches, and tits prefer. Too low and ground predators are a constant threat. Too high and you'll struggle to refill and clean it regularly, which means you won't.
Distance from windows is a safety issue for the birds. Place the feeder either within 1 metre of a window (so birds can't build up enough speed to injure themselves if they flush) or more than 10 metres away. The dangerous zone is 2 to 9 metres, where birds have enough airspace to hit the glass at full speed.
For a Tetra Pak specifically, you want some overhead shelter. Hanging it under a tree canopy, a shed eave, or a garden umbrella will dramatically extend its life by reducing direct rain exposure. Some sun is fine, but a feeder baking in full afternoon sun will also degrade faster and spoil seed more quickly.
Keep it within sight of a shrub or hedge that birds can retreat to quickly if alarmed, but not so close that cats can launch from the bush onto the feeder. A clear zone of about 1.5 metres between the feeder and any dense cover is a reasonable rule.
For hanging, galvanised wire is the most durable option and discourages squirrels from chewing through. Jute twine works fine but will need replacing every couple of months outdoors. If you're hanging from a shepherd's hook, branch, or beam, make sure the structure can take a bit of wind movement without the feeder swinging so wildly that seed scatters and birds can't land.
What to fill it with
The feeding window size you cut largely determines what goes in, and what birds will visit. A Tetra Pak's opening is best suited to loose seed mixes rather than suet cakes, which need a wire mesh cage to hold their shape.
| Fill type | Best for | Notes for a carton feeder |
|---|---|---|
| Mixed seed (sunflower hearts, millet) | Finches, sparrows, tits | Best all-round choice; sunflower hearts are hulled so no mess below |
| Black sunflower seeds | Greenfinches, great tits | Slightly larger seed; works well with a wider feeding window |
| Nyjer (thistle) seed | Goldfinches, siskins | Very fine; pack the window more tightly or birds waste seed |
| Peanut granules (no whole peanuts) | Tits, nuthatches | Safe in granule form; whole peanuts are a choking risk for chicks |
| Suet pellets (loose) | Robins, starlings, wrens | Works well in the carton without a mesh cage |
| Crumbled suet cake pieces | Most garden birds | Cut into small pieces; fills the carton base like seed |
Avoid whole peanuts during spring and summer nesting season, anything salted or flavoured, dry rice, desiccated coconut, and bread (it fills birds up without nutrition). Sunflower hearts are genuinely the best all-rounder for a carton feeder because they attract a wide range of birds, don't leave a shell mess on the ground, and aren't too fine to scatter or too large to access through the opening.
Don't overfill. A Tetra Pak feeder holds seed loosely, and overfilling means seed at the bottom sits for longer and can get damp. Fill it about two-thirds full and top it up every two to three days in busy seasons. This keeps seed fresher and gives you a reason to check the feeder's condition regularly.
Weather proofing and durability tweaks
Paper cartons and outdoor weather are not natural friends, but there are a few things you can do to push the lifespan from a few days to several weeks.
- Tape all cut edges inside and out with clear packing tape or waterproof gaffer tape. The raw cardboard edge is where moisture infiltrates first.
- Apply two or three coats of exterior acrylic varnish or decoupage medium (Mod Podge Outdoor formula works well) over the entire exterior once your decorating is done. This significantly reduces how much water the outer layers absorb.
- Make sure your drainage holes are open and not blocked by seed. Check them every refill.
- Hang under overhead cover whenever possible. A simple DIY rain guard cut from a larger plastic bottle or a piece of corrugated plastic sheet suspended a few centimetres above the feeder will extend its life noticeably.
- In very wet weather, bring the feeder in overnight or when you know heavy rain is coming. A Tetra Pak feeder is lightweight enough that this is easy to do.
- Accept that this is a temporary feeder. Even with all the tricks, plan to replace the carton every four to six weeks. That's part of the deal, and the low cost and recycled materials make it fine.
If you want something that lasts longer but uses a similar budget, a plastic bottle feeder or a tin can feeder will outlast the carton. If you want a more upcycled option with different materials, a tin can bird feeder DIY can be an easy alternative that often lasts longer outdoors. But if you enjoy the build process and like swapping in a new carton regularly, the Tetra Pak version is genuinely satisfying to maintain.
Cleaning, maintenance, and keeping pests away
This is the part most people skip, and it's where birds actually get harmed. Dirty feeders spread bacterial and fungal diseases like salmonellosis and aspergillosis, which can kill birds in large numbers. The cleaning schedule for a Tetra Pak is a bit different from a wood or plastic feeder because you can't scrub it hard without damaging the structure.
Aim to replace the carton every two to four weeks, or sooner if you spot mold inside, soggy seed clumping at the base, or any visible deterioration of the carton walls. Project FeederWatch and Audubon both recommend cleaning seed feeders roughly every two weeks. Because a Tetra Pak can't be fully cleaned and dried as easily as a plastic or metal feeder, replacing it on this schedule is the practical equivalent of a proper clean.
When you do want to clean it between replacements (for example, if a bird has been sick at the feeder), mix one part bleach to nine parts water, wipe the interior with a cloth soaked in the solution, then rinse thoroughly with clean water and allow to dry completely before refilling. Do not refill a damp feeder. The bleach ratio here matches the guidance from All About Birds and Audubon: 1:9 is effective without being so strong it leaves harmful residue after rinsing.
For pest-proofing, squirrels are the main problem. A Tetra Pak won't survive a determined squirrel, so placement is your main defence. Hang it from a thin wire or smooth cord that squirrels can't easily grip, away from jump-off points like fence posts and tree branches. Adding a plastic bottle baffle above the feeder (threading the wire through an inverted bottle) blocks most squirrels. Ants are a summer issue mainly with suet; hanging the feeder over an ant moat or greasing the wire with petroleum jelly can help, but with seed-filled carton feeders ants are usually not a serious problem.
Larger bully birds like starlings and pigeons can monopolise a small carton feeder. A smaller feeding window (6cm wide or less) naturally excludes larger birds and favours the smaller species you're probably trying to attract.
Troubleshooting common problems
Birds aren't visiting
This is the most common frustration and almost always just a timing issue. New feeders can take anywhere from a few days to three or four weeks for birds to discover, especially if you haven't had a feeder in that spot before. Put it in a visible location near existing shrubs or a birdbath if you have one, use sunflower hearts (the most universally attractive seed), and then wait.
If you want an exact build plan and measurements, see this guide on how to make a bird feeder by Liyala Tuckfield. You can apply the same DIY setup mindset to a popsicle stick bird feeder too, just follow the specific popsicle stick bird feeder instructions for your design. Resist the urge to move it every few days, because birds find feeders partly by memory and routine.
The carton is going soggy

If the bottom or sides are softening within the first week, check two things: drainage holes and shelter. If water is pooling at the base, your drainage holes are either too small or blocked by seed. Clear them out and make them slightly bigger. If the whole exterior is deteriorating fast, the feeder is in too exposed a position. Move it under some cover and apply a coat of exterior varnish to the next carton before hanging it.
Seed is spilling or the perch keeps shifting
If seed is spilling out freely, either the feeding window is too large or the carton is swinging excessively in wind. Trim a small strip of cardboard and tape it across the bottom of the window as a raised lip, or hang the feeder in a more sheltered spot. For a wobbly perch, push the dowel through and add a small dab of PVA glue where it enters the carton wall, or wrap it with a bit of tape on the outside to lock it in place.
Squirrels are destroying it
A Tetra Pak offers no resistance to squirrel teeth. Your only real options are placement (thin wire, baffle above, away from launch points) and simply accepting that you'll be replacing it more often. If squirrels are a persistent problem in your yard, a Tetra Pak feeder is probably not your long-term solution; a metal or hard-plastic feeder with a weight-sensitive perch mechanism will serve you better. In the meantime, the carton is cheap enough to replace regularly.
Mold or clumping seed inside
Clumped, damp, or moldy seed is a health risk to birds and needs to be addressed immediately. Remove and discard all the seed, dispose of the carton if the mold is into the walls, clean the hanging wire or cord with dilute bleach solution, and start fresh with a new carton. Going forward, fill less at a time so seed turns over faster, check drainage holes at every refill, and don't leave the feeder up in heavy rain without shelter. In hot, humid weather Audubon recommends cleaning feeders more frequently than the standard two-week schedule, and the same logic applies here: if conditions are damp and warm, swap the carton every week instead.
FAQ
Can I put suet or mealworms in a tetra pack bird feeder?
Yes, but use a narrow, loose-seed mix. Suet cakes need a metal mesh cage to keep their shape, and a plain carton window often lets soft suet slump out, which then clogs the opening and makes mold more likely.
How often should I replace the carton in hot or humid weather?
To reduce spoilage, check the feeder every time you refill, but replace it on a set rhythm. If you are in humid or hot weather, swap the carton weekly, not every 2 to 4 weeks, because damp seed inside degrades quickly even if the carton looks mostly intact.
Is it safe to use scented tape, decals, or exterior paint on the carton?
Bake a small test batch by leaving the window uncovered for 24 to 48 hours after any glue or tape work, then smell it near the opening. If you still notice any odor from materials, do not hang it yet, and avoid products with strong fragrance inside.
What should I do if the carton smells bad or there is mold on the inside walls?
Not really. With a carton you want clean-and-dry only when possible, and scrubbing can weaken the walls. If you see mildew that has penetrated the carton material or the seed is visibly moldy, discard the carton, then clean the wire or cord before starting fresh.
I live in an apartment, how can I place a tetra pack feeder safely near windows?
Keep the porch or balcony version out of the dangerous window zone by using the same rule relative to glass: either very close (within about 1 metre) or far enough away (more than about 10 metres). If you cannot achieve that, use a different placement or a feeder type designed for close-window safety.
How do I know when to refill without leaving old, damp seed?
For fast turnover, set a refill routine based on demand. In a quiet yard, top up every 3 days, in busy seasons every 2 days, and immediately remove spilled seed from the ground so it does not attract pests or turn soggy.
Will narrowing the feeding window keep starlings away?
Yes, if you use it correctly. A smaller window opening (around 6 cm or less) helps exclude larger bully birds, but do not over-trim. If the opening is too small, smaller birds may still struggle, so test with sunflower hearts and adjust after a week.
Can I add bread, rice, or salted foods when the feeder is empty?
Avoid it. Bread can swell and ferment in the stomach, and it does not provide balanced nutrition. If you are mixing seeds, stick to reputable bird seed types like sunflower hearts rather than adding kitchen scraps.
Should I take the tetra pack feeder down during rainstorms?
Yes, but only if you keep the seed dry and the feeder sheltered. Use overhead cover and do not refill right after rain, then check drainage and interior dryness before adding more. In heavy storms, take the feeder down temporarily and rehang once it is dry.
What’s the best fix if the perch keeps moving or the feeder is unstable?
If the perch wobbles, it will scatter seed and discourage birds. Reinsert the dowel and lock it at the wall with a small amount of PVA glue, or wrap the outside with tape to prevent movement, then let glue set before hanging.
Next Article
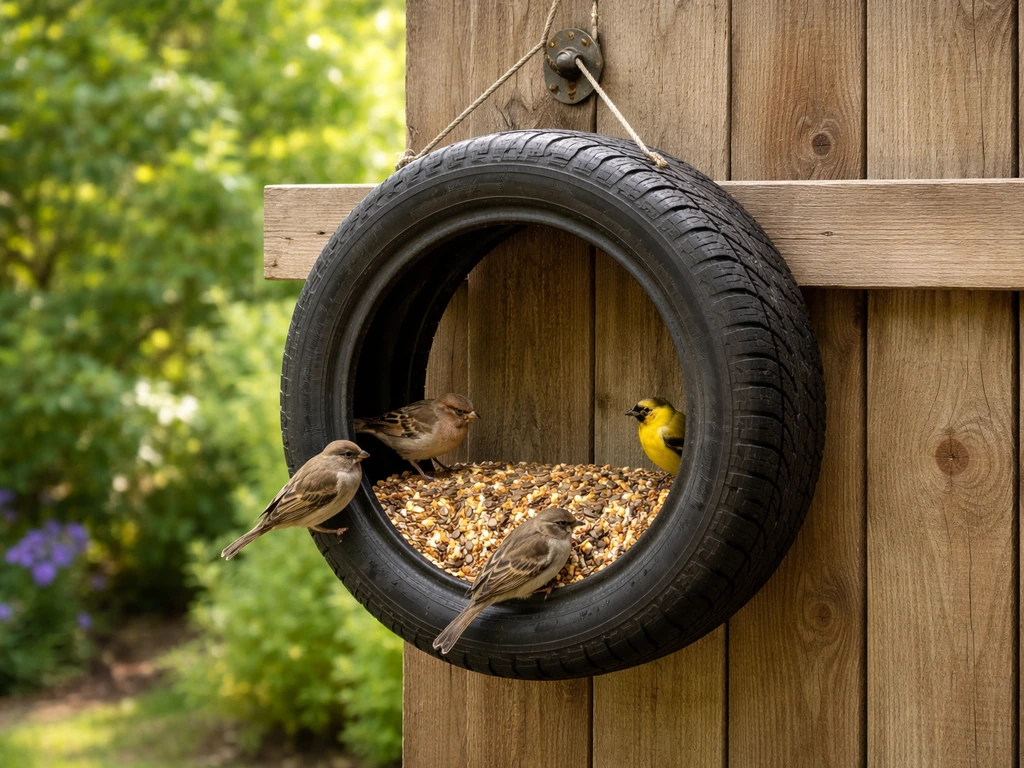
Tire Bird Feeder How to Make It Step by Step
Step by step guide to build, mount, and weatherproof a tire bird feeder, with cutting safety, cleaning, and pest fixes.