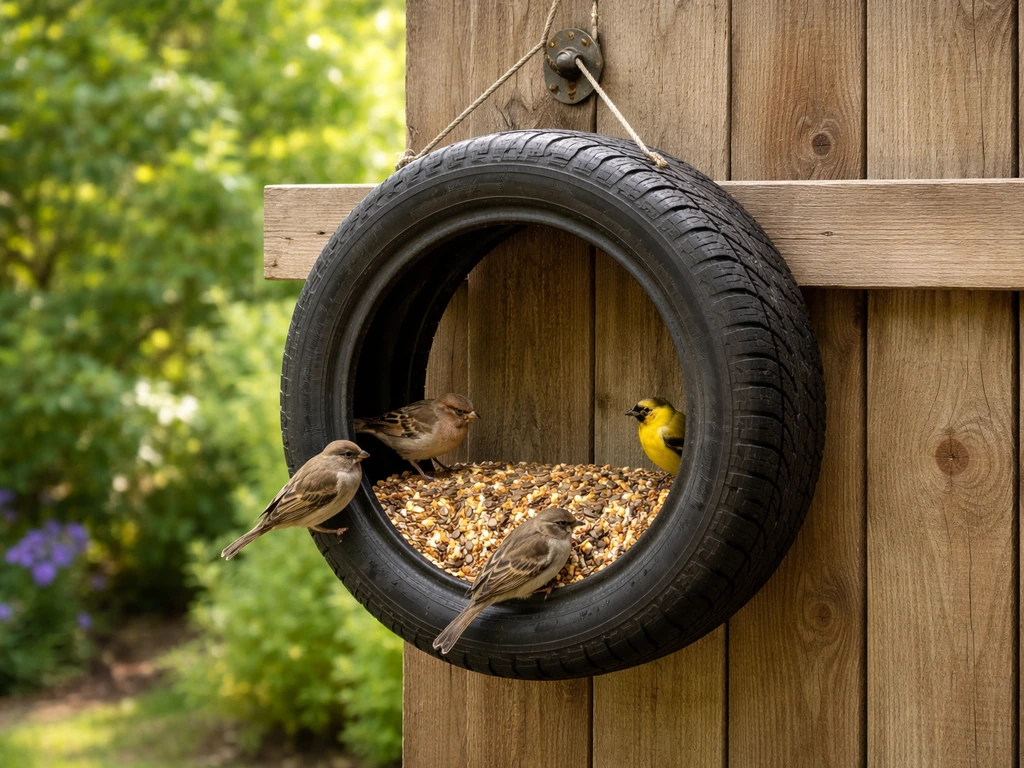
You can turn an old car tire into a solid, weather-resistant bird feeder in a single afternoon using tools you probably already own. The basic approach: clean the tire thoroughly, cut or drill openings for seed access, add a feeding tray or platform inside, and hang or mount it where birds can find it safely. If you want to make it more playful, you can also design a LEGO bird feeder using similar placement and feeding-surface ideas add a feeding tray or platform inside. The result is a heavy-duty feeder that handles rain, wind, and sun far better than most store-bought options, and it costs almost nothing if you're recycling a tire that would otherwise end up in a landfill.
Tire Bird Feeder How to Make It Step by Step
Marcus Brennan
30 May 2026
Choosing the right tire and basic safety
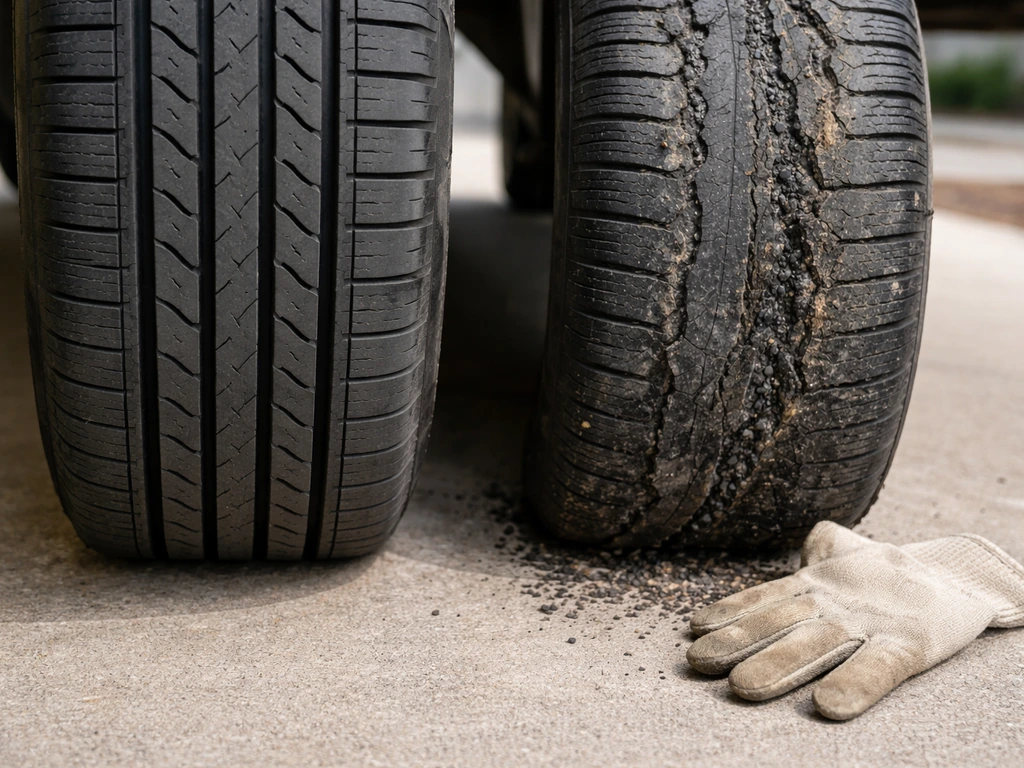
Not every old tire works well for this project, and a couple of choices here affect both your safety and the birds'. Start with a passenger car tire rather than a truck or tractor tire. Passenger tires are lighter, easier to cut, and more manageable to hang. Look for one with no visible cuts, cracks, bulges, or sidewall damage. Those kinds of defects mean the rubber has degraded in ways that can make cutting unpredictable and can release more chemical residue over time.
The main safety concern with tires is chemical residue. Tires contain carbon black, processing oils, and various vulcanizing compounds that can leach slightly, especially when wet and warm. To reduce any risk to birds, avoid tires that have obvious oil staining or chemical smell beyond normal rubber odor. Wash the tire inside and out with dish soap and a stiff brush, rinse it well, and let it air out in the sun for at least two or three days before building. This off-gassing step matters more than most DIY guides mention.
Skip tires with steel belt exposure. If you can see shiny metal threads through the rubber anywhere on the sidewall or tread, that tire is too worn or damaged to work with safely. NHTSA considers tires worn to 2/32 inch tread depth as needing replacement, so tires at that point are fine to repurpose as long as the structure looks intact with no cuts or bulges. Tires from the garage or a local tire shop's discard pile are ideal sources. Many shops will hand them over for free.
Materials and tools list for a tire feeder build
You don't need anything fancy. Here's what to gather before you start:
- One clean passenger car tire (no steel belt exposure, no cracks or bulges)
- A jigsaw or reciprocating saw with a blade rated for rubber or thick material
- A drill with a 1/4-inch bit and a 3/8-inch or larger bit for drainage holes
- A piece of exterior-grade plywood or a cedar board (roughly 12 x 12 inches) for the feeding tray
- Exterior wood screws or stainless steel bolts and nuts (3-inch length works well)
- Sandpaper (medium grit, 80 or 100)
- Waterproof wood sealant or exterior paint rated for outdoor use
- Heavy-duty rope, chain, or galvanized wire for hanging (rated for at least 20 lbs)
- A few wooden dowels (3/8-inch diameter, cut to 6-inch lengths) for perches
- Dish soap, a scrub brush, and a garden hose for prep cleaning
- Safety glasses and work gloves for cutting
If you don't have a jigsaw, a sharp utility knife and some patience can work for thinner sidewall sections, but a jigsaw is genuinely easier and safer. For the feeding tray, cedar or pressure-treated exterior plywood both hold up well outdoors. If you want to skip cutting wood, a terracotta saucer from a garden center fits neatly inside many passenger tire interiors and is a good free-or-cheap substitute.
Step-by-step: making a bird feeder out of a tire
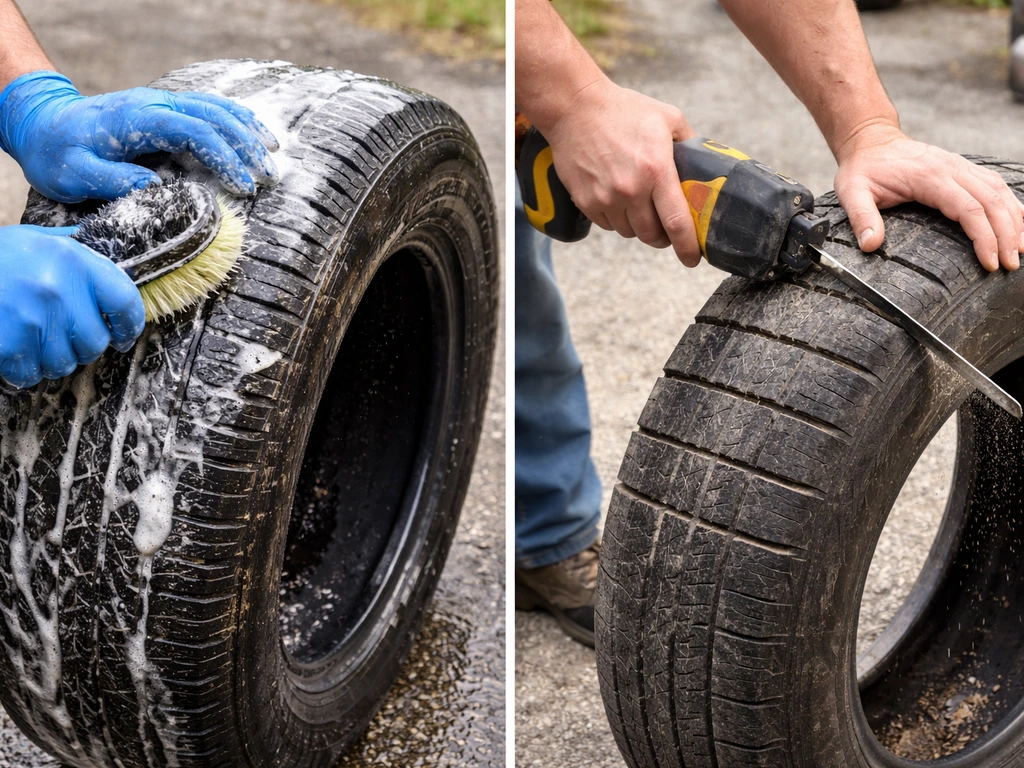
- Wash the tire thoroughly with dish soap and a stiff brush, inside and out. Rinse well and let it dry and off-gas outdoors for at least two to three days.
- Put on your safety glasses and gloves. Lay the tire flat on a stable surface. Use your drill to make a starter hole in the sidewall, then cut a large feeding window using your jigsaw. A good opening size is about 6 inches wide by 4 inches tall, centered on the upper sidewall when the tire is hung vertically. Cut one window on each side of the tire for double-sided access.
- Sand down the cut edges with medium-grit sandpaper until smooth. Rough rubber edges can trap seed and debris, so take a few minutes here.
- Drill 6 to 8 drainage holes (at least 3/8 inch diameter) in the lowest point of the tire's interior when it's in its hanging position. This is critical: without drainage, rainwater pools inside and spoils seed fast.
- Cut your plywood or cedar board into a circle or square that fits snugly inside the tire's inner cavity. This becomes the feeding tray. Sand it smooth, then apply two coats of waterproof exterior sealant or exterior paint and let it cure fully (usually 24 hours per coat).
- Once the tray is dry, position it inside the tire horizontally. Secure it with stainless steel bolts or exterior screws driven through the tire sidewall and into the tray edges at three or four points. The tray should sit level and firm.
- Drill two holes at the top of the tire (one on each side) for your hanging rope or chain. Use a 3/8-inch or larger bit. Thread your rope or chain through and knot or secure it so the tire hangs level.
- Optionally, drill 3/8-inch holes around the lower edge of the feeding windows and press in your wooden dowel perches. A dab of exterior wood glue on each dowel before inserting keeps them secure.
The whole build typically takes two to three hours of active work, not counting the initial off-gassing and paint drying time. Budget a full weekend from start to hang if you want to do it right without rushing the curing steps.
Attaching feeding surfaces and perches (and how to place them)
The interior feeding tray is the heart of the feeder. Position it so it sits roughly 2 to 3 inches below the bottom edge of your cut windows. This gives birds a clear landing spot and keeps seed from spilling out immediately in the wind. If you used a terracotta saucer, nestle it directly on the tray so you can lift it out easily for cleaning.
Perches are worth adding if you want to attract smaller songbirds. Drill the perch holes about 1 inch below the bottom edge of each feeding window and angle the holes very slightly downward so water drains away from the tire body. Wooden dowels at 3/8-inch diameter are the right size for most small birds including finches, chickadees, and nuthatches. Avoid metal perches on a tire feeder since metal conducts heat and cold more than wood does and can be rough on feet in winter.
One thing that helps a lot in practice: keep the feeding tray lightly loaded rather than packed full. A thin layer of seed, around half an inch deep, lets birds pick through it without burying weaker birds. Sunflower seeds and mixed blends both work well in this style of feeder. Avoid loose millet or very fine seeds in an open tire feeder since they scatter and spoil quickly.
Hanging and positioning for backyard birds
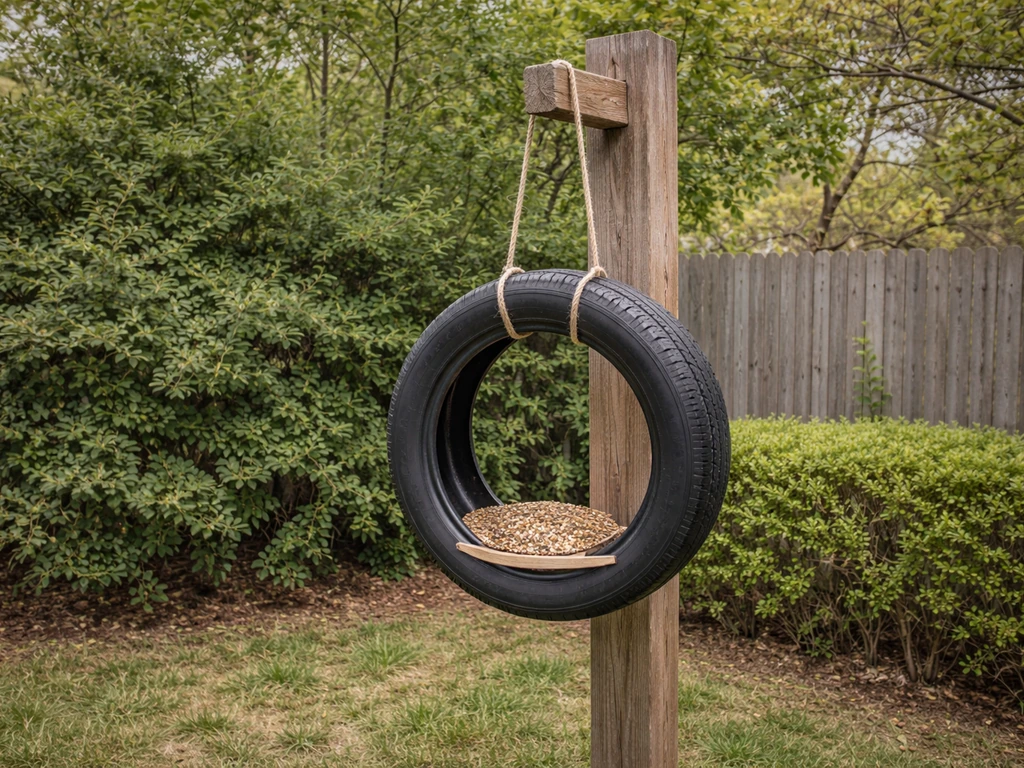
Where you hang the tire feeder matters as much as how you built it. The best spot balances bird safety, predator awareness, and easy refilling for you. Hang or mount the feeder 5 to 6 feet off the ground as a general starting point. That height puts it within easy view for you, makes it accessible to a wide range of birds, and is high enough to make squirrel jumping more difficult (though not impossible, more on that below).
Try to place the feeder within 10 to 15 feet of a shrub, hedge, or tree where birds can wait and retreat. The National Wildlife Federation recommends this approach because birds need nearby cover to feel safe approaching a feeder, especially in open yards. Avoid hanging it right in the open center of a lawn with no nearby cover. Birds will use it eventually, but they'll be stressed and it will take longer for them to become regular visitors.
Window placement deserves special attention. Research from sources including the U.S. Fish and Wildlife Service and All About Birds shows that feeders placed either within 3 feet of a window or more than 30 feet away produce the lowest collision risk. The tire feeder is heavy enough that you likely won't be hanging it right at a window, but if you mount it on a post near your house, aim for 3 feet or less from any large glass surface, or move it well beyond 10 feet away. The 3-to-30-foot zone is the danger zone for bird strikes.
Weatherproofing, cleaning, and ongoing maintenance
The rubber tire itself is naturally weatherproof and needs almost no treatment. The parts that need attention are the wooden feeding tray and any wooden perches. Reapply exterior sealant to the tray once a year, or more often if it shows signs of cracking or checking. Cedar holds up better than pine here, so if you're replacing the tray at any point, go with cedar.
Cleaning is the single biggest maintenance task and it's easy to let slide. Project FeederWatch recommends cleaning seed feeders about once every two weeks, and more often during warm or damp weather. For a tire feeder, the routine is simple: remove the tray (or saucer), dump any remaining seed, scrub the tray and the tire interior with a brush, then disinfect.
Audubon and the National Wildlife Health Center both recommend a solution of nine parts water to one part household bleach for disinfecting. The Virginia DWR recommends soaking for 10 minutes in that diluted bleach solution, then rinsing very thoroughly. Let everything dry completely before refilling. When you clean, wear disposable gloves, both for your own hygiene and because of any bird flu exposure risk the CDC flags for people who handle bird feeders.
If you ever see black mold or cloudy residue inside the tire or on the tray, don't just wipe it off and refill. Discard any seed that was in contact with it, do a full disinfection clean, and let the feeder dry in the sun for several hours before reloading. That black mold is Aspergillus, which is genuinely harmful to birds. Catching it early keeps your visitors healthy.
Also rake and clear the area directly below the feeder regularly. Seed hulls and waste on the ground harbor mold and attract rodents. A quick rake every week or two, or even spreading a tarp underneath that you can shake out, makes a real difference.
Pest-proofing and troubleshooting common problems
Squirrels
Squirrels are the most common complaint with any backyard feeder, and a tire feeder is no exception. The most effective approach is a pole-mounted setup with a baffle. A smooth metal baffle placed about 4 feet up the pole makes it very hard for squirrels to climb past. Audubon specifically recommends pole baffles as the most reliable squirrel deterrent. If you're hanging the feeder from a branch or rope, try threading the rope through a section of smooth PVC pipe above the feeder, which squirrels can't grip. Keep the feeder at least 10 feet from any fence, structure, or tree trunk a squirrel can jump from.
Larger birds dominating the feeder
Grackles, starlings, and pigeons can take over an open tire feeder because the tray design gives them easy access. The simplest fix is to hang a second, smaller feeder nearby with a tube or caged design that physically excludes larger birds, drawing the smaller songbirds away from the tire feeder where the bigger birds congregate. Spreading seed across multiple feeding stations also reduces disease transmission risk by limiting contact between individuals, which Audubon notes as a good practice generally.
Seed clumping and drainage issues
If seed is clumping inside the tire after rain, your drainage holes are either too few or too small. Add more holes (you can never have too many in the lowest section of the tire) and check that the tray itself is not blocking drainage. Tilting the tray slightly so water flows toward the drainage holes helps. In very wet weather, switching to a covered sunflower seed blend or a suet cake in a small cage mounted inside the tire reduces spoilage dramatically compared to open mixed seed.
Feeder swinging in the wind
Tires are heavier than most feeders, but a single-rope hang can still swing and spin in wind, scattering seed. Use two attachment points (thread the rope through two holes in the upper tire, spaced about 6 inches apart) to create a more stable hang. Or mount the tire on a post using a bolt through the center of the tire and a backing plate, which gives you a completely stable, spin-free setup.
If you enjoy this kind of recycled-material project, the same problem-solving approach carries over to other DIY feeders built from tin cans, tetra packs, yogurt pots, and other household materials. If you want another quick project, try a tin can bird feeder DIY plan using the same ideas for safe prep, drainage, and easy cleaning. Each material has its own prep and weatherproofing quirks, but the principles of drainage, cleaning access, and smart placement stay the same across all of them.
Your next steps
If you have an old tire sitting in the garage or can grab one from a local shop, you're most of the way there. Source your tire today, give it a good wash, and set it to off-gas while you gather the rest of the materials. The build itself is genuinely forgiving: if your cuts aren't perfect or your tray isn't exactly level, the feeder still works. Birds aren't measuring your craftsmanship.
Fill it with black-oil sunflower seeds, hang it near some cover, and give it a week. If you want a different style, follow a bird feeder tutorial by Liyala Tuckfield for inspiration and variations on materials and placement. If you prefer a smaller project, you can make bird feeders with yoghurt pots too by adding seed-friendly holes and a simple hanging loop Fill it with black-oil sunflower seeds.
Once the birds find it, you'll be refilling it more often than you expect. If you want an even simpler craft option, popsicle stick bird feeder instructions are a great next DIY step for kid-friendly builds.
FAQ
How long should I off-gas the tire before cutting and building the feeder?
Let the tire sit in sunlight and air for at least 2 to 3 days after washing. If the rubber still smells strongly “chemical” when you get close, extend the off-gassing another day or two before you cut, drill, or glue on any wood.
Is it safe to use a tire with a little dry cracking on the sidewall?
Avoid it. Small cracks can mean the rubber has already broken down, which makes cutting less predictable and increases the chance of shedding residue. If you see any bulges or sidewall cuts, or if the rubber feels brittle rather than springy, pick a different tire.
Can I use a tractor or truck tire instead of a passenger tire?
It is possible but typically not ideal for this design. Larger tires are heavier and harder to hang safely, and their sidewalls are thicker and more difficult to cut cleanly. If you do use one, plan on a post mount or a much more robust baffle setup to prevent sag and seed spill.
What should I do if birds keep landing on top of the tire but not feeding from the tray?
Lower the tray position so it sits closer to the cut openings, and make sure the window openings are large enough for a bird’s body to reach in comfortably. Also keep the seed layer light (about half an inch) so birds can see and pick rather than having to dig through a deep pile.
How many drainage holes do I actually need, and where should they be placed?
Use multiple holes clustered in the lowest section of the tire interior, not just one or two. If water pools after rain, add more holes (more is better) and confirm the tray is not covering the drain area or blocking water flow with the tray’s rim.
What if I notice mold after a few weeks, but I already cleaned once?
If you see black mold or cloudy residue, discard any remaining seed, fully disinfect, and dry the feeder longer in the sun before refilling. Also clean more frequently during warm or damp weather, and rake the ground under the feeder so hulls do not build up and re-contaminate the area.
Is bleach disinfection always necessary, or can I just rinse and scrub?
Rinsing and scrubbing helps, but disinfection is what reduces disease risk when conditions are humid or seed has been sitting. Follow the diluted bleach approach and rinse thoroughly afterward, then let everything dry completely before adding fresh seed.
What’s the best seed choice for a tire feeder in rainy weather?
Use sunflower-based blends rather than very fine seed, and consider switching to a covered setup or suet cake in a small cage during extended wet spells. Thin, accessible seed layers also prevent clumping, since packed seed traps moisture against the tray and interior.
How do I stop squirrels without making the feeder hard for birds to use?
Pole mounting with a smooth baffle is usually the most effective. Keep the feeder at least 10 feet from jump-off points like fences or nearby trunks, and position the baffle so squirrels cannot climb past it even when the feeder is windy and swaying.
What’s the safest way to mount the feeder if it keeps spinning or swinging?
Use two attachment points for a hanging build (spaced apart near the top) to reduce rotation. For maximum stability, bolt-mount the tire on a post using a center hole plus a backing plate so the feeder stays level and seed does not funnel out one side.
How close should the tire feeder be to windows to reduce bird strikes?
Aim for either within 3 feet of a large window or well beyond 10 feet, since the 3-to-30-foot range is the higher-risk zone. If your feeder is on a post near a wall, measure from the window glass to the feeder body so you can adjust placement accurately.
Do I need to seal the tire itself, or only the tray?
Typically you only need to treat the wood parts. The rubber tire is already weather-resistant, but the tray and perches benefit from outdoor sealant on an annual schedule (or sooner if you see checking or cracking).
How often should I refill and clean a tire bird feeder?
Refill when birds empty the tray, but plan cleaning on a schedule, roughly every two weeks as a baseline. In hot, humid, or rainy periods, shorten that interval because seed spoils and clumps faster, and residue can build up in the tire interior.
Next Article
How to Make a Bird Feeder by Liyala Tuckfield
Step-by-step DIY bird feeder build with materials, safe assembly, placement tips, and maintenance for beginner-friendly