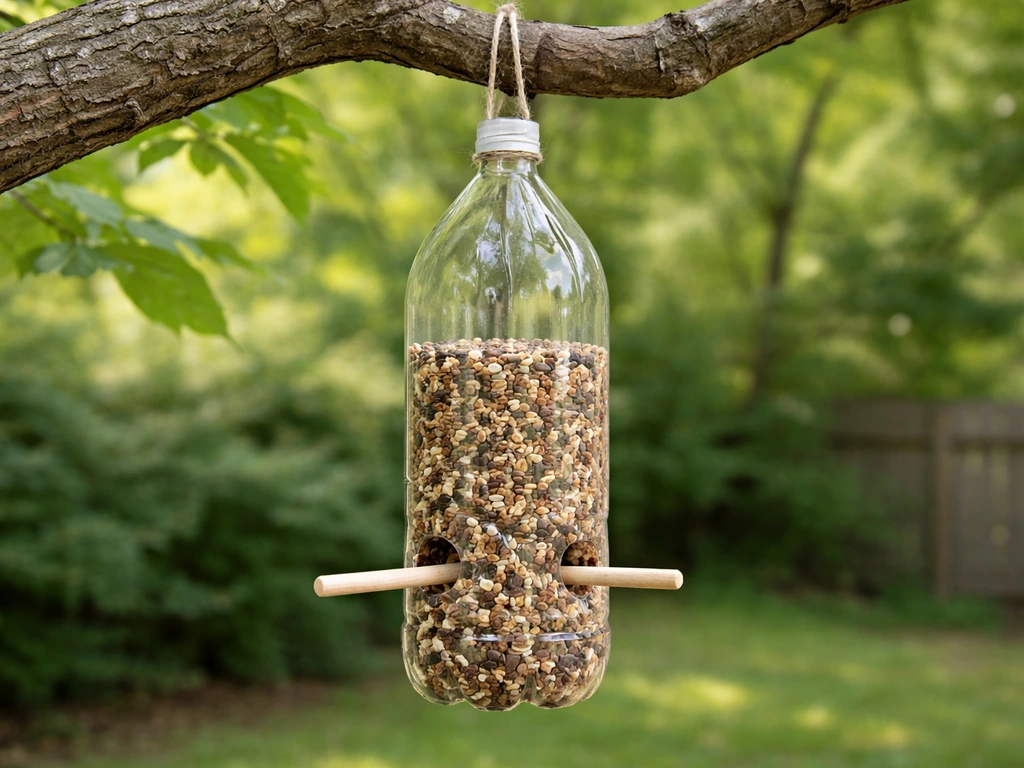
You can make a working bird feeder from a 2-liter bottle in about 20 minutes using a sharp knife, a wooden dowel, some twine, and a handful of sunflower seeds. If you want to try a more seasonal twist, learn how to make a bird feeder out of a gourd and use it the same way you would a standard backyard feeder. Cut two feeding holes above a dowel perch, poke drainage holes in the bottom so seed doesn't rot, fill it up, and hang it from a branch. That's genuinely all it takes to get birds feeding from a recycled bottle. If you want an orange version, use the same port-and-perch idea, but adapt the cut openings and drainage to the orange rind so it stays safe for birds orange bird feeder. The rest of this guide shows you how to do it right so the feeder stays sturdy, stays clean, and birds actually show up.
How to Make a Bird Feeder From a 2L Bottle

Which birds will come and where should you put it
A 2-liter bottle feeder filled with black-oil sunflower seed will attract chickadees, nuthatches, jays, house finches, and sparrows reliably. These are perching birds that feel comfortable feeding from a small port-style opening, which is exactly what a bottle feeder offers. If you want to broaden your visitor list, millet in a separate feeder or a small tray below the bottle brings in ground-feeding species like juncos and doves. Woodpeckers tend to prefer suet blocks, and orioles are better served by their own specialized feeder setup, so don't expect this bottle design to be a one-size-fits-all solution.
Placement matters more than most people think. The two main rules are: place the feeder close to natural cover like shrubs or tree branches so birds have somewhere to wait and retreat if a predator shows up, and manage the distance from your windows carefully. Either hang the feeder within 3 feet of a window or beyond 10 feet away from it. In that 3-to-10-foot zone, birds can build up enough speed to seriously injure themselves if they mistake the glass for open sky. Ten feet seems like a lot, but it's also enough distance that a bird reaching your feeder has a clean, safe flight path back to cover.
What you need before you start
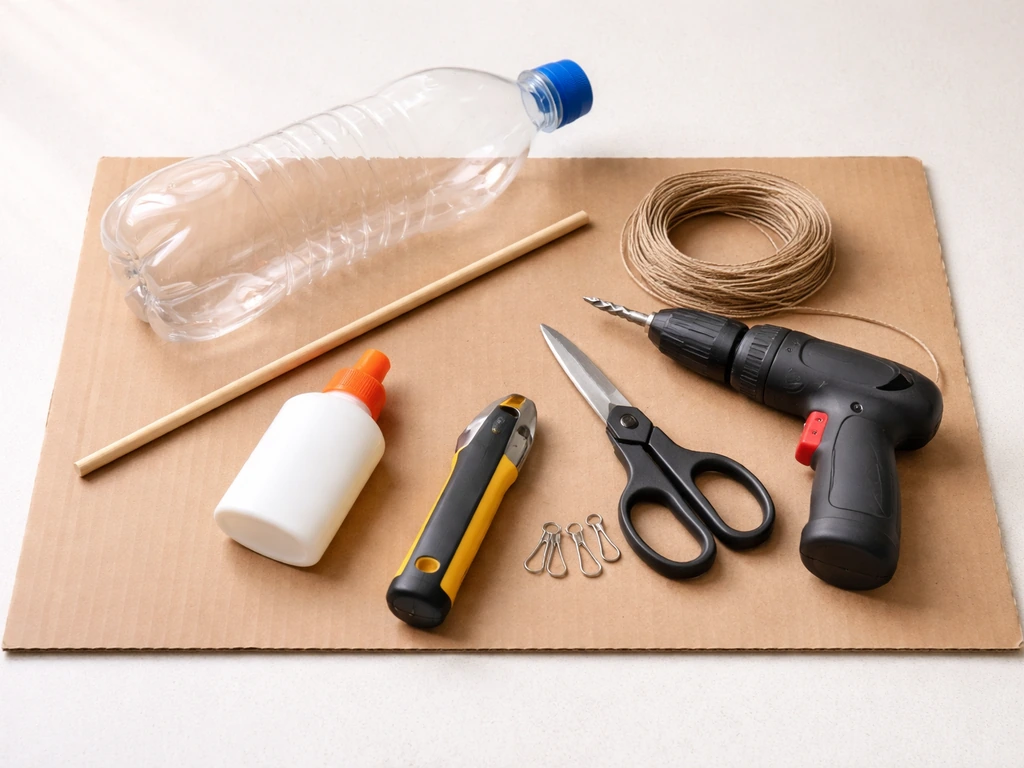
This is a genuinely low-cost project. Most of what you need is already in the house or costs almost nothing to pick up.
- One clean, dry 2-liter plastic bottle with its cap (any color works)
- One wooden dowel rod, roughly 1/4 inch in diameter and about 12 inches long (a chopstick or pencil also works)
- A sharp craft knife or box cutter (scissors struggle with plastic this thick)
- A Phillips-head screwdriver or a heated skewer for making small holes
- Twine, paracord, or a wire coat hanger for hanging
- A permanent marker for marking cut lines
- Hot glue gun (optional but helpful for reinforcing the perch)
- Black-oil sunflower seed or a general wild bird seed mix
- Sandpaper or a lighter to smooth any sharp plastic edges after cutting
If you don't have a dowel, a thick stick from the yard works fine. Just make sure it's dry and straight enough to slide through the bottle cleanly. The whole build costs nothing if you're working with what you have, or a couple of dollars if you need to grab a bag of seed and a dowel from the hardware store.
Step-by-step: building the basic bottle feeder
This design is the classic port-style bottle feeder: two feeding openings on opposite sides of the bottle, a dowel running through below them for birds to land on, and drainage holes at the base. It takes about 20 minutes from start to finish.
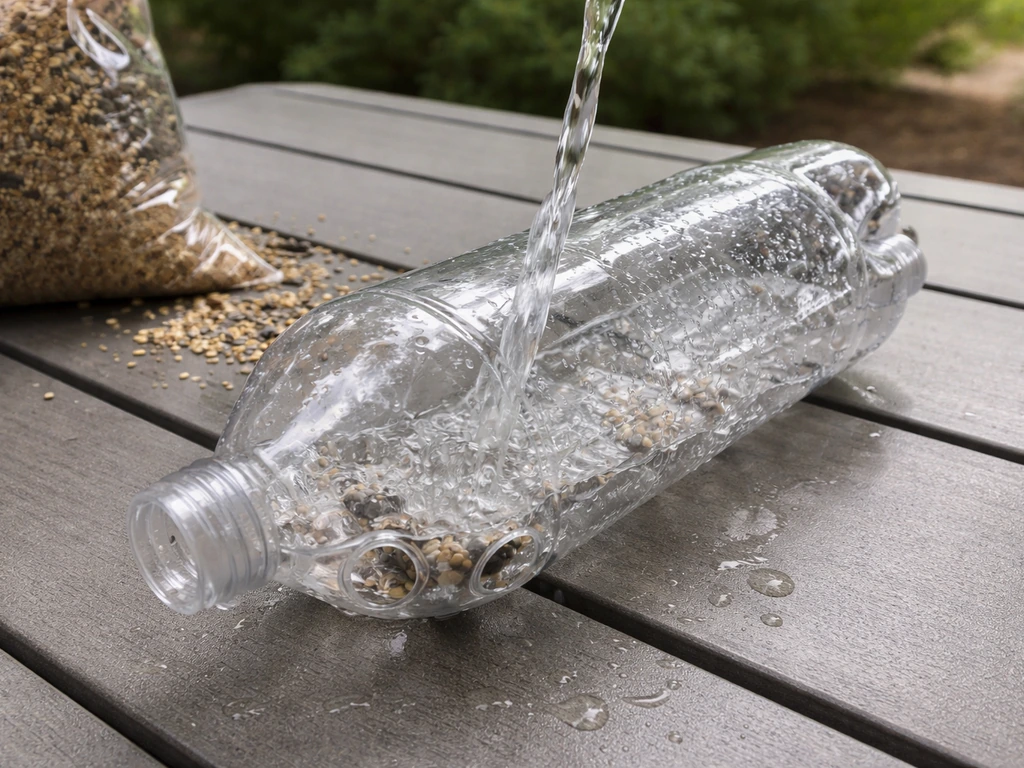
- Wash the bottle thoroughly with warm soapy water and let it dry completely. Any residue from fizzy drink can attract wasps and interfere with seed.
- Decide on your perch height. A good starting point is about 4 to 5 inches up from the bottom of the bottle. Mark a dot on one side with your permanent marker, then mark a matching dot directly on the opposite side.
- Push or drill your 1/4-inch hole through both marks. A heated skewer or a drill bit makes clean holes. The dowel should fit snugly, not loosely.
- Slide the dowel through both holes so it sticks out about 2 to 3 inches on each side. These extensions are what birds actually land on.
- If you have hot glue, run a small bead around each hole from inside the bottle before inserting the dowel. This locks the perch in place and prevents it from rotating or pulling out under a bird's weight.
- Mark your feeding holes about 4 cm (roughly 1.5 inches) directly above each perch hole. These should be centered above where the bird will be standing.
- Cut each feeding hole into a circle about 1.5 inches in diameter using your craft knife. Cut from the center outward in small strokes rather than sawing. The opening needs to be big enough for seed to spill through easily when a bird pecks at it, but not so large that everything dumps out at once.
- Smooth any sharp plastic edges with a few passes of sandpaper or a quick pass of a lighter flame held a centimeter away (don't melt the plastic, just take the sharp burr off). Birds' feet and beaks can get caught on rough cut edges.
- Make your drainage holes at the very bottom of the bottle: push 4 to 6 small holes using a heated skewer or a nail. These should be small, about 3mm, just big enough to let water out without losing seed.
- Make a hanging hole through the cap or thread twine tightly around the neck of the bottle just below the cap. Double-knot everything. The feeder will be heavier than you expect once it's full of seed.
- Fill the bottle about two-thirds full of seed through the feeding holes or, easier, remove the cap and pour seed in from the top, then replace the cap before hanging.
- Hang it up and step back. Give it a day or two.
Getting the perches, drainage, and openings right
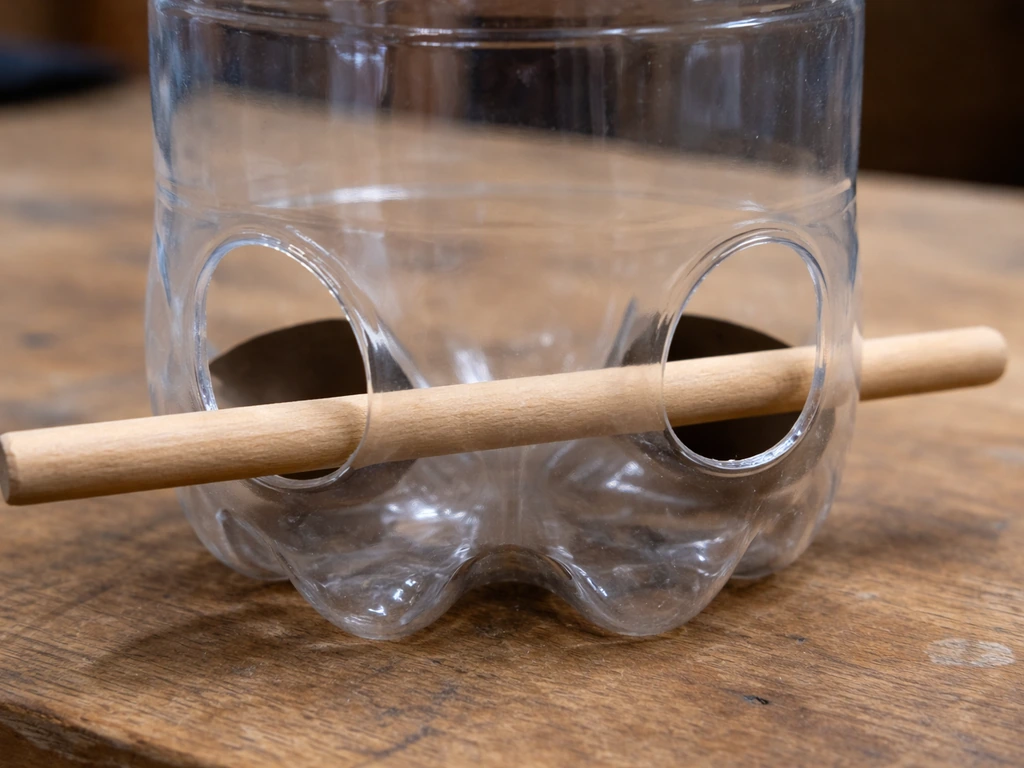
The perch is the part that fails most often. If the dowel is too loose, it spins or slides out when a bird lands. If it's too short, birds can't get a proper grip. Aim for at least 2 to 3 inches of dowel extending past each side of the bottle, and use hot glue or a tight friction fit to keep it from moving. A 1/4-inch dowel through a 1/4-inch hole is almost exactly the right fit; any looser and you'll have trouble.
The feeding holes need to be positioned correctly relative to the perch. If you put them too far above the perch, small birds can't reach the seed. Too close and the bird sits right in front of the opening with no leverage. About 4 cm (1.5 inches) above the perch center is the sweet spot based on instructions from several wildlife organizations, and it works. The Scottish Wildlife Trust educator notes specify placing the feeding holes about 4 cm above each perch about 4 cm (1. 5 inches) above the perch center is the sweet spot. If you find birds can't quite reach, you can enlarge the holes slightly with the tip of your craft knife.
Drainage holes are non-negotiable. Without them, rain and morning dew pool at the bottom of the bottle, soaking the lower layer of seed and creating a perfect environment for mold and bacterial growth. Poke 4 to 6 small holes at the very base of the bottle. They don't need to be large, just enough to drain standing water. If you notice seed clumping at the bottom after rain, add a couple more holes or enlarge the ones you have.
Hanging and placement tips that actually matter
A full 2-liter bottle of seed weighs more than you might expect, so whatever you're hanging it from needs to hold at least a couple of pounds without slipping. A sturdy branch, a shepherd's hook, or a fence post with a hook screwed in all work well. Avoid thin twigs that bounce excessively in wind, since a swinging feeder makes birds nervous and spills seed.
Height is less critical than most guides suggest, but somewhere between 5 and 6 feet off the ground keeps the feeder accessible for you to refill while being high enough to give birds a clear view of approaching cats or other predators. Position it within sight of natural cover (a shrub, hedge, or low branch a few feet away) so birds have a staging area before they commit to feeding.
Come back to the window distance rule: either within 3 feet or beyond 10 feet from any window. If your only good hanging spot is in that dangerous middle zone, move the feeder to a different location rather than accepting the risk. Window strikes can be fatal, and the placement fix costs nothing. If you do hang near windows, consider adding window film or evenly spaced stickers to break up the reflection so glass becomes visible to approaching birds.
Keeping it clean so birds stay healthy
Bird feeders can spread salmonella and other bacterial infections between birds if they're not cleaned regularly. A 2-liter bottle feeder is cheap enough to replace, but cleaning it is easy enough that you don't need to. Plan on a full clean once a month at minimum, and more often in summer when heat speeds up mold growth.
The cleaning process is straightforward: discard any remaining seed, wash the bottle inside and out with warm soapy water, then soak it in a 10% bleach solution (1 part bleach to 9 parts water) for about 10 minutes. Rinse everything thoroughly until you can't smell bleach, then let the feeder air dry completely before refilling. Refilling before it's fully dry is one of the most common mistakes people make, and it leads directly to moldy, clumped seed at the base.
For refilling frequency, check the seed level every 3 to 5 days, especially once birds discover the feeder and start visiting regularly. If the bottom layer of seed looks wet, compressed, or off-color, dump it out before adding fresh seed. Moldy seed can make birds sick and will drive them away from a feeder they'd otherwise love.
| Task | How often | What to use |
|---|---|---|
| Top off seed | Every 3 to 5 days | Fresh black-oil sunflower seed or seed mix |
| Remove old/wet seed from base | After any rain or as needed | Hand or small scoop; check drainage holes |
| Full wash and scrub | Monthly (more in hot weather) | Warm soapy water, brush or bottle brush |
| Bleach soak and rinse | Monthly | 10% bleach solution (1:9), 10-minute soak, thorough rinse |
| Full air dry before refill | Every time after cleaning | Air dry only; no seed until fully dry |
Fixing the most common problems
Birds aren't using it
Give it at least a week before assuming something is wrong. Birds are cautious about new objects in their territory. If no one's showed up after 7 to 10 days, check that the feeder is close to cover, that the seed is fresh (stale or wet seed doesn't smell attractive), and that there are no obvious predators like a cat that regularly patrols the area. Scattering a small handful of seed on the ground directly below the feeder can help birds notice it for the first time.
Seed leaking or spilling
If seed is pouring out of the feeding holes freely without a bird present, the holes are too large. You can't make them smaller once they're cut, but you can work around it by using a slightly coarser seed mix (larger seeds don't flow as freely) or by mounting a small piece of tape over half the opening temporarily to reduce the flow. Next time, start with a 1-inch hole and enlarge it gradually until the feed just barely comes out when the bottle is tapped.
Wet or moldy seed at the bottom
This almost always means one of two things: the drainage holes are too small or blocked, or the feeder is in a location where it gets direct rain from above. Check the drainage holes first and clear them with a skewer. If the feeder is hanging in a fully exposed spot, try moving it somewhere with a bit of overhead cover, like under a porch eave or a tree canopy. You can also tilt the feeder very slightly so water naturally runs toward the drainage holes rather than pooling flat.
Squirrels raiding the feeder
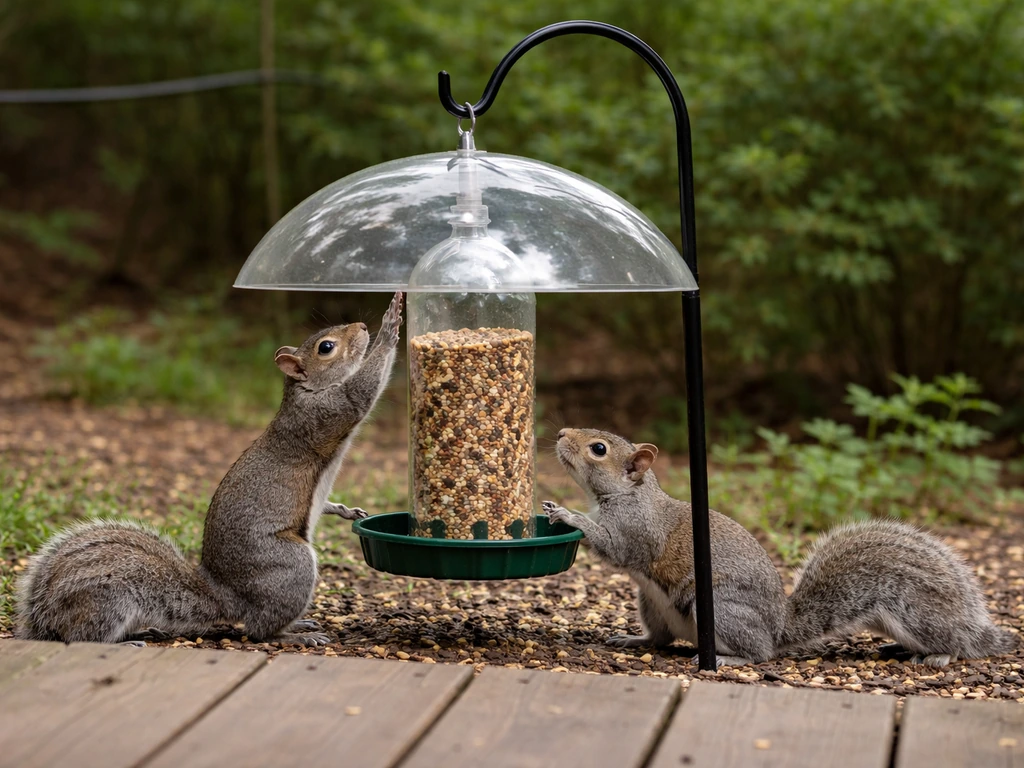
Squirrels are persistent and smart. A 2-liter bottle hanging from a wire with no baffle is an easy target. The most reliable fix is a shepherd's hook with a squirrel baffle (a dome-shaped guard that slides onto the pole), positioned at least 10 feet from any surface a squirrel can jump from. If you're hanging the feeder from a tree branch directly, squirrels will almost certainly reach it. Switching to a safflower seed mix helps too, since squirrels tend to avoid it while most songbirds eat it readily.
Feeder spinning or swinging too much
A bottle feeder that won't stay still in the breeze is frustrating for birds trying to land. Adding a small weight (a flat rock or a few extra ounces of seed in the base) lowers the center of gravity and stabilizes it. Shortening the hanging cord reduces swing. If the feeder is spinning because the cord is twisting, switch from a single strand of twine to a lightweight wire or chain, which resists rotation much better.
The cap or hanging point is failing
Plastic bottle caps can crack over time, especially in cold weather. If you're hanging the feeder from a cord threaded through the cap, reinforce the cap with a bead of hot glue around the hole on both sides before hanging. A better long-term solution is to wrap the cord around the neck of the bottle (just below the cap) with several tight loops and a strong knot. This distributes the weight across the bottle body rather than relying on the cap alone.
A few variations worth knowing about
The design in this guide works for most common backyard songbirds, but you can tweak it for specific situations. Once you get comfortable with the basic bottle feeder, you can also try a wine cork bird feeder for a different look and a fun DIY twist. A smaller soda bottle (like a 500ml bottle) works well for balcony or small-space situations where you want less mess and a smaller footprint. For a seasonal twist, you can swap the plastic bottle approach for a pumpkin bird feeder and follow similar ideas for drainage, perches, and safe placement. If you want a second feeder style, a flat-bottomed platform style using the bottom half of a 2-liter bottle gives you an open tray that species like mourning doves prefer. You can also drill a single large central hole and fill the bottle with suet crumbles to attract woodpeckers and nuthatches, though standard suet blocks are typically better served in a purpose-built wire cage feeder.
If you enjoy the recycled-bottle approach, the same general method scales up well with larger containers. A Coke bottle feeder follows nearly identical construction steps. If you're using a Coke bottle specifically, the construction steps are almost identical to the 2-liter version described earlier in this guide Coke bottle feeder. For even more variety in your backyard setup, mason jar feeders and tin can feeders are worth trying alongside this bottle design, and each attracts a slightly different mix of visitors depending on what you fill them with. Mason jar feeders follow a similar idea but use glass jars instead of bottles, so you can tailor the openings and perches to fit the look and birds you want to attract.
The 2-liter bottle feeder isn't glamorous, but it genuinely works, it costs almost nothing, keeps plastic out of the recycling bin for another season, and gives you full control over what seed goes in. Build one this afternoon and you'll likely have your first visitor by the end of the week.
FAQ
Can I use recycled bottles other than 2-liter, like a 500 ml or a Coke bottle, and still make it work well?
Yes, but expect different feeding behavior. Smaller bottles usually need smaller openings and a shorter perch, and you may get faster clogging if the holes are too small. If you go smaller, keep drainage holes at the very base and test flow by tapping the bottle, so seed just barely drops out when moved.
What seed mix works best if I want to attract more than just perching songbirds?
Use two feeding zones. Keep black-oil sunflower in the bottle, and add a separate ground tray (or scatter a small handful daily for a week). This avoids overcomplicating the bottle design, since port-style holes mainly favor perching birds, while ground-feeders need easier access.
How do I prevent the seed from getting soggy if my feeder gets frequent rain?
Increase drainage reliability and reduce water exposure. Make sure the holes are at the lowest point, clear them with a skewer after storms, and slightly angle the feeder so water runs toward the holes. If rain keeps soaking the bottle from above, move it under partial cover like a porch eave or dense branch canopy.
Is it safe to use the same feeder year-round, or should I replace the bottle every season?
You can reuse it, but inspect the plastic and fittings. If the bottle has cracks, warped holes, or a perch that no longer fits tightly, replace or rebuild, because loose openings can trap seed and worsen mold. For hygiene, always deep-clean before the next season, even if it looks clean.
How can I tell whether the issue is hole size, perch placement, or seed type if birds do not land?
Run a simple flow and reach check. First, tap test the flow (seed should not pour continuously). Second, verify the holes are about 1.5 inches above the perch center, and that the dowel extends at least 2 to 3 inches past the bottle sides for grip. Third, switch seed to a coarser mix like larger sunflower pieces if flow is too fast.
What should I do if squirrels or other animals still get to it even with a perch and drainage holes?
Add an actual barrier, not just distance. Position the feeder with a squirrel baffle on a pole and keep it at least 10 feet from jump-off surfaces. Also consider switching to safflower if you notice squirrels repeatedly testing the openings, since many songbirds accept it while squirrels often avoid it.
How do I reduce window strikes beyond changing the feeder location?
Use both location and visual deterrents. If you cannot stay outside the 3 to 10 foot risk zone, apply window film or place evenly spaced stickers to reduce reflections, and keep the feeder within sight of nearby cover so birds have a safe wait area before committing.
Can I make the feeder for birds that need specialized food, like orioles or woodpeckers?
This bottle port design is generally not ideal for them. Orioles often do better with dedicated setups that match their feeding style, and woodpeckers typically prefer suet blocks in a wire cage. If you want those species, run a separate feeder designed for their food rather than changing the bottle too much.
What is the correct way to clean so I do not leave chemical residue or trigger mold?
Follow a strict rinse and drying routine. After the 10% bleach soak, rinse until there is no lingering bleach smell, then air dry completely before refilling. Refilling while damp is the fastest path to clumped, off-color seed and mold.
How often should I refill if birds are actively using the feeder?
Check every 3 to 5 days once birds discover it, and replace any wet or compressed bottom layer immediately. In hot weather, mold can start faster, so if the seed looks darker, damp, or smells sour, dump the bottom and add fresh seed instead of topping off.
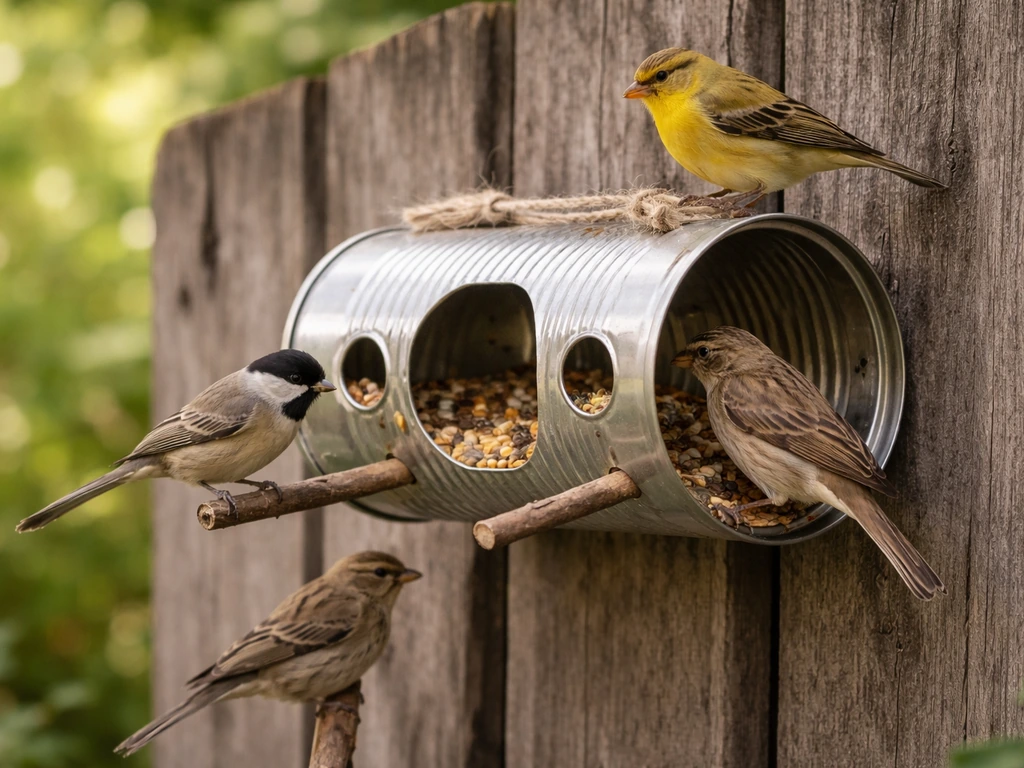
Step-by-step guide to make a tin can bird feeder, safely cut and drill, add access, mount it, and keep it clean.
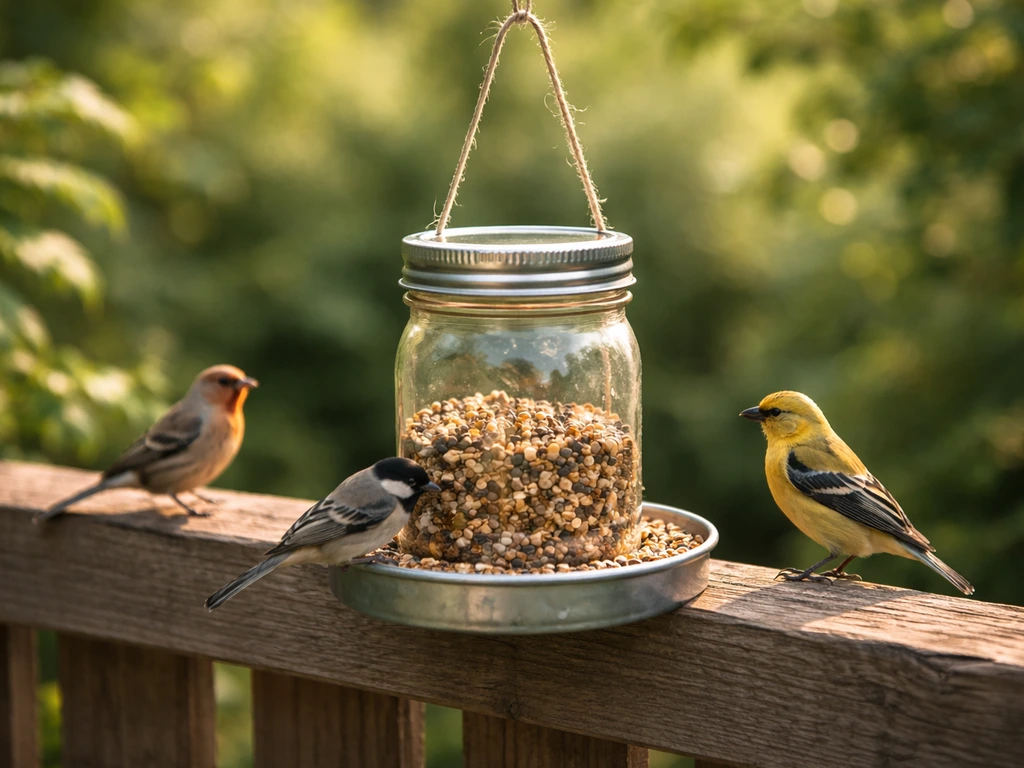
Step-by-step guide to make a mason jar bird feeder, including secure lid setup, hanging design, placement, and care.
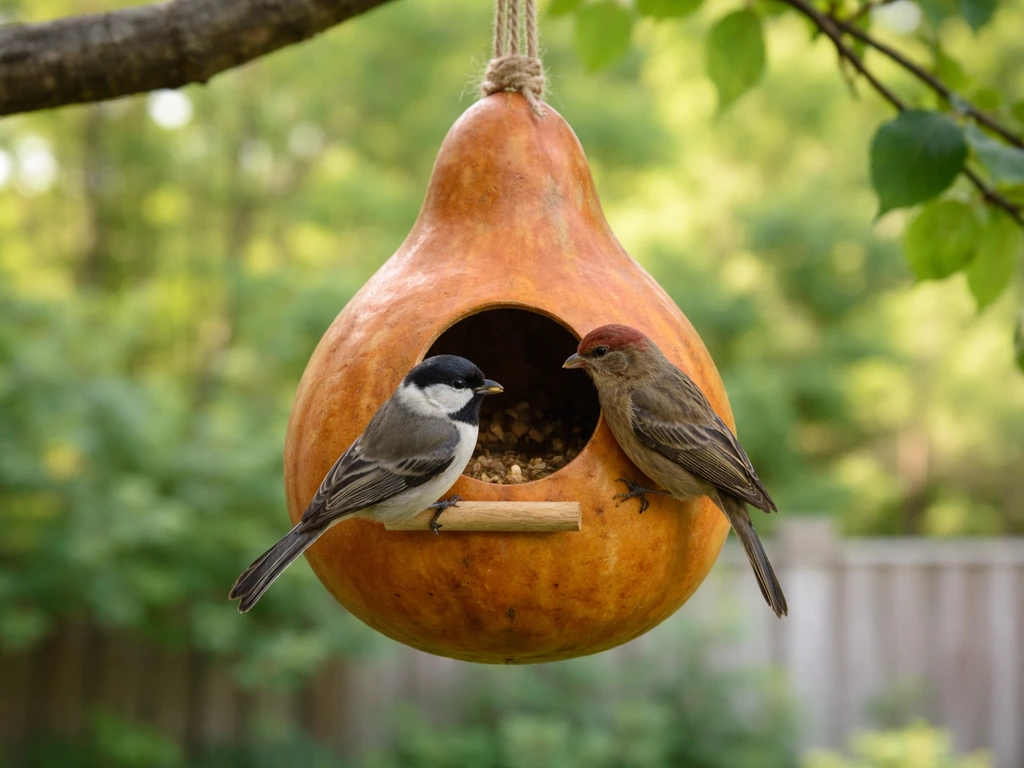
Step-by-step guide to build a gourd bird feeder: drilling, safe prep, hanging, bird food, cleaning, and troubleshooting.