You can make a perfectly functional bird feeder from a shoe box in about 20 to 30 minutes using scissors, string, and a few household supplies. Cut a wide feeding opening in the front, add a stick or pencil as a perch below it, poke drainage holes in the bottom, thread string through the top corners for hanging, and fill it with seed. That's the core build. The trickier part is making it last outdoors and keeping the food safe for birds, which is what the rest of this guide covers.
How to Make a Bird Feeder With a Shoe Box

Marcus Brennan
1 Jun 2026
Feeder or bird house? Know what you're building first
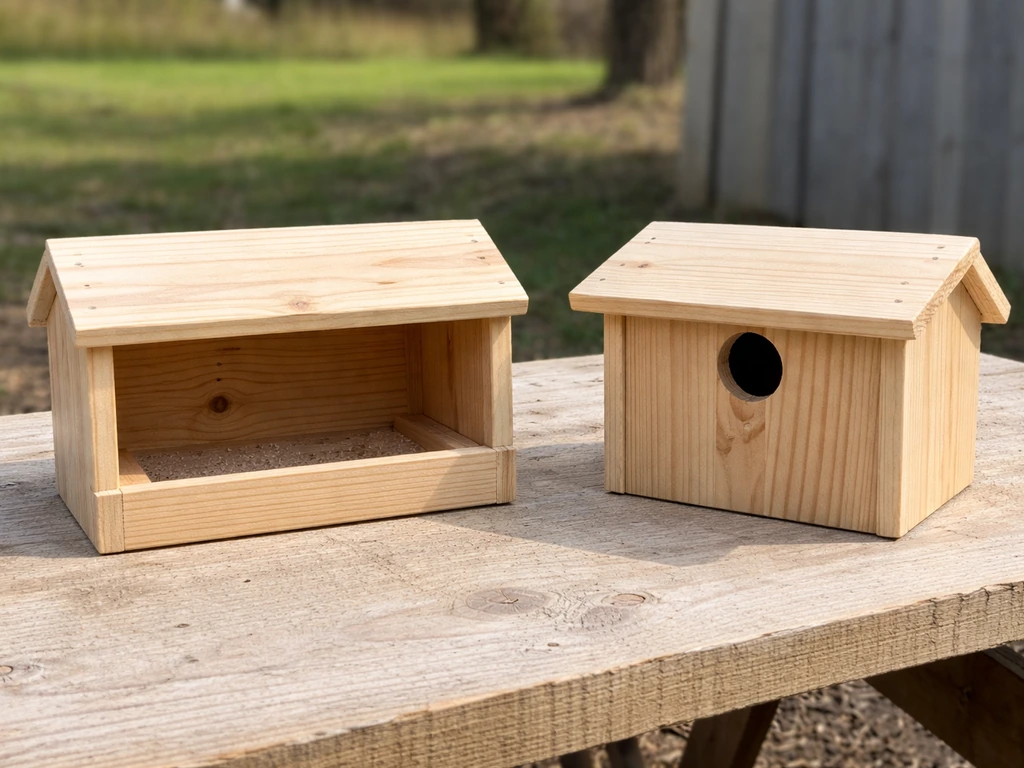
A lot of people search for "bird house" when they actually mean "bird feeder," and building the wrong one matters more than you'd think. A bird feeder is a feeding station where birds land, eat, and leave. A bird house (or shelter box) is a nesting and roosting space where birds actually live for weeks or months. These two things have completely different requirements, and a shoe box handles one much better than the other.
For a feeder, the priority is keeping food dry, visible, and accessible. Audubon similarly emphasizes that feeders are for food access, while nest boxes and shelters provide a protected place for nesting and roosting, which changes what you need to build for each design. You want a wide opening, a perch, and good drainage so seed doesn't rot. For a shelter, the priority is a safe, enclosed, ventilated interior with a small entry hole just big enough for the target bird species. Cardboard is honestly a poor material for a long-term shelter because it absorbs moisture, loses structural integrity in rain, and can trap dampness that leads to mold. It works fine as a feeder if you treat it right and accept it's a temporary build. As a true nesting box, it can be unsafe. This article covers both designs so you can make an informed choice, but if you're serious about attracting nesting birds, consider the shoebox shelter a fun learning project rather than a permanent home.
What you'll need before you start
The good news is you probably have most of this already. Here's what the builds require, separated into must-haves and nice-to-haves.
| Item | Feeder Build | Shelter Build |
|---|---|---|
| Shoe box with lid | Required | Required |
| Sharp scissors or craft knife | Required | Required |
| Pencil, dowel, or thick stick (perch) | Required | Optional |
| Twine, jute string, or wire | Required | Required |
| Hole punch or skewer | Required | Required |
| Ruler and pencil (for marking) | Recommended | Required |
| Non-toxic waterproofing (Mod Podge, beeswax, or clear acrylic spray) | Recommended | Recommended |
| Non-toxic wood glue or hot glue gun | Optional | Recommended |
| Small mesh or hardware cloth scraps | Optional | Optional (predator guard) |
| Sandpaper (if using a dowel) | Optional | Optional |
One important note on coatings: if you plan to waterproof the box, use non-toxic options and let everything dry completely before any bird comes near it. There are no conclusive studies on whether residual fumes from paint or sealants harm birds, but the guidance from wildlife experts is consistent: choose safe materials and give them plenty of time to off-gas before putting the feeder out.
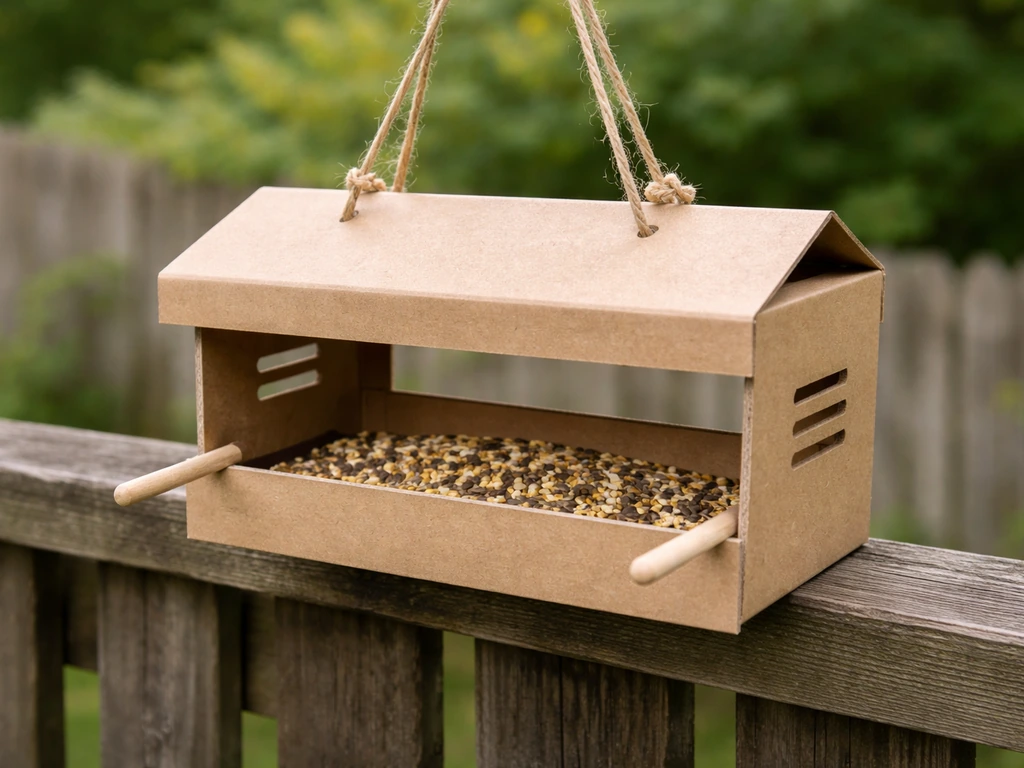
How to make a shoe box bird feeder
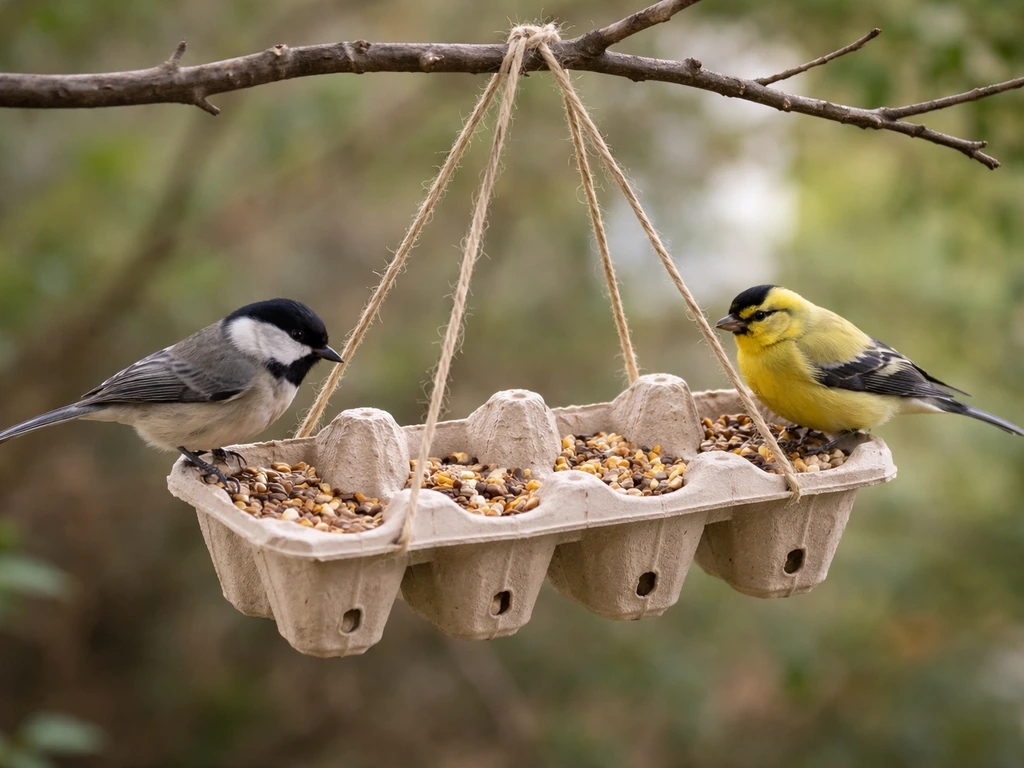
This build takes about 20 to 30 minutes and works best with a standard adult shoe box (roughly 13 x 8 x 5 inches). If you want to start right away, follow these steps for how to make a cardboard bird feeder using a shoe box, simple tools, and quick weatherproofing How to make a shoe box bird feeder. A boot box or larger box gives you even more seed capacity. You can even swap in an egg carton as a low-cost container for a similar DIY feeder build how to make a bird feeder out of egg carton.
- Start with the lid. The lid of the shoe box becomes your feeder tray or roof, depending on your design. For the simplest build, set the lid aside and use the box itself as the main feeder body.
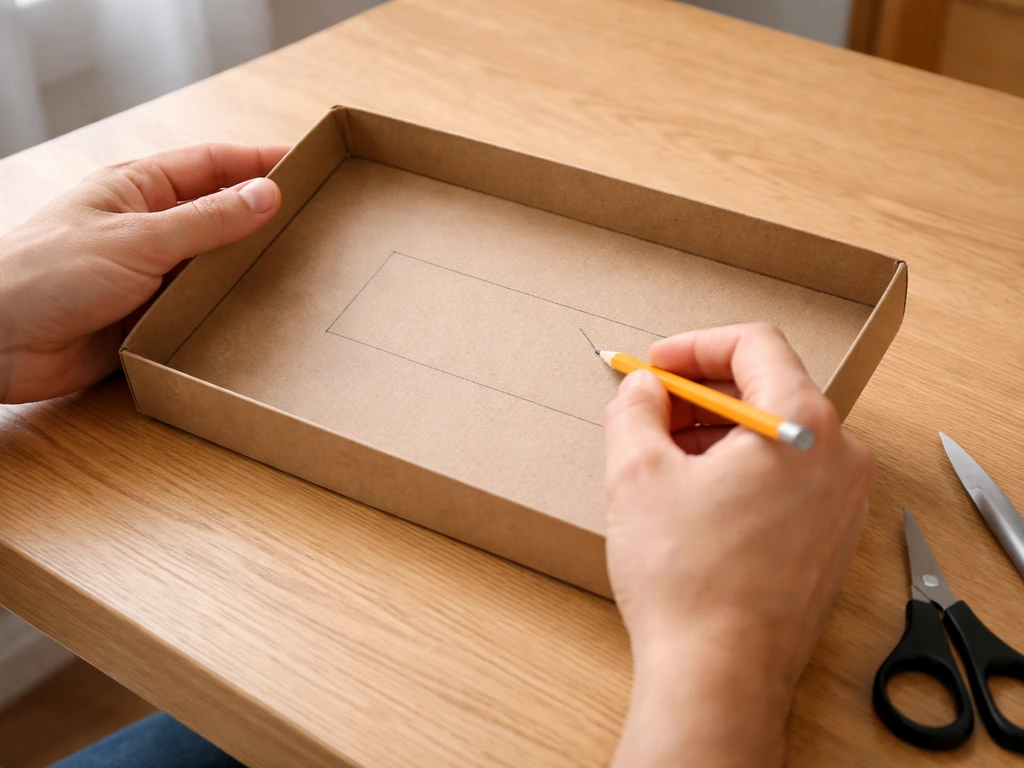
- Cut the feeding opening. On one of the long sides of the box, cut a wide rectangular opening starting about 1.5 inches from the bottom and leaving at least half an inch of border on the sides and top. This low ledge keeps seed from spilling out immediately and gives birds a surface to land on. Make the opening wide enough that birds can access seed easily, around 4 to 5 inches wide by 3 inches tall for small songbirds.
- Add drainage holes. Use a skewer, hole punch, or the tip of your scissors to poke 6 to 8 small holes in the bottom of the box. This is non-negotiable. Without drainage, any moisture that gets in will turn your seed into a moldy mess within a day or two.
- Create the perch. Push a pencil, wooden dowel, or sturdy stick through both side walls of the box, positioned about half an inch below the bottom of the feeding opening. The perch should stick out at least 2 to 3 inches on each side so birds have somewhere stable to grip. A pencil works perfectly and requires no tools beyond a skewer to start the hole.
- Reinforce if needed. The bottom corners and the area around the feeding opening are the first places cardboard feeders fail. A strip of hot glue along the interior bottom seams and around the opening edges adds a surprising amount of stability.
- Waterproof the outside. Apply a thin coat of Mod Podge, a clear non-toxic acrylic spray, or even melted beeswax to the outside surfaces. Avoid the inside where seed will sit. Let it dry completely, at least a few hours, before filling.
- Attach the hanging hardware. Use a hole punch to make two holes at the top corners of the back wall. Thread a 24 to 30 inch length of twine or wire through both holes and knot securely on the inside. Create a loop at the top for hanging. For extra security, run a second piece of twine under the box lengthwise like a sling.
- Fill and hang. Add about an inch of mixed seed, black oil sunflower seed, or millet to the bottom of the feeder. Hang it and you're done.
How to make a shoe box shelter (bird house style)
This design is more of a roosting or temporary shelter box than a true nest box, since cardboard degrades in weather. Think of it as a beginner's learning project or a short-season shelter rather than something you'd leave up for years. That said, it's a great way to understand what makes a proper nest box work, and you can apply those lessons when you build with wood later.
- Choose a sturdier shoe box. A boot box or a thick-walled gift box holds up better. If you have two similar boxes, nest one inside the other for double-wall thickness.
- Cut a small entry hole. Unlike the feeder's wide opening, a shelter needs a small, species-appropriate entry hole. For small songbirds like chickadees, aim for a hole about 1.25 to 1.5 inches in diameter. Use a craft knife and cut the hole on one of the short ends, positioned in the upper third of the wall. This keeps the interior protected from rain and predators.
- Do not add a perch below the entry hole. This sounds counterintuitive, but perches below entry holes actually help predators get inside. Leave the entry hole clean.
- Add ventilation holes. Use a skewer or hole punch to make 4 to 6 small holes (about a quarter inch diameter) near the tops of the two side walls, just under where the lid will sit. This keeps the interior from overheating and prevents moisture buildup, which is one of the most important features of any good shelter box.
- Add drainage holes. Poke 4 to 6 small holes in the bottom corners of the box. If any water does get inside, it needs somewhere to go rather than pooling under nest material.
- Secure the lid. The lid becomes your roof. Attach it with a strip of hot glue or non-toxic glue along the back edge only, so it can be opened for cleaning. Add a small piece of tape or a paper clip latch on the front edge to keep it shut against wind.
- Waterproof and let dry. Apply non-toxic waterproofing to the outside of the entire box, including the roof. Keep it away from the ventilation holes so airflow isn't blocked. Allow it to dry fully before placing it outdoors.
- Attach hanging hardware the same way as the feeder, using heavy twine or wire through reinforced holes at the top back corners. Make sure the box hangs level or tilts very slightly forward so rain runs off the front rather than pooling inside.
Getting the details right: perches, openings, drainage, and food fit
These small details are where most beginner builds go wrong, and they genuinely affect whether birds will use what you've made.
Perches on the feeder

The perch needs to be below the feeding opening, not above it. Birds approach food from below and hop up to eat, not the other way around. A pencil or quarter-inch dowel works well. If it wobbles in the holes, a dab of hot glue on each side stabilizes it without making it permanent.
Opening size and what seed fits
For the feeder, the opening size determines which birds can access it and also how quickly seed blows or spills out. A 4 to 5 inch wide opening works for most small feeder birds like finches, sparrows, and chickadees. If you want to attract cardinals, go wider (5 to 6 inches) and make the tray ledge deeper. If you’re building a tray bird feeder, shape the tray ledge so seed stays accessible while still draining and staying dry. If you want a larger audience, adjust the opening and ledge depth specifically for cardinals so the feeder stays usable for them attract cardinals. For the shelter, the entry hole diameter is critical: a 1.25 inch hole targets chickadees and small wrens, 1.5 inches works for tree swallows and nuthatches, and anything bigger invites European starlings and house sparrows, which are aggressive toward native species.
Drainage and ventilation
Drainage holes in the bottom of any cardboard build are essential. Without them, the bottom gets wet, the cardboard softens, and the whole structure fails. For the feeder, drainage also prevents seed from sitting in moisture and going moldy. For the shelter, ventilation holes near the top of the side walls are equally important. Quarter-inch holes spaced about an inch apart near the top of each side wall keep the interior from becoming a heat trap in summer and prevent condensation buildup.
Best seed choices for a shoe box feeder
Black oil sunflower seeds are the best general-purpose choice because they attract the widest variety of birds and have a thin shell that small birds can crack. Millet works well for ground-feeding birds like sparrows and juncos. Avoid mixes with lots of filler seeds like milo (the small round red ones) because most birds toss them aside and they pile up, rot, and attract pests faster. Don't put suet, peanut butter, or wet foods in a cardboard feeder. Stick to dry seed only.
Where to hang it and how high
Placement is one of the most underrated parts of a feeder build. You can make the perfect feeder and get zero birds if it's in the wrong spot.
Aim for a location with some nearby cover: a shrub, tree, or fence within about 10 feet gives birds a place to retreat to if they feel threatened. Completely open placement makes birds nervous and they'll avoid the feeder. At the same time, don't tuck it so deep in dense shrubs that predators like cats can hide right underneath.
Window strikes are a real risk with any feeder. The safest placements are either very close to a window (closer than 3 feet, where a startled bird can't build up enough speed to get hurt) or far enough away that birds have time to see and avoid the glass (more than 10 feet). The middle distance of 3 to 10 feet is actually the most dangerous zone. Affixing the feeder directly to a window frame or using a window-mount suction cup is a good option for beginners because it eliminates the strike risk entirely.
Height matters too. Most feeder birds are comfortable with feeders hung between 5 and 6 feet off the ground. Too low and ground predators like cats are a constant threat. Too high and you'll struggle to refill and clean it regularly, which matters more than you might think.
- Hang in a spot with natural cover nearby but not directly underneath
- Place closer than 3 feet to a window or farther than 10 feet to reduce window strikes
- Aim for 5 to 6 feet off the ground for most songbirds
- Face the feeding opening away from prevailing wind to keep seed dry
- Avoid placing directly over a patio, deck furniture, or anything you don't want covered in seed hulls and droppings
Keeping it clean, dry, and pest-free
This is the part most beginners skip, and it's where feeders go from being helpful to actually harming birds. A dirty feeder is a disease vector, plain and simple.
Cleaning schedule
Clean your feeder at least once every two weeks as a baseline. In hot, humid weather (like summer in much of the US), clean it weekly. The standard disinfecting solution recommended by wildlife health experts is 1 part bleach to 9 parts water. For a cardboard feeder, you can wipe the exterior and perch with a rag dampened with this solution, but don't soak it. The whole point of a cardboard feeder is that it's cheap and replaceable, so if it starts to break down or smell musty, replace it rather than trying to salvage it. Always let the feeder dry completely before refilling: moisture left in the feeder dramatically increases mold and disease risk.
When food goes bad
Seed that clumps together, smells musty, or has visible mold needs to come out immediately. Don't just add fresh seed on top of old seed. Rake or sweep up seed hulls and droppings on the ground below the feeder regularly, because that buildup is where disease spreads most easily between birds. In wet weather, check your feeder every couple of days. A shoe box feeder in rainy conditions may need to be brought inside overnight.
Dealing with pests
Squirrels are the classic problem, and honestly a cardboard feeder is not squirrel-resistant at all. If squirrels are an issue, hang the feeder on a thin wire stretched between two points rather than a single cord from a tree branch. Squirrels have a much harder time walking a wire than shimmying down a rope. Rats and mice are attracted by seed spillage on the ground more than the feeder itself, so raking underneath regularly helps more than anything you can do to the feeder design.
If you see sick birds
If you notice birds acting lethargic, fluffed up, or disoriented at your feeder, take the feeder down immediately. Clean it thoroughly with the 1:9 bleach solution and leave it down for one to two weeks. This is one of the most effective things you can do to slow disease spread at a feeding station. It feels counterintuitive to stop feeding, but it protects the broader local bird population.
When to refill
Refill when the feeder gets down to about a quarter full, not bone empty. Letting it run completely dry discourages birds from returning. But don't top up wet or old seed either: if the seed at the bottom looks clumped or darker than fresh seed, dump it out, wipe the bottom dry, and start fresh. It takes an extra two minutes and it makes a real difference in the quality of birds you attract.
How long will a shoe box feeder last?
With waterproofing and a covered location, a shoe box feeder can last a few weeks to a couple of months. Without any treatment, expect a week or two in good weather and much less in rain. This isn't a criticism of the project, it's just the reality of cardboard outdoors. The upside is that when it's done, you toss it and make a new one in 30 minutes. Think of it as an ongoing project rather than a one-time build. If you want something that lasts a full season or longer, the shoe box build is a great way to figure out your preferred design before you commit to cutting wood. It's also worth knowing that builds from other recycled materials like plastic bottles or milk jugs hold up significantly better in rain if longevity becomes a priority.
If you're enjoying this kind of project, a seed catcher tray hung below your feeder can dramatically reduce the mess on the ground below and make your maintenance routine much easier. For a more permanent feeding station or a design tuned for a specific bird like a cardinal, those are natural next builds once you've got the basics down with your shoe box version.
FAQ
Can I make a shoebox bird feeder and leave it out in the rain?
Yes, but only in limited cases. If you line the box with a non-toxic waterproof liner and keep the feeding opening and drainage clear, it can handle light rain. In heavy rain, cardboard feeders still soften and mold risk rises, so plan to bring it inside overnight or switch to a more weather-tough material for long wet spells.
What foods should I avoid in a shoebox bird feeder?
Use a dry-seed only approach. Suet and peanut butter are sticky and can trap moisture and create hygiene problems in cardboard, and wet foods spoil quickly. Stick to dry sunflower seed or millet, and if you want a higher-energy option later, use a feeder type designed for those foods.
My perch keeps slipping or wobbling, how do I fix it?
If the perch wobbles or falls out, stabilize it before hanging by adding small wedges or extra hot-glue reinforcement on both sides where it passes through. Recheck it after the first day outdoors, since cardboard can soften slightly with humidity even if drainage is good.
Do I need ventilation holes for the feeder part, or only for the shelter version?
Quarter-inch holes near the top of the side walls help prevent heat buildup in the shelter version. For a feeder, ventilation holes are less critical than drainage and keeping the opening uncovered, but if you notice condensation on the inside bottom, add or enlarge bottom drainage and avoid overfilling.
How do I adjust the opening if I am targeting cardinals versus smaller birds?
If you are trying to attract specific birds, adjust the opening width and ledge depth for the target species. A wider opening and deeper tray ledge generally helps larger birds like cardinals access seed comfortably, while very narrow openings limit access and can reduce waste by discouraging larger, aggressive species.
My birds stopped using the feeder, what should I check first?
If birds start refusing the feeder, it is often because the seed is stale, damp, or mixed with too many filler seeds. Remove all old seed, wipe and fully dry the bottom, then refill with fresh dry sunflower seed or millet. Avoid topping up, because clumped seed increases mold and pest attraction.
When should I refill, and should I top off old seed?
For shoe boxes, a quarter-full refill rule is safer than waiting until it is empty. When levels drop to around a quarter, refill with fresh seed and remove any damp or dark clumps first. Completely empty feeders can become less reliable visit targets for some birds, especially in bad weather.
Does the ground below the feeder matter, and how do I manage multiple feeders?
Yes, spacing helps. If you have multiple feeders, keep some distance so droppings and spilled seed do not build up in one spot. Also rake or sweep under each feeder regularly, since the disease risk comes more from seed hulls and droppings on the ground than from the feeder design itself.
How often should I clean it, and what if it starts smelling musty?
A dirty shoebox feeder can spread disease quickly, especially in heat. Clean at least every two weeks, switch to weekly in hot, humid weather, and disinfect without soaking (wipe the exterior and perch). If it smells musty, replace it rather than trying to salvage damaged cardboard.
What is the safest distance to place a shoebox feeder from a window?
Yes. The 3 to 10 feet zone near windows is commonly where strikes happen because birds cannot judge distance well. Either mount the feeder very close (under about 3 feet) or place it far away (over about 10 feet), and consider using a window-mounted suction cup to eliminate the strike risk for beginners.
How high should I hang the feeder to keep birds safe and still easy to refill?
If cats or other ground predators are common, hang it higher, but not so high you cannot maintain it. A typical comfort range is about 5 to 6 feet. If you see birds not landing, try a slightly lower height only if your area is predator-safe and you can still clean often.
What is the best way to prevent squirrels from getting to the seed?
Cardboard is not squirrel-proof, but you can reduce access. Hanging on a tight, thin wire between two points makes it harder for squirrels to shimmy down. Also reduce attractants by raking spilled seed and hulls underneath frequently, since squirrels are drawn to ground mess more than the box itself.
Next Article
How to Make a Bird Feeder Out of an Egg Carton
Step-by-step guide to make a bird feeder from an egg carton, choose safe materials, add drainage, fill smart, and troubl