You can decorate a bird feeder safely using non-toxic, low-VOC or zero-VOC paints, stains, and sealants, as long as you let everything cure fully before putting it back outside for birds. The most important rules: keep paint away from perches and feeding ports, make sure you never block drainage holes, and give any coating at least 24 to 48 hours of drying time before the feeder sees food or moisture. Get those basics right and decoration is genuinely fun, low-risk, and something you can redo every season.
How to Decorate a Bird Feeder Safely and Keep It Clean

Marcus Brennan
8 Jun 2026
Choosing bird-safe decoration materials
The materials you pick matter more than the design. Birds come into direct contact with feeders when they land, grip perches, and lean in to eat, so anything that chips, flakes, or off-gasses inside a feeder is a real risk. Stick to products that are explicitly labeled non-toxic and low-VOC or zero-VOC.
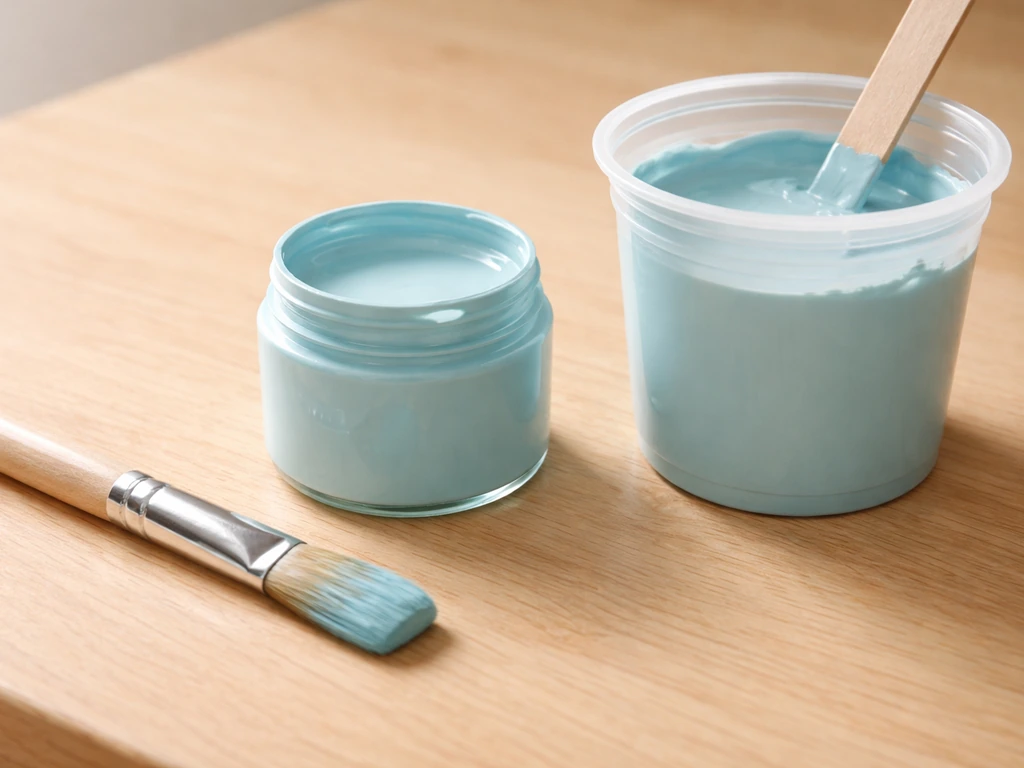
For paint, water-based latex or acrylic craft paints are the easiest choice. They come in every color, clean up with water, and dry without harsh fumes. Avoid oil-based paints and spray enamels, which take much longer to off-gas. Even paints marketed as zero-VOC can release fumes for months after application, which is why NestWatch specifically recommends painting in the fall so the feeder has time to air out before the busy spring and summer feeding season.
For wood feeders, natural oil finishes are a great alternative to paint. Products like BeesBlock Oil are marketed as zero-VOC and non-toxic, and they penetrate the wood rather than sitting on top of it, which reduces peeling. For a clear protective coat over painted or bare wood, something like AFM Safecoat WaterShield works well. It's non-toxic, lead-free, formaldehyde-free, and contains no silicones, which makes it a solid bird-safe choice.
- Water-based acrylic or latex craft paints (non-toxic label required)
- Natural wood finishes like beeswax oil products with zero-VOC ratings
- Low-VOC or zero-VOC clear sealants such as AFM Safecoat WaterShield or VOC-free products like Tricopolymer Lumber-Seal
- Non-toxic PVA or white glue for attaching decorative elements, fully dried before hanging
- Natural materials: twine, dried grasses, pine cones, bark, and small branches
What to avoid: anything with a strong chemical smell, oil-based paints, wood stains with fungicide or preservative additives, epoxy resins unless specifically rated non-toxic after cure, and spray adhesives. Also skip any decorative glue that says 'super' or 'instant' on the label, as most of those use cyanoacrylate, which can be irritating to birds. If you're using glue to attach decorations, non-toxic white glue is your safest pick, and let it dry completely before the feeder goes outside. Chemically treated wood (pressure-treated lumber) should not be used at all in any part of the feeder structure.
Decorating different feeder types
Different feeder materials take decoration differently. Here's how to approach each type without causing problems.
Wood feeders
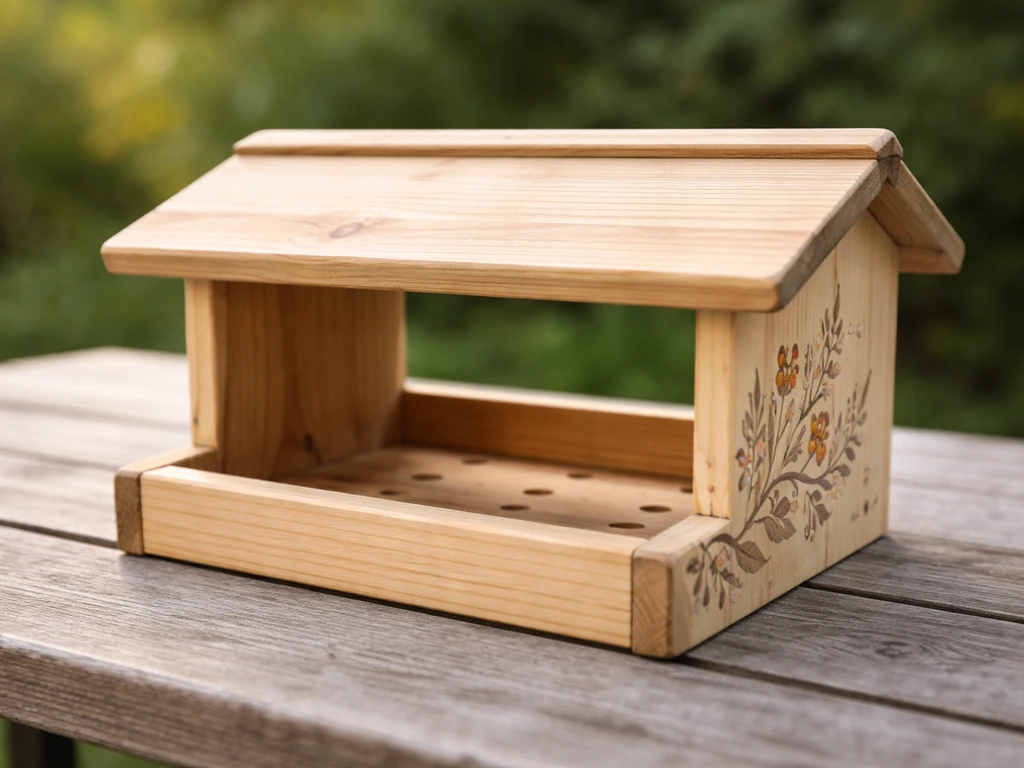
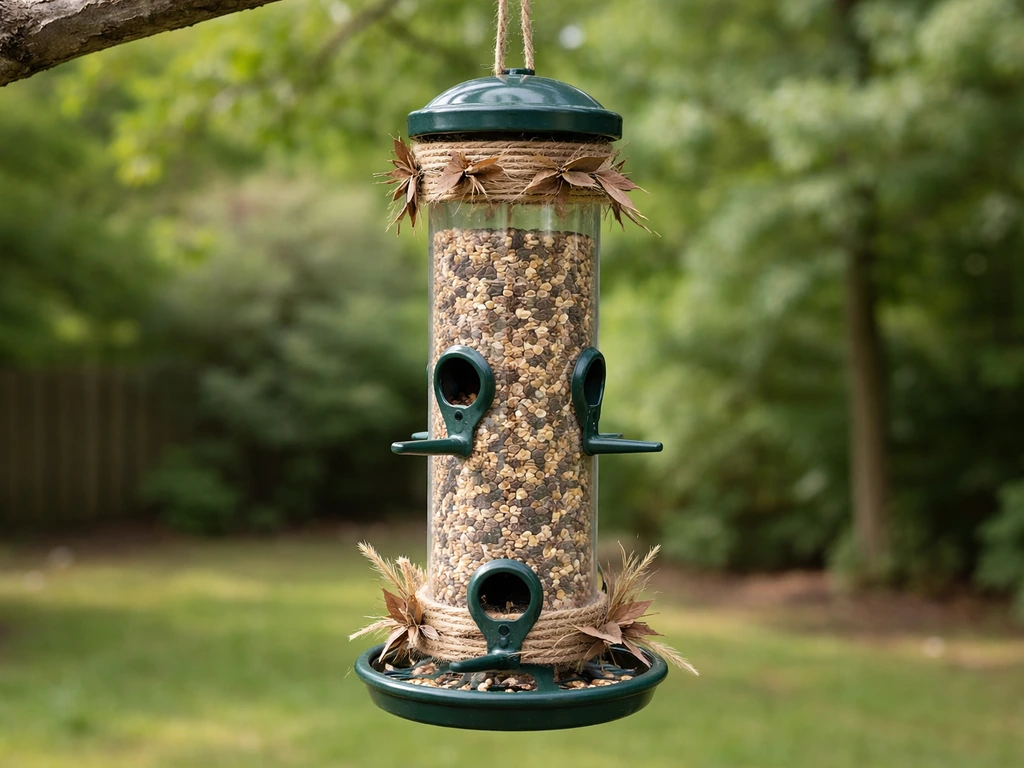
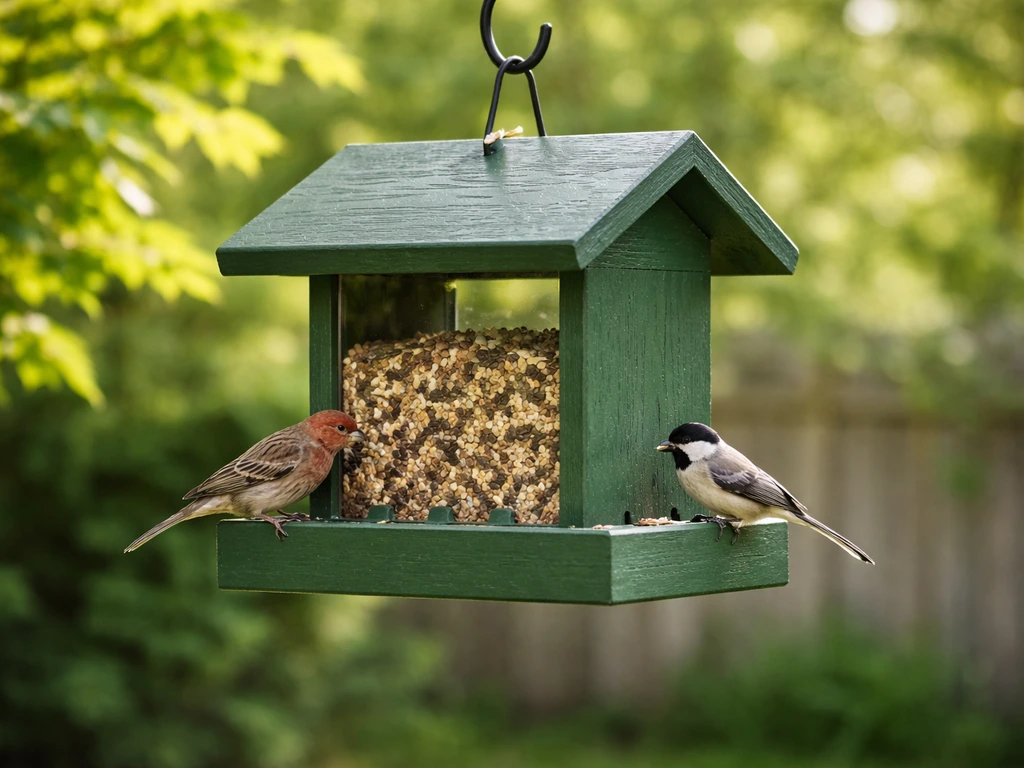
Wood is the most forgiving surface to work with. You can paint, stain, wood-burn designs, or attach decorative trim pieces. Lightly sand the surface before painting so the paint has something to grip. Use two thin coats rather than one thick coat. Thick applications take longer to cure and are more likely to crack or peel when the wood expands and contracts with temperature changes. Focus your decoration on the roof and exterior walls, and leave the inside surfaces and any areas near seed ports completely unfinished.
Plastic bottle and milk jug feeders
Paint doesn't bond well to slick plastic on its own. If you want to add color to a plastic bottle or milk jug feeder, wipe the surface with rubbing alcohol first to clean off any oils, then use acrylic craft paint. It'll still chip over time, so think of these as seasonal decorations rather than permanent finishes. Alternatively, wrap the outside with twine, natural raffia, or strips of burlap for texture and visual interest without paint at all. Avoid using adhesive tape or stickers, since the adhesive tends to attract dirt and gunk up the surface. These feeder types are cheap enough to replace regularly, so you can also just swap to a newly decorated version each season rather than repainting the old one.
Pinecone feeders
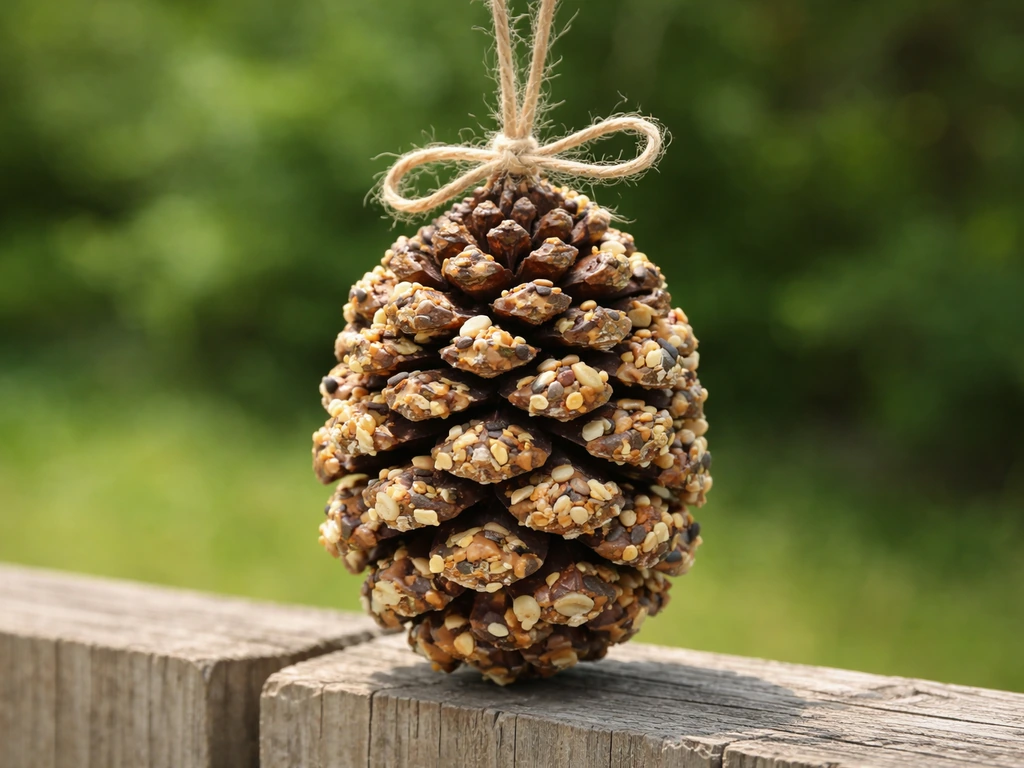
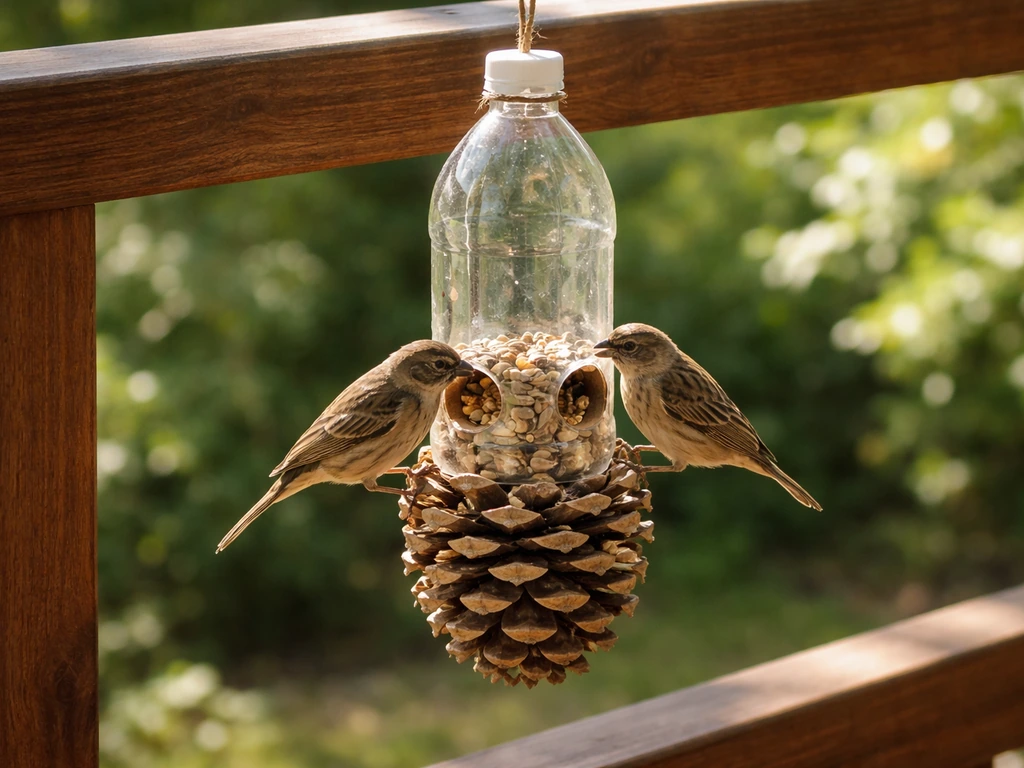
Pinecone feeders rolled in peanut butter and seeds are already decorative on their own, but if you want to add a visual touch, tie on ribbon or natural twine in bright colors before hanging. Keep any added materials organic or made of natural fiber so they don't become a hazard if a bird pecks at them. Skip glitter, synthetic ribbon, and metallic wire entirely. These feeders don't last long outside anyway, so decoration is really just about making them look nice on the way out the door.
Store-bought feeders
Most store-bought feeders are made of plastic or metal and don't need a protective finish, but you can still personalize them. Use acrylic paint on plastic sections after cleaning with rubbing alcohol. For metal feeders, use paint specifically labeled for use on metal surfaces, and look for rust-inhibiting formulas in outdoor-rated acrylic. Hanging decorative elements like wind chimes or colored glass beads near (not on) the feeder can add charm without interfering with the feeder itself. Just make sure nothing you hang is close enough to startle birds or block their approach path.
Design choices that keep the feeder working properly
A beautifully decorated feeder that doesn't function properly is worse than a plain one. These are the functional details you need to protect when you're decorating.
Drainage
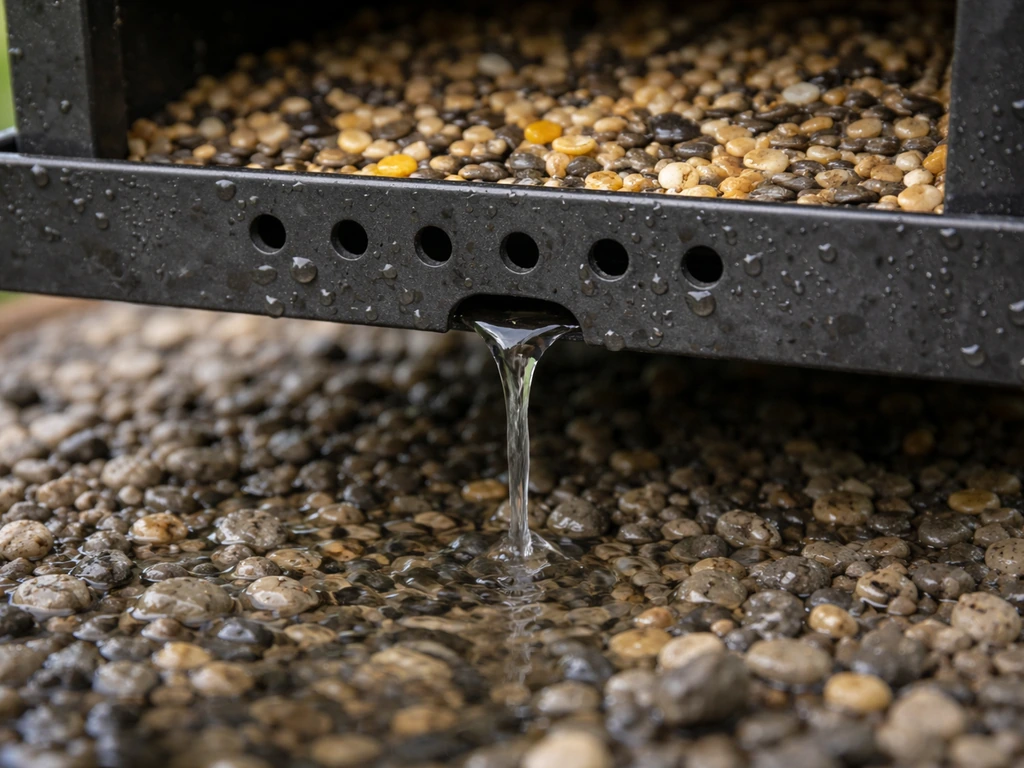
Drainage holes are non-negotiable. For platform and hopper feeders, water that collects in the seed tray will soak seed and cause mold growth fast. Make sure any existing drainage holes in the base stay clear of paint, sealant, and decorative attachments. If you're building or modifying a wooden feeder, drill at least four holes in the floor area, each about 3/8 to 1/2 inch in diameter. Position them at the low points of the tray so water actually flows out rather than pooling. Choosing good drainage hole locations helps the interior dry out quickly after rain, which is the main way to keep mold from taking hold.
Access and cleaning panels
If your feeder has a hinged side, a removable roof, or any panel designed to open for cleaning and refilling, do not paint or seal it in a way that glues it shut. Test that every moving part still moves freely after any finish dries. If you're decorating a feeder you built yourself, build in that access point before finishing. A feeder you can't open and clean thoroughly is a disease risk, no matter how nice it looks.
Perches and seed ports
Leave perches, seed ports, and the areas immediately around them unpainted or use only a very thin, fully cured coat of a non-toxic sealant. Thick paint on perches can flake off and be ingested. Decorative elements glued near ports can restrict access, especially for smaller birds. A good test: hold the feeder up and look at each port. If anything you've added blocks the opening by even 20 percent, trim it back. Birds won't fight to get at a feeder with awkward access when there are easier options nearby.
Seed flow
On tube feeders and hoppers, seed has to flow freely from the reservoir down to the feeding ports. Avoid adding decoration to the inside of any feeder. Even a rough texture inside from paint application can cause seed to clump and bridge, blocking flow. If you're decorating the outside of a tube feeder, keep any attachments away from the port openings at the bottom of the tube where seed exits.
Using color and placement to attract birds (and avoid pest problems)
Color is one of the most effective and low-effort decoration choices you can make, because it actually does affect which birds visit. Hummingbirds are drawn to red, orange, and yellow, and while that preference is learned rather than hard-wired, it's well-documented enough that painting a hummingbird feeder or its hanger in these colors genuinely helps. For general songbirds, natural wood tones and earth colors blend well with surroundings and don't spook shyer species. Avoid bright white or chrome finishes on feeders you're putting in open spots, since those can be visually alarming to birds until they're used to them.
Placement ties directly into decoration decisions. Hanging the feeder near native shrubs or trees gives birds cover and escape routes, which makes them more likely to stick around. Audubon recommends native plantings near feeding stations specifically for this reason. But that same cover can give squirrels and raccoons launch points to reach your feeder. The practical rule: keep the feeder at least 10 feet from any branch or structure a squirrel can jump from, and use a baffle on the pole placed at least 4 to 5 feet off the ground. If you're adding decorative hooks or extensions to hang the feeder, make sure those don't give a squirrel an easy grip point.
On the pest side, avoid using sweet or scented materials in your decorations. Dried fruit, honey, or fragrant wood finishes can attract wasps, ants, and rodents. Stick to unscented finishes and natural, non-food decorative materials. If you're hanging decorations near the feeder for visual effect, like wind spinners or hanging beads, position them where they'll deter squirrels without sitting in the flight path birds use to approach.
Finishing, curing, and weatherproofing
This is the step most people rush, and it causes the most problems. Even if the paint looks and feels dry, it may not be safe for birds yet, and it definitely won't be as weather-resistant as it will be once it's fully cured.
Cure times to know
For a product like AFM Safecoat WaterShield, the general guidance is dry to touch within about 2 hours and fully cured hard in about 24 hours under normal conditions (around 70 degrees Fahrenheit and moderate humidity). Cold or high-humidity conditions slow that down significantly. In practice, I'd wait at least 48 hours before putting any painted or sealed feeder into service, especially in spring or fall when temperatures vary a lot. Thick applications take even longer, which is another reason thin coats are better.
For general acrylic craft paints without a topcoat, give them 24 hours to dry, then add your sealant layer and wait another 48 hours. If you painted in the fall as recommended, you have weeks or months for fumes to dissipate, which is ideal. If you're painting mid-summer because you want the feeder ready now, paint it, let it cure completely with good airflow outdoors (not in the garage where fumes concentrate), and do a smell test before putting seed in. If you can smell anything chemical, wait longer.
Weatherproofing a decorated feeder
A clear topcoat is your best protection for any painted design. Apply a thin, even layer of a non-toxic outdoor sealant over the painted exterior surfaces. Avoid the feeding areas and ports. Two thin coats with full drying time between them will outlast one thick coat every time. For wood feeders, a natural oil finish can act as both the color base and the weather seal if you choose a tinted version, skipping the need for a separate topcoat.
| Finish type | Best surface | Bird-safe when cured? | Weather resistance | Notes |
|---|---|---|---|---|
| Water-based acrylic paint | Wood, some plastics | Yes (non-toxic label) | Low without topcoat | Add a sealant layer for outdoor durability |
| Natural beeswax/oil finish | Wood only | Yes (zero-VOC rated) | Moderate | Penetrates rather than sitting on surface; less peeling |
| Low-VOC clear sealant (e.g., WaterShield) | Wood, some plastics | Yes | High | Best as a topcoat over paint or bare wood |
| VOC-free wood sealer (e.g., Lumber-Seal type) | Wood | Yes (VOC-free rated) | High | Good for unpainted wood you want to protect naturally |
| Oil-based paint or stain | Not recommended | No (off-gasses long) | High but irrelevant | Avoid entirely for bird feeders |
Maintenance, seasonal refresh, and fixing common problems
Even a well-decorated feeder needs regular cleaning, and that cleaning process can stress your finish over time. Planning for that upfront saves you from redoing everything every few months.
How to clean without wrecking your decoration
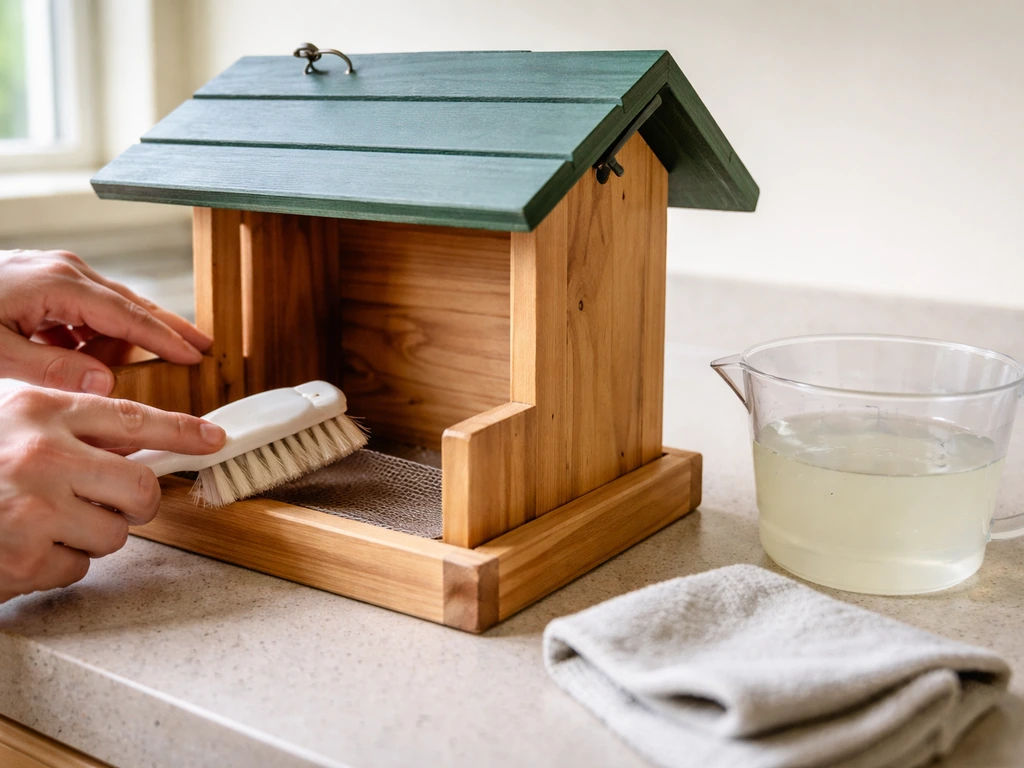
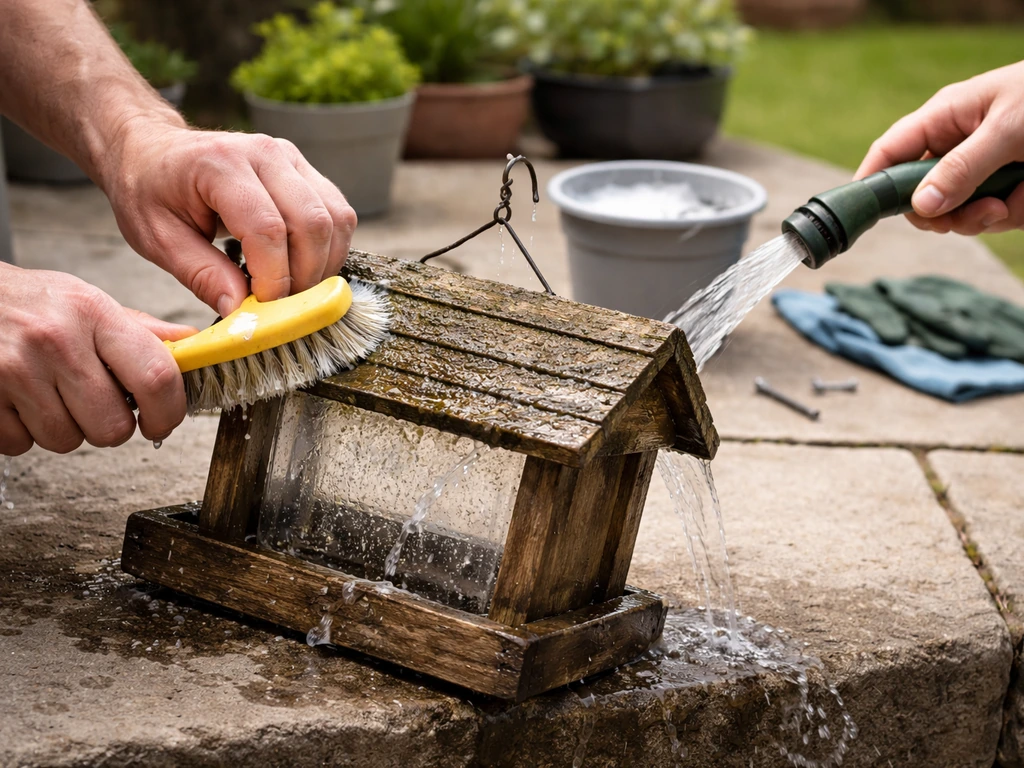
The standard recommendation from Audubon and Cornell Lab is to clean feeders once a month, more often in hot or wet weather. Use a 10 percent bleach solution (1 part bleach to 9 parts water) and soak the feeder for about 15 minutes, then rinse thoroughly with clean water and let it dry completely before refilling. If you prefer not to use bleach, a 9-to-1 vinegar-to-water solution works as a gentler option. Wear rubber gloves for either method.
The issue with bleach and painted surfaces is that repeated soaking can soften or lift paint, especially if the sealant layer is thin or damaged. The fix is to make sure your topcoat is solid before the feeder goes outside, and to touch up any chips or worn spots at the start of each season before moisture gets under the finish.
Seasonal refresh ideas
One of the easiest ways to keep a feeder looking good is to plan a refresh every fall. Clean the feeder thoroughly, let it dry, sand any rough or peeling spots lightly, and apply a fresh coat of paint or sealant. This is also the best time to do it from a bird-safety standpoint, since the feeder has all winter to off-gas before heavy spring use. Swapping out natural decorative elements like twine wrapping or attached dried materials is easy to do at the same time, and it keeps the feeder looking intentional rather than weathered.
Troubleshooting common problems
Peeling paint is the most common complaint. It almost always comes from one of three causes: the surface wasn't clean or sanded before painting, the coat was too thick, or there was no protective topcoat. Fix it by scraping off the loose paint, sanding the area smooth, cleaning with a damp cloth, and reapplying in thin coats with a sealant on top.
If birds stopped visiting after you decorated, the most likely culprits are strong paint fumes that haven't fully dissipated, a blocked or narrowed feeding port, or a decorative element that's visually alarming (flapping materials, shiny surfaces) right in the birds' approach path. Remove the feeder, check for smell, inspect every port and perch for obstructions, and move any decoration that could be moving or reflecting in a startling way.
If pests like squirrels, raccoons, or ants have suddenly become more interested in your feeder after you decorated it, check whether any materials you used have a scent or food component. Honey-based finishes and fruit-scented craft supplies are common culprits. Also check that any new hooks or extensions you added didn't inadvertently give squirrels a better grip point. A properly placed baffle, at least 4 to 5 feet off the ground and well below the feeder itself, handles most squirrel problems regardless of decoration.
Mold buildup inside a feeder after decoration usually signals blocked or painted-over drainage holes. Take a drill bit the same size as the original holes and clear them out. If the problem keeps recurring, add more drainage holes to the low points of the floor. Keeping the feeder in a location with good airflow and some morning sun also helps the interior dry faster after rain.
If you're working on a DIY feeder and want more ideas on starting from scratch inexpensively, there's good overlap with building a feeder from common recycled materials, where the same material and safety principles apply from the very first step of construction rather than as an afterthought. If you want to build a bird feeder from scratch, you can also follow a guide for how to make a bird feeder out of PVC pipe and then decorate it safely using the same bird-safe finish rules. An eco-friendly bird feeder also starts with the build and materials you choose, not just the decoration eco friendly bird feeder. If you want to start with that recycled approach, you can also follow guides for how to make bird feeders from old dishes and then use these decoration and safety tips. If you are working with an older feeder instead of starting fresh, it can help to know what to do with old bird feeders before you refinish or redecorate it. If you're looking to keep costs down, you can combine those same bird-safe material rules with a simple cheap feeder build using recycled parts. The color choices you make during decoration are worth thinking about carefully too, since specific hues genuinely affect which species you attract most. If you want a quick starting point for the best overall shade, consider what birds you want to attract and how the feeder will look in your yard The color choices you make during decoration.
FAQ
Can I decorate a bird feeder with Sharpies, markers, or paint pens?
It depends on the ink, but most markers are not made for outdoor, bird-contact use. If you want to use them, choose products labeled non-toxic and low-VOC, apply them only to the outside surfaces, keep them away from perches and seed ports, and then seal over the area with a non-toxic outdoor topcoat. Do a smell test after full curing (at least 48 hours) and avoid any marker that still smells chemical when dry.
Is it safe to put stickers or decals on a feeder?
Usually no. Adhesives can attract dirt and can loosen when wet, and the plastic film can create sharp edges if it peels. If you want branding or a pattern, paint the design instead, or use natural-fiber wraps like twine or raffia on the exterior only, with no materials attached near feeding areas or any moving lids.
How close can decorations be to the feeding ports or perches?
Treat the area around ports and perch grips as a no-decoration zone. Keep attachments far enough that a bird can approach and grip without hitting them, and keep any sealant or thin coating off the actual feeding opening edges. A practical check is to look through each port opening and make sure nothing you added reduces the clear opening more than about 20%.
What’s the safest way to add a decal or appliqué without glue problems?
Attach decorations only with non-toxic white glue or by mechanical fastening that stays on the exterior. Avoid hot glue and any “instant” cyanoacrylate products, and never seal a removable roof or hinged panel in place. Let the adhesive cure completely outdoors before refilling, then inspect for any sharp edges or loose corners that could chip or snag.
Can I use glitter, sparkles, or metallic finishes on a feeder?
Avoid glitter and metallic craft products. They shed micro-particles over time and can end up on feathers, in food, or inside areas where birds feed. If you want a “shiny” look, use safe color paint or textured wraps that do not flake and keep them away from perches and ports.
Do I need a clear topcoat if I already used a “weatherproof” paint?
Often yes, especially if the feeder will be cleaned regularly or exposed to heavy rain. Even outdoor-labeled paint can wear faster without a dedicated non-toxic outdoor sealant layer. Focus topcoating on the painted exterior surfaces only, keep coatings off feeding areas, and re-check chips at the start of each season.
Can I decorate a feeder that’s already painted or stained?
Yes, but you need to ensure the old finish is stable. Clean thoroughly, lightly sand glossy areas for adhesion, and remove any peeling or flaking paint first. If the prior product has an unknown chemical smell when wet, do not decorate over it, since fumes can remain trapped under new coatings.
Why do birds stop visiting after decorating, even if everything is dry to the touch?
Dry-to-touch can happen well before full curing and before fumes fully dissipate. Also check for visual or physical changes: a narrowed port opening, paint on perches that flakes, shiny or moving decorations in the approach path, or materials that reflect light. If you notice this, remove the feeder, do a smell check, and reopen any access panels.
How can I decorate without increasing mold risk?
The big risk is blocking drainage or creating internal texture that traps moisture or seed. Make sure drainage holes remain clear of paint and attachments, and never add paint or rough texture inside tube or hopper interiors where seed flows. If you see mold after decorating, clear existing drainage holes and consider adding extra holes at the low points.
What’s the best way to handle cleaning if I want to preserve the decorative finish?
Plan for less aggressive abrasion and more careful re-sealing. Clean monthly as usual, but avoid heavy scrubbing on painted artwork, and always rinse thoroughly after any soak. Touch up chips promptly at the start of each season, since small breaches let moisture reach the underlayers and accelerate peeling.
Can I use scented or flavored items as part of the décor?
Avoid anything scented or sweet, including honey-themed finishes, fragrant wood treatments, and dried fruit decorations. These can attract wasps, ants, and rodents and can increase pest pressure around the feeder. Keep décor unscented and non-food, even if it seems like it would attract birds.
Next Articles
How to Make a Cheap Bird Feeder From Household Items
Step-by-step cheap DIY bird feeders from bottles, milk jugs and pinecones, plus safe hanging, maintenance and pest-proof
What to Do With Old Bird Feeders: Clean, Repair, Repurpose
Step-by-step guide to clean, repair, repurpose or retire old bird feeders, fix mold, pests, rust, clogs, and set safe pl
What Color Should I Paint My Bird Feeder? Best Options
Choose bird-friendly feeder colors, prep and paint it safely step by step, then test and adjust for your backyard birds.