The best colors to paint a bird feeder are natural, earthy tones like green, brown, and gray, with red being a strong choice if you're specifically targeting hummingbirds. If you are working with reclaimed items, you can also use old dishes to create a similar feeder that still holds up safely outside bird feeder. These colors either blend the feeder into vegetation (which makes birds feel safe approaching) or signal food to species already wired to notice those hues. Avoid loud, unnatural colors like neon orange or bright white, which can spook cautious birds or make the feeder look more like a threat than a food source.
What Color Should I Paint My Bird Feeder? Best Options

Marcus Brennan
24 May 2026
Best feeder colors for attracting birds
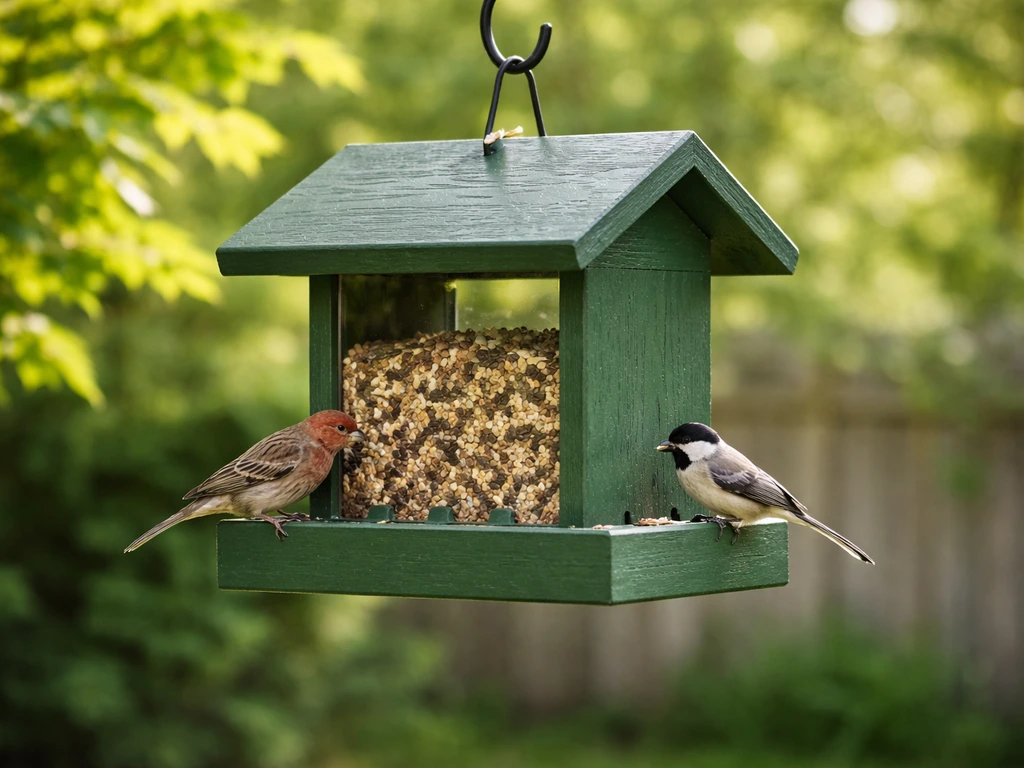
Green is probably your safest all-around choice. A 2021 Journal of Ornithology study comparing green and yellow feeders found birds selected green feeders more often, and visit rates were higher regardless of habitat (urban or rural). Green reads as natural to birds, blending into the foliage and signaling that the area is safe to land. Brown and weathered gray work similarly, mimicking bark and dead wood tones that birds associate with everyday perching.
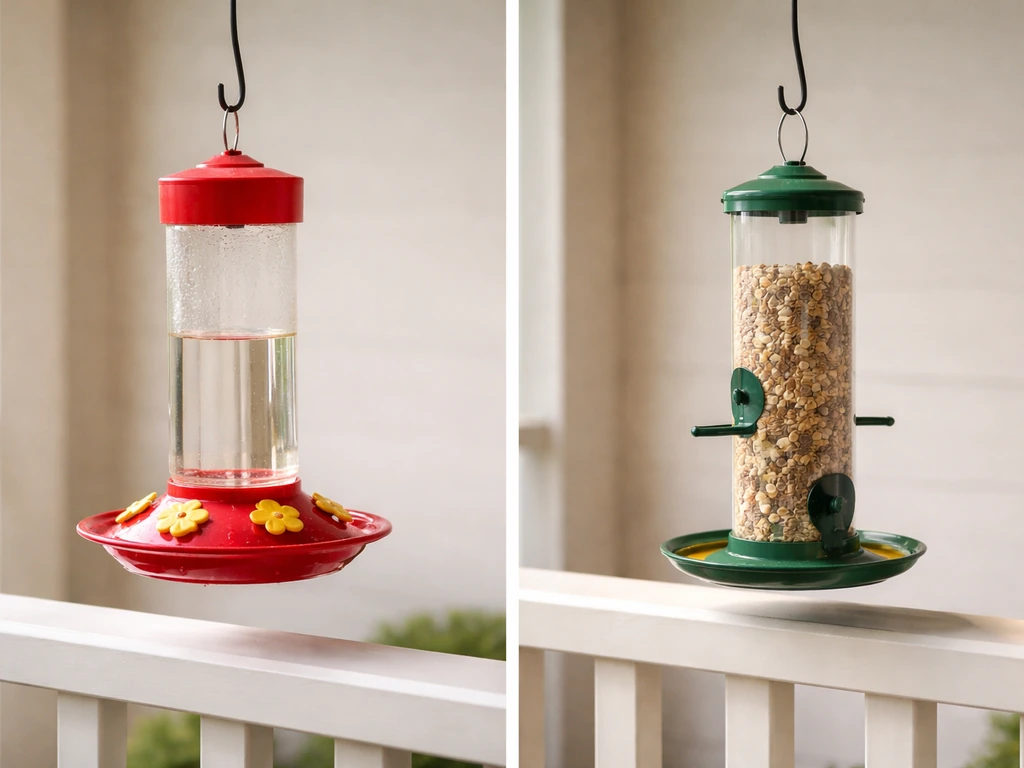
Red is the standout exception. If hummingbirds are your goal, red is the single most effective feeder color you can use. Hummingbirds are strongly drawn to red flowers in the wild, and that preference carries over directly to feeders. Purdue Extension and the USDA Forest Service both specifically recommend red feeders for hummingbirds. Just paint the outside of the feeder red and leave the nectar solution clear, plain sugar water. Adding red food dye to the nectar doesn't help and may actually be harmful to the birds.
Here's a quick breakdown of which colors tend to perform well across common feeder types:
| Color | Best For | Notes |
|---|---|---|
| Green | Seed feeders, all-purpose feeders | Blends into vegetation, higher visit rates in studies |
| Brown / Bark tones | Wooden feeders, suet feeders | Feels natural, low-threat appearance |
| Red | Hummingbird feeders | Strong innate attraction for hummingbirds; use on feeder body, not nectar |
| Gray | Any feeder | Mimics weathered wood, unobtrusive, works in most yard settings |
| Yellow | Finch/nyjer feeders | Goldfinches are drawn to yellow; less effective for other species |
| White / Neon | Avoid | Can startle cautious birds and may attract unwanted pests |
How feeder color affects bird behavior and visibility
Birds don't see the world the way we do. Humans have three types of color-sensing cones in our eyes; birds have four, making them tetrachromatic. That fourth cone gives them UV vision, meaning they can perceive colors in the ultraviolet spectrum that are completely invisible to us. Research on wild hummingbirds has shown they can even discriminate non-spectral colors, essentially color combinations that humans have no equivalent for. The practical takeaway: a color that looks subtle or muted to you might look vivid and signaling to a bird, and vice versa.
This matters for feeder color because birds aren't just processing the basic hue you paint on. They're reading the whole visual context, including how the feeder contrasts with its background, whether the color suggests food or danger, and what they've learned from prior experience. A study published in a peer-reviewed journal on color biases in foraging birds found that color preference can shift depending on context and prior exposure, meaning juvenile birds and adults may react differently to the same feeder color. So painting your feeder one color and seeing slow uptake early on doesn't mean it's wrong. Sometimes birds just need time to learn a new food source.
Visibility also matters in a practical sense. A feeder that completely disappears into the background might not be noticed quickly by passing birds. Hanging a small visual cue alongside a camouflaged feeder, even something as simple as a red ribbon near a hummingbird feeder, can help birds spot it faster. Project FeederWatch has noted that visual accessories like these can increase visitor rates while the feeder gets established in your yard.
Choosing colors based on target bird species
Different birds respond to different visual signals, so if you have a specific guest list in mind, let that drive your color choice. Here's what tends to work for the species backyard feeders most commonly target:
- Hummingbirds: Red is the clear winner. These birds are genetically primed to associate red with nectar-producing flowers. A red feeder body with clear sugar water is the most effective combination you can set up.
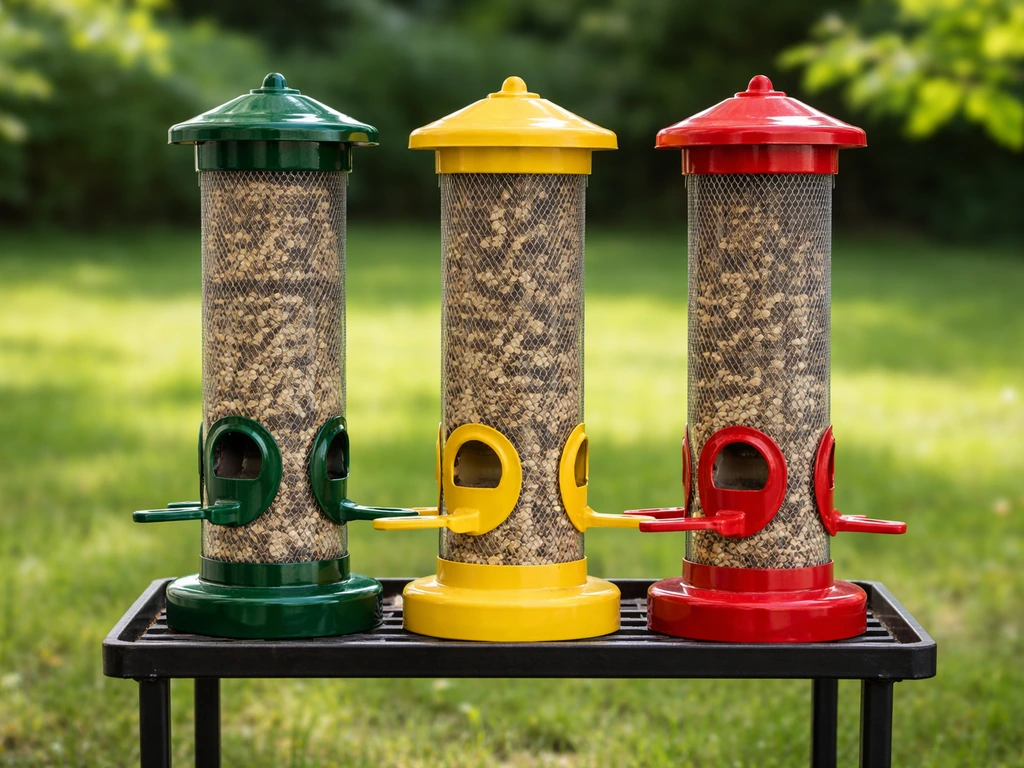
- Goldfinches: Yellow feeders, especially tube-style nyjer seed feeders, attract these birds well. Goldfinches seem comfortable approaching bright, saturated yellows.
- Cardinals: Cardinals are bold birds and aren't easily spooked by a feeder's color, but a red or dark natural-tone feeder fits their environment preference. A large platform feeder in dark brown or green with a good sunflower seed supply will pull them in.
- Chickadees, nuthatches, and titmice: These birds are adaptable and will visit almost any feeder that offers black-oil sunflower seeds. Neutral colors like gray, brown, or green work best since these species prefer feeders that feel embedded in the natural landscape.
- Wrens and sparrows: Low-to-the-ground or sheltered feeders in earth tones work best. These birds are cautious and prefer feeders that don't stand out visually.
- Woodpeckers: Suet feeders that mimic bark colors (dark brown, gray) will feel familiar and safe to woodpeckers, who spend most of their foraging time on tree trunks.
If you're building or decorating a feeder specifically for one species, lean into that species' preference hard. If you're going for a mixed community of birds, green or brown gives you the broadest appeal without alienating anyone.
Color choices to reduce predators and discourage pests
Feeder color isn't just about attracting birds. It also plays a role in how safe birds feel using the feeder, and how visible the feeder is to animals you don't want showing up. A feeder painted in stark white or bright metallic tones can actually work against you by making the birds landing on it more visible to hawks and cats. Birds are prey animals and they know it. A feeder that looks exposed will get fewer visits, especially from smaller, ground-feeding species.
Painting a feeder in colors that blend into its surroundings gives visiting birds better camouflage cover while they're feeding, which makes them more willing to linger and come back. Green blends into tree canopy backdrops, brown merges with fence or post backgrounds, and gray mimics branch coloring. The birds feel safer because they effectively are safer from airborne predators that rely on spotting contrast.
For squirrels and other mammal pests, feeder color doesn't do much to deter them directly. Squirrels are largely colorblind compared to birds and are driven more by smell and learned behavior than visual cues. A baffle (that bowl-shaped barrier you mount on the pole below the feeder) is far more effective than any paint color for stopping squirrels. That said, keeping the feeder visually low-profile, dark and tucked into foliage, rather than bright and obvious, can slow down initial discovery by curious squirrels and ground-feeding rodents. Also, no matter what color you paint it, a feeder that drops seed on the ground will attract rodents, so make sure the design keeps seed contained. FeederWatch also warns that bird food scattered on the ground can attract rodents, so feeder design should keep seed contained.
If you're using visual deterrents to keep pest birds like starlings or pigeons away from feeders meant for smaller species, OSU Extension notes that visual deterrent strategies work best when rotated and combined with other tactics since birds habituate quickly to static visual noise. Feeder color isn't going to solve a starling problem on its own, but a smaller, more camouflaged feeder can make the setup less appealing to large, bold species that prefer open, visible feeding stations.
Painting tips: prep, paint type, and durability
The most important rule before you pick up a brush: the paint you use on a bird feeder must be non-toxic, water-based, and low or zero VOC. Birds will perch on the feeder, possibly chew on it, and eat food that has been sitting near the painted surface. A paint that off-gasses harsh chemicals or contains heavy-metal pigments is a genuine health risk to wildlife. Stick with exterior-grade, water-based acrylic paints labeled as low-VOC or zero-VOC. Brands like ECOS Paints (which makes a pet-dwelling-specific line) or exterior acrylics from Dunn-Edwards' EVERSHIELD line are good examples of what to look for. Rubio Monocoat's Hybrid Exterior Wood Protector is another option if you want a penetrating finish rather than a surface paint, especially for wooden feeders you've built yourself.
Never paint the inside of a feeder. This is a firm rule, similar to guidance from the Alaska Department of Fish and Game about birdhouses: the interior surface can flake, and birds will ingest those flakes. Only paint exterior surfaces, and avoid painting any surface that directly contacts the seed, nectar, or suet.
Step-by-step painting process
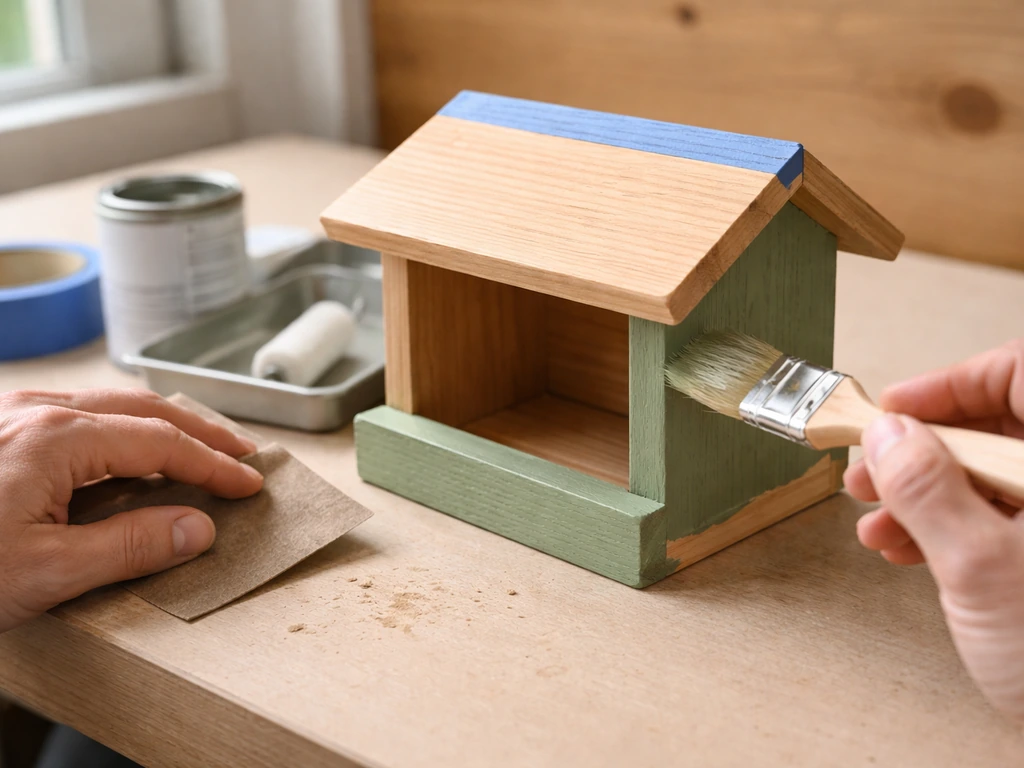
- Clean the feeder thoroughly. Remove all old seed, debris, and any existing flaking paint. Wash with mild soap and water, then let it dry completely, at least 24 hours.
- Sand lightly if painting over bare wood or a previously painted surface. This gives the new paint something to grip. Wipe away all dust with a dry cloth before painting.
- Apply a primer coat if the feeder is bare wood or raw material. A zero-VOC primer (like those in the ECOS Pet Dwellings system) seals the surface and helps the topcoat last longer outdoors. Let the primer dry per the manufacturer's instructions before moving on.
- Apply your first coat of exterior acrylic paint in your chosen color using a brush or small roller. Thin, even coats are better than one thick coat. Work with the grain if you're painting wood.
- Let the first coat dry fully before adding a second coat. Follow the manufacturer's recoat window exactly. Water-based acrylics often feel dry to the touch in an hour but need more time before recoating so the bond is solid.
- Apply a second coat, then allow full cure time before hanging the feeder. Full cure for most exterior acrylics is 7 to 14 days, even if the surface feels hard sooner. Hanging too early risks paint damage from weather before the film has hardened.
- Skip painting any interior surfaces, seed ports, nectar ports, or perches where birds grip and feed directly.
If you're working on a feeder you've built yourself from wood, check out tips on construction and materials before you paint, since the paint job will only last as long as the wood underneath is solid. A quick, cheap feeder made from recycled materials might not need paint at all, depending on what it's made from.
Testing and adjusting your feeder color in your yard
Here's the reality: no single color is universally perfect for every yard. Your local bird community, the trees and structures surrounding the feeder, the light conditions, the season, and even which individual birds learned about the feeder first all affect what works. The best approach is to treat your first paint choice as a starting point, not a final answer.
Give a newly painted and hung feeder at least two to three weeks before drawing any conclusions. Birds are cautious about new objects in their environment, and it takes time for them to recognize the feeder as a food source. If you're seeing very few visitors after three weeks, try adding a small visual cue near the feeder, like a red ribbon near a hummingbird feeder or a handful of seeds scattered on a platform to draw attention. Project FeederWatch handbook materials note that visual accessories like a red ribbon can increase feeder visibility and help attract visitors as the feeder gets established blank" rel="noopener noreferrer">a red ribbon near a hummingbird feeder. If you also want to focus on sustainability in your setup, see how to make an eco friendly bird feeder for material and design ideas that pair well with your color choice. Once birds start visiting, you can also build a practical PVC pipe bird feeder by cutting the pipe to size and adding perches and openings small visual cue. Project FeederWatch recommends keeping simple tally logs of which species visit, how often, and at what times. Even a basic notebook record over a few weeks will tell you a lot.
If visits are still low after a month, consider adjusting the color on your next maintenance repaint. You can repaint a feeder at the start of each season when you're already doing your cleaning and maintenance routine. This gives you a low-effort opportunity to experiment with a different shade without committing to a permanent change. For example, if green wasn't pulling in the traffic you hoped for, try a warmer brown or shift to red if you're in an area with hummingbirds.
Also pay attention to what your specific yard background looks like from a bird's perspective. If your feeder is hanging against a light-colored fence or wall, a dark green feeder will create visible contrast that makes it easier to spot from above. If it's hanging in dense foliage, a lighter sage green might disappear too well. Small adjustments in shade can make a meaningful difference in visibility and visit rates. After you choose the right color, add simple decorating touches like a perch-friendly layout or a visible cue so birds find the feeder quickly how to decorate a bird feeder.
The main thing is to keep iterating. Once you stop using a feeder, clean it thoroughly and decide whether to reuse it, repair it, donate it, or recycle the materials what to do with old bird feeders. Backyard birding is genuinely a trial-and-error hobby, and the most successful setups are built up over multiple seasons of watching, adjusting, and paying attention to what the birds in your specific patch of yard actually prefer.
FAQ
Should I paint a bird feeder before or after I season it or assemble it?
Paint exterior surfaces before final assembly when possible, because seams and hardware can be hard to seal later. If the feeder already has seed or nectar contact areas exposed, keep paint away from those spots so nothing flakes into the feeding zone.
Is “non-toxic” paint enough, or do I need to worry about VOCs and off-gassing timing?
You should prioritize water-based, low or zero VOC paint, and give it a full cure time per the label before hanging it. Even with safe paint, strong odors or tackiness can discourage birds and create a risk if they chew or contact wet surfaces.
Can I use spray paint on a bird feeder?
Often it is a poor choice because many spray paints are solvent-based or have higher VOCs. If you use spray, verify it is exterior-grade, water-based or low/no-VOC, and let it cure completely, then inspect for any overspray near the food-contact areas.
What’s the best way to choose a color if my feeder is near a white house or pale fence?
Use the background contrast as your guide. If the backdrop is light, darker green or weathered gray can become easier for birds to locate from above. If you place it in dense foliage, a mid-tone (like sage green) may be visible, but very light shades can disappear too well.
Do I need to repaint each year to keep the feeder safe and effective?
Not automatically, but you should repaint when the finish is peeling, chalky, or rough enough that particles could transfer. Treat repainting like maintenance during cleaning, and re-check that no paint has migrated into areas where seed, nectar, or suet sits.
Can I paint only part of the feeder, like just the base or the top?
Yes, and it can be a smart compromise. Keep the zones near openings and any food-contact surfaces unpainted, then use the color mainly on the perching and outer housing where it affects visibility and reduces startling contrast.
Will painting a hummingbird feeder red still work if I’m using a cover or feeder housing?
It depends on whether the birds can visually see the red cue. If the housing or cover blocks most of the red area, opt for a design where red is visible from the typical approach angle, while still keeping nectar contact areas free of dye or paint.
Is red dye in the nectar ever beneficial, or can it be harmful?
Do not add red food dye to the nectar. Birds can be lured by a red feeder cue, and dye adds unnecessary variables without improving safety or attraction, and it can create additional risk if it alters the solution in ways the birds are not adapted to handle.
How long should I wait after repainting before judging results?
Give it at least two to three weeks. In the early period, birds often need time to learn the new object and ignore it as “new,” and a cured finish also matters for scent and texture, which can affect first visits.
What should I do if my feeder color attracts the wrong species (like larger aggressive birds or pests)?
Don’t rely on color alone. If bigger birds dominate, adjust setup instead: use a feeder style meant for smaller species, reposition for more cover, add a squirrel baffle, and consider rotating visual deterrents only for the specific pest situation since animals habituate to static cues quickly.