You can turn almost any old dish into a working bird feeder in under an hour, using a drill, some basic hardware, and wire or rope to hang it. If you also want your feeder to be eco friendly, choose durable lead-free materials and reuse old dishware to keep waste out of landfills eco friendly bird feeder. Once your feeder is built, you can add visual appeal by decorating the area around it and choosing bird-safe materials that won't chip or leach into the seed decorate a bird feeder. The safest picks are plain glass, unglazed stoneware, or modern lead-free ceramic dishware in good condition. When it comes to painting, focus on food-safe, outdoor-safe materials rather than coating the dish with bright decorative glazes that could shed into the seed area plain glass, unglazed stoneware, or modern lead-free ceramic dishware. Avoid anything with bright hand-painted decorations, vintage pottery with unknown glaze origins, or chips and cracks that trap bacteria. Get that part right, and the build itself is genuinely straightforward.
How to Make Bird Feeders From Old Dishes: Step by Step

Choosing safe old dishes for feeder builds
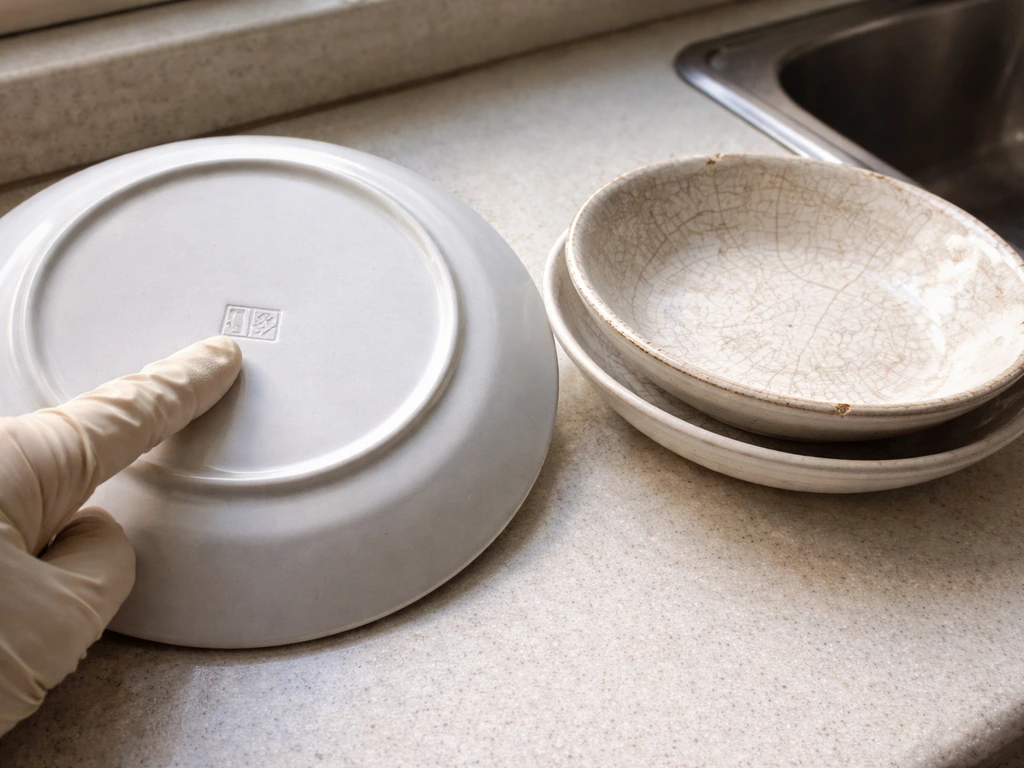
The biggest safety concern with reusing ceramic dishes is lead. The FDA and Health Canada have both flagged that lead and cadmium in ceramic glazes can migrate out of the glaze when the piece contacts food or liquid. That's a real problem for birds because seed and water sit in the dish for extended periods. The risk is highest with vintage, handmade, or imported pottery where the glaze was fired at low temperatures or applied over decoration. BfR (Germany's federal risk assessment institute) notes that migration depends on glaze quality, firing temperature, and contact duration, so there's no easy way to visually confirm a dish is safe unless you know its origin.
The practical rule: stick to modern, commercially produced dishware marked dishwasher-safe and made after roughly the mid-1990s when lead-in-glaze standards tightened in North America and Europe. Plain glass dishes and bowls are excellent because glass is inert. Unglazed terracotta or unglazed stoneware is also fine since there's no glaze to leach anything. What you want to avoid includes hand-painted vintage plates, brightly decorated mugs with exterior paint that flakes, any dish with visible crazing or chips in the glaze, and anything you found in a grandparent's attic with no clear manufacturing origin.
- Plain glass plates, bowls, or pie dishes: safest and easiest to drill
- Modern lead-free ceramic plates and bowls (dishwasher-safe, post-1995): good option
- Unglazed terracotta saucers and bowls: naturally safe, no glaze at all
- Stainless steel mixing bowls or pie tins: rust-resistant and very durable
- AVOID: vintage hand-painted pottery, crazed or chipped glazed ceramics, decorative pieces not intended for food contact, any dish with peeling or flaking surface decoration
Condition matters too. A hairline crack in a ceramic bowl will harbor mold, bacteria, and old seed that you can never fully scrub out. If a dish has any cracks, skip it. A small chip on the rim is usually fine as long as the seed-holding surface is intact.
Step-by-step feeder designs using old dishes
There are three reliable builds depending on what you have on hand: a plate or shallow bowl platform feeder, a deep bowl hanging feeder, and a stacked cup-and-saucer feeder. Each takes about 30 to 60 minutes and needs minimal tools. I'll walk through all three.
Build 1: Plate or shallow bowl platform feeder
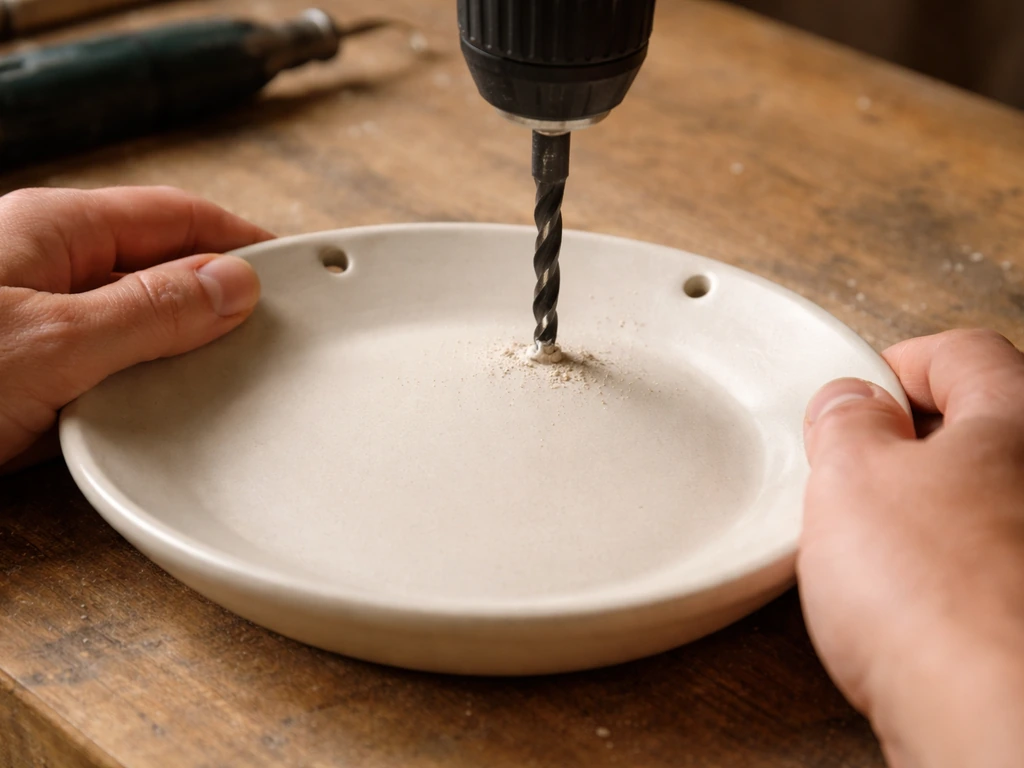
This is the simplest build and attracts the widest variety of birds. If you want a different project, you can also learn how to make a bird feeder out of PVC pipe with basic cutting and drainage planning. You need one shallow plate or bowl (8 to 12 inches across works best), a diamond-tipped or glass-and-tile drill bit, a drill set to low speed (400 to 1000 RPM is the recommended range to avoid cracking glass or ceramic), a short length of chain or paracord, and three small screw eyes or eye bolts with washers.
- Mark three evenly spaced holes near the rim of the plate, about half an inch from the edge, using a marker. For a round plate, think of them at 12, 4, and 8 o'clock positions.
- Place the plate on a folded towel on a firm surface. Fill a small ring of plumber's putty or modeling clay around each drill mark to hold a few drops of water, which cools the bit and prevents cracking.
- Drill slowly at low speed (400-1000 RPM), keeping steady downward pressure. Let the bit do the work. Do not force it. If you see smoke, you're going too fast or too dry.
- Once holes are through, rinse and dry the plate. File any sharp edges lightly with a small diamond file or fine sandpaper.
- Thread wire or paracord through each hole, tie a secure overhand knot underneath each hole so the cord can't pull through, then bring all three strands up and tie them together about 6 inches above the plate to form a central hanging loop.
- Add a small eye bolt at the knot junction if you want a cleaner hang point, then attach a short S-hook for hanging.
Build 2: Deep bowl hanging feeder
A deeper bowl (think mixing bowl or salad bowl, 4 to 6 inches deep) works as a contained feeder that holds more seed and offers some natural wind protection. The drilling process is identical to the plate build. The difference is that with a deep bowl you only need one central drainage hole drilled in the bottom (about 3/8 inch diameter) plus the three rim holes for hanging. The drainage hole is essential: without it, rainwater pools in the bowl and spoils seed within hours.
- Drill one drainage hole in the center of the bowl's base using the same low-speed, water-cooled technique.
- Drill three hanging holes near the rim as described in Build 1.
- Thread wire or heavy cord through the rim holes, knot below, and bring strands up to a central hanging point.
- Hang so the bowl tilts very slightly (just a few degrees) toward the drainage hole side to encourage water runoff.
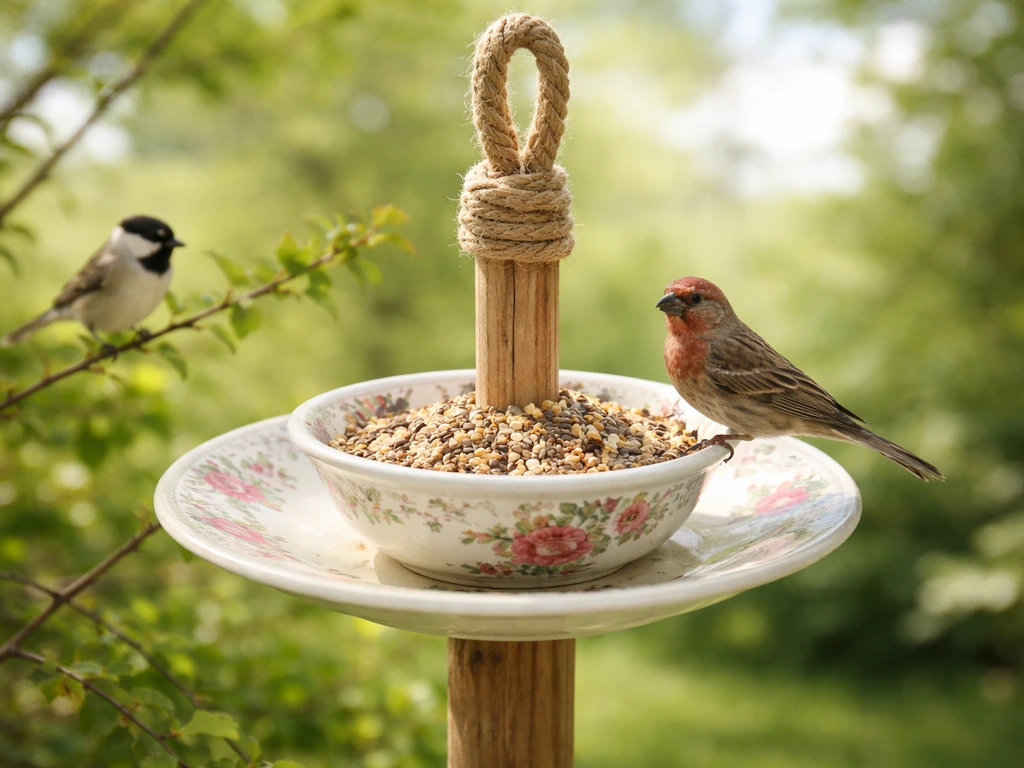
Build 3: Stacked cup-and-saucer feeder
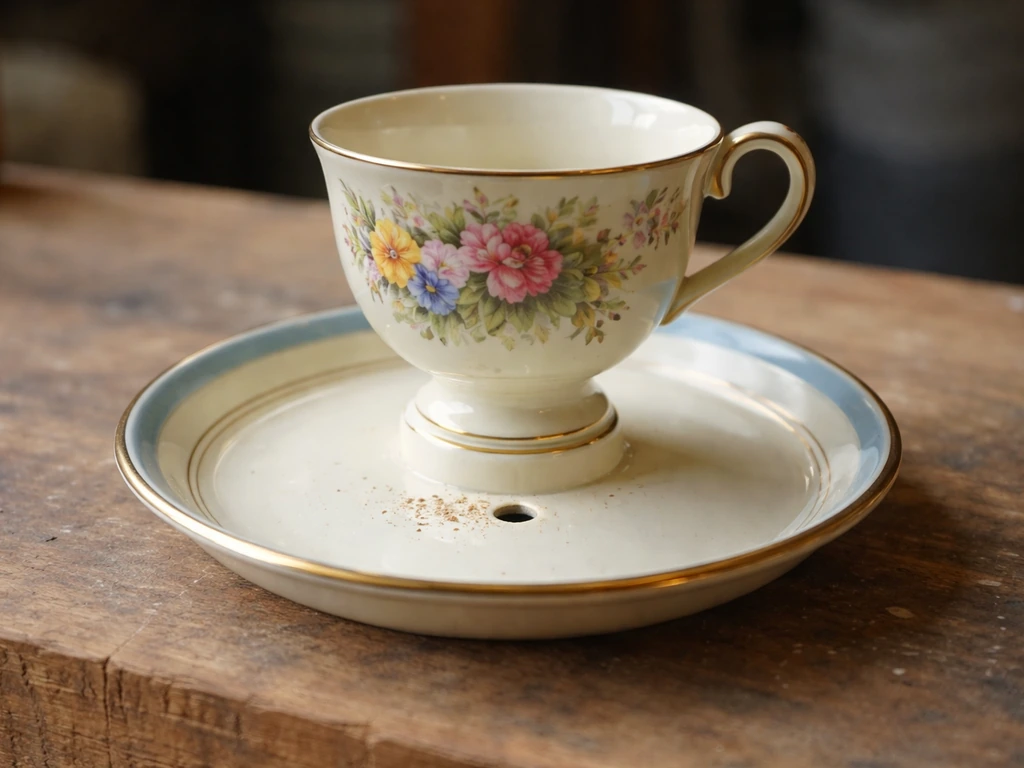
This is the most decorative option and a great way to use mismatched teacups or mugs from a thrift store. The cup acts as a seed reservoir that slowly trickles into the saucer platform below. You need one cup and one matching or close-fitting saucer, a long threaded rod (about 6 to 8 inches, 1/4 inch diameter), two nuts and washers, waterproof adhesive or epoxy as backup, and a hanging wire.
- Drill a single hole through the center of the saucer's base and through the bottom of the cup, both slightly larger than your threaded rod diameter.
- Stack the cup upside-down onto the saucer (rim of cup rests in the saucer), aligning the holes.
- Push the threaded rod through both holes, place a washer and nut on each end, and tighten snugly but not so tight that you crack the ceramic.
- Apply a small bead of waterproof epoxy around the washer on the exposed underside of the saucer as extra security.
- Bend the top of the threaded rod into a hanging hook using pliers, or attach a separate eye nut to the top of the rod for hanging.
The cup naturally tips seed into the saucer as birds feed from the rim. This design looks great but does require checking that the cup's drainage (or the gap between cup and saucer) doesn't get blocked by wet seed.
Attaching, stabilizing, and hanging feeders safely
The most common failure point with dish feeders is wobbling in the wind, which tips seed onto the ground and eventually stresses the hanging hardware until something breaks. The fix is simple: use three-point suspension for plates and bowls (the three-cord or three-wire method described above) rather than a single central hook, and make sure the load is evenly distributed. A feeder that hangs level is stable; one that lists to one side will spin, swing, and spill constantly.
For hardware, 20-gauge galvanized wire is reliable for lightweight glass or ceramic dishes. For heavier stoneware bowls, use stainless steel chain (like lightweight jack chain available at any hardware store) because paracord will eventually rot outdoors, especially in wet climates. Connect the three chain or wire strands to a single swivel snap hook at the top: the swivel prevents the whole feeder from spinning and untwisting the strands over time.
Hanging the finished feeder: a shepherd's hook pole sunk about 18 inches into soil is the most versatile option because you can move it. Screw eyes in a porch beam or tree branch work too, but make sure the support is genuinely solid. A wobbling branch amplifies every bit of wind motion down to the feeder and shakes seed out constantly. If you're hanging from a tree, use a sturdy branch at least 2 inches in diameter. Loop the hanging wire around the branch and use a cable clamp or a figure-eight knot that won't slip under load.
Where to put the feeder in your yard
Window collisions kill millions of birds every year, and feeder placement is one of the most controllable factors. The guidance from ornithology researchers is clear and specific: place feeders either within 3 feet of a window or more than 30 feet away. The logic is counterintuitive but solid. At under 3 feet, birds leaving the feeder can't build up enough speed to cause a fatal collision if they hit the glass. At over 30 feet, they've left the feeder's vicinity before heading toward any windows. The danger zone is that middle range of 4 to 29 feet, where birds accelerate enough for a deadly impact.
Beyond window safety, look for spots with nearby natural cover. A feeder within 10 to 15 feet of a shrub or small tree gives birds an escape route from hawks and cats, which makes them much more willing to visit regularly. Avoid placing directly under a large overhanging tree if squirrels are a concern (more on that below). Keep feeders away from spots where they'll be constantly dripped on by rain runoff from eaves, as constant moisture accelerates mold in seed and speeds up the degradation of hardware.
A slight east or southeast exposure is ideal in most of North America: birds are active early and morning sun helps dry any overnight dew on the seed. Avoid full western exposure where afternoon sun can cause seed to heat up and go rancid faster in summer.
Cleaning, maintenance, and seasonal troubleshooting
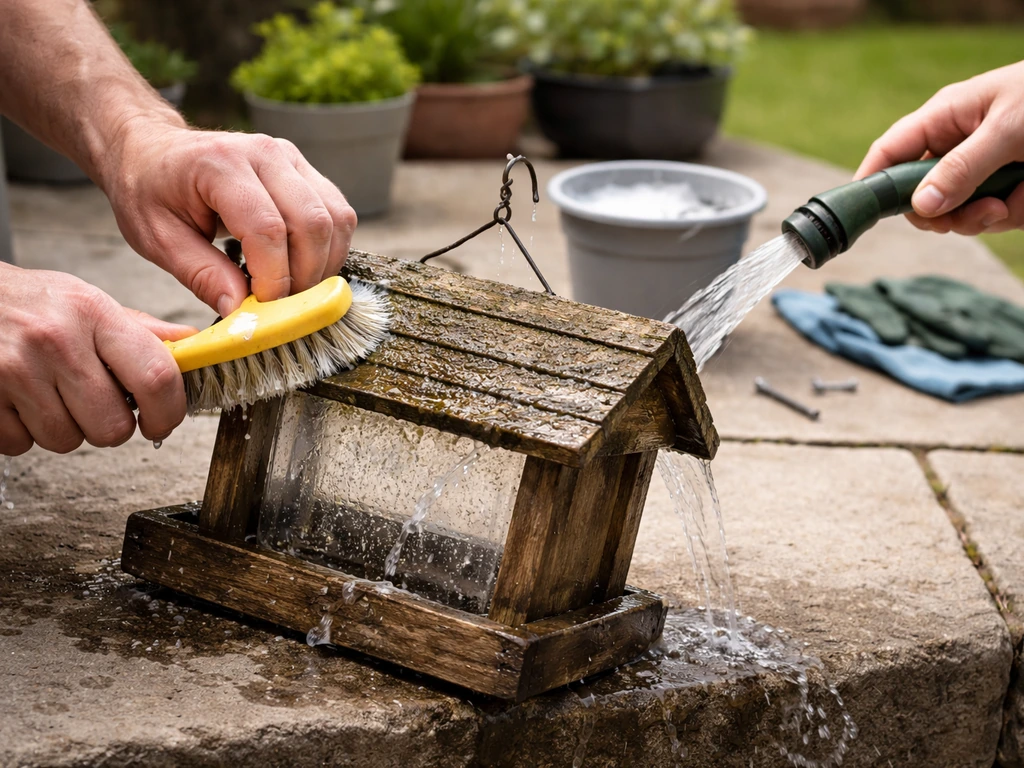
The single most important maintenance task is regular cleaning. Wet, moldy seed and fecal contamination at feeders can spread diseases like salmonellosis and avian conjunctivitis between birds. The standard cleaning protocol used by All About Birds, PetMD, Iowa DNR, and the Bird Rescue Center all land on the same formula: 1 part bleach to 9 parts water (a 10 percent bleach solution). Soak the dish in that solution for 10 to 15 minutes, scrub with a dedicated brush (not one you use for anything else), rinse thoroughly with clean water, and let it dry completely before refilling. Completely dry: residual moisture in seed causes rapid mold growth.
How often? Aim for at least once a month as a baseline, but bump that up to every two weeks during hot summer months or wet spells when seed spoils faster. If you ever see the seed clumping, looking grey or green, or smelling musty, clean the feeder immediately and discard all the old seed before refilling. Don't just add fresh seed on top of bad seed. That's one of the most common mistakes people make and it's why birds sometimes abandon a feeder that seems fine.
The dish feeder designs here have one big advantage for cleaning: they're dead simple to disassemble and scrub. There are no tubes, no small ports, no dark corners. Glass and glazed ceramic are non-porous, so they don't absorb bacteria the way wood does. That makes dish feeders genuinely easier to keep clean than most store-bought tube or hopper feeders.
Troubleshooting: when birds won't visit
If birds ignore a new feeder for the first week or two, don't panic. It takes time for local birds to discover a new food source, especially if feeders aren't already established in the area. Try scattering a small handful of seed on the ground nearby to act as a visual advertisement. Make sure the feeder is actually visible from approach angles, not hidden behind dense foliage. If it's been more than three weeks and nothing, move the feeder to a different spot and check that you're using the right seed for local species. Black oil sunflower seed attracts the broadest range of birds and is a reliable starting point for any new feeder.
Wet seed and seasonal challenges
Open dish feeders are more vulnerable to rain than enclosed tube feeders. In rainy seasons, reduce the amount you put out to what birds can eat in a day or two, rather than filling the dish to the brim. After heavy rain, check the feeder and swap out wet clumped seed before it molds. The drainage holes in the bowl design help a lot, but they're not magic: if you fill a bowl feeder right before a two-day downpour, the seed will still get soaked even if water drains out. Small fills, checked frequently, is the right strategy in wet climates.
Keeping squirrels out and birds safe
Squirrels are the perennial challenge with any open feeder design, and dish feeders are especially tempting because there's nothing to stop them from sitting on the rim and eating everything. There are a few approaches that actually work.
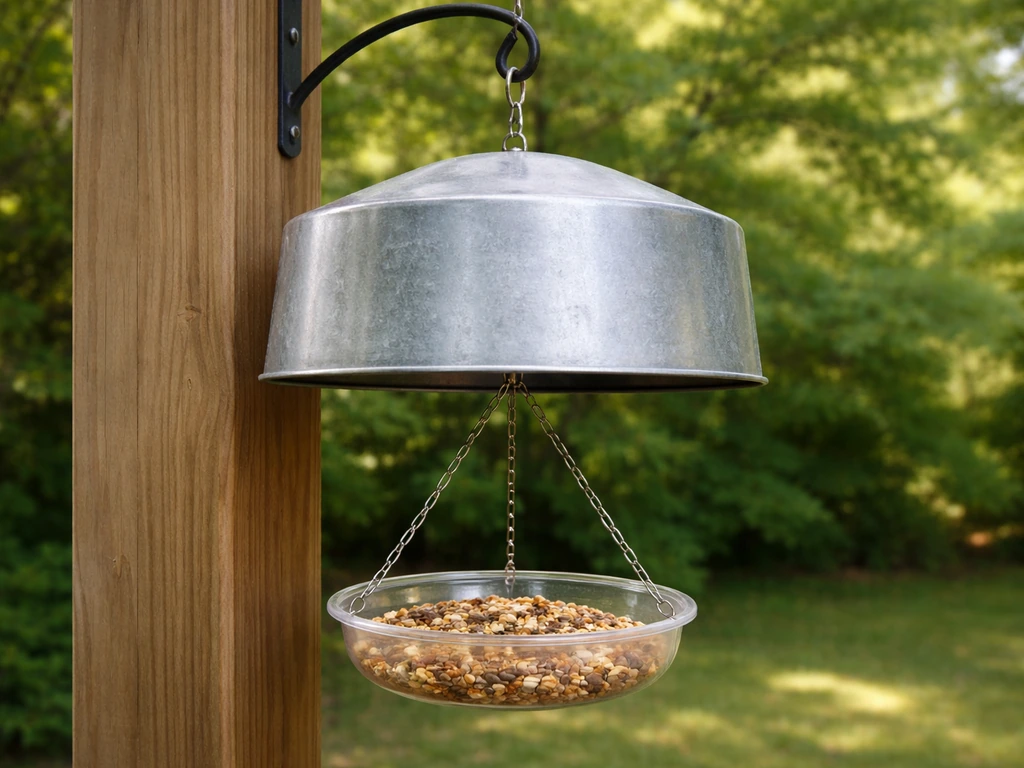
The most reliable physical solution is a squirrel baffle: a wide dome or cylinder of metal or plastic mounted on the pole below the feeder, or hung above it on the line. Baffles are a humane physical barrier that simply makes the feeder inaccessible, and they're more effective than any repellent or hot pepper additive. For a pole-mounted feeder, position the baffle at least 4 feet off the ground and make sure the feeder itself is at least 5 to 6 feet from any fence, tree trunk, or structure a squirrel can launch from. Squirrels can jump roughly 5 feet horizontally and 4 feet vertically from a standing start, so distance and baffle height both matter.
Weight-activated squirrel-proof feeders (like the Droll Yankees Yankee Flipper, which uses a motorized perch that spins when a heavier animal climbs on) work brilliantly but are designed for tube feeders, not dish builds. If you want that kind of automation, you'd be better served by a purpose-built feeder for that feature. For dish feeders, stick to baffles and placement discipline.
Rain protection for the dish itself can be added without much effort. A simple rain shield is a second, larger plate or a piece of cut acrylic hung 4 to 6 inches above the dish on the same hanging wire, centered so it sheds rain away from the seed below. It doesn't need to be elaborate: even an old pot lid hung above the bowl blocks most direct rainfall and extends how long fresh seed stays dry.
| Pest/Problem | Effective Solution | Notes |
|---|---|---|
| Squirrels climbing pole | Baffle on the pole, 4+ feet high | Keep feeder 5-6 feet from jump-off points |
| Squirrels dropping from above | Dome baffle above feeder on hanging wire | Also blocks most direct rain |
| Seed spoiling in rain | Overhead rain shield plate or pot lid | Reduce fill amount in wet weather |
| Mold in seed | Clean every 2-4 weeks with 1:9 bleach solution | Never add fresh seed on top of old wet seed |
| Raccoons/large animals | Bring feeder indoors at night | Dish feeders are easy to bring in |
| Window collisions | Place within 3 feet or beyond 30 feet of windows | Avoid the 4-29 foot danger zone |
One final thought: dish feeders are genuinely one of the most beginner-friendly builds you can do because the materials are free, the cleanup is easy, and the open design lets you watch exactly which birds are visiting and what they're eating. If you're already thinking about how to make a cheap bird feeder or want to go further and decorate what you've made, the foundation skills here carry over directly. Get one dish feeder working well, keep it clean, and adjust placement based on what you see. For a broader next step after you build and hang a dish feeder, you can also review what to do with old bird feeders so you know when to clean, repair, or retire them adjust placement based on what you see. That trial-and-error approach, more than any perfect first setup, is what actually fills a yard with birds.
FAQ
Can I use any old dish if I just drill holes and hang it?
Not always. Even if it drains well, the biggest issue is whether the dish has a leaded or cadmium-containing glaze that can migrate into seed or water. If you do not know the dish origin, avoid hand-painted vintage pieces and anything with unknown glaze marks, crazing, or chips on the seed-contact surface.
What’s the safest way to tell if a dish is likely to be lead-free?
Look for clear labeling like “dishwasher safe” and “food safe” on modern commercially produced items, and skip anything that looks handmade, imported without markings, or decorated with heavy overglaze paint. For older ceramics with no documentation, the practical decision is to not use the glazed area that will hold seed.
Is unglazed terracotta really okay for holding seed?
Usually, yes, because there is no glaze to leach, but terracotta can absorb moisture. To prevent mold, fully dry the feeder after cleaning and do not overfill right before extended rain.
How do I handle a dish feeder that seems to crack or chip after drilling?
Stop and replace the dish if you see new cracks radiating from the hole, because stress cracks can worsen when birds land or when it freezes. Use low drill speed and a proper bit, and add a scrap backing material under the dish to reduce stress at the exit point.
Do I need to seal the ceramic or glass with something food-safe?
Typically no, and adding coatings can create new risks if they are not truly outdoor food-contact safe. If you want protection, focus on avoiding questionable glazes and using inert materials like glass, and make sure any adhesive or epoxy is used only for structural attachment away from seed contact.
Can I use a dish feeder for water or only seed?
The designs are intended for seed, but if you plan to hold water you need extra care. Use a dish that will not pool water, clean more frequently, and avoid any ceramic glaze that is not known to be lead-free because contact duration is long.
What should I use for seed in a dish feeder to avoid waste and spoilage?
Start with black oil sunflower seed because it brings in many species and is easy to monitor. In wet climates, use smaller fills you can replace within 1 to 2 days, since open dish feeders soak faster than enclosed types.
How often should I clean if birds are still visiting but the feeder looks fine?
Clean on schedule regardless of appearance. If you notice clumping, musty smell, or gray or green seed, clean immediately and discard old seed instead of topping off.
Can I compost or reuse the cleaned bird feeder after using bleach?
Yes, after it is fully rinsed and dried, you can treat it like a regular kitchen item for reuse. For disposal of old seed, compost only if it is free of heavy contamination signs and not mixed with chemicals or pesticides.
What do I do if the feeder attracts squirrels immediately?
Do not keep filling while they are learning. Install a squirrel baffle and adjust placement so the feeder is well away from launch points like tree trunks, fences, or porch structures. Then start with small fills so birds get the advantage without providing unlimited takeoff food.
Is it safe to hang a dish feeder from a tree branch?
It can be, but use a branch that is thick and sturdy (at least about 2 inches in diameter) and secure the attachment with a cable clamp or a knot that cannot slip. A wobbling or flexing branch increases spilling and can loosen hardware over time.
How do I prevent window collisions when my yard layout forces a mid-range placement?
If you cannot meet the “within 3 feet or beyond 30 feet” spacing, add barriers on the glass, like exterior window screens or decals, to break up flight paths. Also consider relocating temporarily during peak bird activity, then reassess.
What’s the best way to start using a new dish feeder if birds ignore it?
Keep it clean and visible, and place a small amount of seed nearby on the ground to advertise the food source. If nothing changes after about three weeks, try a different location and switch to a seed that matches local preferences.
Why does my feeder keep spilling seed even though it is hung level?
Check for small imbalances at the hanging points, uneven hole placement, or a dish that is not actually level because of how the holes were drilled. Three-point suspension is more forgiving than a single central hook, and equal tension prevents constant twisting.