Pick your mounting method first: a Velcro strap around a tree branch or trunk, a hose-clip bracket on a metal pole, or a tripod adapter on a deck stand. Get the feeder camera facing north or east at roughly 18 to 24 inches from the seed tray, dial in your Wi-Fi before you climb the ladder, and you can be watching live 1080p bird footage within an afternoon. Everything below walks you through the full process from gear check to first recording.
How to Mount Bird Feeder With Camera: Step-by-Step

Marcus Brennan
29 Apr 2026
Choosing the right smart camera bird feeder setup
Before you buy anything or drill a single hole, spend five minutes matching the feeder to your actual yard. The two big decisions are whether you want a combined feeder-plus-camera unit (like the Birdfy/Netvue lineup) or a separate camera pointed at a traditional feeder, and then whether your power source is battery, solar, or wired. For specific guidance on how to mount a Netvue bird feeder, follow the mounting method that fits your yard setup and confirm the camera angle and clearance before you secure it Netvue bird feeder mounting.
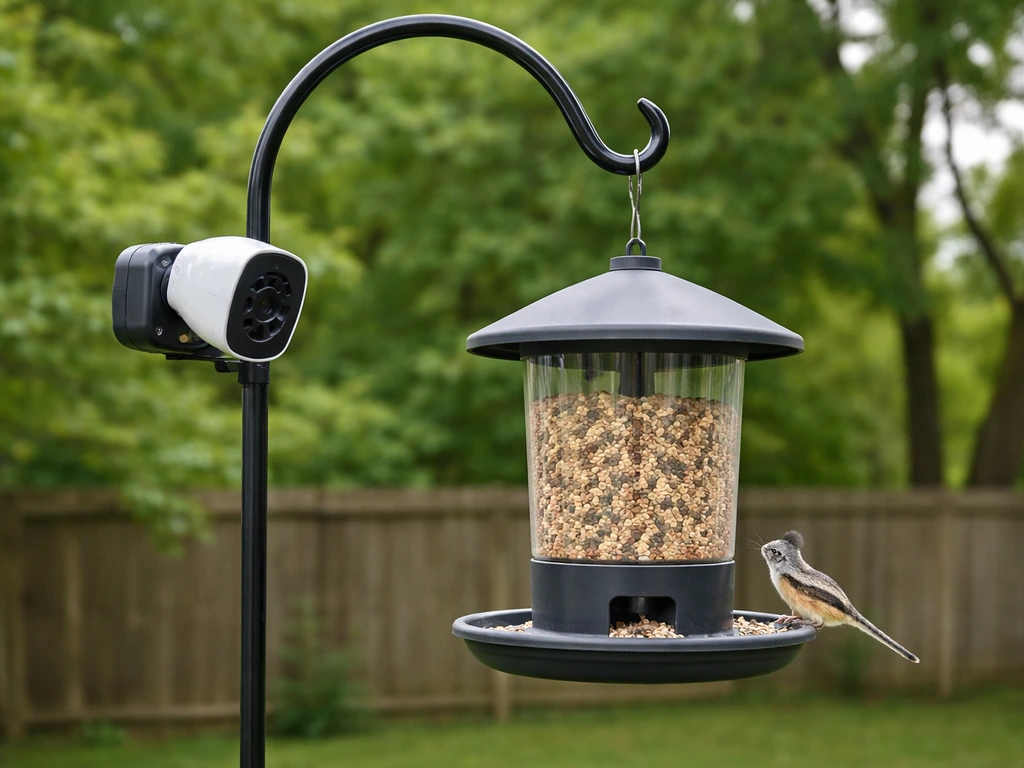
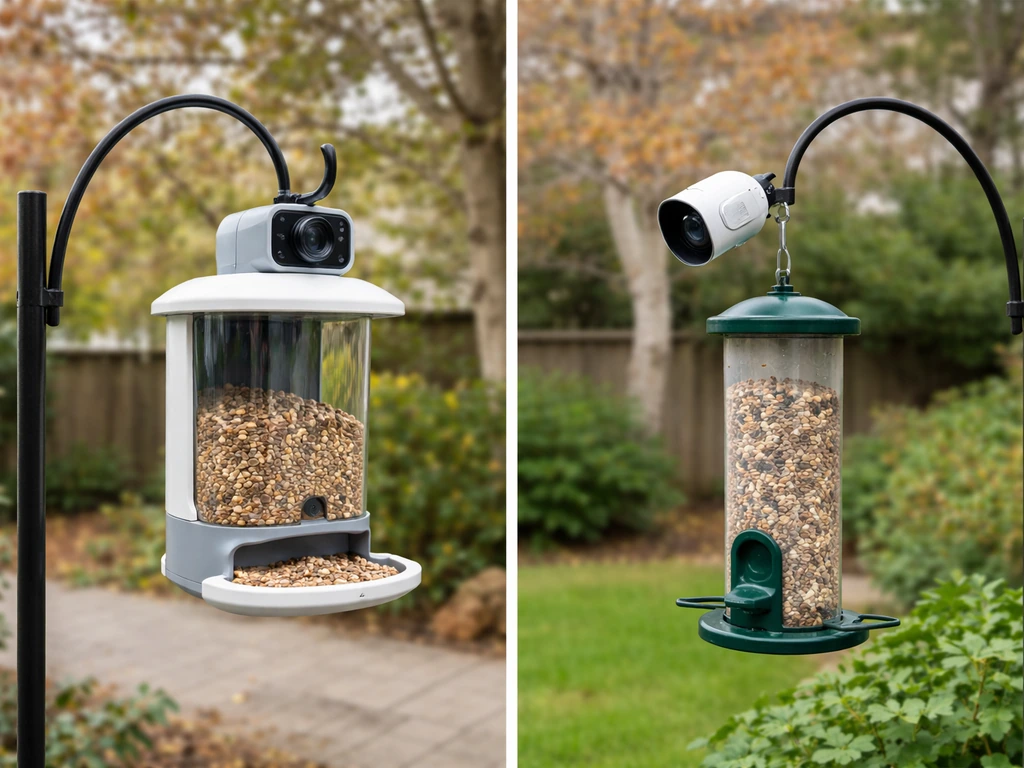
Integrated camera feeders are the easier starting point for most people. The Birdfy AI+Solar, for example, packages 1080p FHD video, a 135-degree field of view, a 5000mAh rechargeable battery, and a solar panel into one weatherproof unit rated IP65. You hang it once, aim it once, and you're done. Separate cameras pointed at a feeder give you more flexibility in placement but double the mounting work and introduce alignment drift over time as the feeder shifts with wind.
Also think honestly about your space. If you have a mature tree in the yard, the Velcro-strap tree mount is quick and non-destructive. No tree? A ground pole mount works just as well and is actually more stable in windy spots. On a balcony or deck, a tripod adapter (sold separately for most Birdfy models) lets you skip drilling entirely. The mounting method shapes every other decision, so settle this before moving on.
Tools and parts checklist for mounting a camera feeder
Most integrated smart feeders ship with the core mounting hardware already in the box. Here's a realistic checklist covering both what's usually included and what you'll need to source yourself.
Usually included in the box
- Mounting bracket with handle nut for camera angle adjustment
- Velcro strap for tree mounting
- Hose clip (metal band clamp) for pole mounting
- Tripod adapter thread fitting (check model specs — not always included)
What you'll need to grab yourself
- A metal or wooden pole, 1 to 1.5 inches in diameter, if going the pole route (shepherd's hook works fine)
- A tripod rated for outdoor use if using the tripod adapter on a deck or patio
- A small flathead or Phillips screwdriver for tightening bracket screws
- A phone with the Birdfy app (or your feeder's companion app) already downloaded
- Your Wi-Fi password handy (2.4GHz network — more on this below)
- A microSD or TF card if your model supports user-inserted storage (check your specific model first, since some slots are manufacturer-only)
- A ladder tall enough to reach your intended mounting height safely
- Zip ties or additional bungee cord as backup if mounting in a windy spot
Realistic time estimate: budget about 30 to 45 minutes for a straightforward tree or pole mount, plus another 15 minutes for app pairing and camera angle tuning. First-timers who are still figuring out Wi-Fi placement should add another 20 minutes.
Mounting methods: hanging, pole, and eave/stand options
There are three main ways to mount a camera feeder, each with real trade-offs. Here's how to do each one properly.
Tree mount (Velcro strap method)
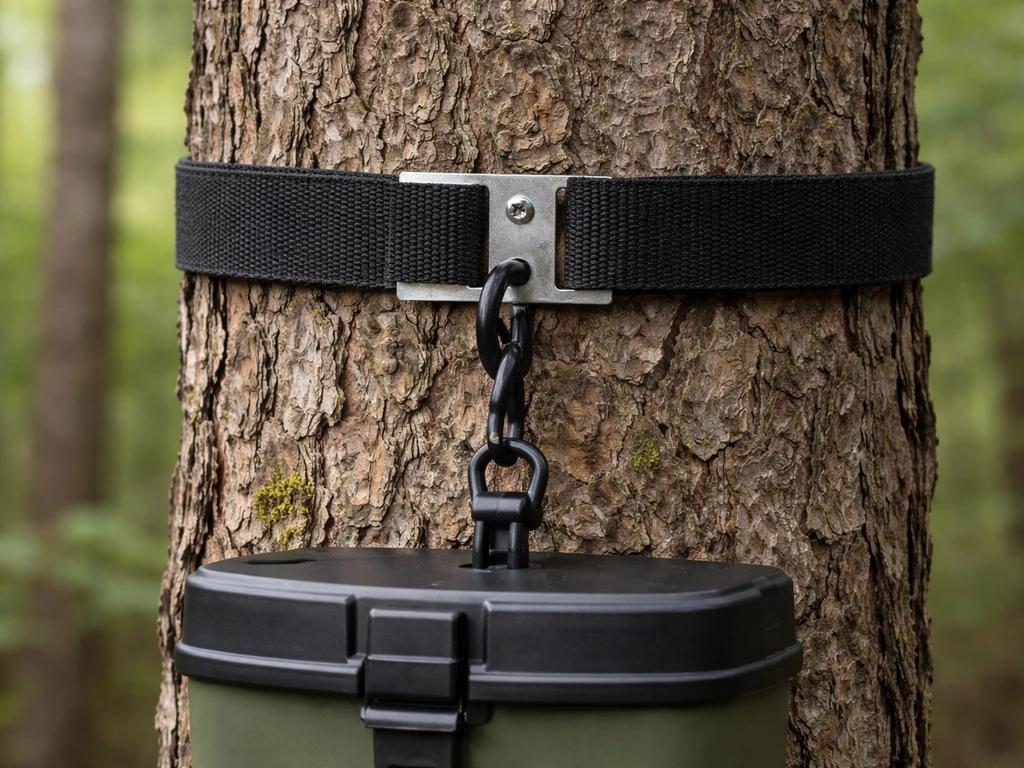
- Choose a trunk or sturdy branch at least 4 inches in diameter so the feeder hangs level and doesn't bounce excessively.
- Thread the provided Velcro strap through the mounting bracket slots.
- Wrap the strap around the tree at your target height (roughly 5 to 6 feet off the ground is a good starting point — see the camera positioning section below).
- Press the Velcro firmly closed and tug the feeder to confirm it doesn't slip or rotate.
- Loosen the handle nut on the bracket, adjust the camera angle toward the seed tray, then retighten the nut until snug.
One honest heads-up: Velcro straps on rough bark can gradually work loose, especially after rain. Check the strap tension every two weeks until you're confident it's stable. A zip tie through the bracket hole as a backup never hurts.
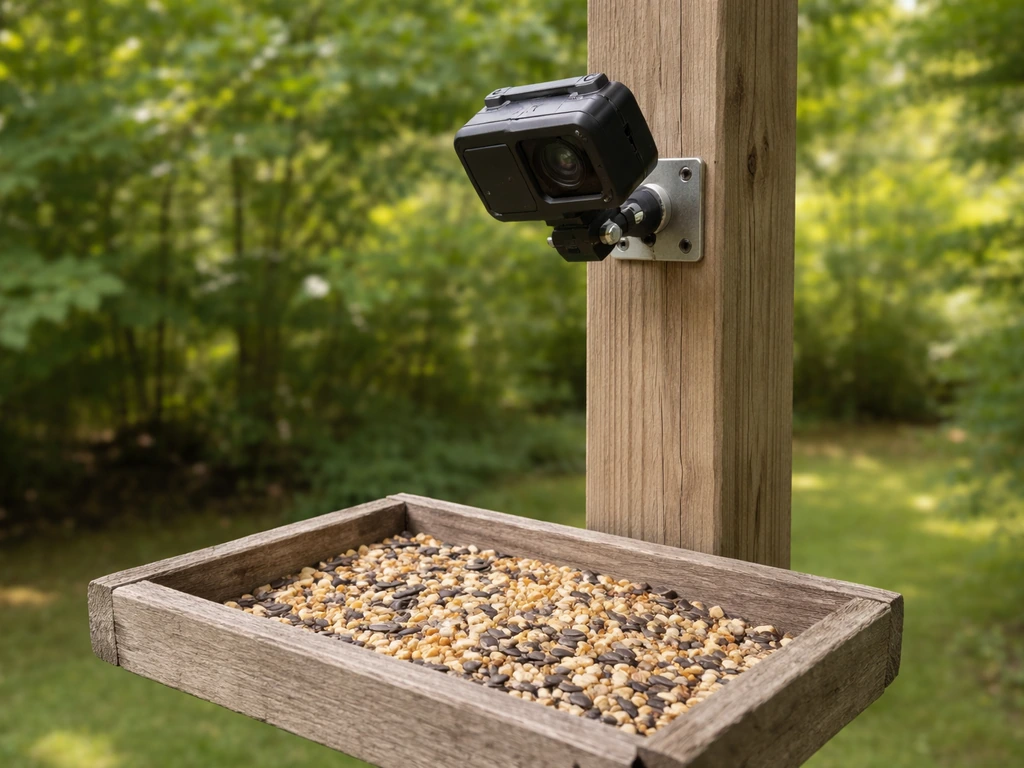
Pole mount (hose clip method)
- Push or drive your pole into the ground at least 12 inches deep for stability. For soft soil, go 18 inches.
- Slide the mounting bracket around the pole at your target height.
- Thread the provided hose clip (metal band clamp) around both the bracket and the pole.
- Use a screwdriver to tighten the hose clip until the bracket cannot rotate or slide under pressure.
- Adjust the camera angle using the handle nut as described above.
The pole mount is actually the most stable option for windy yards. A pole mount is also handy when you want a simple, stable way to mount your bird feeder higher off the ground. It also gives you full control over height and orientation since you're not constrained by where a tree happens to be. If you're curious about pole-specific setups in more detail, the topic of how to mount a bird feeder on a pole covers pole diameter, material, and anti-squirrel baffle placement thoroughly. If you do not have a tree in place, the same pole principles can guide you with how to hang a bird feeder without a tree.
Tripod or deck stand mount
- Attach the tripod adapter to the feeder's mounting bracket screw thread.
- Thread the adapter onto your tripod head and tighten finger-snug, then add a quarter turn with a coin or screwdriver.
- Set the tripod on a flat, level surface and spread the legs fully for maximum stability.
- On windy decks, loop a bungee cord or paracord from one tripod leg to a balcony railing as a tether.
- Adjust camera angle and height by repositioning the tripod head.
Tripod placement on a balcony or raised deck opens up a lot of nice camera angles since you can fine-tune height without digging anything into the ground. If a balcony is your only option, the guide on how to hang bird feeders on a balcony has extra tips on weight limits and railing clearance that are worth reading alongside this. If you're hanging a feeder from a tree instead, the same basic positioning and stability checks can help you get steadier footage how to hang bird feeders on a balcony.
Camera positioning for birds (angle, height, field of view, lighting)
This is the step most people rush, and it's where most bad footage comes from. Spend the time here and everything else pays off.
Height and distance
Aim for a mounting height between 4.5 and 6 feet from the ground for most backyard species. At that height, the camera is roughly at eye level with the seed tray, giving you natural-looking footage instead of a bird's-eye view of the top of every bird's head. Distance from the seed tray matters too: 18 to 24 inches gives the camera's 135-degree FOV room to frame the entire tray plus a little background context. Closer than 12 inches and larger birds will overflow the frame; farther than 36 inches and small birds like chickadees and finches look tiny.
Camera angle
The bracket handle nut is your best friend here. Loosen it, rotate the camera until the lens is pointing slightly downward toward the seed tray at roughly a 15 to 25-degree tilt, then retighten. This slight downward angle catches birds landing on the perch, eating, and taking off, which is most of the action you actually want. A fully horizontal camera tends to photograph birds' chests and miss the best moments.
Lighting and sun glare
Orient the camera so it faces north or east whenever possible. A camera facing south or west will be shooting directly into the afternoon sun for hours every day, which washes out video and triggers constant false motion events. If north or east isn't possible due to your yard's layout, use a feeder location that has a tree, fence, or wall providing afternoon shade. For dawn and dusk shooting, Birdfy cameras include both infrared night vision (black and white, effective to about 7 meters) and a white-light color night vision mode, so you don't have to choose. Switch between modes in the app based on whether you want color or to avoid startling birds with visible light.
Power and connectivity (battery vs solar, Wi-Fi range, storage)
Battery and solar power
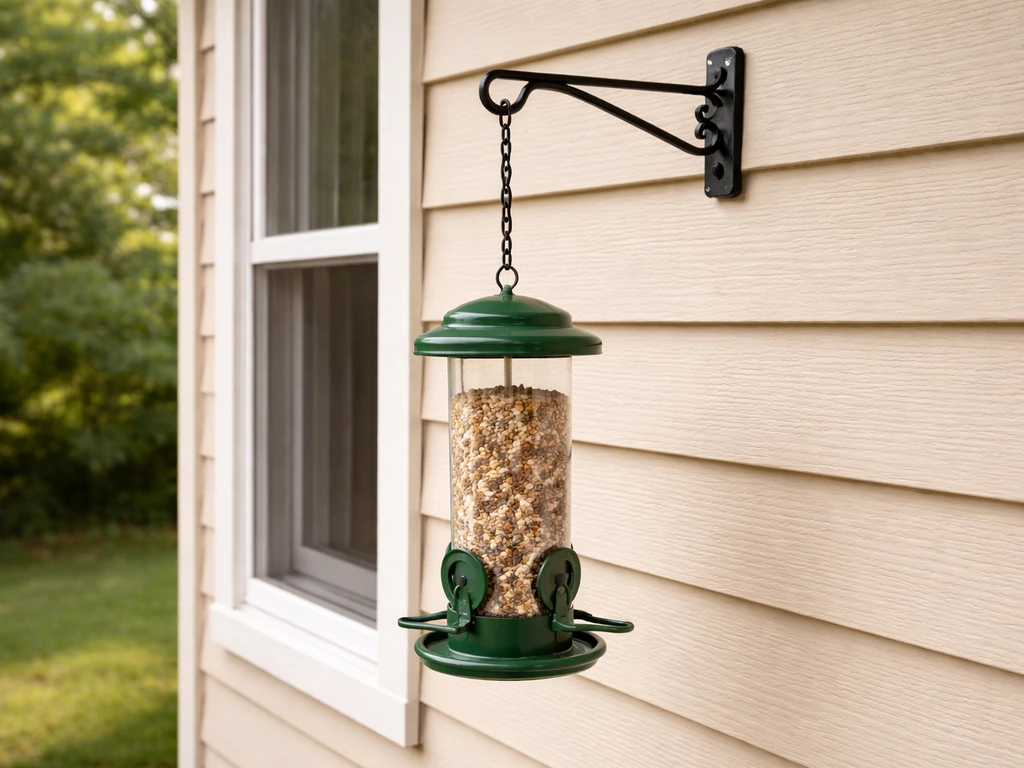
Solar-plus-battery combos like the Birdfy AI+Solar are the most practical choice for most yards because they eliminate cord-running entirely. The built-in 5000mAh battery provides a meaningful buffer on cloudy days or during high-activity periods when the camera is recording frequently. In most climates with reasonable sun exposure, you'll rarely need to manually recharge. If you choose a battery-only model, expect to recharge every 2 to 6 weeks depending on how much activity your feeder sees. Wired power (USB or DC) is the most reliable option if you're mounting near your house, but managing a cord across a yard to a pole mount is messy and a trip hazard unless you bury it or route it along a fence. If you plan to hang your bird feeder from your house, double-check Wi-Fi range and consider a stable mounting option that won’t strain the siding mounting near your house.
Wi-Fi range and network setup
Every Birdfy feeder requires a 2.4GHz Wi-Fi connection. This is non-negotiable during setup and ongoing operation. Before you finalize your mounting location, take your phone to that spot and check your Wi-Fi signal strength. One or two bars is usually not enough for reliable streaming and event uploads. If your router signal is weak at the feeder location, either mount the feeder closer to the house or add a Wi-Fi extender. The 2.4GHz band has better range than 5GHz through walls and foliage, but it still has limits. If your router broadcasts a combined 2.4/5GHz network under one name, you may need to split them in your router settings so the feeder can connect to the right band during pairing.
Storage options
You have two storage paths: cloud and local SD card. Birdfy's cloud storage is free for event clips with a 30-day rolling retention window. Videos older than 30 days are automatically deleted unless you're on a paid subscription for longer retention. Local storage via microSD or TF card is available on some models, but check your specific model's documentation before buying a card. On certain Birdfy units, the microSD slot was intended for manufacturer testing and is not designed for end-user insertion. If local storage matters to you, confirm compatibility before purchase.
| Storage method | Cost | Retention | Accessible offline? | Watch out for |
|---|---|---|---|---|
| Cloud (free tier) | Free | 30 days rolling | No | Videos auto-delete after 30 days |
| Cloud (paid subscription) | Monthly/annual fee | Extended (plan dependent) | No | Ongoing cost |
| Local microSD/TF card | One-time card cost | Until card is full | Yes | Not supported on all models — verify first |
Weatherproofing and securing against pests and vandalism
Weatherproofing the feeder and connections
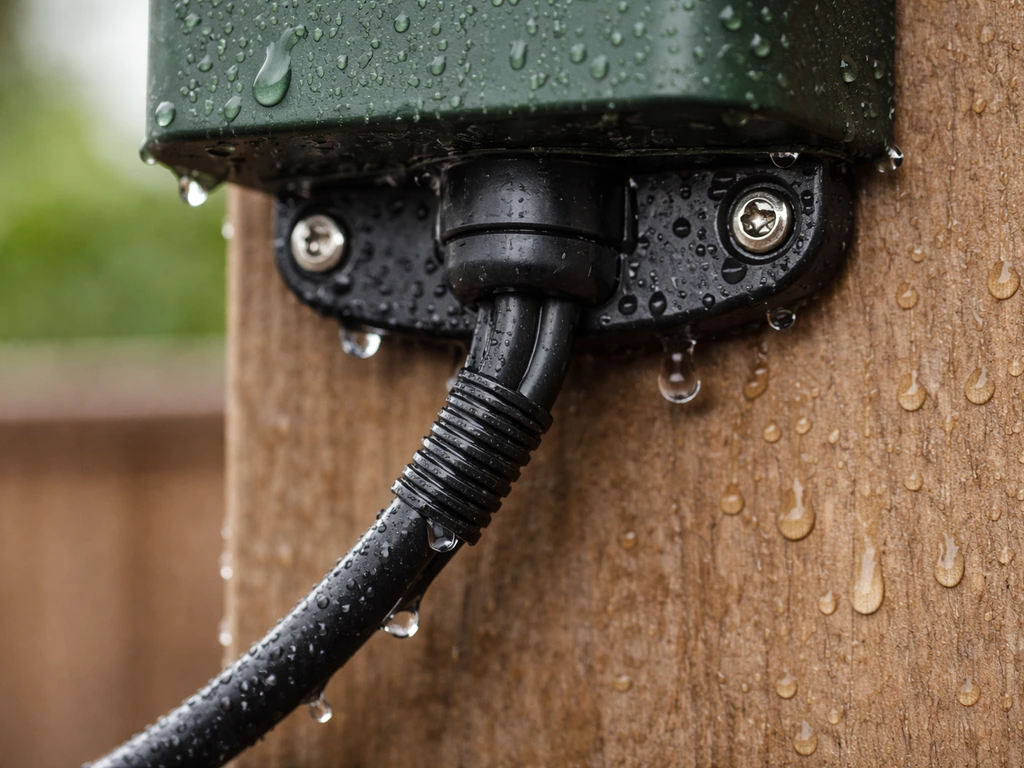
An IP65-rated feeder like the Birdfy AI+Solar handles rain, snow, and dust without any additional treatment on the unit itself. What you do need to weatherproof are your mounting connections and any power cables. If you're running a USB cable to the feeder, use outdoor-rated cable clips or conduit along the route and leave a drip loop (a downward curve in the cable just before it enters the feeder) so water doesn't run along the cable and into the port. Check that every bracket screw and hose clip is stainless steel or plastic-coated so they don't rust and seize up over winter.
Preventing squirrel and animal interference
Squirrels are the number one reason camera feeders end up crooked, damaged, or on the ground. On a pole mount, add a squirrel baffle (a cone or cylinder-style guard) about 4 feet up the pole, below the feeder. Keep the feeder at least 10 feet horizontally from any tree branch, fence top, or structure a squirrel can launch from. On a tree mount, there's less you can do about jump distance, so position the feeder on a trunk rather than a side branch where possible, and check the Velcro strap tension after any squirrel activity. For the camera itself, a determined squirrel or raccoon can knock or rotate the mounting bracket. Back up the Velcro strap with a zip tie loop through the bracket, or add a second hose clip on a pole mount.
Preventing theft and vandalism
Smart feeders are real money, and unfortunately they do get stolen. In public-facing spots like front yards or low fence lines, use a security cable (bike-lock-style) looped through the bracket and around the pole or post. Mount at a height that's visible from inside your house so you notice any tampering. Some people also add a second inexpensive dummy bracket or stake sign nearby to signal the area is monitored, which is a cheap deterrent.
Testing, troubleshooting, and maintenance routine
First-time setup and pairing
- Download the Birdfy app (or your feeder's companion app) and create an account before going outside.
- Power on the feeder and wait for the status light to indicate pairing mode.
- In the app, tap 'Add Device' and scan the QR code located on the lower side of the camera.
- Enter your 2.4GHz Wi-Fi password when prompted. If pairing fails, verify your network is 2.4GHz and your phone is on the same network.
- Once paired, go to a live view and confirm the image is clear and aimed correctly. Adjust the bracket handle nut if needed.
- Trigger a test event by waving your hand in front of the camera and confirm the clip appears in the app event log.
Common problems and fixes
- Camera shows offline in app: Check Wi-Fi signal at the feeder location, confirm you're on 2.4GHz, and try power-cycling the feeder. If it stays offline, use a paperclip or ejector pin in the reset hole to perform a factory reset, then re-pair.
- Video is blurry or washed out: Likely a lighting issue. Reorient the camera away from direct sun, or clean the lens with a dry microfiber cloth. Check that the lens cover film was fully removed at setup.
- Feeder keeps rotating or tilting: Tighten the hose clip or Velcro strap. Add a zip tie as a secondary lock. On windy days, a second mounting point (two hose clips spaced a few inches apart) makes a big difference.
- No motion events being captured: Check that motion detection sensitivity is turned up in the app settings. Also confirm there are no obstructions between the camera and the seed tray.
- Night footage is too dark: Switch between infrared mode and white-light mode in the app. White-light mode provides color but may briefly startle birds; infrared is silent but monochrome. Infrared range is approximately 7 meters, so don't mount farther away than that for overnight recording.
Ongoing maintenance schedule
A smart feeder still needs regular attention to keep both the birds happy and the footage clean. Here's a simple routine that keeps things running well without becoming a chore.
| Frequency | Task |
|---|---|
| Every 1 to 2 weeks | Refill seed; wipe down camera lens with dry microfiber cloth |
| Monthly | Disassemble and clean the seed tray and seed ports (follow manufacturer disassembly guide); check and tighten all mounting hardware |
| Every 2 months | Check Velcro strap or hose clip for corrosion, loosening, or UV degradation; replace if needed |
| Each season | Reposition camera angle if sun angle has shifted significantly with the season; check that solar panel is unobstructed by new leaf growth |
| As needed | Review cloud storage; download any clips you want to keep before the 30-day window closes; check for firmware updates in the app |
The biggest thing that kills camera feeder setups long-term isn't weather or squirrels, it's neglect. Moldy seed blocks ports and drives birds away, and a dirty lens makes even a 1080p camera look terrible. The monthly clean takes about 10 minutes and makes everything else work better.
FAQ
Can I mount the camera feeder upside down or rotate it after installation if the view is wrong?
Yes, you can rotate most camera heads, but avoid mounting the camera at a way that traps water in the lens opening or microphone area. If you need a major change in framing, loosen the handle nut, rotate toward a slight downward tilt, then retighten, and confirm you can still access the app for a full re-check after the adjustment.
What if my yard only has a south or west-facing spot, can I still mount it there?
You can, but plan for afternoon sun problems. Use a shaded feeder location that gets indirect light part of the day (for example, behind a fence or near a wall that casts shade), and watch for false motion triggers after setup. If your camera supports it, switch to a mode that reduces glare sensitivity and verify the clip quality for at least one full afternoon.
How do I choose between Velcro tree mounting and a pole mount for camera stability?
If your yard is windy or the feeder will sway, prioritize a pole mount because it gives consistent height and orientation over time. Use Velcro only on relatively steady trunks and treat it as “temporary until proven,” checking tension every two weeks after rain or gusty weather, and add a zip tie backup through the bracket hole.
How do I prevent squirrels from knocking the camera bracket even if I add a baffle?
A baffle helps, but bracket integrity matters too. Back up the strap with a zip tie loop through the bracket, or add a second hose clip on pole mounts. Also keep the feeder at least 10 feet from launch points like branches and fence tops, and avoid placing the feeder where a squirrel can jump from a nearby horizontal surface directly toward the camera.
What is the best camera distance if I want close-up bird behavior without losing the whole feeder?
Stay in the 18 to 24 inch range from the seed tray. Closer than about 12 inches tends to crop larger birds and may show only partial bodies, while beyond 36 inches makes small birds look tiny. After mounting, do a short test recording to confirm the tray and perch are both fully in frame.
How much downward tilt should I use, and how do I know it is set correctly?
Aim for a slight downward angle (roughly 15 to 25 degrees) so landing and takeoff moments are captured naturally. Then validate by watching a few minute-long clips, if birds only appear as chests or the tray edge is missing, adjust in small increments rather than flipping to a fully horizontal orientation.
My feeder keeps going offline, could it be Wi-Fi placement or power issues?
It can be either. First, stand at the exact mounting location and verify 2.4GHz signal strength, one or two bars often causes dropouts. If Wi-Fi is strong there, then check battery or solar behavior (especially after cloudy stretches). Battery-only units may need more frequent charging when recording events often.
Do I need to split my 2.4GHz and 5GHz Wi-Fi networks during setup?
Not always, but it helps when the feeder cannot reliably choose the 2.4GHz band. If pairing fails or the feeder reconnects intermittently, go into router settings and ensure a dedicated 2.4GHz SSID is available, then retry pairing from the mounting spot to confirm signal stability.
What is the safest way to run power if I use a wired or USB option near my feeder?
Use outdoor-rated cable clips or conduit and include a drip loop right before the cable enters the feeder so water runs away rather than into the port. Route along a stable path, avoid places where people or pets walk, and if you can, keep cords elevated or sheltered to reduce wear.
If I want local storage, how can I avoid buying a microSD card that will not work?
Confirm model-specific microSD support before purchase. Some units treat the microSD slot as factory testing only, so “a card inserted” may not actually record. If the documentation is unclear, check whether local recording is enabled in the app or whether the device offers an SD recording setting.
How do I keep the camera view clean during rain and snow?
The unit itself may be weatherproof, but the mounting connections and lens area still benefit from good routing and placement. Ensure your cable or power entry point is sealed by a drip loop, and wipe the lens during monthly cleaning, rain droplets and dust can make 1080p footage look soft even when the camera is functioning correctly.
Will mounting height change the types of birds I attract and the footage I get?
Yes. The 4.5 to 6 foot range typically matches common backyard bird perch height and gives natural-looking angles. Higher placement can shift the view toward more overhead angles, while lower placement may increase disturbances and false motion. Keep the camera near eye level relative to the tray to preserve behavior shots.
What should I do right after mounting the feeder for the first time?
Do a short live-view and event test before leaving it alone. Check that birds can land and that the camera is aimed slightly downward, then confirm night-vision mode behavior by waiting for dusk and verifying whether the app selects infrared (black and white) or white light color mode as expected.
How often should I clean and adjust after squirrels or heavy bird traffic?
Clean monthly (about 10 minutes) and do quick inspections after unusual events like heavy storms or visible squirrel activity. After squirrel attempts, re-check Velcro strap tension, confirm the bracket did not rotate, and verify the camera still faces the correct compass direction without the feeder drifting out of frame.
Next Article
How to Hang a Bird Feeder From a House Safely
Step-by-step guide to hang a bird feeder from your house safely, with placement tips and squirrel-proof hardware